SEARCH FINESCALE.COM

Enter keywords or a search phrase below:

Humvee

9244 views
14 replies
1 rating 2 rating 3 rating 4 rating 5 rating
  • Member since
    January 2010
Humvee
Posted by Klik on Saturday, August 28, 2010 6:27 PM

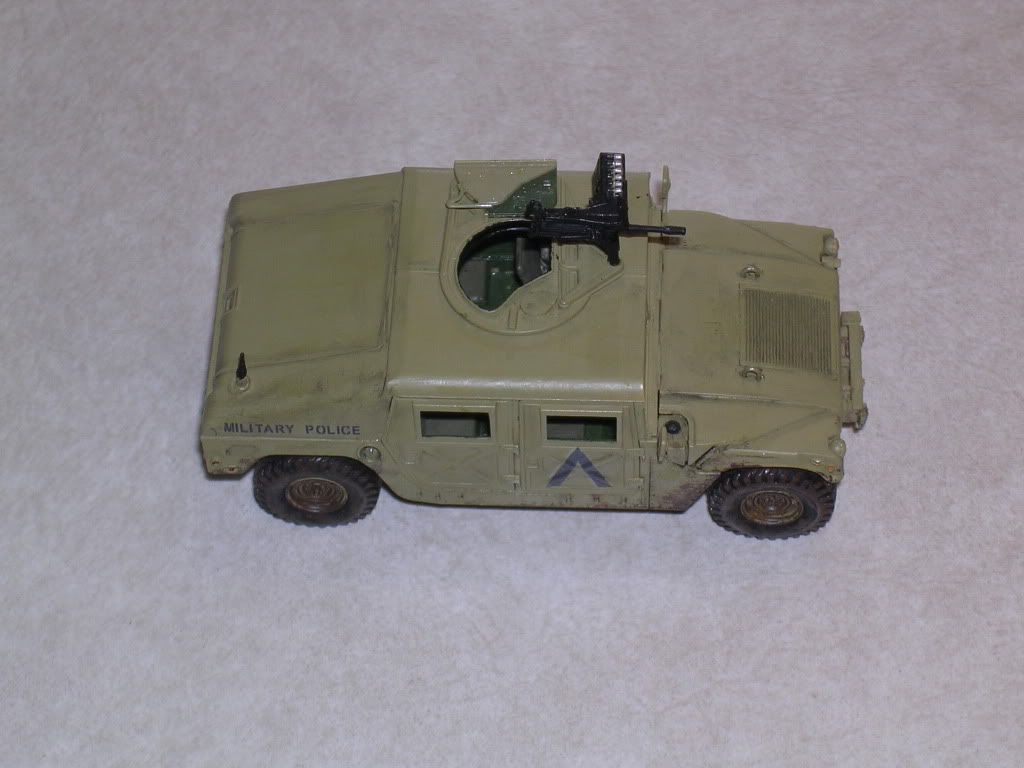
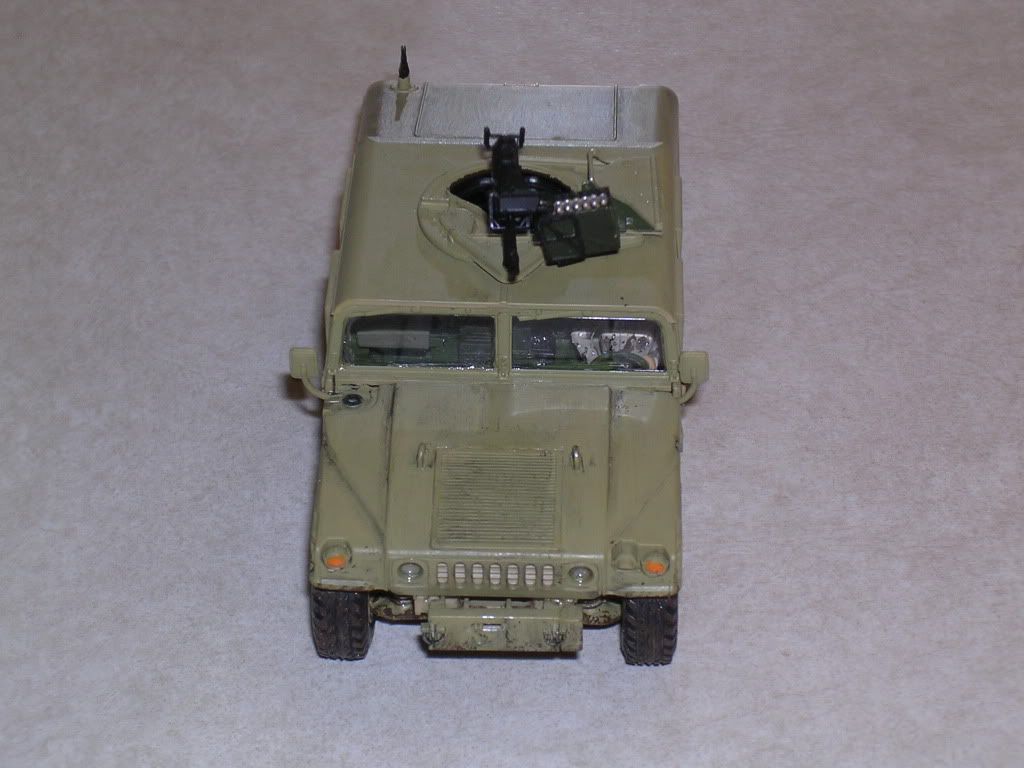
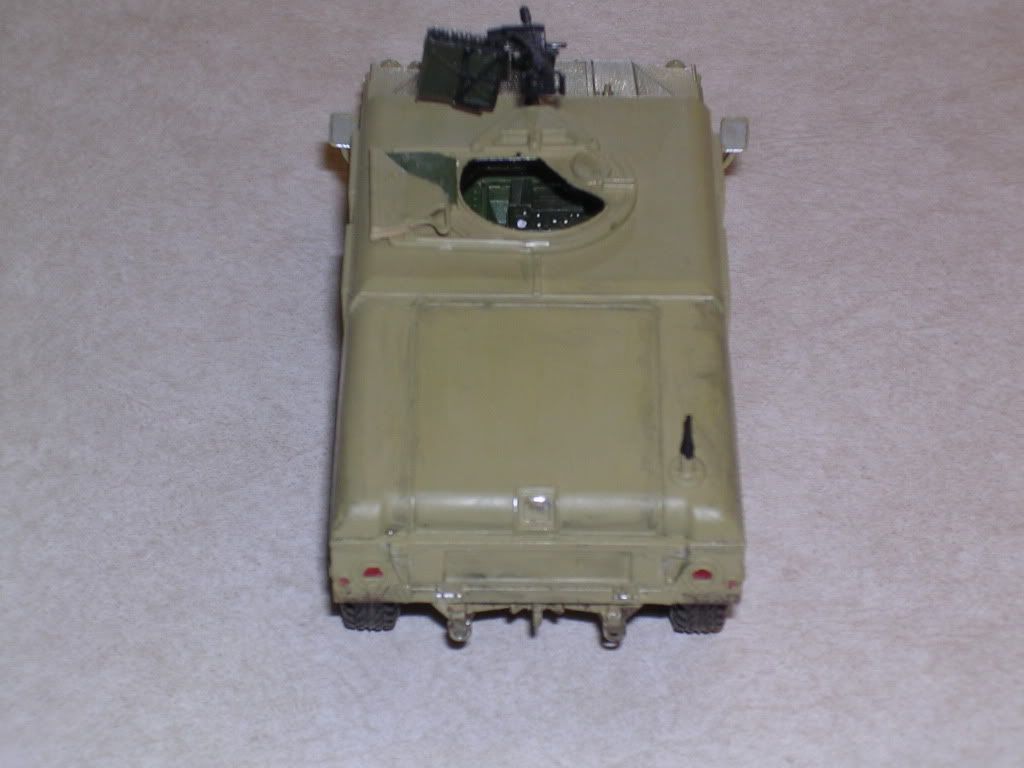
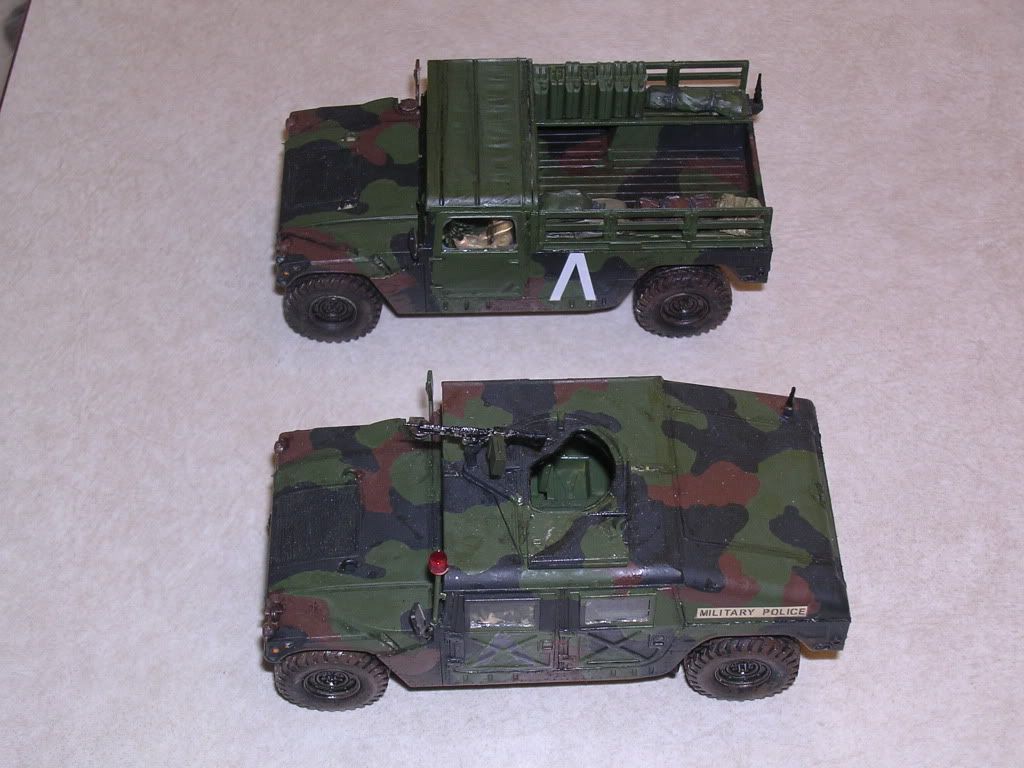
Finished another 1/48th Tamiya Humvee recently, thought I'd post some pics of it: (note: this is the best of three that I have built, and is the best. I won't post the lesser ones, unless you want, because they're embarrassing for me. In one or two of these pics, you will see one of the rejects.)


 Note the reject in the background--this Humvee came in Tamiya's 1/48th F-117 model pack, and was my first. That's why it looks so bad.


 In my opinion, this one turned out beautifully. What do you think?


P.S. I did eventually attach the roof, doors, and decalled it. Since I haven't dullcoated it yet, it isn't picture-ready, so I apoligize for not having pics of it totally finished yet.

oneyearwar1

The hardest part of flying isn't flying...it's landing.

  • Member since
    August 2010
Posted by Iain Hamilton on Saturday, August 28, 2010 11:07 PM

Nice Pics. I think it is cool that you are sticking one subject in order to master it. May I suggest toning them down a bit with a flat clear and possibly a dust coat of Tamiya buff? Should you choose to go this direction, simply thin Tamiya Buff down by a ratio of 20% color to 80% thinner and give a 'dusting" to your Hummvee. Be sure to experiment on something first to be sure you like the effect.

Nice work.

  • Member since
    September 2009
  • From: Rugby, England
Posted by Hinksy on Sunday, August 29, 2010 4:44 PM

Iain Hamilton

Nice Pics. I think it is cool that you are sticking one subject in order to master it. May I suggest toning them down a bit with a flat clear and possibly a dust coat of Tamiya buff? Should you choose to go this direction, simply thin Tamiya Buff down by a ratio of 20% color to 80% thinner and give a 'dusting" to your Hummvee. Be sure to experiment on something first to be sure you like the effect.

Nice work.

Nice work and nothing to be embarrased about buddy!

I'd hit that interior with the drybrush to bring it to life - that will work wonders. Get some buff 'dusting' from the AB on it like Paul says (it works really well-just take it easy) and get some dullcoat on them shiny tyres. A bit of pigment work will finish it off nicely.

You could take some time on the windscreen/ windshield and try and get a clear curve where the wipers would clean the glass.get some light dusty pigment to show where the wipers wouldn't be touching the screen. Finally, get some stowage in the rear. Just some bedrolls, tarps or ammo boxes. 

ATVB

Ben Big Smile

On the Bench - Dragon Pz. IV Ausf. G (L.A.H.) Yes

Your image is loading...


  • Member since
    December 2002
  • From: NYC, USA
Posted by waikong on Friday, September 3, 2010 12:09 PM

Hey, thanks for posting your pictures, always like to see 1/48 armor, especially modern armor.

May I suggest a wash before you put that flat coat on? That will really make all the little details pop and give your model depth.  I think that and a flat coat will make a big, big difference. The great thing tis that you can still do these tasks to improve your finished models.

If you do, please post more pics and let us see the progress.

  • Member since
    January 2010
Posted by Klik on Friday, September 3, 2010 4:29 PM

I have taken some updated pics, and was in the process of attempting to upload them to my Photobucket account, but what do ya know, they've got some stupid ad that won't go away, so I can't get in to my account. Needless to say, I am Censored

Bang Head

Will post pics as soon a Photobucket will let me in.

I even took some pics of the not-so great Humvees, my first two, for comparison to this one.

oneyearwar1

The hardest part of flying isn't flying...it's landing.

  • Member since
    July 2006
  • From: New Jersey
Posted by redleg12 on Friday, September 3, 2010 6:49 PM

Great to see you posting. It is looking very nice, I want to see the finished pics after dull coating.

Here are a couple to tips.

  • The exhaust and tailpipe look almost red. The exhaust on the HMMWV would be a mix of dull metal and some rust. A good thing would be to apply the rust as a dry brush with burnt umber. The end of the tail pipe could have a touch of black,
  • You are showing mud splatters and muddy wheels but the interior is clean??? Mud means muddy boots and muddy floor pans.
  • Your mud splatters are great but need depth. To make a good mud splatter I use.....mud. Mix a littler dirt with a bit of white glue....Yummmm
  • The steering wheel in the HMMWV is a rubber black color
  • When you are ready, you should read up and experiment with pin washing. It will bring up many of the details.

Keep on building.....practice will make perfect!!  I will keep an eye out for you from my bunker!! Wink

Rounds Complete!!

"The Moral High Ground....A Great Place to Emplace Artillery."

  • Member since
    December 2002
  • From: Fort Knox
Posted by Rob Gronovius on Saturday, September 4, 2010 9:43 AM

redleg12
  • The steering wheel in the HMMWV is a rubber black color

Not always, originally they were green plastic. It was smooth, thinner and had the finger grip ridges along the underside (not visible from this angle).


Newer ones are a black rubber color. The steering wheel is a much thicker one if it is black rubber. It doesn't have the finger grip ridges and is smooth all around.

The fuel tank on the underside of a HMMWV is opaque white in color, similar to the coolant or wiper fluid tank on a modern car. Not that big a deal since it is one the underside of the truck.

Note: My apologies if anyone is insulted by these observations. I will delete this post if anyone takes issues with any of my observations. I am in no way critiquing any model on this forum and am only posting photographic reference material that I personally took in order to make my own models more accurate. It is not my intention to impose my own personal perferences on any other modeler on this forum.

My apologies in advance if the above paragraph insults any reader.

  • Member since
    January 2009
  • From: Springfield, MA
Posted by sk3tch on Saturday, September 4, 2010 12:26 PM

Rob Gronovius

Note: My apologies if anyone is insulted by these observations. I will delete this post if anyone takes issues with any of my observations. I am in no way critiquing any model on this forum and am only posting photographic reference material that I personally took in order to make my own models more accurate. It is not my intention to impose my own personal perferences on any other modeler on this forum.

My apologies in advance if the above paragraph insults any reader.


...A disclaimer!

I don't do armor but based off what I see from the "reject" I would like to see more of it.  I think it looks great and I do the same thing with models...do several of the same type.  Keep it up!

  • Member since
    July 2006
  • From: New Jersey
Posted by redleg12 on Saturday, September 4, 2010 9:05 PM

Rob Gronovius

 redleg12:
  • The steering wheel in the HMMWV is a rubber black color


Not always, originally they were green plastic. It was smooth, thinner and had the finger grip ridges along the underside (not visible from this angle).

http://www.armorama.com/modules/gallery/albums/albup58/abx.jpg


Newer ones are a black rubber color. The steering wheel is a much thicker one if it is black rubber. It doesn't have the finger grip ridges and is smooth all around.

http://gallery.kitmaker.net/data/12865/9M1123_007.jpg

The fuel tank on the underside of a HMMWV is opaque white in color, similar to the coolant or wiper fluid tank on a modern car. Not that big a deal since it is one the underside of the truck.

http://www.armorama.com/modules/gallery/albums/albup58/aaq.jpg

Note: My apologies if anyone is insulted by these observations. I will delete this post if anyone takes issues with any of my observations. I am in no way critiquing any model on this forum and am only posting photographic reference material that I personally took in order to make my own models more accurate. It is not my intention to impose my own personal perferences on any other modeler on this forum.

My apologies in advance if the above paragraph insults any reader.

Rob......I remember black, but the photo tells the story. Thanks for the catch....a mind is a terrible thing to waste.

As far as the paragraph insulting anyone....it is a shame that we have to post a disclamer like that, but I understand....in the cureent atmosphere it is better to wear the flak jacket.

I am never insulted Wink and thank you Rob for updating my info!

Rounds Complete!!

"The Moral High Ground....A Great Place to Emplace Artillery."

  • Member since
    December 2002
  • From: Fort Knox
Posted by Rob Gronovius on Sunday, September 5, 2010 7:40 AM

Black is more recent, post 2002-2004. The plastic was original. Since his kit has the early style side view mirrors, the truck would more properly have the early style steering wheel. The later style side view mirrors showed up during Desert Storm so you would see early steering wheel with later mirrors, but "never" the late steering wheel with the early mirrors.

  • Member since
    January 2010
Posted by Klik on Tuesday, September 7, 2010 8:17 PM

Ok. guys, I finally got the pics up on Photobucket, and after a long holiday weekend up in the mountains (no computers, no models, etc), here they are:

These pics show them as they currently are, so the only changes I can do are to the exterior. Note: when it came to painting the model(s), I followed the painting guide for these Humvees (all of which date back to the First Gulf War in '91), with one exceptiion: the Bright red exhaust. The painting guide said Hull Red, but I never picked up a bottle, so I just used Clear Red, my darkest red hue, and globbed it on.

First off: the Prime Humvee as it currently sits:
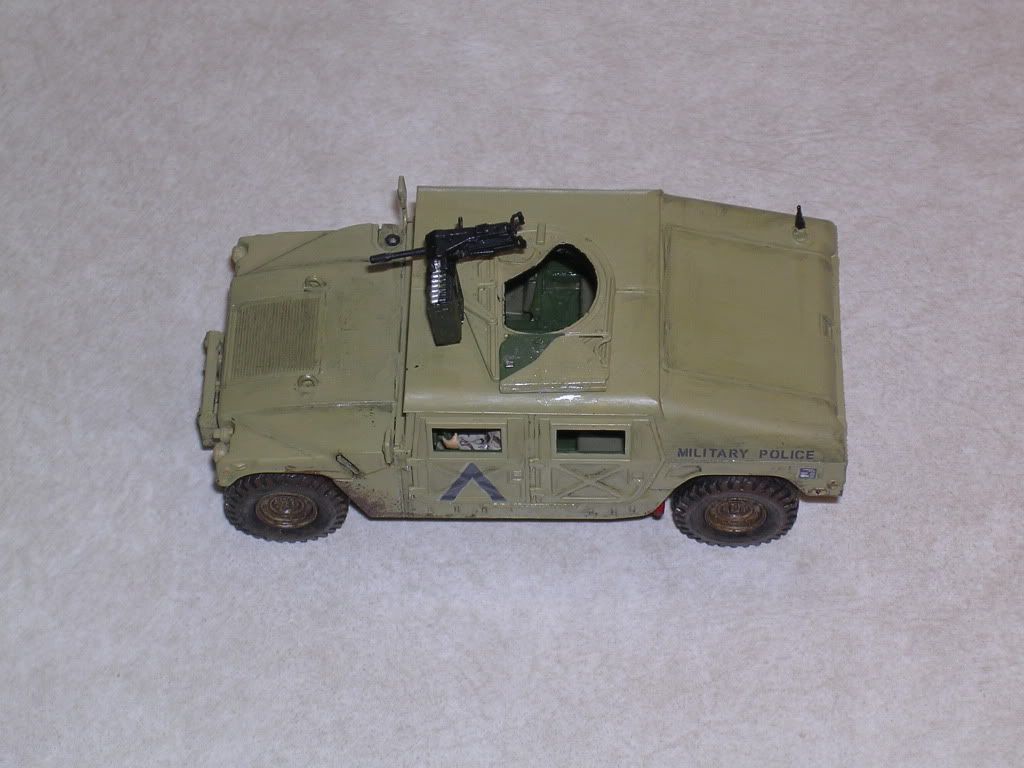


Sorry about the wierd angle on these shots, I tried to take them at a shallower angle, but the glare from my flash was so bad, due to the as-yet shiny surface. (on a side note, does anyone know what happens when you dullcoat clear plastic?)

I made the passenger-side door removable to view the interior:
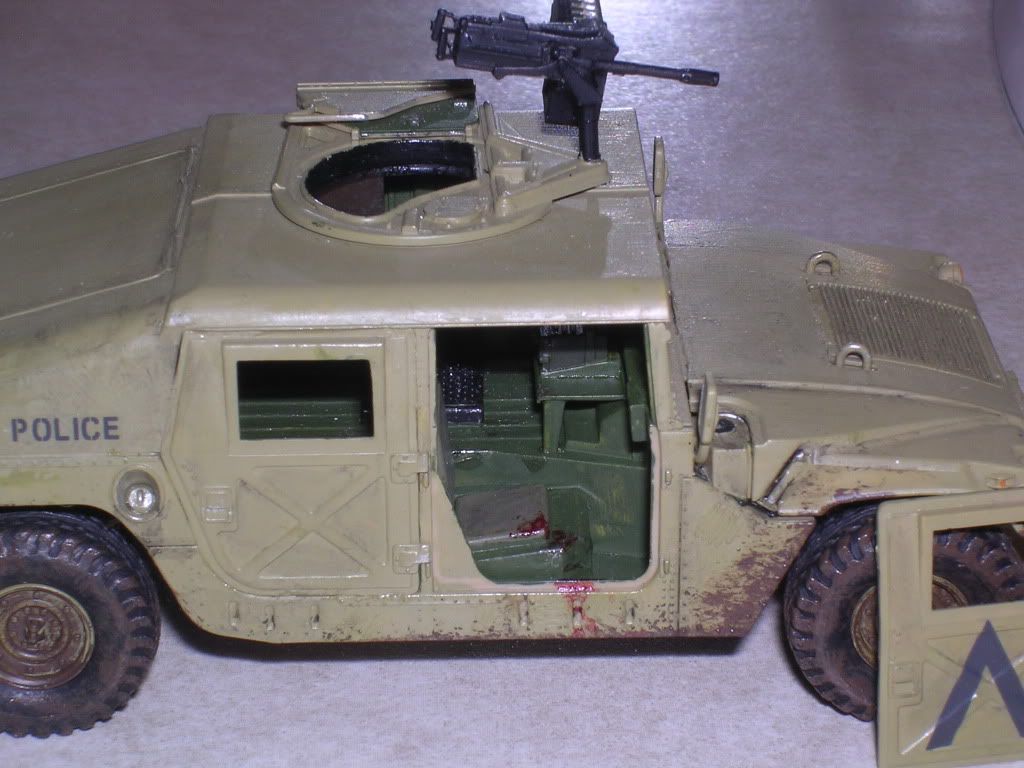
 

I find it interesting to note that you guys zeroed in on the color of the steering wheel, but no one noticed the missing piece (can you find it?), or the 'spatter' on the passenger seat.

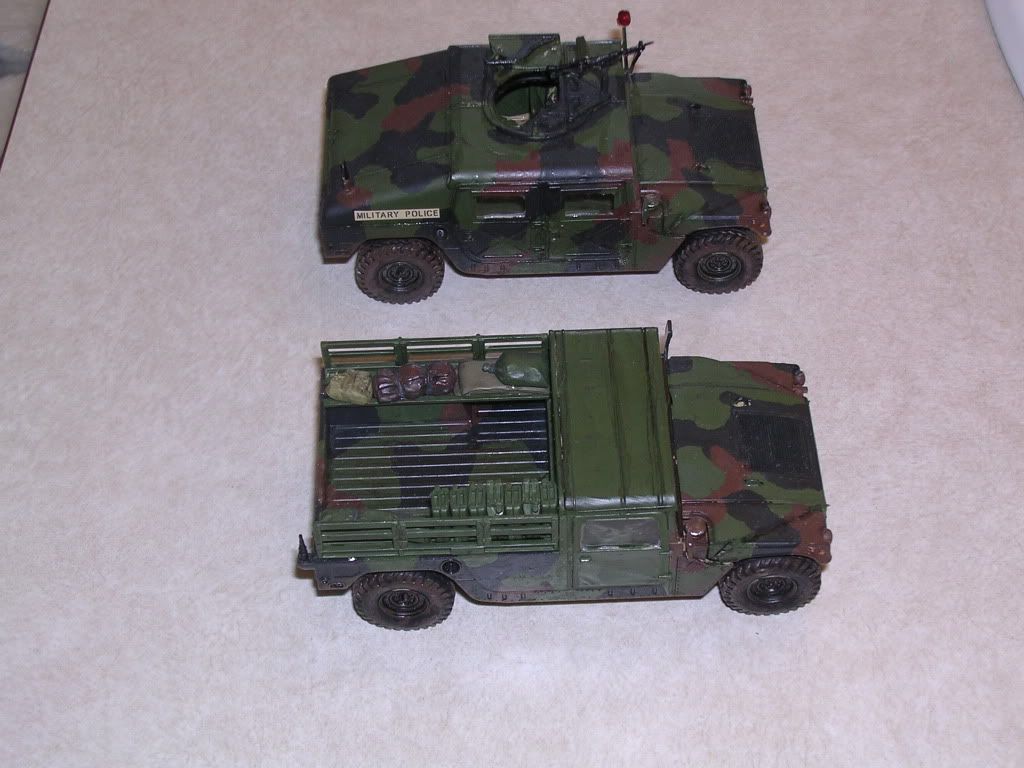
Ok, for those of you who wanted to see my 'rejects', here they are (in all thier...glory): The turreted one was my first.
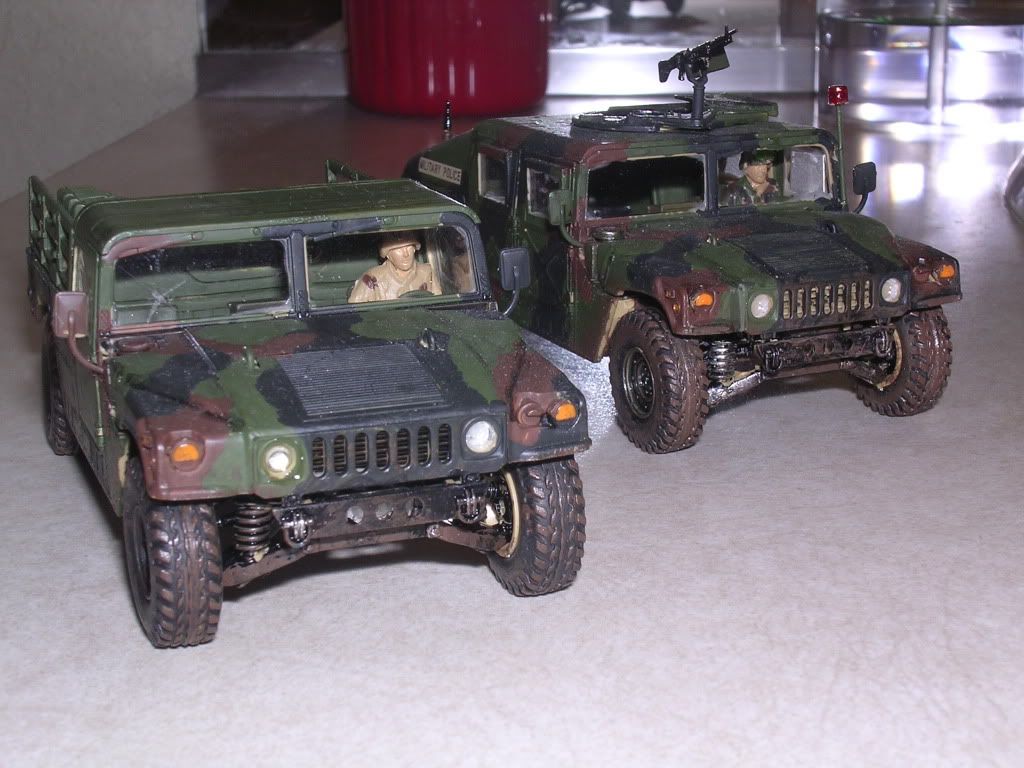
 as you can see, they look hideous from the front. the pickup only has one headlight--the other is clear plastic cement filling in the hole.
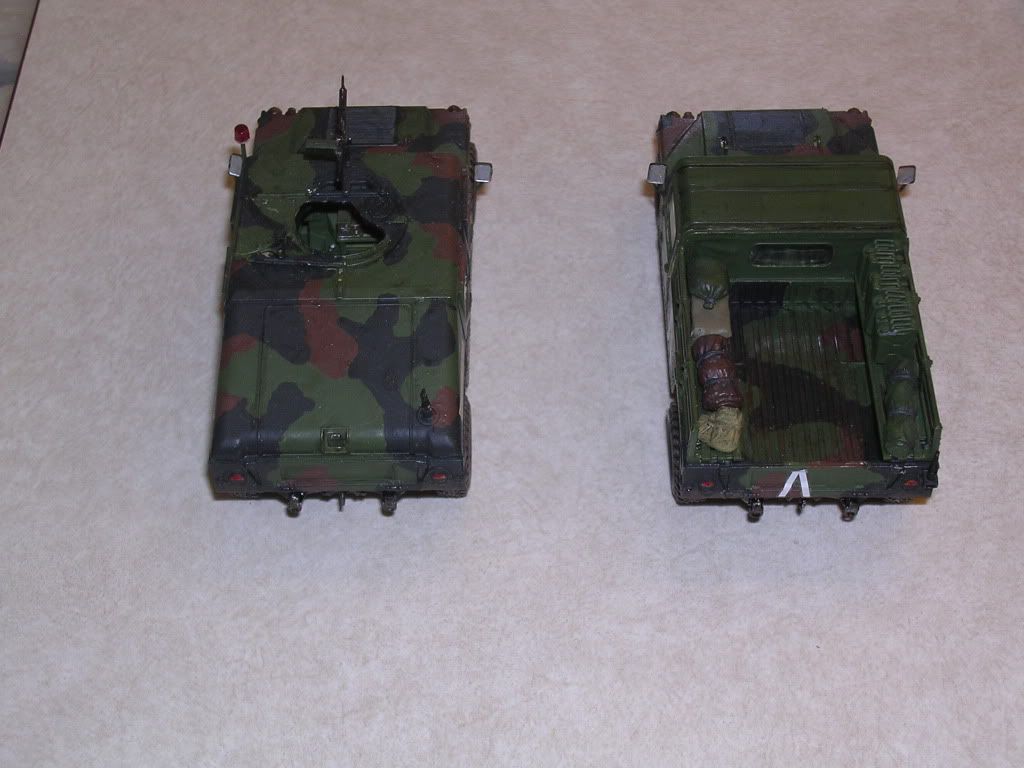


Here's a bottom shot of both for comparison (the one on the left is the pickup, the right, the MP unit wih the light)
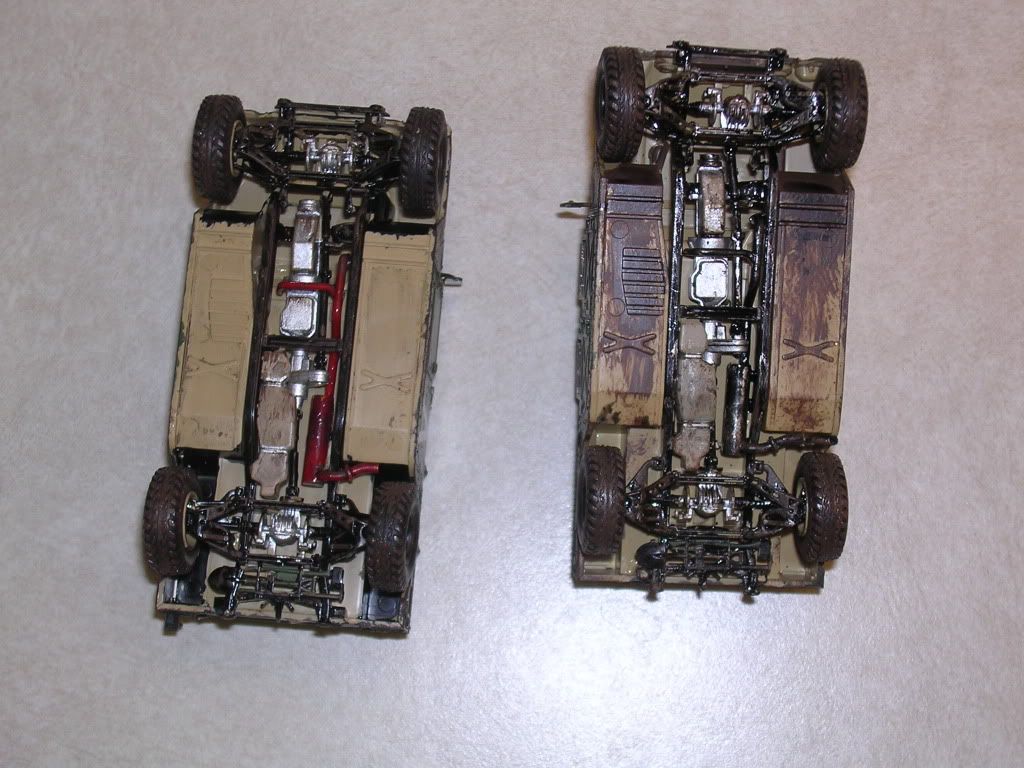
again, wierd angles due to shiny finish (for the time being). note the dust--these guys have been sitting on my shelf for a while...

oneyearwar1

The hardest part of flying isn't flying...it's landing.

  • Member since
    November 2004
  • From: Cat Central, NC
Posted by Bronto on Wednesday, September 8, 2010 10:39 AM

Klik

(on a side note, does anyone know what happens when you dullcoat clear plastic?)


I find it interesting to note that you guys zeroed in on the color of the steering wheel, but no one noticed the missing piece (can you find it?), or the 'spatter' on the passenger seat.


Clear plastic turns a frosty white color when you apply dullcoat to it.  You need to mask it if you are spraying the overall vehicle with it.  As for the missing part - the air intake cover is missing.

  • Member since
    December 2002
  • From: Fort Knox
Posted by Rob Gronovius on Wednesday, September 8, 2010 12:20 PM

Klik

I find it interesting to note that you guys zeroed in on the color of the steering wheel, but no one noticed the missing piece (can you find it?), or the 'spatter' on the passenger seat.

Only one person noted an error in the color of the seering wheel. I just showed him that it could be another color. If you read my disclaimer in a previous post, I will not point out any criticisms on another modeler's build. I could care less if you glued the steering wheel on upside down or added pink fuzzy dice. It is your model to build as you see fit.

  • Member since
    January 2010
Posted by Klik on Wednesday, September 8, 2010 6:21 PM

Bronto--Thanks for the info. I have only ever used dullcoat on spacecraft, so no windows. As for the air intake cover--it was lost somewhere in my work area, which has hardwood floors (so I can't just blame it on the 'carpet monster').

Rob--I meant my statement as Irony. Criticisms are always welcome-without someone pointing out what I've done wrong, I'll never improve.

Thanks and have a good day.

oneyearwar1

The hardest part of flying isn't flying...it's landing.

  • Member since
    May 2009
  • From: San Jose, CA
Posted by hedorah59 on Thursday, September 9, 2010 2:26 PM

It came out looking pretty nice. I can definitely see the progression of your skills here. Thanks for posting all three Yes

Kirk

JOIN OUR COMMUNITY!

Our community is FREE to join. To participate you must either login or register for an account.

SEARCH FORUMS
FREE NEWSLETTER
By signing up you may also receive reader surveys and occasional special offers. We do not sell, rent or trade our email lists. View our Privacy Policy.