SEARCH FINESCALE.COM

Enter keywords or a search phrase below:

New project for end of 2010, beginning of 2011 W.I.P.

1639 views
13 replies
1 rating 2 rating 3 rating 4 rating 5 rating
  • Member since
    January 2010
New project for end of 2010, beginning of 2011 W.I.P.
Posted by Klik on Friday, December 31, 2010 2:53 PM

My project for the new year was a Christmas Present--A 1/48th Tamiya Jagdpanther 38(t) Hetzer Mid Production, one of those fancy ones that comes with a metal lower hull.


I began construction yesterday, with this:


and for today, I have left it off at this stage:


I am in the process of painting the tracks with a black base coat for my weathering to come later. The tank itself is painted German Grey, XF-63.

If you noticed, in the previous picture, there are these handy little extensions on the edges of the track sprues that are used to align the top tracks.


right now, it's all two-tone, grey and black, which begs an interesting question: does anyone know if there actually were any mid-production Hetzers painted in German grey?

oneyearwar1

The hardest part of flying isn't flying...it's landing.

  • Member since
    July 2004
  • From: Texas
Posted by wbill76 on Friday, December 31, 2010 3:29 PM

Looks like a fun little project!

Hetzers were produced starting in April-May 1944 and the switchover from Panzer Gray to Dunkelgelb happened in March 1943, so no Hetzers would've been finished in Panzer Gray I'm afraid! As a mid-production, this one actually has features suitable for mid-late 1944 so there are a lot of options open to you but all of them would involve 3-tone camo similar to what is pictured on the box art. HTH! Beer

  • Member since
    March 2003
  • From: Rain USA, Vancouver WA
Posted by tigerman on Friday, December 31, 2010 3:58 PM

i also advise that you build as much of the base color as you can before you paint it. It will leave a much better appearance and no glue marks. Also the glue adheres better to an unpainted surface.

i could be wrong, but i think you have the long-run of track on the top rather then the bottom. There are pieces to leave a sag between the top roller. HTH

   http://i7.photobucket.com/albums/y269/wing_nut_5o/PANZERJAGERGB.jpg

 Eric 

  • Member since
    January 2010
Posted by Klik on Saturday, January 1, 2011 11:14 AM

Small update for the New Year; I attached all the tracks this morning, after painting them last night. I also attached the gun to the front and have begun painting all the fiddly-bits (not pictured)


As a side note, the tracks were not glued yesterday: I meant to show the alignment with the front idler(?) wheel. I did add in the sag after glueing them in place, but as you can see, touchups are needed.


and that's all I got for you all this morning.

 I wish I'd have done a little more research before commencing with the painting of this tank--should've noticed that the only schemes in the instructions were for tri-tone tanks. But, since I've got the tracks on, I'm going with the German Grey--kind of a what-if sort of model. I kinda wanted to paint it up this way from the start, and doesn't it look cool in German Grey?

I'll probably get some more painting done on the bits later today, provided that I get my chores done.

Happy New Year to you all!

oneyearwar1

The hardest part of flying isn't flying...it's landing.

  • Member since
    February 2009
  • From: mass,USA
Posted by scratchmod on Saturday, January 1, 2011 11:59 AM

Nice start on that little hetzer.

As Bill stated the change over happened Mid Feb 1943, so no PG Hetzer. Atleast it gives you a good preshade color.


Rob

www.scratchmod.com


  • Member since
    September 2009
  • From: Rugby, England
Posted by Hinksy on Sunday, January 2, 2011 5:41 AM

I'll be interested to see how this turns out!

Are you AB'ing or brush painting her?

Shame Tamiya are still knocking their 1/48 line out with Die Cast hulls, Lord I can't stand them!

I was looking at the latest Tamiya Magazine the other day and I see they have released a cracking little 1/48 StuH 42. I'd love to have a go at that but again a die-cast chassis left me feeling dissapointed - but I'll probably still have a go at her as she looks like a great build Yes

ATVB

Ben Toast

On the Bench - Dragon Pz. IV Ausf. G (L.A.H.) Yes

Your image is loading...


  • Member since
    January 2010
Posted by Klik on Tuesday, January 4, 2011 8:33 PM

Sorry for the lack of posting recently, Will have pics up tomorrow. I had to run to the LHS to get more German Grey--I apoligize to those of you who have to make everything "historically accurate", but this model is going Grey, mainly because I am terrible at painting tri-tone schemes, especially at such a small size.

Anyhow, made some minimal progress on the tank--top attached, tracks touched up, fiddly bits prepainted. Pics tomorrow-Promise!

oneyearwar1

The hardest part of flying isn't flying...it's landing.

  • Member since
    January 2010
Posted by Klik on Wednesday, January 5, 2011 5:23 PM

Pics, as promised. Painting on the body is mostly done, with preliminary weathering (a black wash) also done.


more to follow...

Comments and criticisms welcome, as always...

oneyearwar1

The hardest part of flying isn't flying...it's landing.

  • Member since
    January 2010
Posted by Klik on Sunday, January 16, 2011 6:14 PM

Ok, lots to update... fiddly bits painted and attached, just machine gun to add. As a note to all of you saying "the Hezter never was painted German Grey", this model was mostly supposed to be a test platform for brushed weathering. German Grey also happens to be my favorite look for German Armor.

First off (about a week ago, been busy), I attached the Exhaust and weathered it. Base coat of Rust, then a black wash followed by dry-brushing on (in order) Silver, IJN grey, then a smige of German Grey.

Pics:
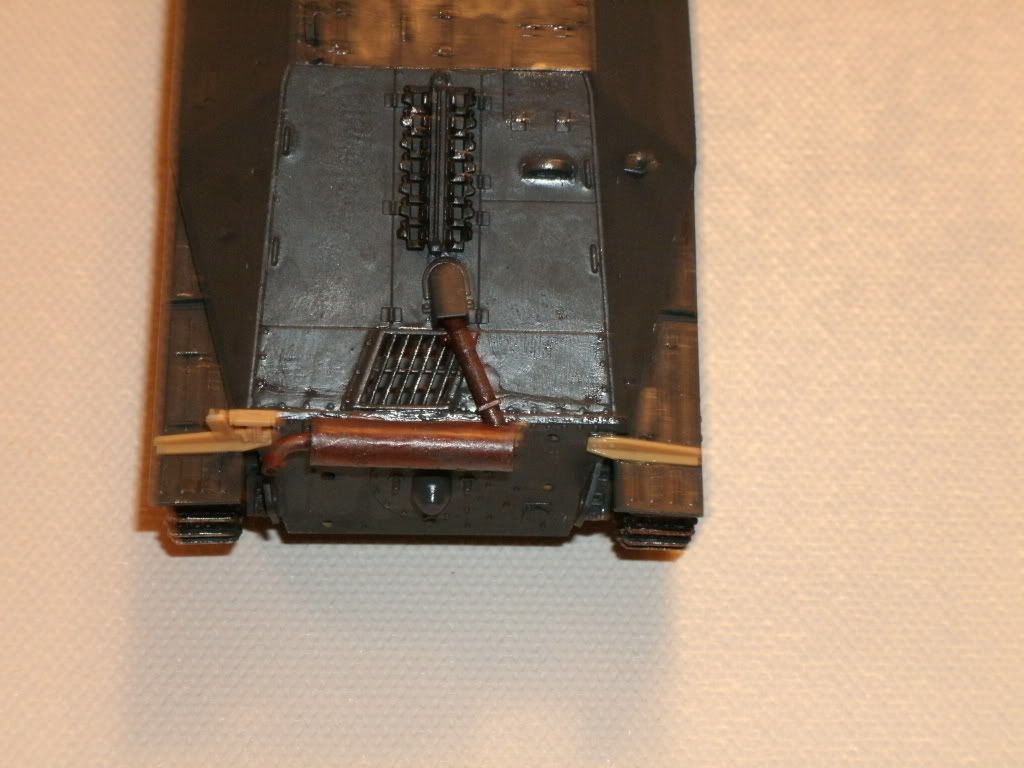
 

edit: I also attached, belatedly, the fender attachments, as you can see, not painted.

I also weathered the tracks, with silver, then rust.
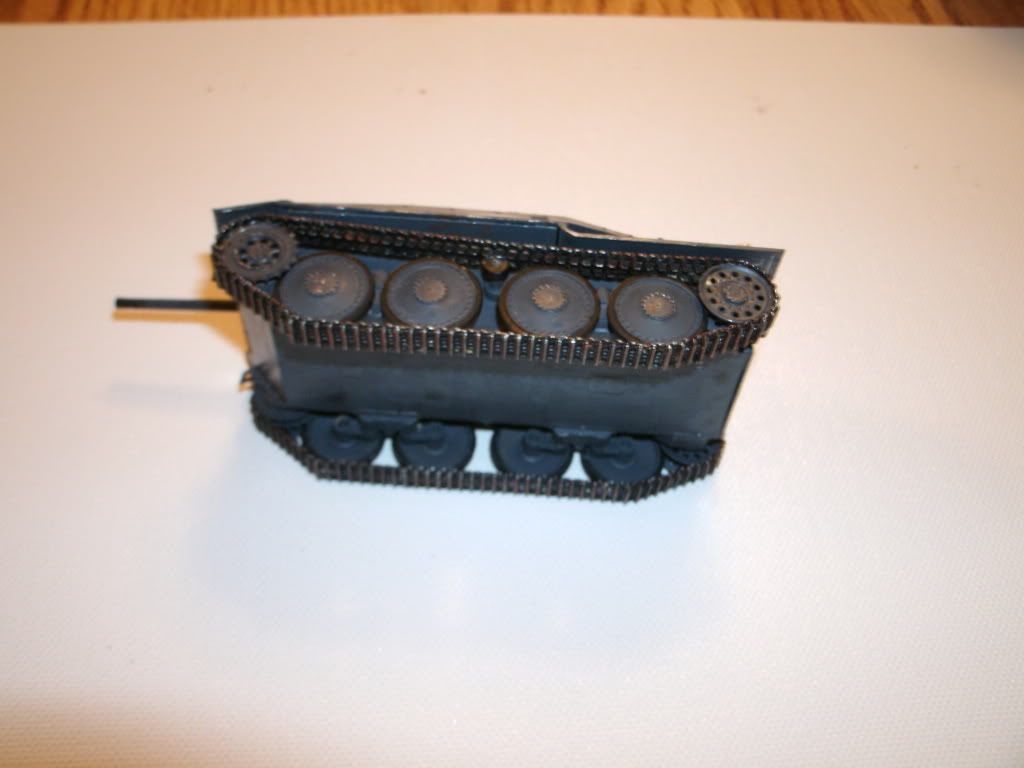
 

the pics don't give it credit, but it looks well-worn, if clean. I intend to add a coating of dust with Red Brown, but I got the wrong paint-something about Linolnium. Live and learn.

After a couple of days, I attached the fiddly bits.

From this:
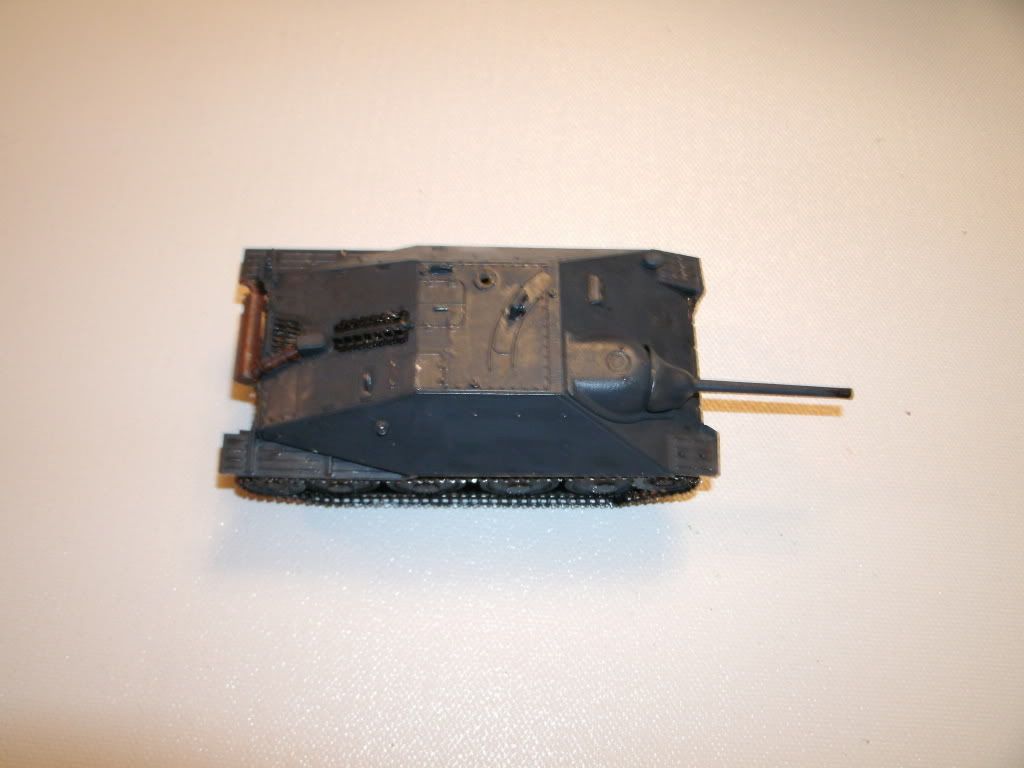
To this:


(Don't ask me why I painted an 'A' on the box, I did it impulsivly)

From this (after adding tow Cable):
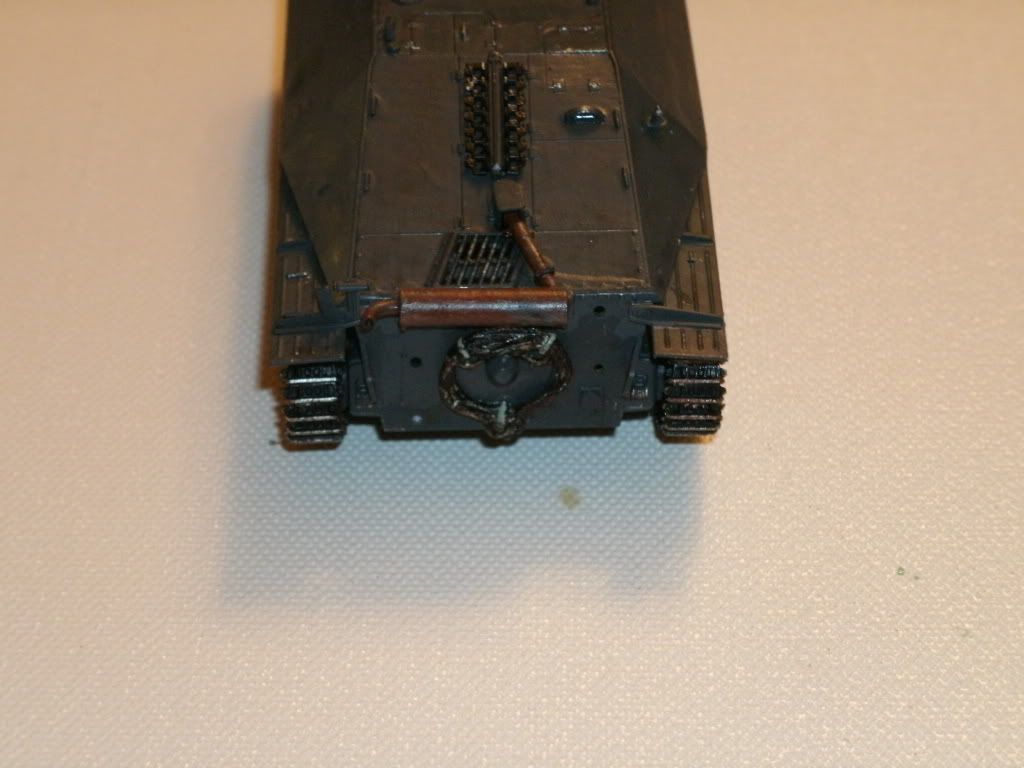
 

To this (with spare tracks and toolbox added):
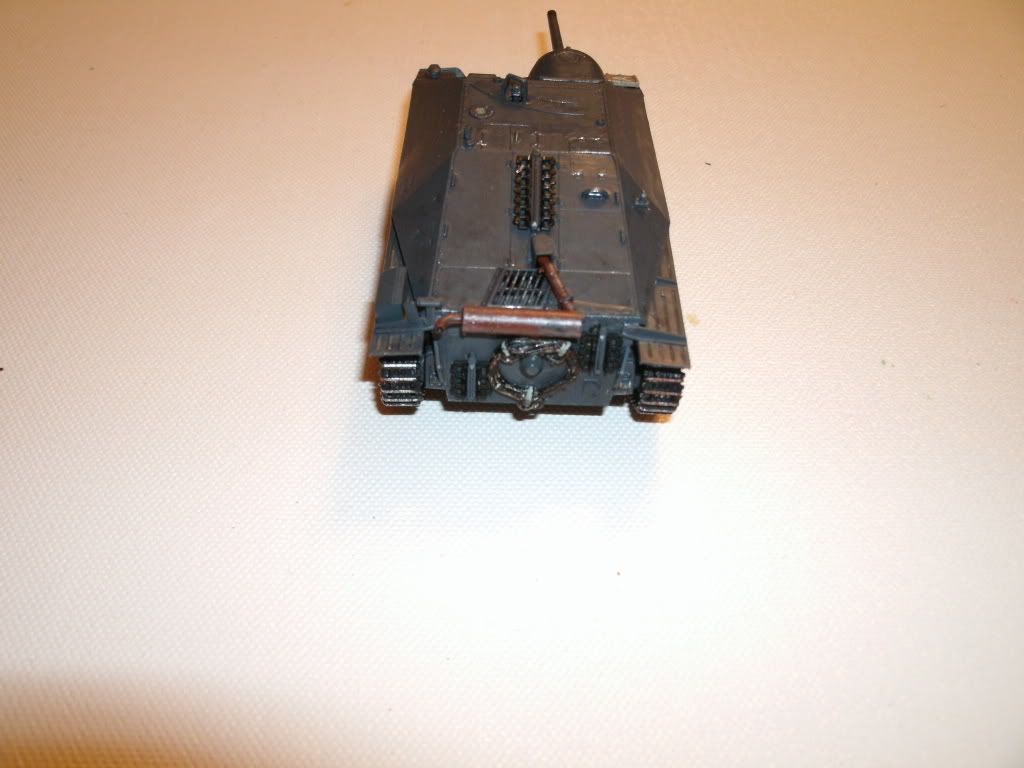
 

and that's how it sits today. The machine gun is painted and glued, but was busy drying, so no pics of it yet (besides, I haven't weathered it yet).

Tips, Comments, and criticisms welcome as always.

KlikCaptain

oneyearwar1

The hardest part of flying isn't flying...it's landing.

  • Member since
    January 2010
Posted by Klik on Thursday, February 3, 2011 9:33 PM

Ooookay... been a long time since I last updated this, so here we go...

School started, so I've been busy with that, not much time for models.Crying

Anyhow, I got a lot done on this here tank.

First off, I got the skirts (shurtzen?) added.


and painted (note that the attachment points are not painted above, but are painted below)


with a bit of black wash, they blend right on the rest of the tank.

Then, came the weathering... a "dusting" of Red Brown, the reason why I went with German Grey. This dusting only seems to work well with German Grey, and I wanted to make this work, so I used this guy as a test bed. It looks like this:


and then came the 2nd to last step: Decals, and the machine gun (finally!)


And that's all I've got for today...all that's left is a mite more weathering and a shot of dullcoat to seal the whole thing.

Comments and Criticisms welcome as always!

oneyearwar1

The hardest part of flying isn't flying...it's landing.

  • Member since
    March 2003
  • From: Rain USA, Vancouver WA
Posted by tigerman on Thursday, February 3, 2011 11:20 PM

Don't feel alone about the paint. Back when I was a youngen, I too painted my Italeri Hetzer in grey, as well as all my armor back then. I too learned the hard way, but liked the grey too.

Are you brushing acrylics? I highly recommend Humbrol enamels. They are great for brush painting. The key is to have a good brush as well and to stir the paint up very well with a little thinner.

   http://i7.photobucket.com/albums/y269/wing_nut_5o/PANZERJAGERGB.jpg

 Eric 

  • Member since
    September 2009
  • From: Rugby, England
Posted by Hinksy on Friday, February 4, 2011 6:29 AM

tigerman

Don't feel alone about the paint. Back when I was a youngen, I too painted my Italeri Hetzer in grey, as well as all my armor back then. I too learned the hard way, but liked the grey too.

Are you brushing acrylics? I highly recommend Humbrol enamels. They are great for brush painting. The key is to have a good brush as well and to stir the paint up very well with a little thinner.

Ditto

It's okay buddy!

I recently built a 1/35 scale Hetzer so I can imagine this was a pretty tricky build as it would have been fairly small in 1/48.

Tigerman has said what I was thinking - are you brush painting Acrylics? If so try some Humbrol Enamels mixed with their own Enamel Thinner - it brushes on much easier than Acrylics and takes much longer to dry too so brush painting will be made far easier.

It does look a little flat and monotone so I'd recommend some basic dry brushing on the raised areas (bolt details and sharp edges etc) and some light chipping too. Search on her or on YouTube for videos of chipping and drybrushing (drybrushing will really make your model come to life and it's really easy to do) Imo it's not finished - yet.

I honestly don't know how experienced you are but if you are a newbie I'd try a few more builds but in 1/35 scale as it's far easier to detail and build when you are starting out. Do a bit of research on your build before starting out ie the kit you bought would have had a very brief description on the sort of colours used on a later version Hetzer.

When you feel competent in building and colours/cammo etc, get an air brush but only if you think you are going to keep the hobby up. I got my Iwata air brush set up (compessor and air brush and tools) for £100 or about $140 to $160 (is that right)?

You'll be fine painting with brushes for a while yet as that's how we all started but remember to thin your paint. Brushed on too thickly you'll hide your model's detail's - and the paint will take forever to dry if you are using Enamels!

ATVB

Ben Big Smile

On the Bench - Dragon Pz. IV Ausf. G (L.A.H.) Yes

Your image is loading...


  • Member since
    January 2010
Posted by Klik on Friday, February 4, 2011 1:47 PM

To respond to both of you:


Yes, the whole model is brush-painted with Tamiya acrylics. I've been modeling for about 5 years now, and have no intention of quitting, but I prefer to hand-paint everything (the one time I used a rattle-can, I ruined an otherwise beautiful model of the Enola Gay). It's just my thing. Maybe someday, when I feel I've mastered brush-painting, I'll move on to an airbrush.

From the start, I intended to paint this tank German Grey, seeing as how it's my favorite color on German armor. Call me what you will, but I absolutely hate the tri-tone schemes, both in painting it and how it looks, especially on something as small as 1/48th. I didn't find out that Hetzers weren't Grey until after I had put the wheels on, and with only a brush available, I had to leave it Grey. Still, it looks pretty cool in Grey, even if it's not "historically accurate".

I know that I had fun with my Grey Hetzer, and it was a handy test bed for my weathering technique (with the shape of the hull and that much track showing, it was a perfect platform), which, unfortunately, I have found only works on German Grey.

Anyhow, I have been thinking about how I can use this inaccurate tank in a display. Maybe a diorama of a Hollywood set (we all know how "accurate" they are...Wink) with this tank sitting in a mocked-up battlefield, a director yelling at his actors with a cameraman rolling...

Anyhow, it's just a thought...

Thank you all for your insights. I will take them into account when I get around to making another Hetzer (with the right paint scheme this time!Big Smile)

oneyearwar1

The hardest part of flying isn't flying...it's landing.

  • Member since
    March 2003
  • From: Rain USA, Vancouver WA
Posted by tigerman on Friday, February 4, 2011 2:04 PM

Bottom line is that you have fun. Accuracy should take a back seat, otherwise the hobby becomes more of a job. None of my models are 100% accurate, but I don't enter contests, so I'm basically building for myself. I try to balance fun and accuracy both, and sometimes accuracy takes allthe enjoyment out of the build and delays the completion.

   http://i7.photobucket.com/albums/y269/wing_nut_5o/PANZERJAGERGB.jpg

 Eric 

JOIN OUR COMMUNITY!

Our community is FREE to join. To participate you must either login or register for an account.

SEARCH FORUMS
FREE NEWSLETTER
By signing up you may also receive reader surveys and occasional special offers. We do not sell, rent or trade our email lists. View our Privacy Policy.