SEARCH FINESCALE.COM

Enter keywords or a search phrase below:

BT-7 mod 1937

18507 views
77 replies
1 rating 2 rating 3 rating 4 rating 5 rating
  • Member since
    March 2011
Posted by ED1CavScout on Sunday, April 24, 2011 11:42 PM

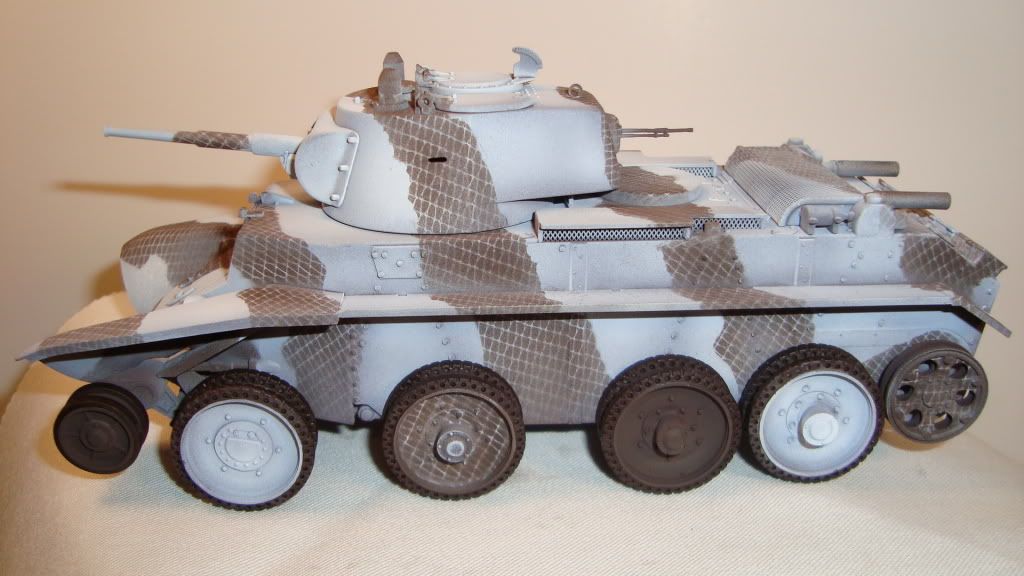
Awesome job on your BT-7!  I wish I could have had the tracks on mine turn out as nice, but they didnt...

  • Member since
    May 2005
  • From: Dublin Rep Of Ireland
Posted by terry35 on Sunday, April 24, 2011 5:55 PM

Rob she looks great on her base. She should do well in front of a judging panel.

Terry.

  • Member since
    January 2006
  • From: California
Posted by SprueOne on Sunday, April 24, 2011 5:38 PM

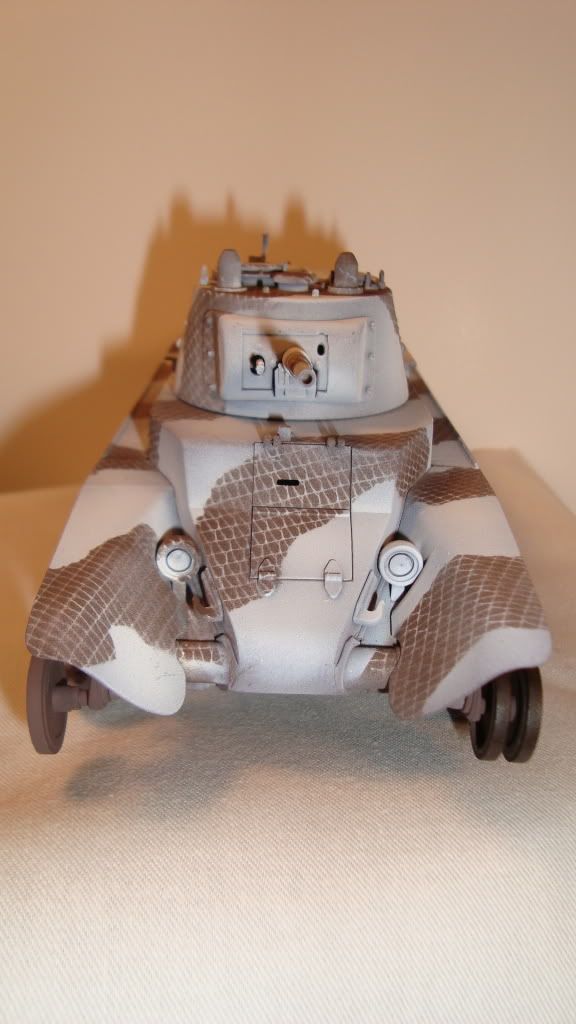
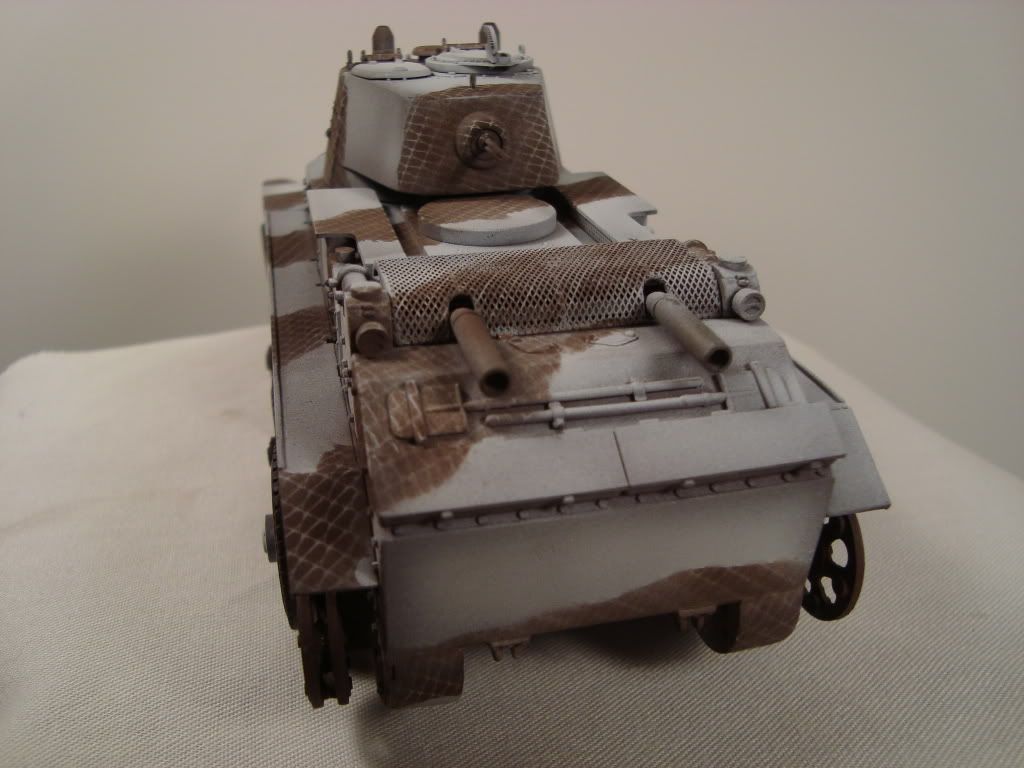
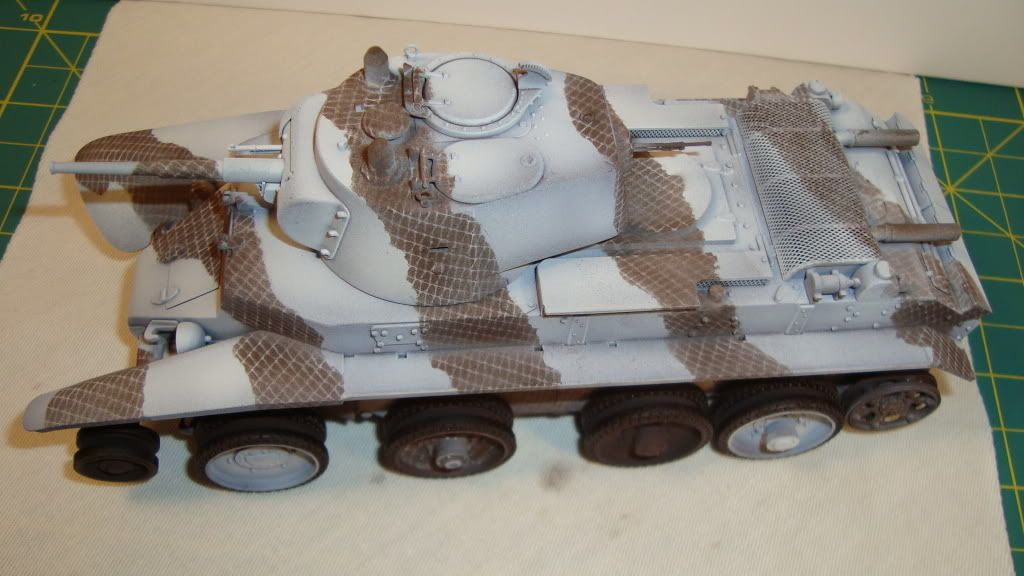
fantastic finish! The work on the engine cover screen mod really paid off. The headlamps look good too 


Tags: soviet armor

Anyone with a good car don't need to be justified - Hazel Motes


Iron Rails 2015 by Wayne Cassell Weekend Madness sprueone

  • Member since
    October 2009
Posted by PANZERWAFFE on Sunday, April 24, 2011 4:37 PM

ANDY - The name plate is just a P-Touch sticker.  Cheapand easy but effective on some bases.  All the bases you mention work fine but remember if you use a solid wood base to take the appropriate steps to avoid warpage.

F MATTHEWS - Your BT also looks great.  I also find these BT's to be very intresting.  I also agree that the EE kits are nice ones and I see myself building more of them.  Would be intrested in seeing your other BT when finished.

NATE, ERIC - Thanks for the comments, good too hear you like.  Look forward to seeing both of your builds in the Panzerjager GB.

WBILL - Always appreciate the comments, Thanks Big Smile

Rob

  • Member since
    July 2004
  • From: Texas
Posted by wbill76 on Sunday, April 24, 2011 11:23 AM

Definitely a great and unique piece to have on your shelf Rob! Enjoyed every minute of watching this one come together. Yes Yes

  • Member since
    March 2003
  • From: Rain USA, Vancouver WA
Posted by tigerman on Saturday, April 23, 2011 5:27 PM

That's one of the coolest things I've seen in long time. Love it.

   http://i7.photobucket.com/albums/y269/wing_nut_5o/PANZERJAGERGB.jpg

 Eric 

  • Member since
    August 2003
  • From: Connecticut, USA
Posted by Nachtflieger on Saturday, April 23, 2011 3:41 PM

Beautiful build Rob. I love the camo as well as the rusting on the fenders; very well done!

Nate


  • Member since
    May 2009
Posted by F Matthews on Saturday, April 23, 2011 1:54 PM

Looks fantastic!  I'm a big fan of the early war stuff, especially the BT series.  I just finished the Tamiya BT-7, but am just about finished with my build of the EE BT-7A and it's not a bad kit at all with a little work as you've demonstrated.  The screened-in air intake makes all of the difference in the world I think.

Here's a pic of the Tamiya kit which was a weekend build (including a full interior) and the second weekend was used to paint and finish it.  Cool tanks!

  • Member since
    April 2009
  • From: Carmel, IN
Posted by deafpanzer on Saturday, April 23, 2011 12:35 PM

I give you ten Yes for this... creativity and great diomara.  I loved the base and name sign... where or how did you make those?   I plan to make bases for my first four builds this summer and I haven't decided how to do those.  Circle or square, picture frames or readily made wood bases from Michael's or Hobby Lobby... so many choices. 

Andy

  • Member since
    October 2009
Posted by PANZERWAFFE on Saturday, April 23, 2011 10:52 AM

WBILL - Thanks for taking a look and for the comments.

I'm calling this one done. 

Broke the MG during pictures so that will need to be fixed.

Thanks too all for staying with this one through the build.  Any comments are welcome.

Rob

  • Member since
    July 2004
  • From: Texas
Posted by wbill76 on Sunday, April 17, 2011 7:46 PM

Making good progress on this one Rob, definitely going to be a show-stopper once you've got it finished. Beer

  • Member since
    October 2009
Posted by PANZERWAFFE on Sunday, April 17, 2011 3:48 PM

SOMEFELLA - Thanks much.

Here is the idea I have for this one. 

Stay tuned

Rob

  • Member since
    December 2009
  • From: Canada
Posted by somefella on Sunday, April 17, 2011 2:34 PM

Not only is this different but it is well done. Just what I like to see.Yes

  • Member since
    October 2009
Posted by PANZERWAFFE on Saturday, April 16, 2011 9:58 PM

ANDY - Tracks are parts off the sprue, normal injection mold.  Thanks for the Yes  I'll be checking in on your Chaffee.

GREG, TIGERMAN, JOSIAH - Thanks for taking a look and thank you very much for the comments.  There's just something about fishnet stockings and armorStick out tongue

DM, SPRUEONE - It is good to get back on this one.  Should not be much longer before I can call this one done, just a few things left.

TERRY - Thank you very much for the kind words.

Most of the chipping, weathering is on.  Also painted the tools, exhaust pipes, rear lights and added the chain.  Forgot to make and put some handles for the hatches so have to work on that also have to mount the MG on the commanders hatch.  Will make a very simple base for this one to sit on, there is still work too be done to it.  Here are a few pictures too show some progress.

Thanks too all for stopping by.


Rob

  • Member since
    May 2005
  • From: Dublin Rep Of Ireland
Posted by terry35 on Saturday, April 16, 2011 8:56 PM

Rob thats some inspiring work there. Excellent scheme and such a clever way of achieving it.

Terry.

  • Member since
    January 2006
  • From: California
Posted by SprueOne on Saturday, April 16, 2011 10:30 AM

good to see this one back in the middle of the bench. The lights look great, tracks look great, the weathering bringing it all together! 


Anyone with a good car don't need to be justified - Hazel Motes


Iron Rails 2015 by Wayne Cassell Weekend Madness sprueone

  • Member since
    July 2003
  • From: On my kitchen counter top somewhere in central North Carolina.
Posted by disastermaster on Friday, April 15, 2011 10:43 PM

 I'm VERY interested in how this turns out when it is complete...........  Stage

                       LOOKIN' GOOD!

                            http://i20.photobucket.com/albums/b232/gluetank/Animated/th_1-Animated-Disastermaster.gif?t=1296616998

 https://i.imgur.com/LjRRaV1.png


  • Member since
    October 2004
  • From: Northern Virginia
Posted by ygmodeler4 on Friday, April 15, 2011 10:14 PM

Good to see some new updates on this one. Looks very good...as with pretty much everyone else, I love the camo.

-Josiah

  • Member since
    March 2003
  • From: Rain USA, Vancouver WA
Posted by tigerman on Friday, April 15, 2011 9:55 PM

Well, that is indeed unique. Nice to Russian armor dressed in something besides green. I still need to get me one of these.

   http://i7.photobucket.com/albums/y269/wing_nut_5o/PANZERJAGERGB.jpg

 Eric 

  • Member since
    April 2009
  • From: Carmel, IN
Posted by deafpanzer on Friday, April 15, 2011 8:48 PM

Yes Always looking great! Yes Are those resin tracks? I am about to assemble my first resin tracks for Chaffee over the weekend. Big Smile

Andy

  • Member since
    December 2006
  • From: t.r.f. mn.
Posted by detailfreak on Friday, April 15, 2011 7:35 PM

                              A very unique scheme there Rob. I have seen fishnet stockings used to create this effect on motorcycle parts. Very cool!Cool

                                                   Greg"Detailfreak"RowleyYes

[View:http://s172.photobucket.com/albums/w1/g-earl828/]  http://i158.photobucket.com/albums/t104/cycledupes/1000Roadwheels4BuildBadge.jpg

  • Member since
    October 2009
Posted by PANZERWAFFE on Friday, April 15, 2011 7:14 PM

Time too resurrect this thing.  Fixed the lights, wheels and tracks are on and the weathering has begun.

More too come.

Rob

  • Member since
    October 2009
Posted by PANZERWAFFE on Sunday, March 6, 2011 9:19 PM

Hey Nate, Thanks and happy you like.

No work done on this one for two days now, maybe a problem.  Filled the headlights with clear window maker that was two days ago.  Not sure if it is going to dry properly Bang Head  Never had proplems doing this in the past so it will continue to sit standing straight up for a few more days and hope for the best.

Did get all wheels and misc parts done.  It also received first light wash of raw umber.  Will up date again when lighs are dry Tongue Tied

Rob

  • Member since
    August 2003
  • From: Connecticut, USA
Posted by Nachtflieger on Wednesday, March 2, 2011 12:44 AM

That just looks SO cool!

Nate


  • Member since
    October 2009
Posted by PANZERWAFFE on Tuesday, March 1, 2011 8:40 PM

TRM - Thanks T for the nice comments.  Sometimes the other half is not too bad at all Smile

Andy - The silly putty does make it easy as long as I quit sticking it to the instruction sheet and stretching the pictures, it also helps with the anxiety.

SprueOne - Little embarassed to say Embarrassed do not know much about this paint scheme on the real ones.  Have only seen this scheme three times, one black and white photo and one color drawing in two different books, last place was on a documentry.I know not to completly trust documentries but it was an older one and in black and white, the pattern could definatly be seen.  After seeing three different sources thought would give it a try.  Would like to know more about it if any one knows.  Used the same colors that was in the book with the color drawing.

Nate - Thank you much for the words.  One other thing did not mention in the explanation of how:  The color used to spray threw the netting was thick.  Normally thin my paint to milk consistencybut found this not to work.  It would just go under the net.  So the paint was almost straight from the bottle, did put a little thinner in but not much.  When painting would often have to turn the pressure up and blow some paint threw then turn it back down and go back to painting.  Thought you or someone might want to know in case you ever try it out.

TD4438 - Thanks for those great comments.  Been wanting to try this for about a year or so but I too wasn't sure if it would work.  Finally decided would try it and find out.

Marc - Thats just what I needed, should be a great relationship....at least until the next piece of armor comes along Stick out tongue

The update - Finished painting the stripes.  The rear stripe had messed up, paint to thin and it turned into a big brown blob.  Repainted in white and had to paint it again, did not come out perfect but it will do.
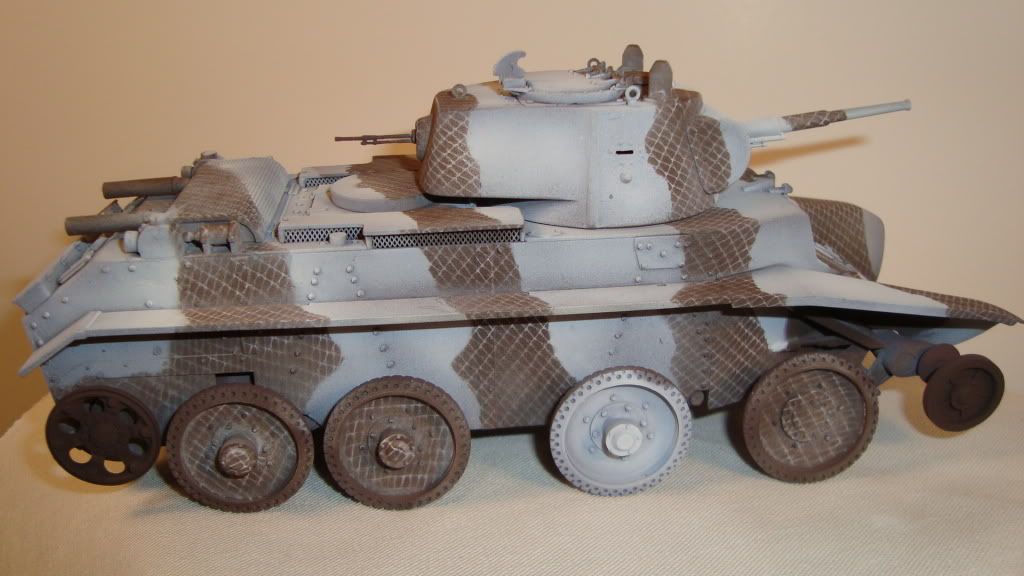
Stayed up late making the correction last night and was at work late today so no work on the BT today.  Should be on the downhill side of things now.

More to come soon, thanks to all for looking.

Rob

  • Member since
    April 2005
  • From: Piscataway, NJ!
Posted by wing_nut on Monday, February 28, 2011 9:30 AM

I now pronounce you husband and tank.  you may kiss the armor.

Lovin' it!

Marc  

  • Member since
    March 2006
Posted by TD4438 on Monday, February 28, 2011 5:34 AM

Most creative camo pattern around here in a while.I was gonna do something like this with a kit,but wasn't sure if it would work.It does!

  • Member since
    August 2003
  • From: Connecticut, USA
Posted by Nachtflieger on Monday, February 28, 2011 3:44 AM

Thanks for the explanation Rob. Who knew the fabric store had such goodies????

Really, really nice work.

Nate


  • Member since
    January 2006
  • From: California
Posted by SprueOne on Sunday, February 27, 2011 9:38 PM

out of curiosity, how were the 1/1 tanks painted like this? 


Tags: russian camo

Anyone with a good car don't need to be justified - Hazel Motes


Iron Rails 2015 by Wayne Cassell Weekend Madness sprueone

JOIN OUR COMMUNITY!

Our community is FREE to join. To participate you must either login or register for an account.

SEARCH FORUMS
FREE NEWSLETTER
By signing up you may also receive reader surveys and occasional special offers. We do not sell, rent or trade our email lists. View our Privacy Policy.