SEARCH FINESCALE.COM

Enter keywords or a search phrase below:

1/6th scale M4A3E2 Jumbo 76mm

7287 views
14 replies
1 rating 2 rating 3 rating 4 rating 5 rating
  • Member since
    April 2005
1/6th scale M4A3E2 Jumbo 76mm
Posted by armourguy on Wednesday, June 29, 2011 4:16 PM

Hi guys, With the Vantex Sherman now out of the way I have started on my next build which will be this static M4A3E2 Jumbo Sherman.


This project is one that I have been wanting to do for several years now. The model itself is the master that was used to create the plastic panzers kit. The project was started back in 2005 when I was contacted by Tim who was interested in releasing a jumbo kit in 1/6th scale. I was contacted because around that time I had just finished a 76mm sherman, and the jumbo's turret was very similar. The master for the hull was created a year later.


The model's hull was built off of a rotomold JD sherman that was reworked for the Jumbo. To rework the hull I added the armored hull sides and armored front glacis plate.


I also made many of the modifications that I make to my shermans. This would be the replacement of the rear wall removing the molded in idler mounts, reworked side hull with indents, removal of the molded in details. Most importantly I also reworked the bow hatch sections replacing the incorrect molded in hatch hinges with ones that would make the hatch open properly.


The tank's bottom floor was plated over. I designed basic hatches to be molded into the bottom portions of the hull, while the other upper hull fittings were to be molded into the turret ring. All of these parts were very basic and will not be used on my build. Also I designed the master to be very tough to withstand the molding process. The master has an array of bulkheads and support structures on the interior, even with all of the reinforcement the master did suffer some surface damage but nothing serious.


The tank's turret is all scratch built. The mantlet was also scratch built and comes with the kit, but didn't survive the molding process. Like the hull the turret also suffered form some damage but again nothing serious.


I have been working on the model now for about a few days now and I have made some progress on the build.


The molded in engine grills have been cut out. These grills will be reworked and will be made functional. 


I have also completed the lower hull detailing.


The molded in hatches were cut out and removed and the entire lower hull was plated over with sheet styrene. Styrene was also used to fabricate the access panels. Plastruct angles were used fabricate the support ribs.   


The drain plugs were fabricated as well.


On the tank's rear wall I cut out the section for the replacement engine hatch and added the rear hull extensions.


welds and access panels have been added to the sponsons


On the tank's transmission cover I added the mounting bolts, the mounting bolt bulge that is found on the top portion of the cover, and the tow hook mounts.


With the lower hull mods now complete I can start on assembling the VVSS suspension


More to come.    


  • Member since
    September 2006
  • From: Dripping Springs, TX, USA
Posted by RBaer on Thursday, June 30, 2011 7:46 AM

I still get a kick out of these monsters......

Apprentice rivet counter.

  • Member since
    April 2005
Posted by armourguy on Tuesday, July 5, 2011 2:57 PM

Thanks, This project will be a relatively quick build since I already have most of the detail parts on hand. I have made more progress on the model.


I completed the lower rear hull detailing. All of these parts (exhausts, functional engine hatch, tow hitch equipment, and idler mounts) are my standard off the shelf resin details. All that remains to finish off the lower rear hull now will be the pivoting exhaust grill, which will be made out of metal and will be added later.


On the sponson I added the exhaust conduit for the little Joe Auxiliary generator. The conduit is all brass construction.


The front transmission cover detailing has also been completed.


The tank's functional VVSS suspension has also been assembled and mounted. For this tank I used the Late version of my VVSS suspensions. To give the model a more in the field look I mixed some of the swing arms with the wrench slits and the ones without the wrench slits together. I also mixed the road wheels with two versions. The late dish wheel and my new solid spoke wheel.


The new wheel has also been added to the product lines. http://www.eastcoastarmory.com/m4.htm


The tank's underbelly received a coat of primer and then a OD base coat.


While I have the model on its back I was able to paint the inner portions of the road wheels. This area will be very difficult to paint once the model is fully built.


I have a set of sprockets and final drives from Panzerwerk, once they arrive I will then be able to mount them to the vehicle. I will now be focusing on the tank's idler wheels. More progress to follow.


  • Member since
    February 2003
  • From: Allentown, PA
Posted by BaBill212 on Wednesday, July 6, 2011 12:54 PM

Incredible,,,,,,

Thanks for sharing!

Enjoy the ride!


  • Member since
    April 2005
Posted by armourguy on Monday, July 11, 2011 2:14 PM

More progress has been made on the model.


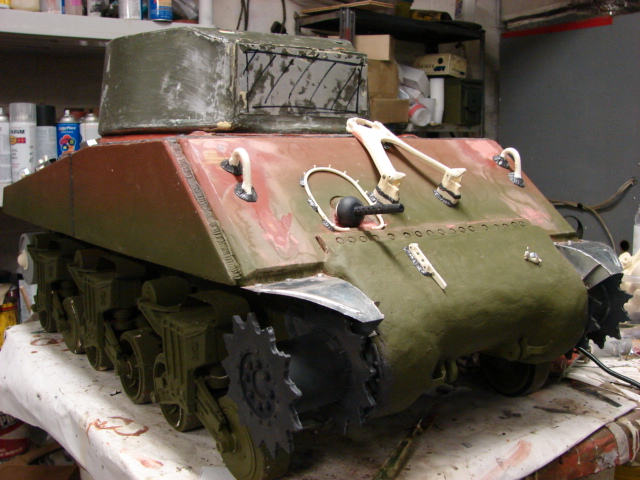
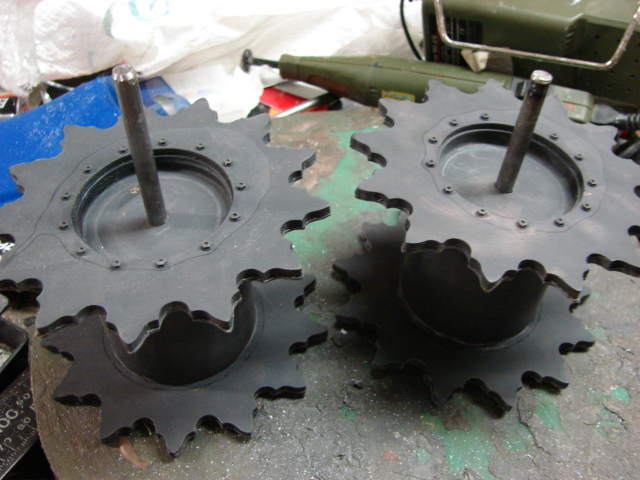
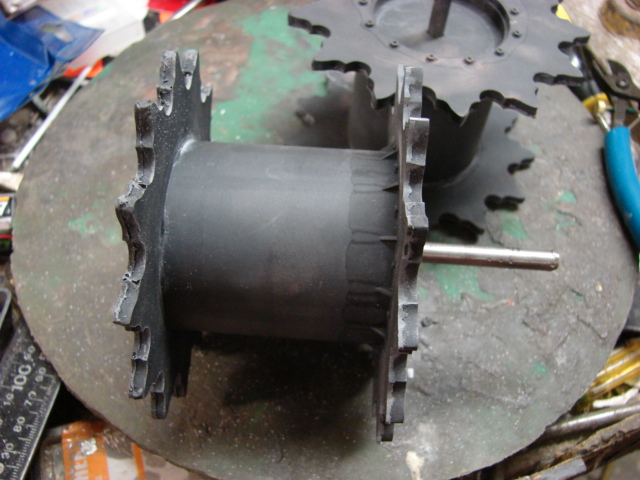
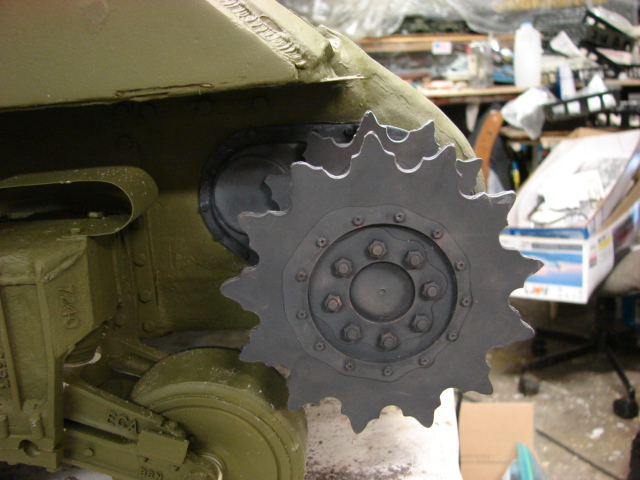
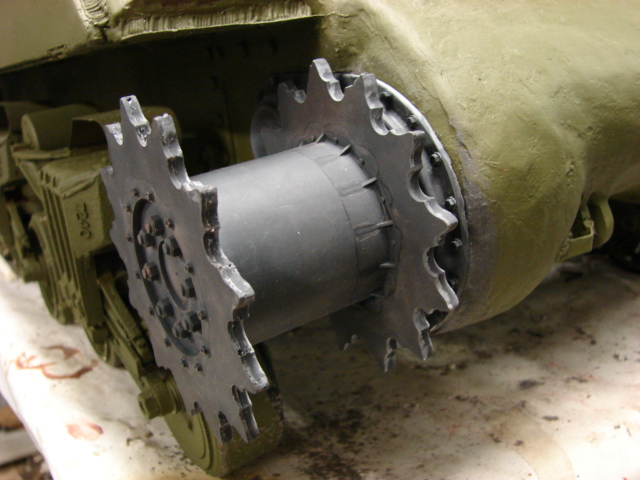
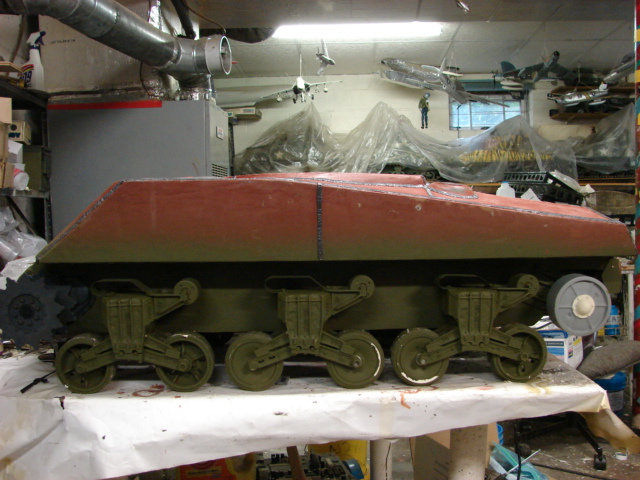
The panzerwerk final drives and sprockets were mounted to the model's hull. To mount the sprockets I simply drilled a 1/4 inch hole through the sprocket and mounted a 1/4 inch steel shaft to the sprocket. The sprocket is held to the tank securely and still spins freely.


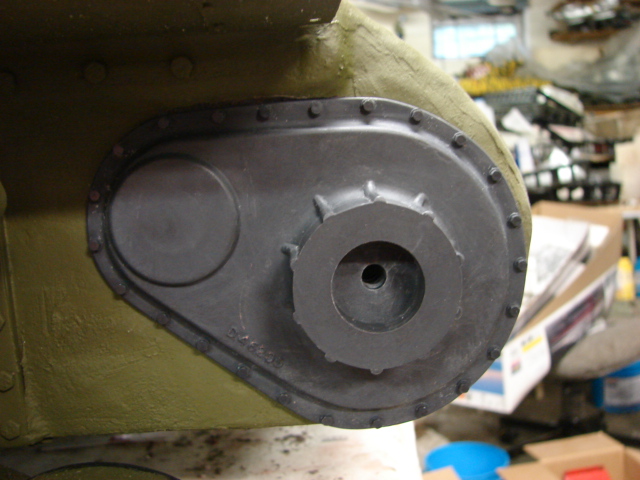
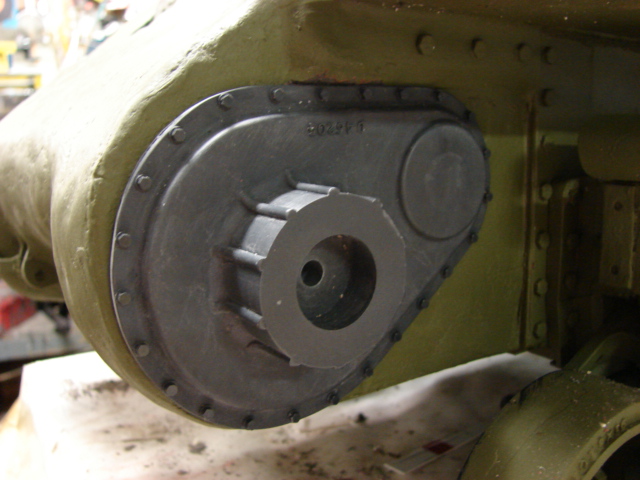
the sprocket's installation went on with no hang-ups.


While I was finishing up the lower chassis I added some new parts to the product lines. http://www.eastcoastarmory.com/m4.htm

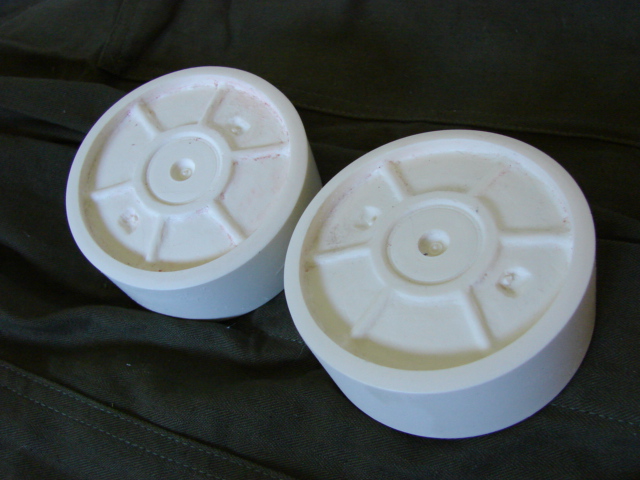
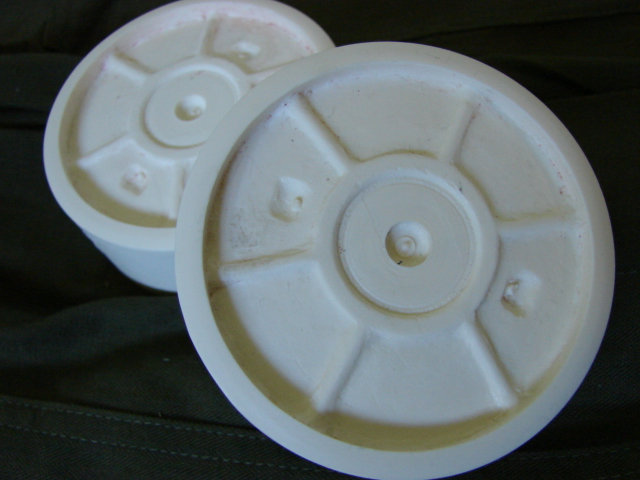
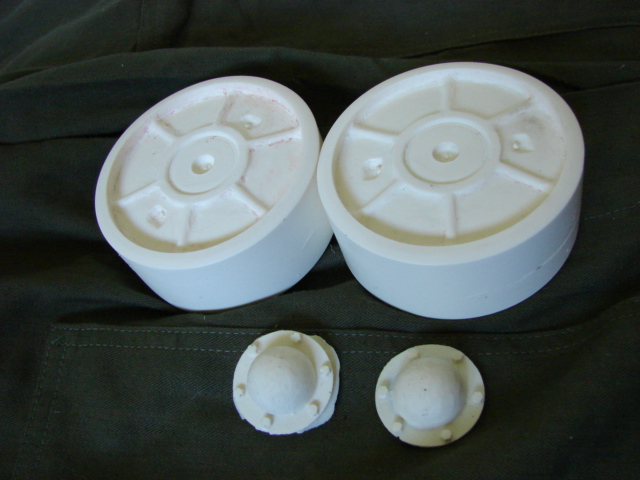
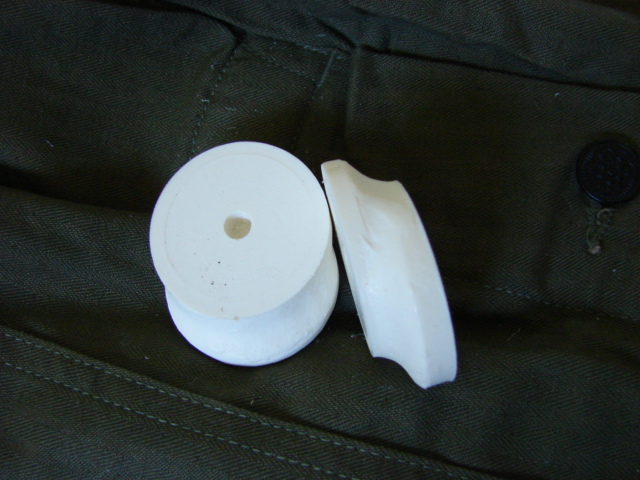
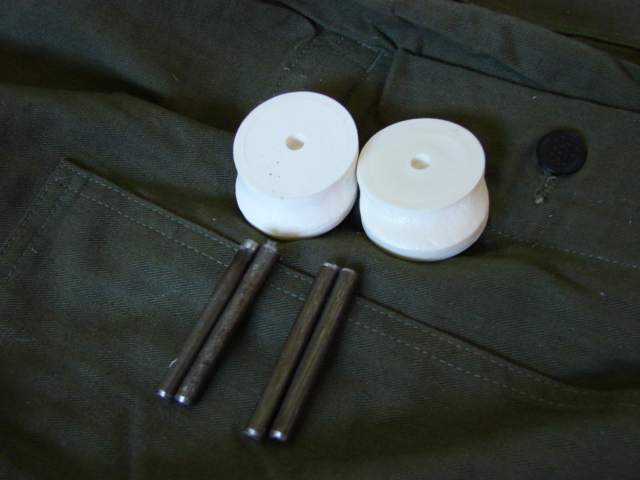
mid / late production stamped idler wheel set. Set includes two wheels and two hub caps.


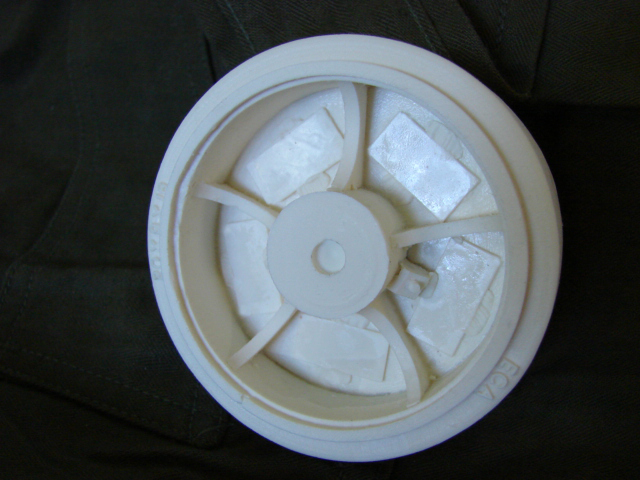
Reversible welded over M4 spoke road wheel. On many shermans the open spoke road wheels had their spoke holes plated over to keep foreign objects to clog the wheel and to cause problems.


This road wheel is reversible with different styles of patches on each side. On one side you have ovular patches, and on the other side square patches. With this wheel you can have two wheel styles in one package, which can make mix and matching wheels easier.


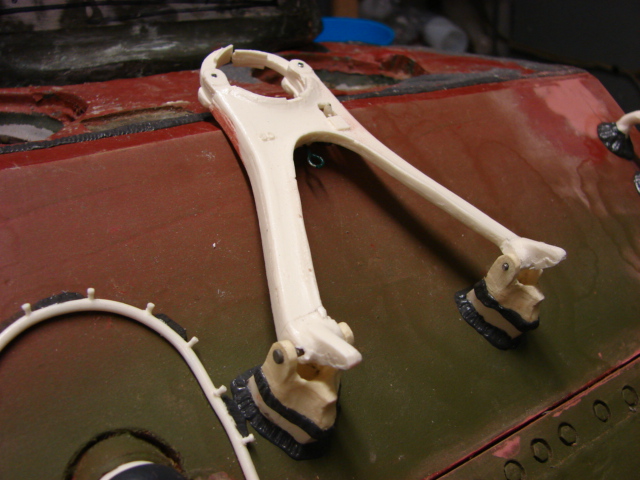
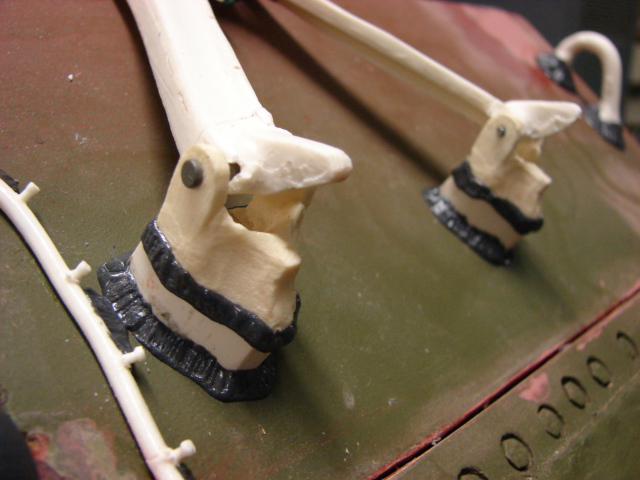
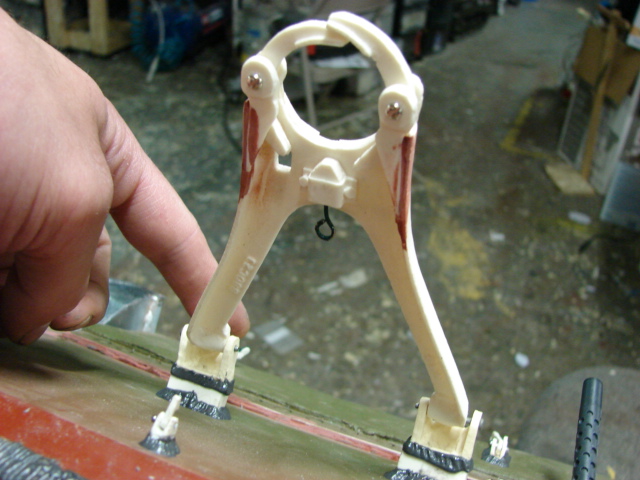
Revised Idler wheel mounts. On the tank's idler mounts I added the idler swing plate. with this new addition the idler wheels can now have their tension adjusted and the idlers will have a more realistic hang to them. Steel shafts are now included with the sets.  


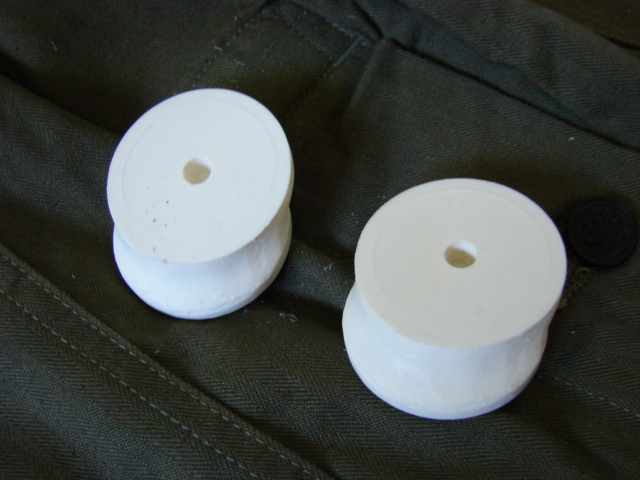
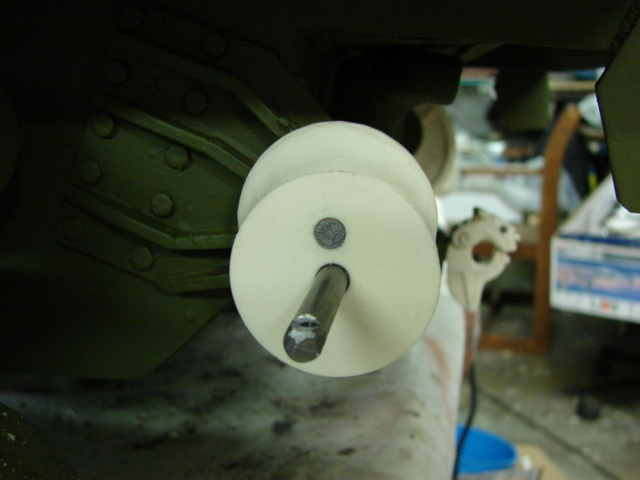
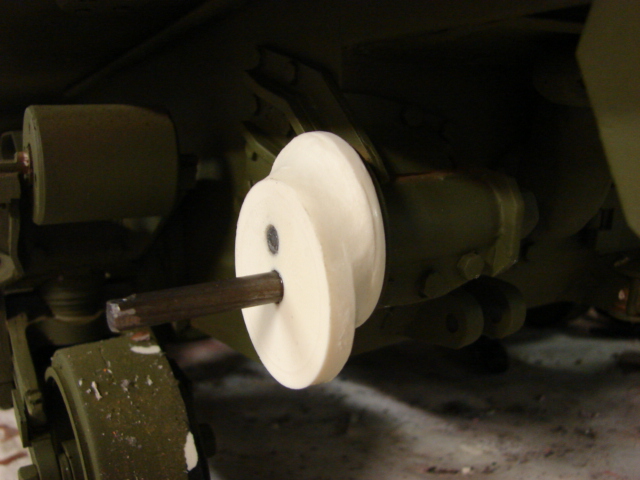
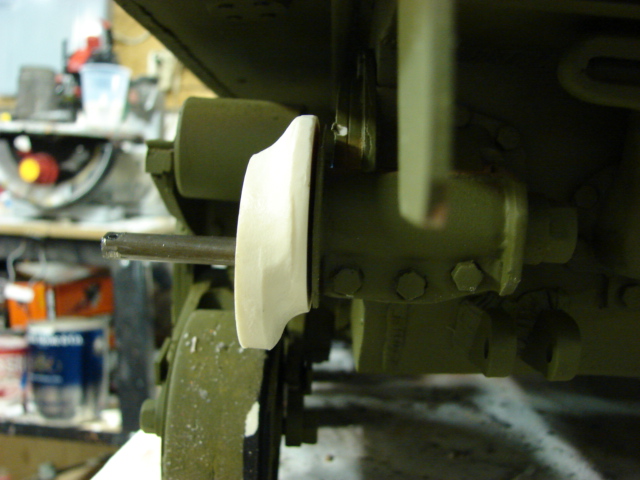
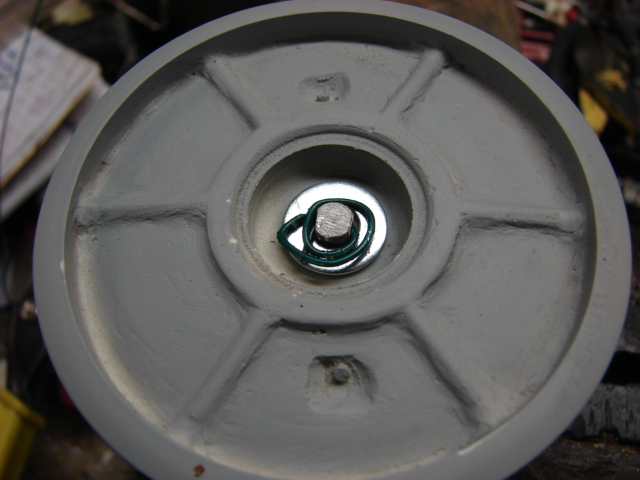
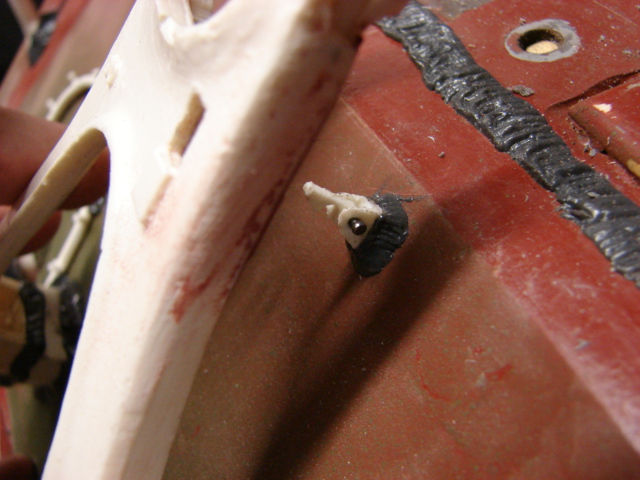
To mount the idlers to the shaft I used my retaining pin method. To do this I drilled a small hole into the shaft and use a washer and a coiled piece of wire. This system securely holds the idler in place and the mount but also allows the wheel to spin freely.


Once the idler is mounted the hub cap is added covering the mounting system.


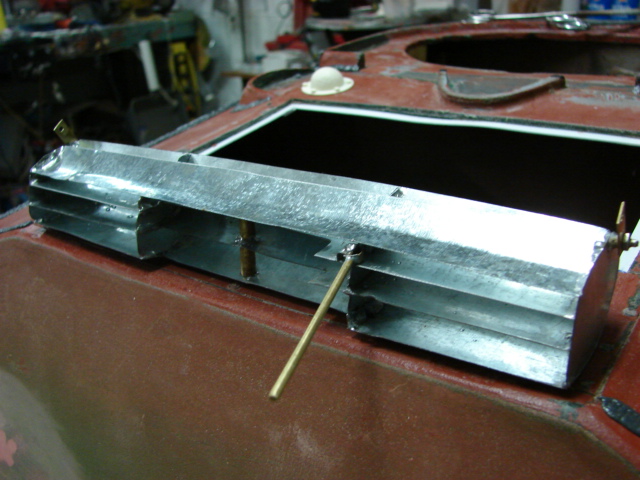
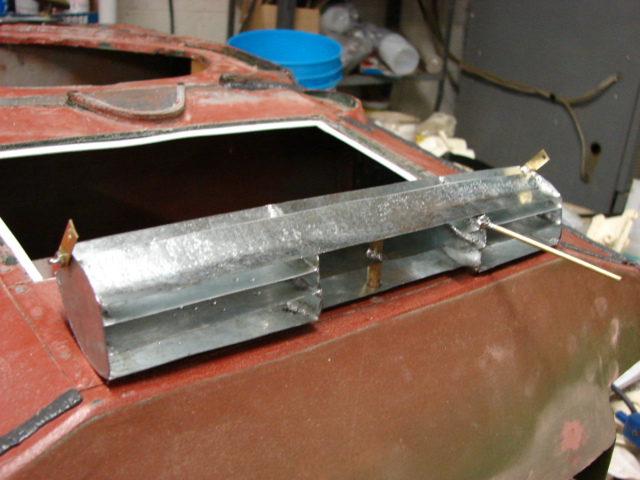
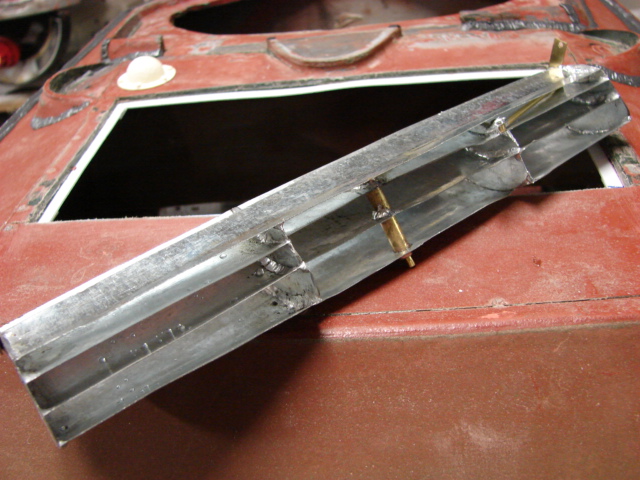
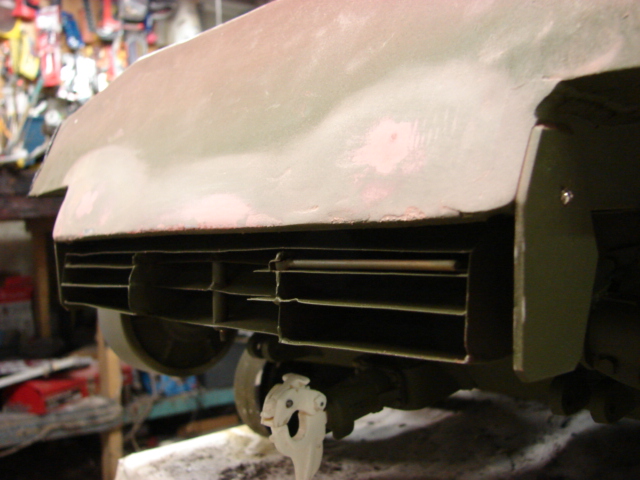
After the idler wheels were mounted I then fabricated the exhaust deflector flip grill. The grill is all fabricated out of sheet metal, and is fully retractable.


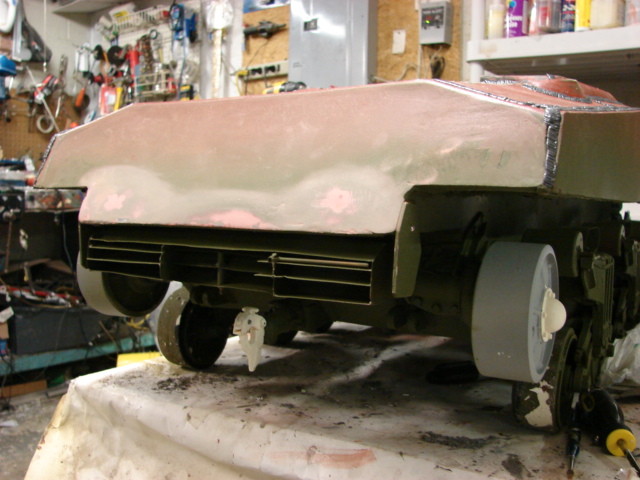
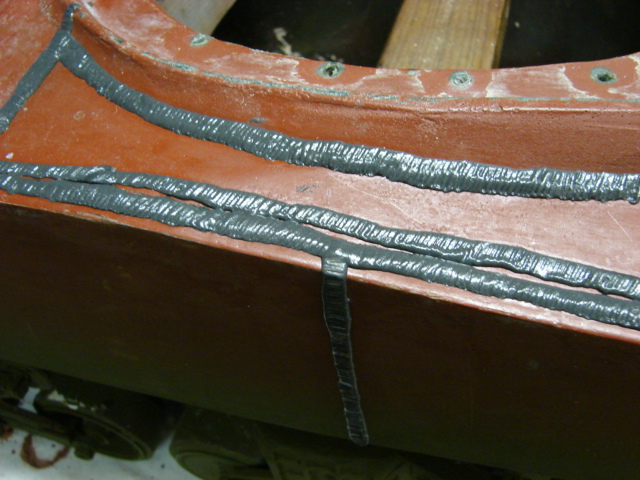
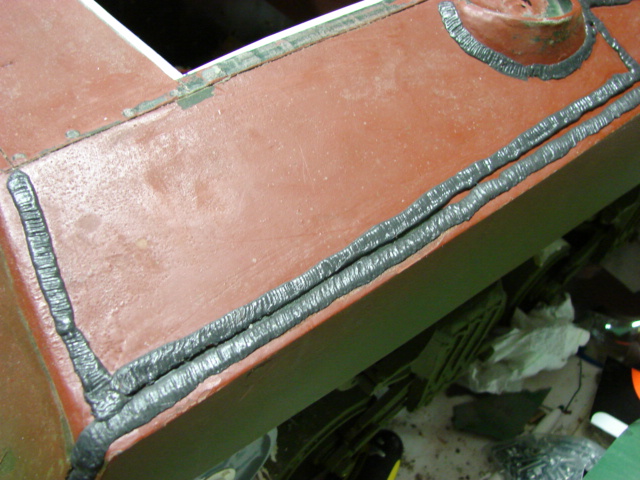
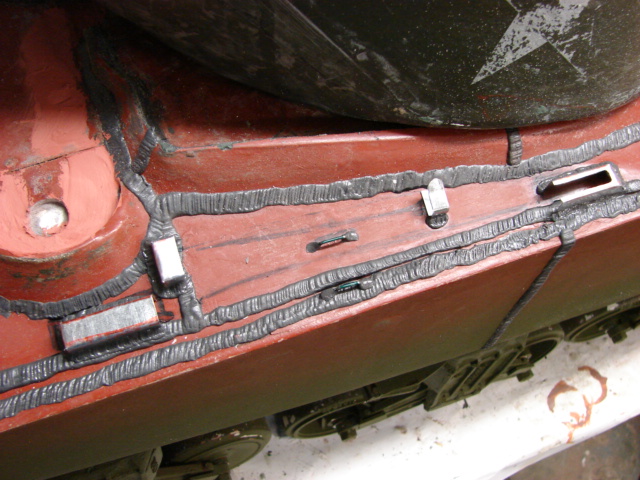
Almost all of the tank's upper hull weld lines were sculpted. On the upper portion of the hull two weld seams are visible. The first bead is for the original armor side plate. The second is for the jumbo's added armored side plate. Another note the side armor plate was actually comprised of two panels that were welded together towards the center of the tank. 


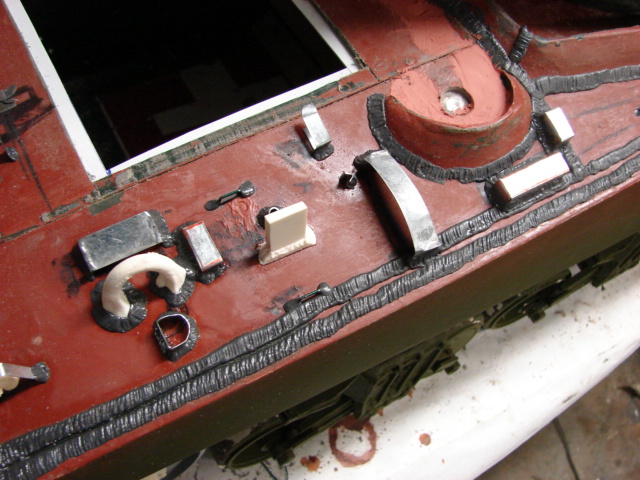
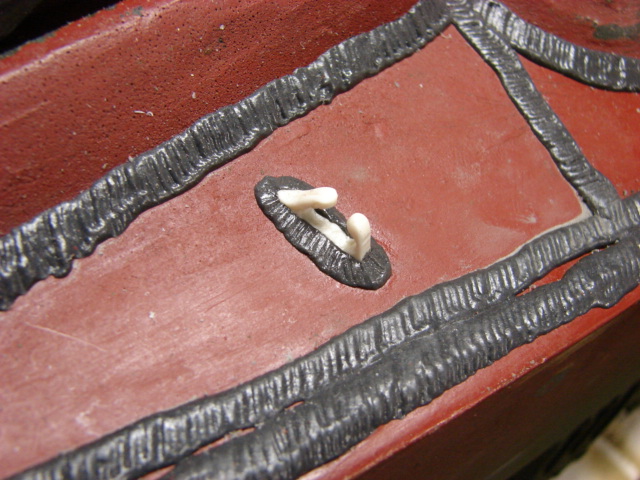
In addition to the weld beads the tank's tool posts and some of the rear upper hull details were added. These would include the engine hatch stops tail light, tail light brush guards, tow cable cleat, tow cable lock and the rear lift hooks. 


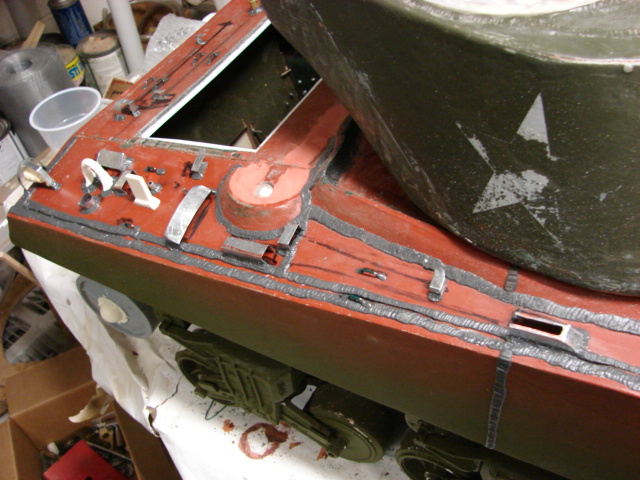
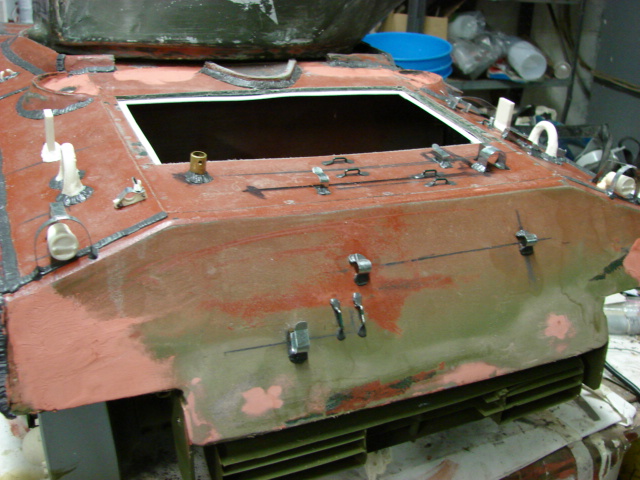
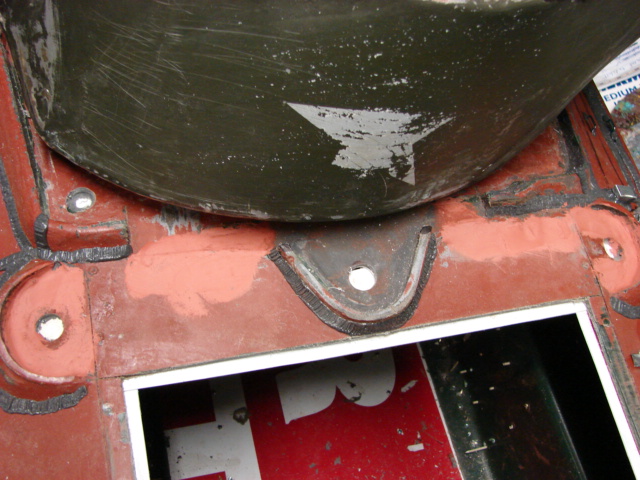
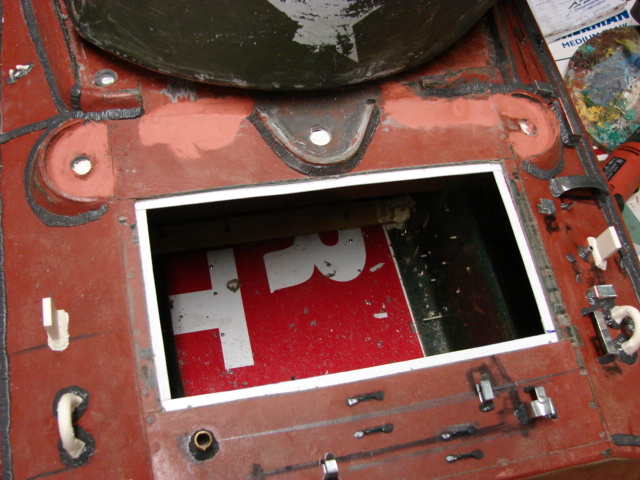
The hull is now ready for the functional fuel cpas and the inner shelf was added to the engine hatch bay. The shelf is to hold the hatches when closed.


All of the tank's front hull detailing has been completed.


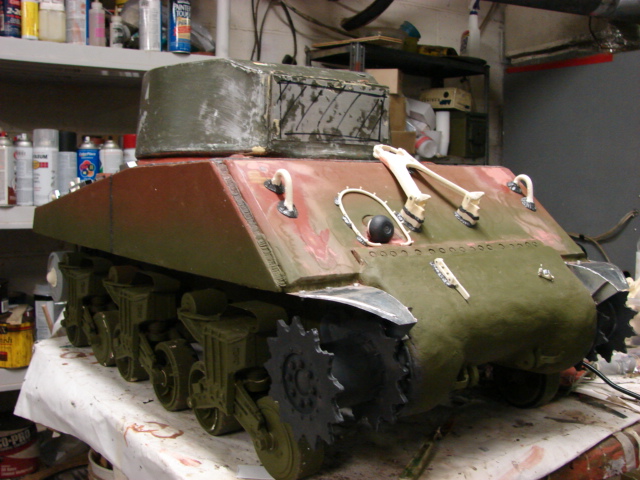
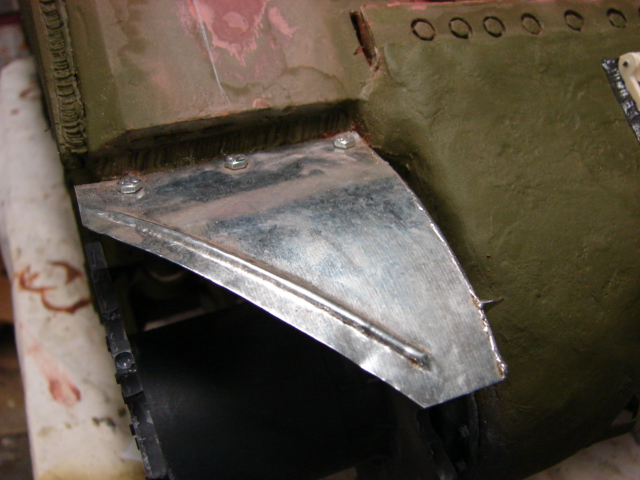
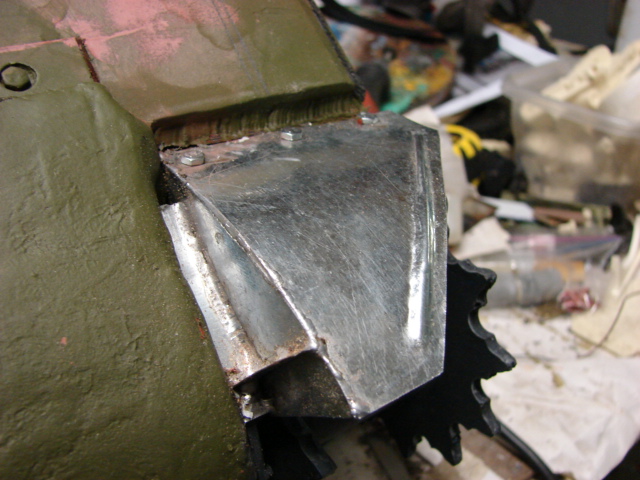
The front fenders were added and are scratch built out of sheet metal. On the Jumbo the fenders mount differently than they do on a standard sherman. Due to the thicker transmission cover the fenders have to mount to the tank's final drive bolts. This gives the fenders a sunken in appearance.


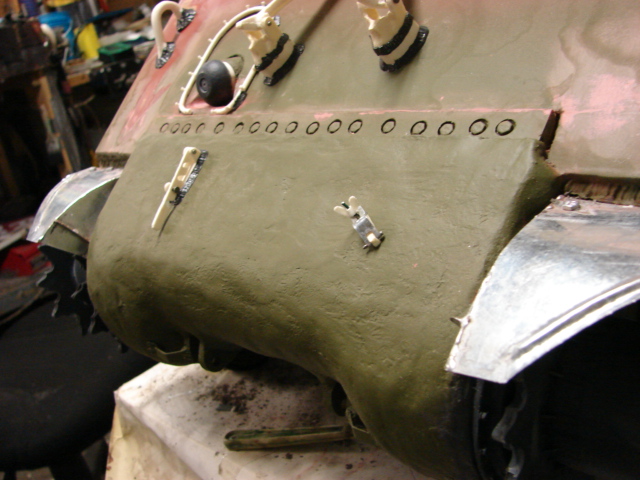
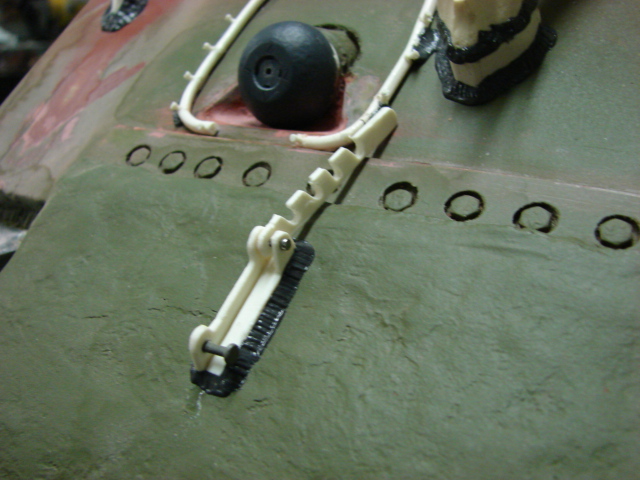
On the transmission cover the retracting comb wire cutting device and the tow cable mock was mounted


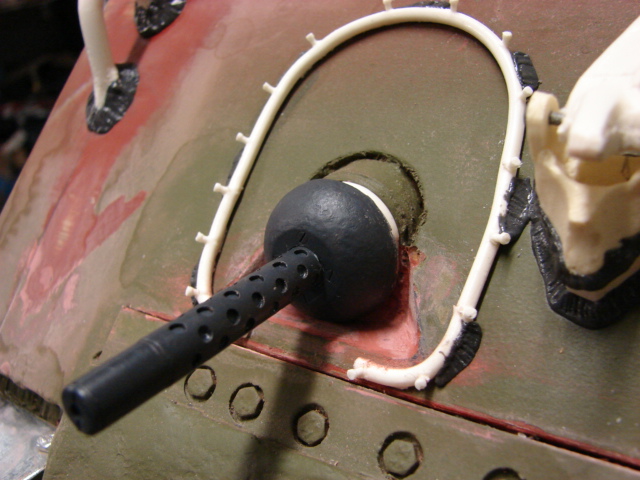
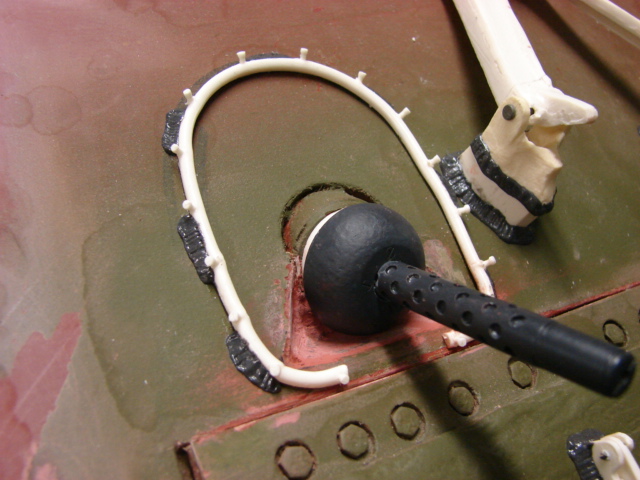
The front armored plate details differ slightly than that of a standard sherman. On the jumbo there aren’t any head lights, horn, or brush guards. Only the lift hooks, MG tarpaulin mount ring and the 75mm travel lock. For the bow M1919A4 I used the panzerwerk bow MG set.  


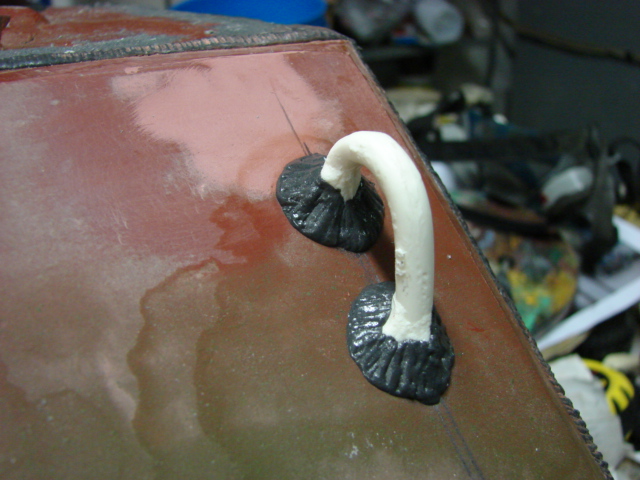
On the Jumbo's 75mm travel lock the two mounting lugs were elevated off the front hull via two risers. Scrap chunks of resin were used to make the risers on the travel lock and the retaining latch. 


I will now be focusing on the tank's folding rear rack and rear detailing. I should have the hull fully completed by the end of the week and will then be starting on the turret. The whole tank should be ready to paint in about two weeks. More to follow.


  • Member since
    April 2005
Posted by armourguy on Wednesday, July 20, 2011 6:50 PM

I have made a lot more progress on the tank completing the tank's hull.


I have completed the tank's bow hatches. I have wanted to create this set for several years now and with this project I had the chance. I have added them to the product lines. http://www.eastcoastarmory.com/m4.htm


For the inner periscope detail I used a set from panzerwerks.


In addition to the front hatches I also added the front air filter intake and armored cover.


Before I was able to add the intake guard I added the cast texture and tow cable cleat. The bow hatch area is now complete.


I was also able to complete the tank's rear hull plate detail. This would include the spare track racks, and the metal rear folding rack. All of these components are fully functional.


After the rear wall was completed I then focused on completing the rear deck detailing.


The tank's functional fuel caps, fire extinguisher, and rear air intake were all mounted. 


The tank's functional rear grill work was another part of the build that I completed.


For the grill work I reworked the kit grills that were originally molded into the hull. I fabricated the grills out of brass strip that were soldered together. The air intakes were also fabricated out of sheet steel and brass. They were then soldered to the grill work.  


Kit Original (taken from a stock JD)


Reworked


Finally to finish off the hull I added the fender mounts.


In addition to the lower hull I was able to make some progress on the turret and mantlet.


The turret suffered more damage from the mold making process than I first thought, and to repaire the damage I had to remove all of the initial detail that I built into the turret when I first built it. Once the repairs were made I rebuilt the lost detail, as well as reworking the front sections, adding the mantlet mounts, adding the rear turret air intake, and cast texture.


As I mentioned earlier the mantlet master didn't survive the molding process so a new mantlet was needed to be fabricated. Today I was able to complete the basic mantlet shape out of wood. Tomorrow I will add the remaining details and cast texture completing the mantlet.


The mantlet is constructed out of several layers of plywood. After I was happy with the overall look and feel of the mantlet I coated the entire component in fiberglass resin in preparation for the next step.


I should have the mantlet and gun completed and installed within a day or two. Once complete I will be able to add the last of the turret detailing. Once done the tank will be ready for painting! More progress to follow.   


  • Member since
    April 2005
Posted by armourguy on Tuesday, July 26, 2011 6:13 PM

Thanks, the model is about ready to be painted.


The tank's mantlet and gun have been completed and added. The 76mm gun was machined out of PVC


On the real Jumbo the tank used a modified M62 76mm gun mantlet from a T23 turret. The cast steel mantlet had a large steel slab welded over the top. The standard lift hooks were also deleted and new ones were placed over the mantlet's corners. To simulate this effect on the model I added cast texture to the rear portion and sanded the front portion smooth. Welds were added as well as notches were milled into the mantlet's front.


The mantlet rotor caps were added and cover the fasteners that mount the gun and mantlet to the turret. The barrel is spring held to keep the gun barrel steady and not floppy.


The tank's turret mounting bolt has also been added. The turret bolts to the hull via one large nut and bolt.


Once the mantlet was added I added most of the turret detailing


The turret lift hooks, smoke mortar, range finder, gunner's periscope guard box, searchlight mounts, folding 50.cal travel mock, folding 50.cal pintle mount, and MP 48 spring antenna base are now all complete.


The copula and loader's hatch has been assembled and mounted. A Panzerwerk periscope will be added to the copula after the tank is painted.


All periscope brush guards have been added to the turret and hull.


The rear 50.cal pintle storage pintle has also been added. Currently the 50.cal racks are in molding and will be added tomorrow.


After the 50.cal racks and searchlight are added the tank will be going into painting!  


  • Member since
    January 2010
  • From: MN
Posted by 101stAirborne on Tuesday, July 26, 2011 9:53 PM

You and your big a$$ tanks! Keep em' up I love looking.

Models on the bench:

Too many to count!


  • Member since
    April 2005
Posted by armourguy on Friday, July 29, 2011 12:31 PM

The last parts have been added and the tank is now ready for painting


The T23 turret style 50.cal storage racks are complete and will be added to the product line soon.


After the last of the parts were added the tank went into painting


Final Prime


For the tank's base coat I used the same custom shade of OD that I used on my last M4A3


The tank is now ready for the next step. The whole model itself should be ready by next week. More progress to come!


  • Member since
    September 2005
  • From: beacon falls , Ct.
Posted by treadwell on Friday, July 29, 2011 3:16 PM

hey Armorguy  :  )

I really enjoy watching you build these  giants and always enjoy the finished product. I am sure this one will be just as excellent. 

One thing I wanted to comment on was what you called the ' wire cutter' one the right side.  It is not a wire cutter, but a device used to lock the brakes during shipping  ( I am referring to the 'comb' device).... here are a couple of links for you to check out  http://web.inter.nl.net/users/spoelstra/g104/comb_brakelock.htm  and 

http://web.inter.nl.net/users/spoelstra/g104/comb.htm  

keep up the great work, always look forward to your updates !

william carls


  • Member since
    April 2005
Posted by armourguy on Wednesday, August 3, 2011 10:40 PM

Thanks William, thanks for pointing me out ot the real purpose of the comb. When I first created that component many years ago that evidence was not yet posted on the sherman register. At that time it was still speculation to it's purpose.

Thanks Brad, The tank is now about 95% complete

After the base coat was added the tank's markings were applied. All of the tank's markings are painted on via stencils, as I do on my other builds.

The tank's tracks were assembled and added as well. For the tracks I used the T48 rubber chevron track links from Panzerwerks. I have used these tracks in the past and they are worth every penny. The tracks and sprocket fit so well that the tank will roll with the slightest touch.

The tracks before weathering.

After weathering


And mounted

I was also able to mount the spare track links onto the track racks.

Before the tracks were fitted all of the tank's zerk fittings were painted in red. Also painted were the tank's lights and fire extinguisher handles.

All that remains left on the tank to add is the tools, and the 50.cal MG.


  • Member since
    March 2010
  • From: Democratic Peoples Republic of Illinois
Posted by Hercmech on Thursday, August 4, 2011 10:36 AM

Holy COW! I knew it was big but when I saw you holding that track... call me even more amazed. Great build log and fantastic work!


13151015

  • Member since
    April 2005
Posted by armourguy on Monday, August 8, 2011 11:18 AM

Thanks guys,

With the exception of the 50.cal MG the tank is now complete!


All of the tank's tools and gun cleaning kit have been mounted.


The tank's gun cleaning kit rods can also connect together like on my other 1/6th scale shermans.


In addition to the tools the tank's fuel caps and fuel cap chains were completed.


The tank's periscopes and hatches have been painted and weathered.


The tank's searchlight and pintle mount cover caps were added as well. Both the searchlight and the pintle mount set will be getting updated with these new parts. More info to follow soon.


In addition to the added cover cap and chain on the hollow searchlight set I will phasing out the vacuum formed clear lens and replacing it with a new lens casted in clear resin. These are available now.


The tank's turret coaxial MG was also added. On the up gunned 76mm Jumbo the standard M1919 was replaced with a M2 50.cal MG.


I have an Armorpax cradle mount kit on the way, once it arrives I will be able to mount the tank's 50.cal. Once added I will then be able to take some outdoor images. Until then I will be cleaning up the shop in preparation for my next project!


  • Member since
    April 2005
Posted by armourguy on Wednesday, August 24, 2011 6:16 PM

It has been a wile since I posted last on this project, but I added the armorpax M23 50.cal cradle and DML 50.cal a little while ago. The gun received my usual modifications and improvements. I was also able today to take some quick outdoor shots along with my M26.


I will now be creating the tank's gallery webpage, more to follow.


JOIN OUR COMMUNITY!

Our community is FREE to join. To participate you must either login or register for an account.

SEARCH FORUMS
FREE NEWSLETTER
By signing up you may also receive reader surveys and occasional special offers. We do not sell, rent or trade our email lists. View our Privacy Policy.