SEARCH FINESCALE.COM

Enter keywords or a search phrase below:

**Finished 10/18/12*' M3 Light Tank 'Stuart' 80th Armored Regiment, Fort Knox, KY

9404 views
25 replies
1 rating 2 rating 3 rating 4 rating 5 rating
  • Member since
    September 2007
  • From: Fredrikstad, Norway
**Finished 10/18/12*' M3 Light Tank 'Stuart' 80th Armored Regiment, Fort Knox, KY
Posted by Stampede on Friday, December 9, 2011 11:12 AM


It's been quite while since I posted anything in here. So I'm trying once again to get out of the build drought, and thought I'd make a WIP on my current build.

Found an Academy M3 on the shelf at the local styrene pusher. Nostalgia caught up with me and I just had to buy it. I built the old and not so very correct Tamiya kit back in the day, and I think this little tank is kinda cool.

It's not the most complicated kit in the world, but it needs some corrections since Academy hasn't quite done their "homework". Some shortcuts here and there, a mix of M3, M3A1 og M5 on the sprues. The interior included in the kit is all wrong for an M3, it's for an M3A1, and I will not use it on this model. Some PE from Eduard will also come in handy to replace some of parts that are both too large and too thick.

I'm bulding this one as a training vehicle from the 80th Armored Regiment, The Armored Force School, Fort Knox, KY, around 1942-43. No on vehicle tools or other field equipment will be included in this build. These training vehicles was stripped for any unnecessary equipment on the training fields. But it'll get olive drab and white stars.  Wink ...and maybe a little bit of artistic freedom. Smile

Started the lower hull.

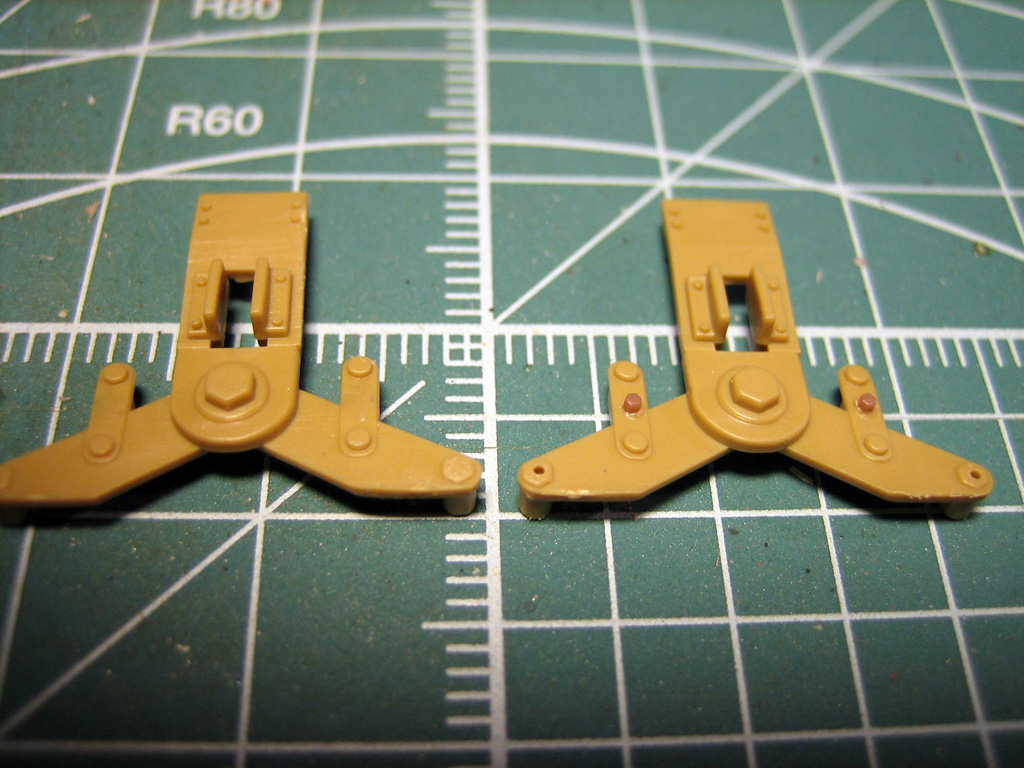
Some bolts are missing on the bogeys, and Academy has taken short cuts, that I chose to address.

Front of the bogeys. OOB to the left, and modified with extra bolts and holes to the right.
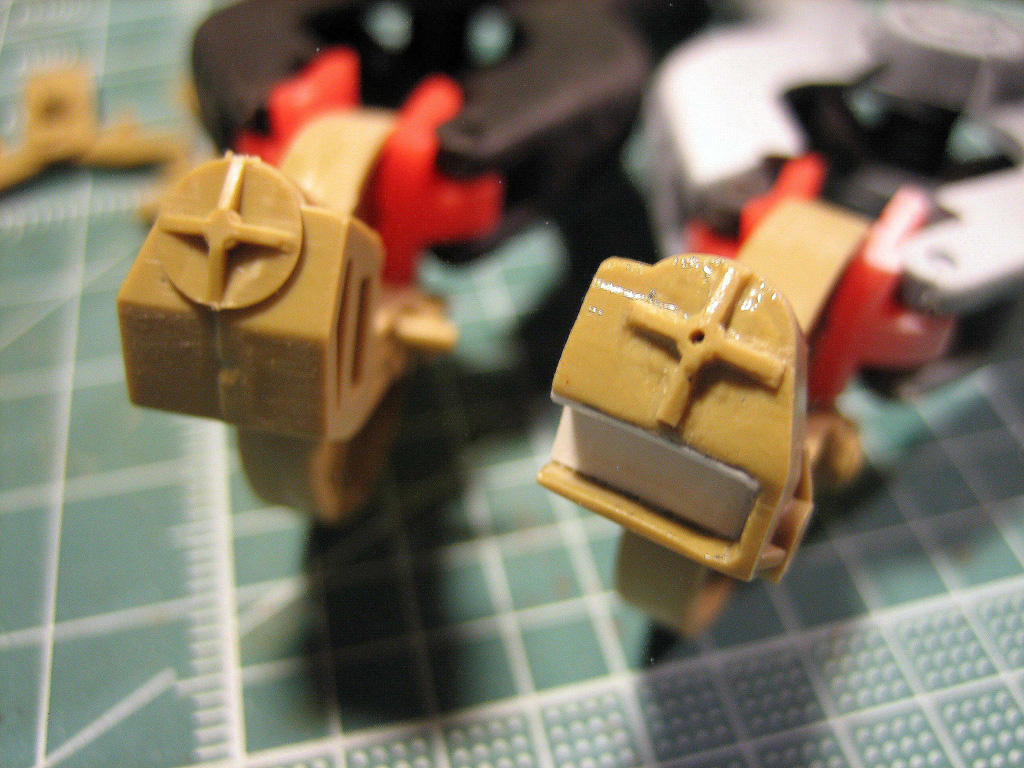
On the idler suspension it's kind of a mix of versions. To the left OOB which is almost correct for an M5A1. To the right after modification to what is correct for an M3.
Academy has also taken a short cut where the idler arm bolts to the lower hull. It's supposed to be open at the end facing forward with two extra bolts, but they've made this part solid. I grinded out the closed piece of the part and used some Evergreen to make it more correct. I also added the two missing bolts after connecting the idler arm to the lower hull.
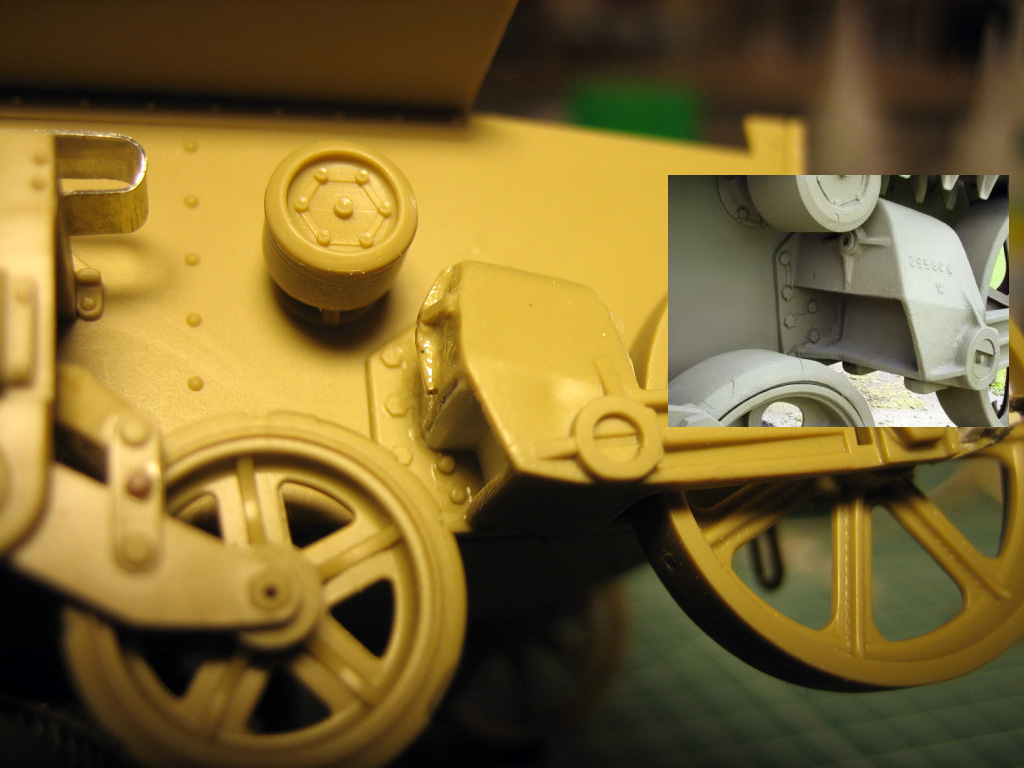
Kinda sloppy idler tensioner mechanism OOB, so I cut it of and replaced it with some brass rod and Evergreen.
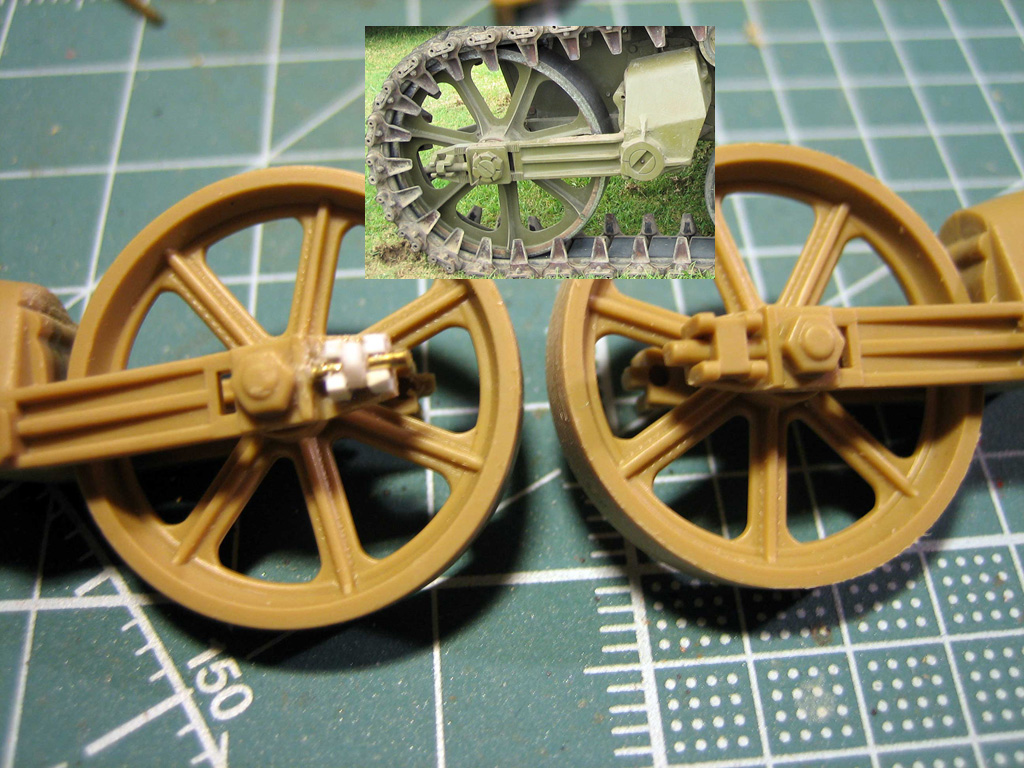
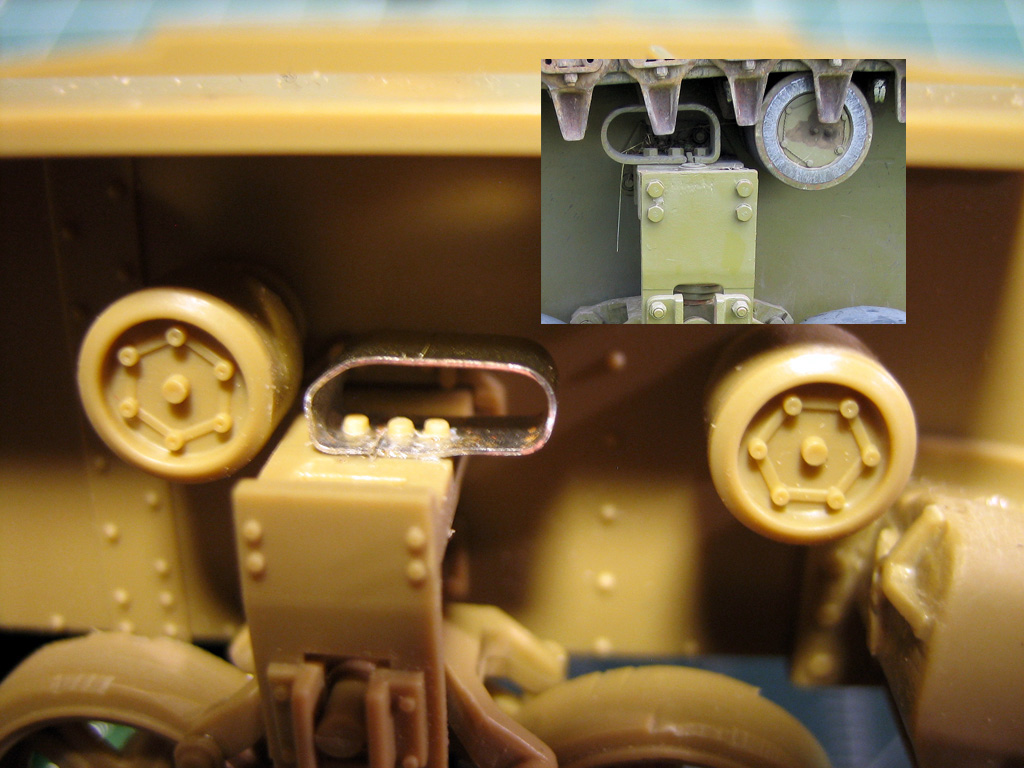
Made new track guides out of 0.15 aluminium to replace the way to thick ones in the kit, "bolted" them to the bogeys with 3 bolts as the original.
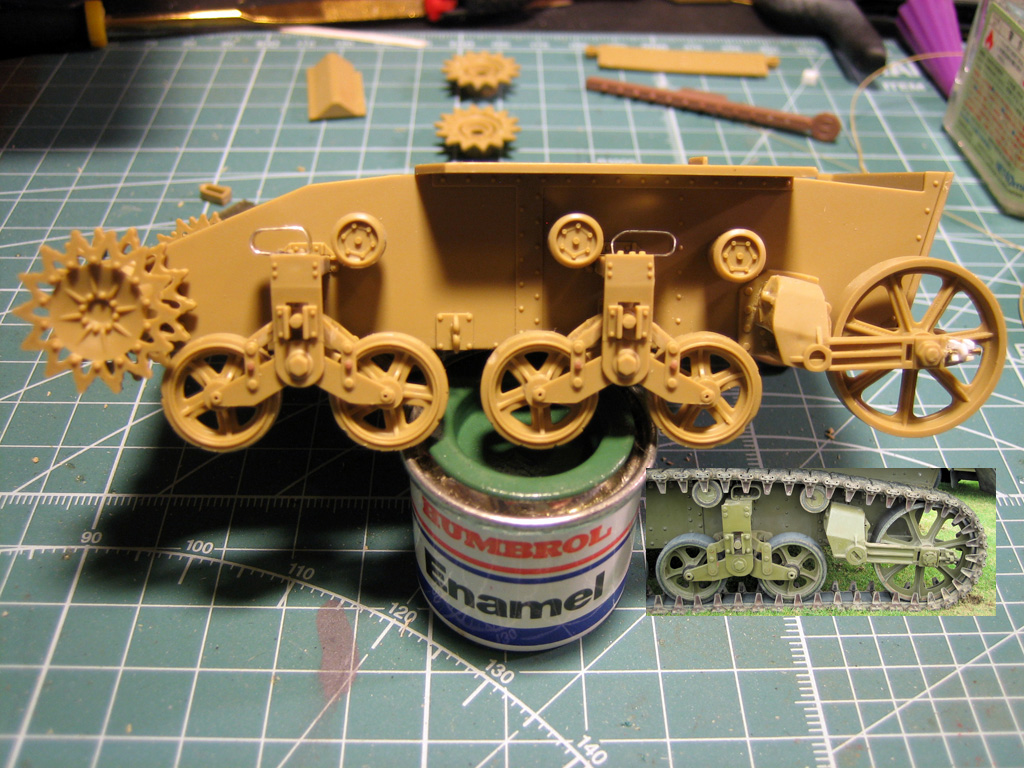
Complete lower hull ready for the tracks. Not sure if I'm gonna use the individual links in the kit or take a short cut and use the vinyl tracks. The vinyl tracks has got a very nice detail, and they are also correct...time will show.
Starting the upper hull

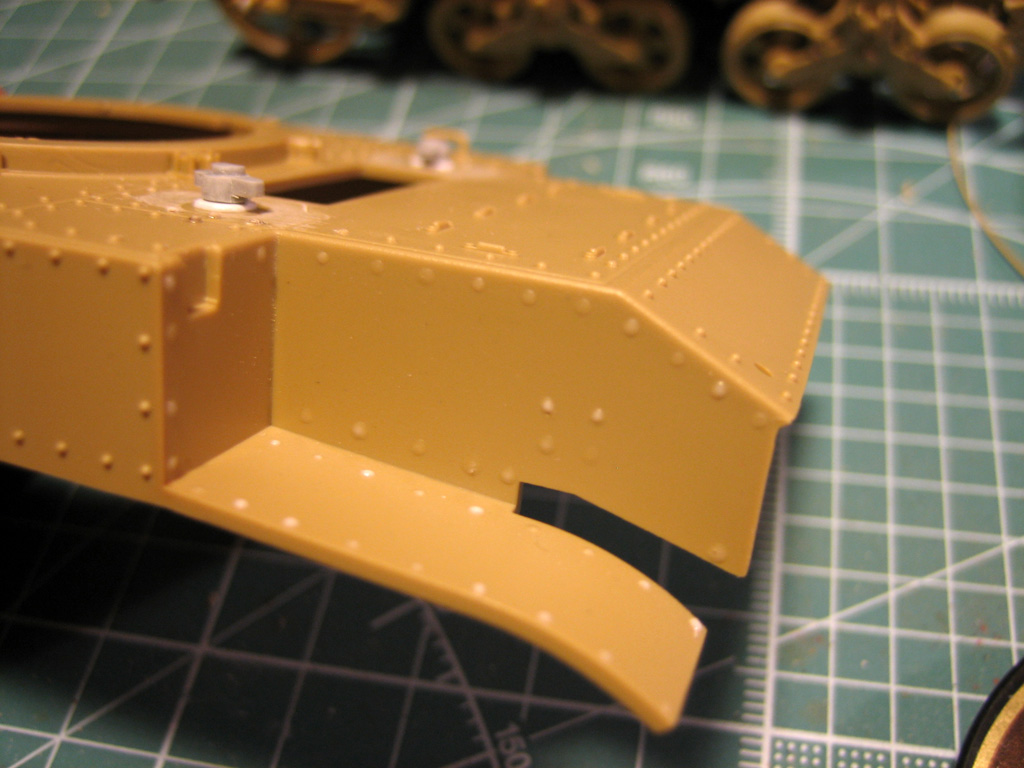
Academy has missed out about 40 rivets on the rear of the tank and fenders. I added these with white glue and a tooth pick.
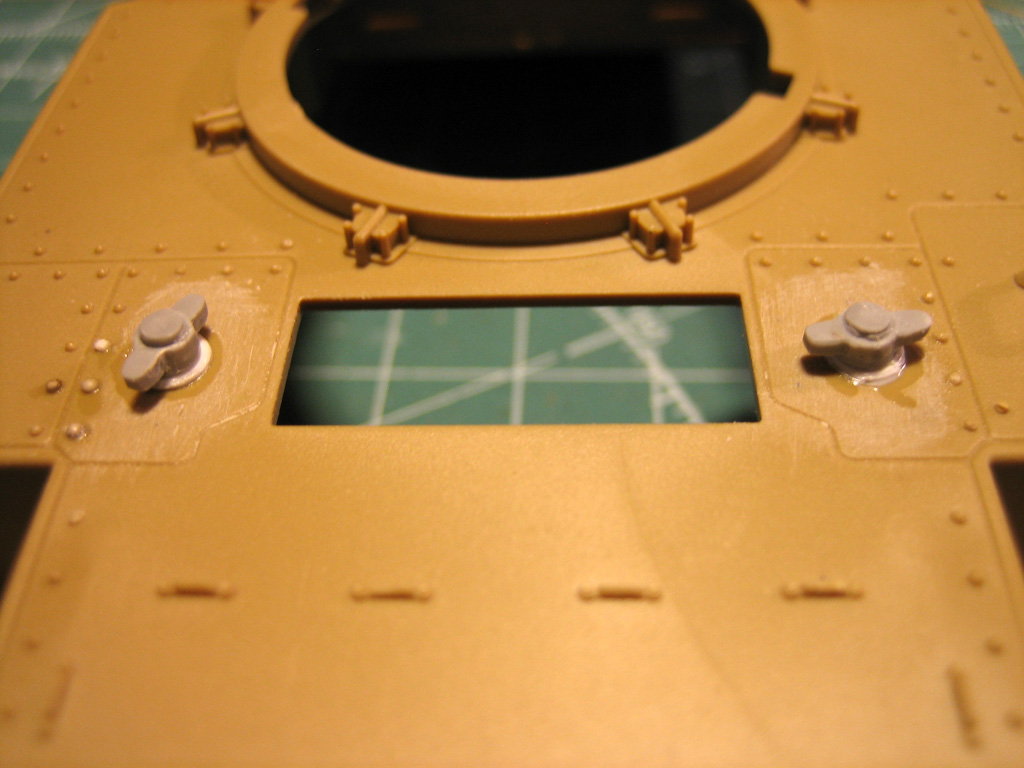
Poor research on some other details as well. The gas caps included in the kit is for the M3A1, so I had to scratch new ones from sprue an Evergreen. Just a small chain on each of the caps to be mounted before they are complete, and correct.
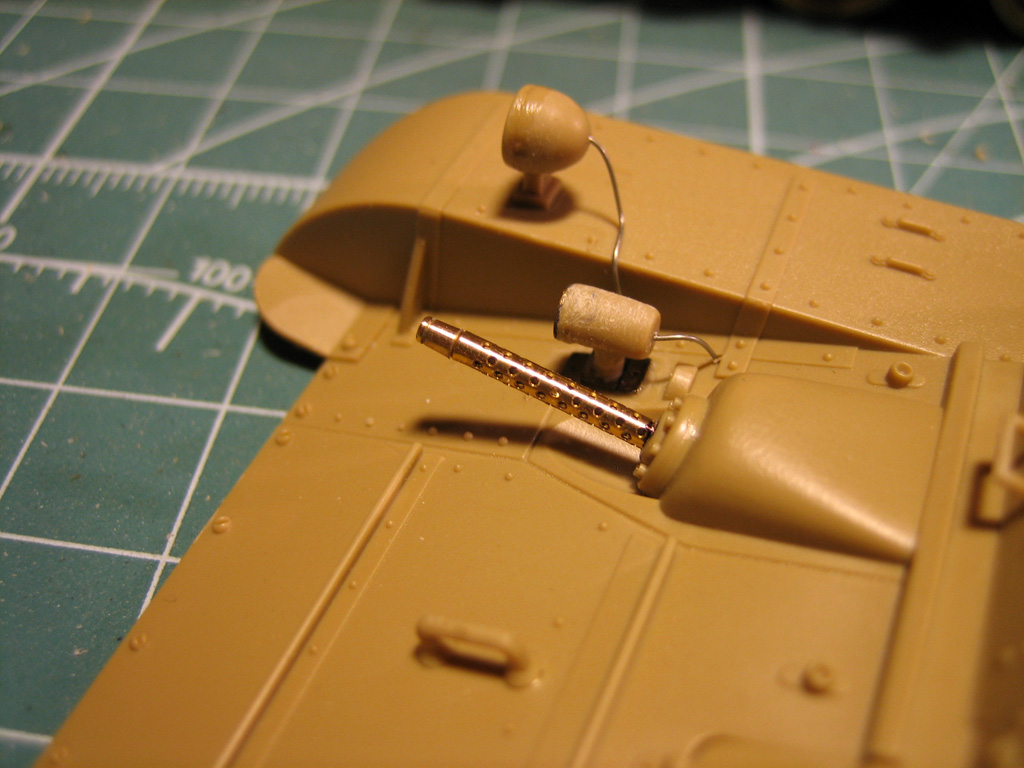
The Headlights are also wrong for an M3, but correct for an M3A1. I modified these and chose to update them slightly. No clear lenses are included in the kit and that doesn't look good. I mounted the "glass" that came with the kit and grinded out the internals. Found a couple of lenses with the correct pattern that will be mounted after paint. Looks way better that silver painted glass.

I've also added some wires for the lamps and siren up front, and added Aber Browning M1919 brass barrel.
I'm kinda uncontrolable when it comes to detailing a kit, so this one got a bit more details than I opted for when I decided to build this model. It was supposed to be a "get out of the building drought model", but that thought got cancelled fairly quickly.

Well, down to business.

A small piece of chain, and a PE antenna bracket, plus an air intake mesh found it's way to the engine deck.
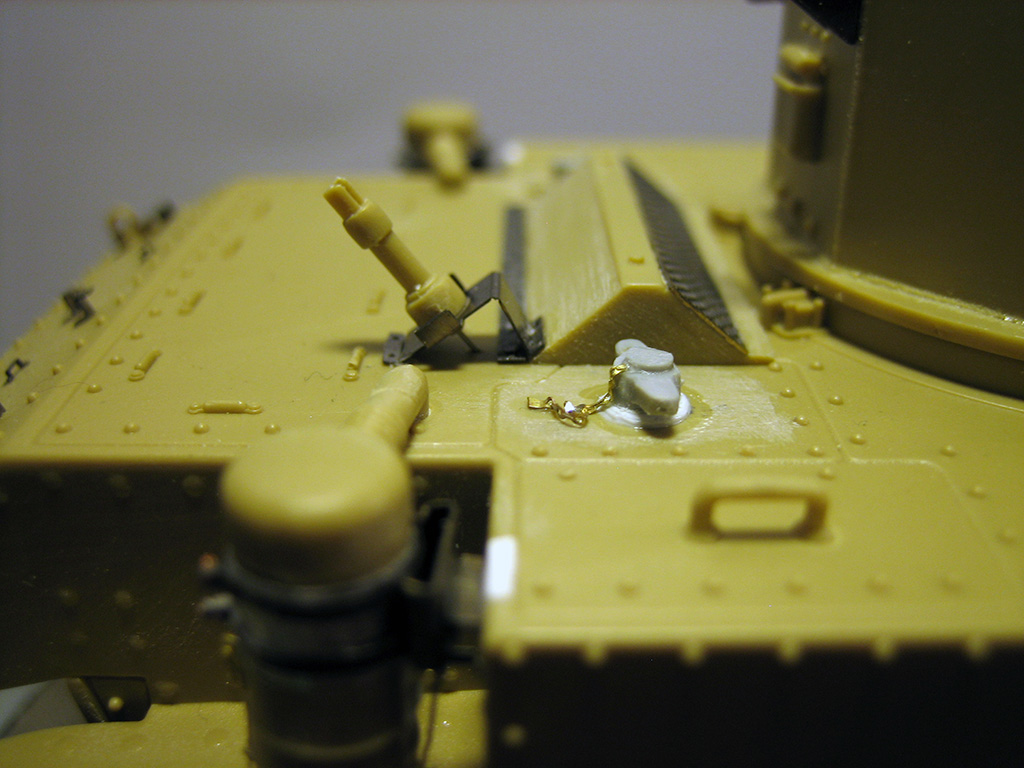
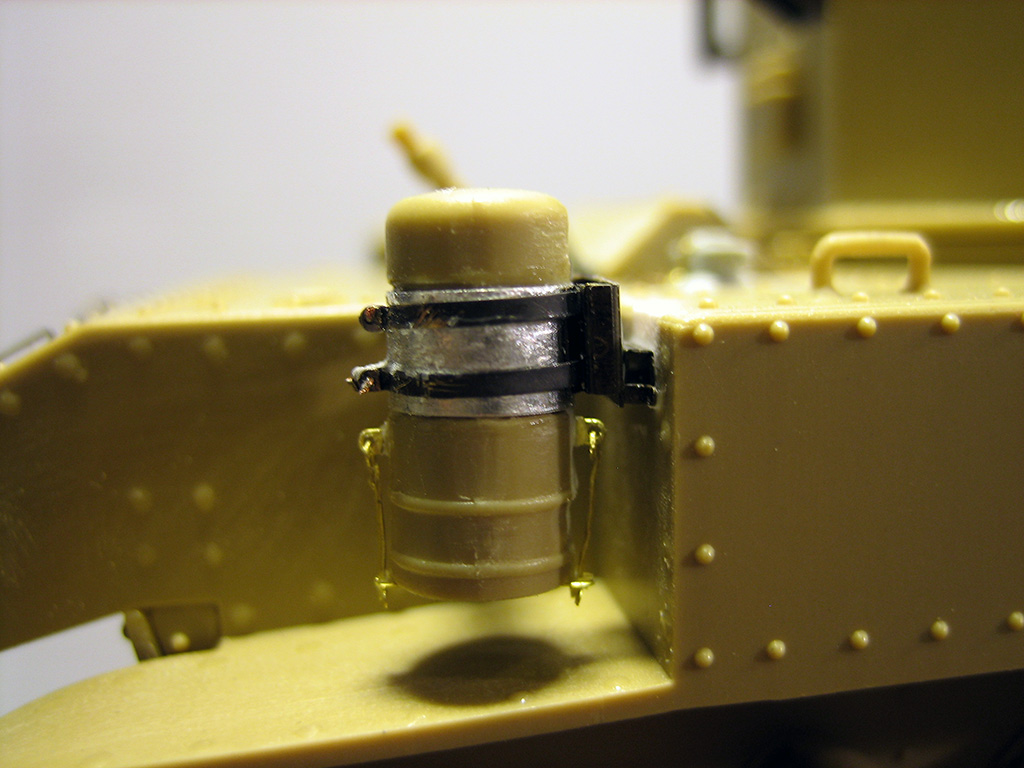
Some details on the air filters. Swapped the fastener bands and the attachement bracket with PE and banged up the air filter canister a little bit. I also made the bottom fasteners on the canister of some left over PE. A bit of clean up now and it's ready for paint.
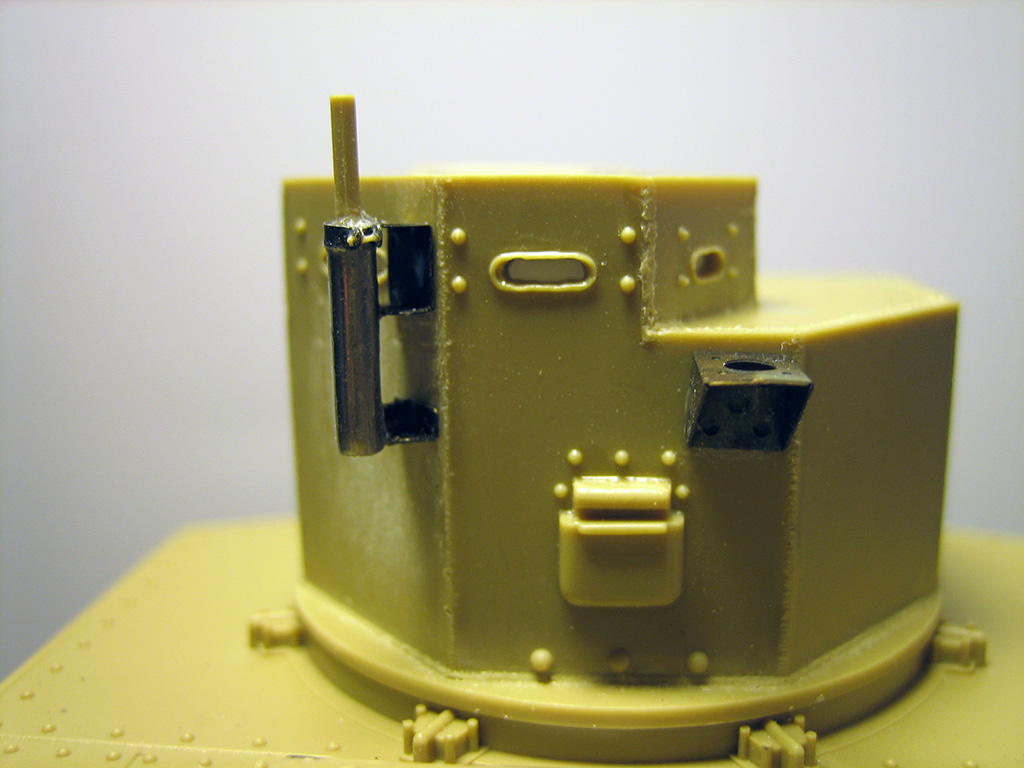
The weld seams on the M3 turret was grinded almost flush with the turret walls, according to the reference pictures I've got. I tried to simulate this with stretched sprue, Tamiya glue and an X-acto knife.

Applied stretched sprue, bombed it with glue and made the seams with the knife. Left it to dry thoroughly and used a Flexi-file to round of and sand down the seams.

The mounting bracket for the M1919 machinegun are made up of a piece of solder, some PE and stretched sprue. Drilled open all vision port on the cupola and made rain covers for all of them.
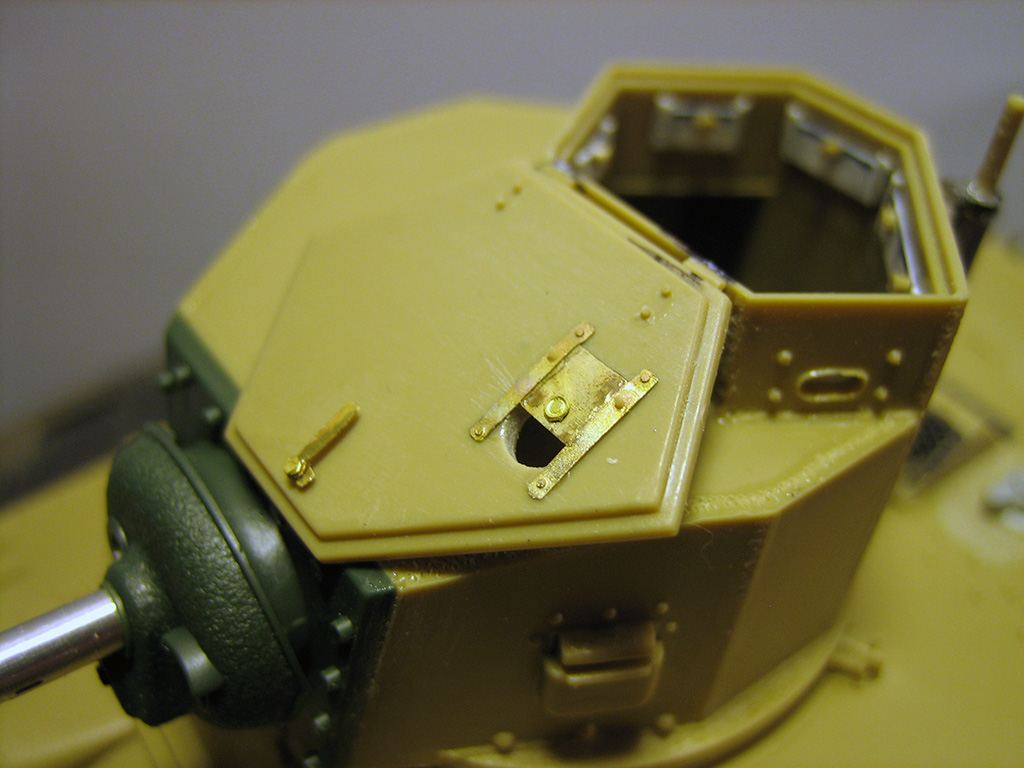
The turret hatch got it's share of detailing too. I drilled open the ventilation hole on top and made the rain cover from some left over PE from my Sherman project, I also made the internal handle for the hatch of some PE from this project. The four mounting bolts for the hatch are made from stretched sprue.
The on vehicle tools are omitted on this one because it's a training vehicle, but all the fasteners and brackets should be there. These were mounted on the engine deck and rear plate . The bracket for the shovel was banged up a bit, as per a reference picture from Fort Knox.

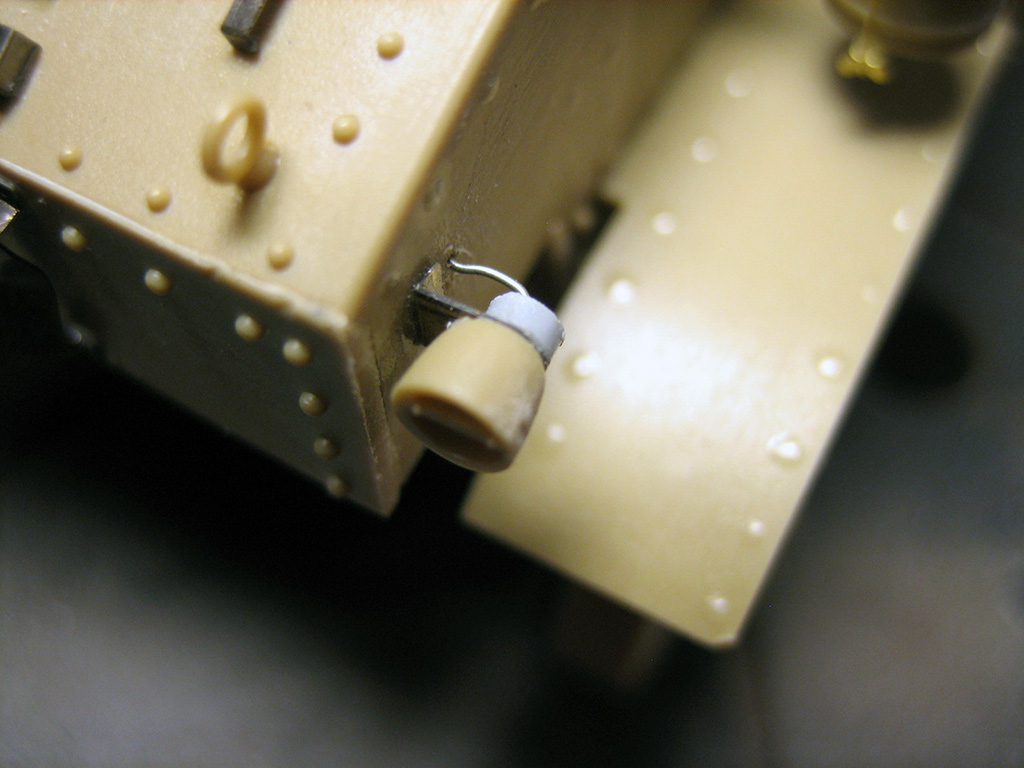
Some detail on the rear lamps. A PE bracket, some plastic tubing to make up the rear of the lamp and a piece of wire.
A couple of "full figure" shots from right, left and above.
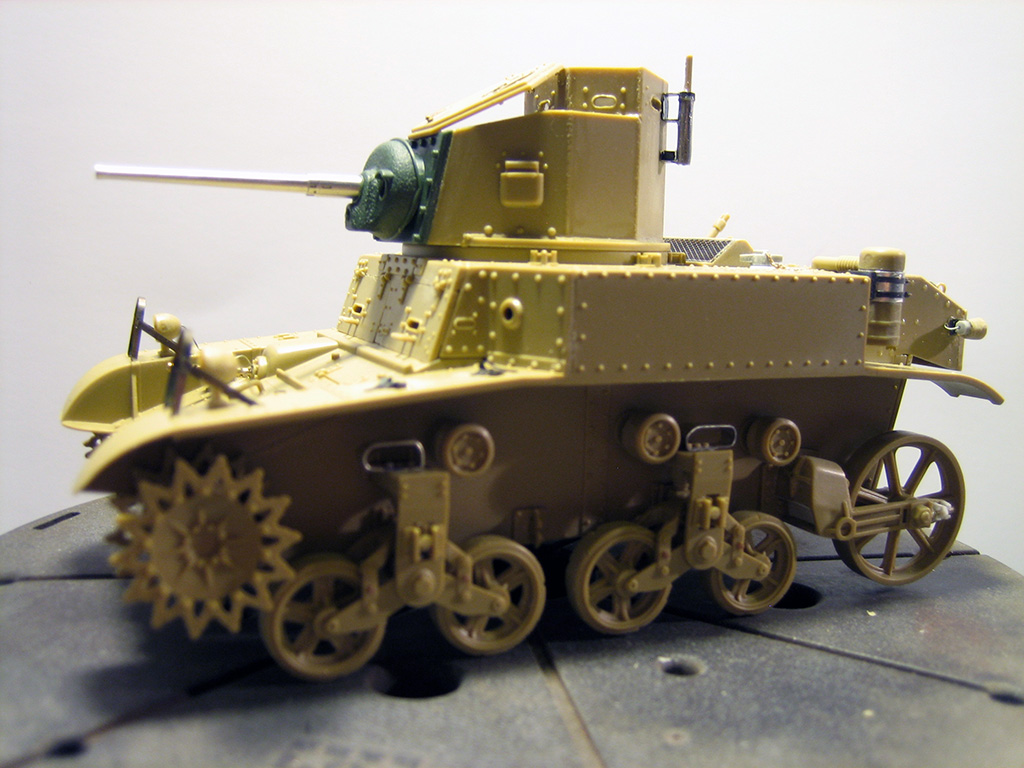
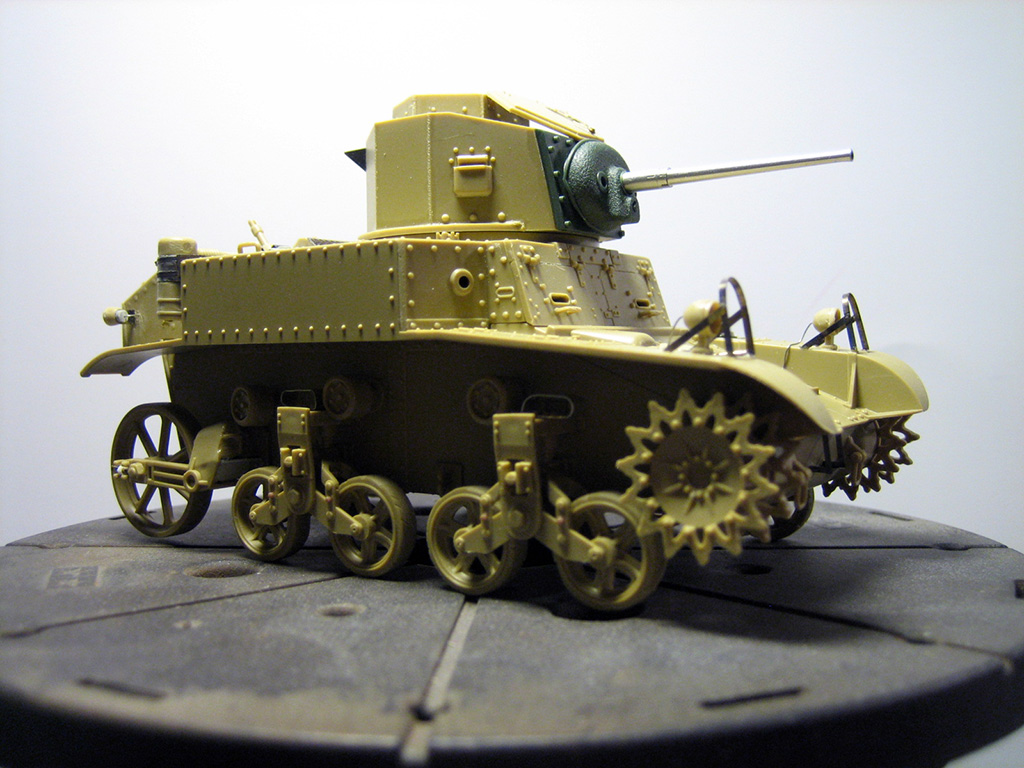
In this picture the rain cover I made for the cupola are visible. The ejection marks on the air filters are filled with CA-glue and sanded, if anybody should comment on that they are visible. Wink

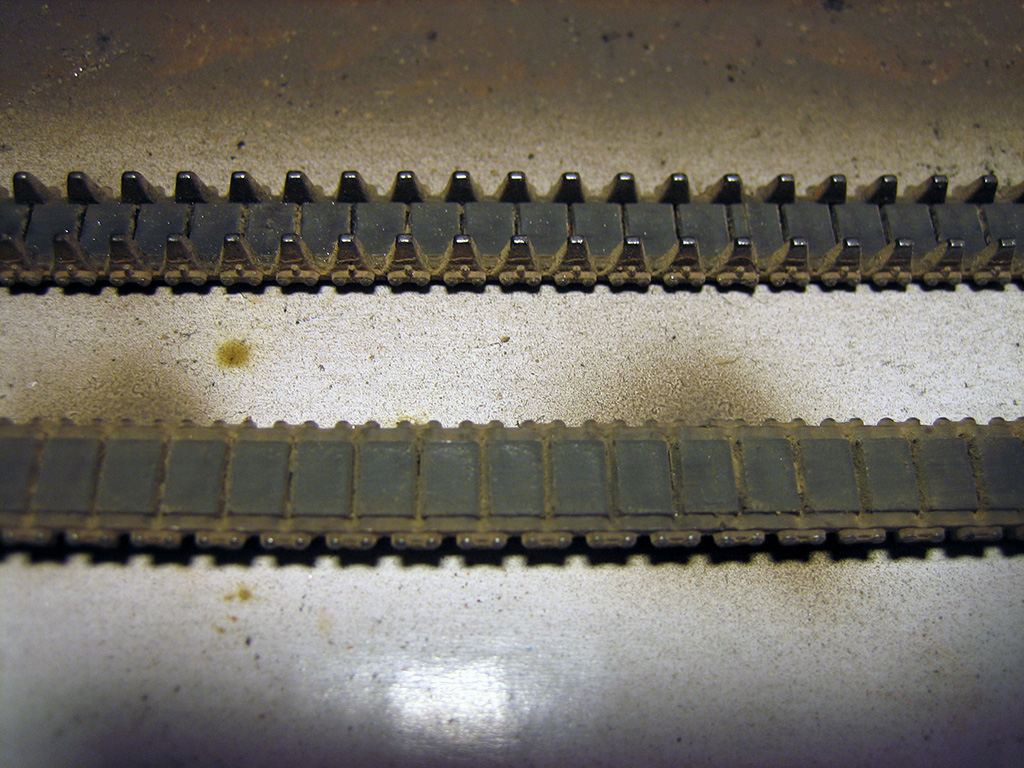
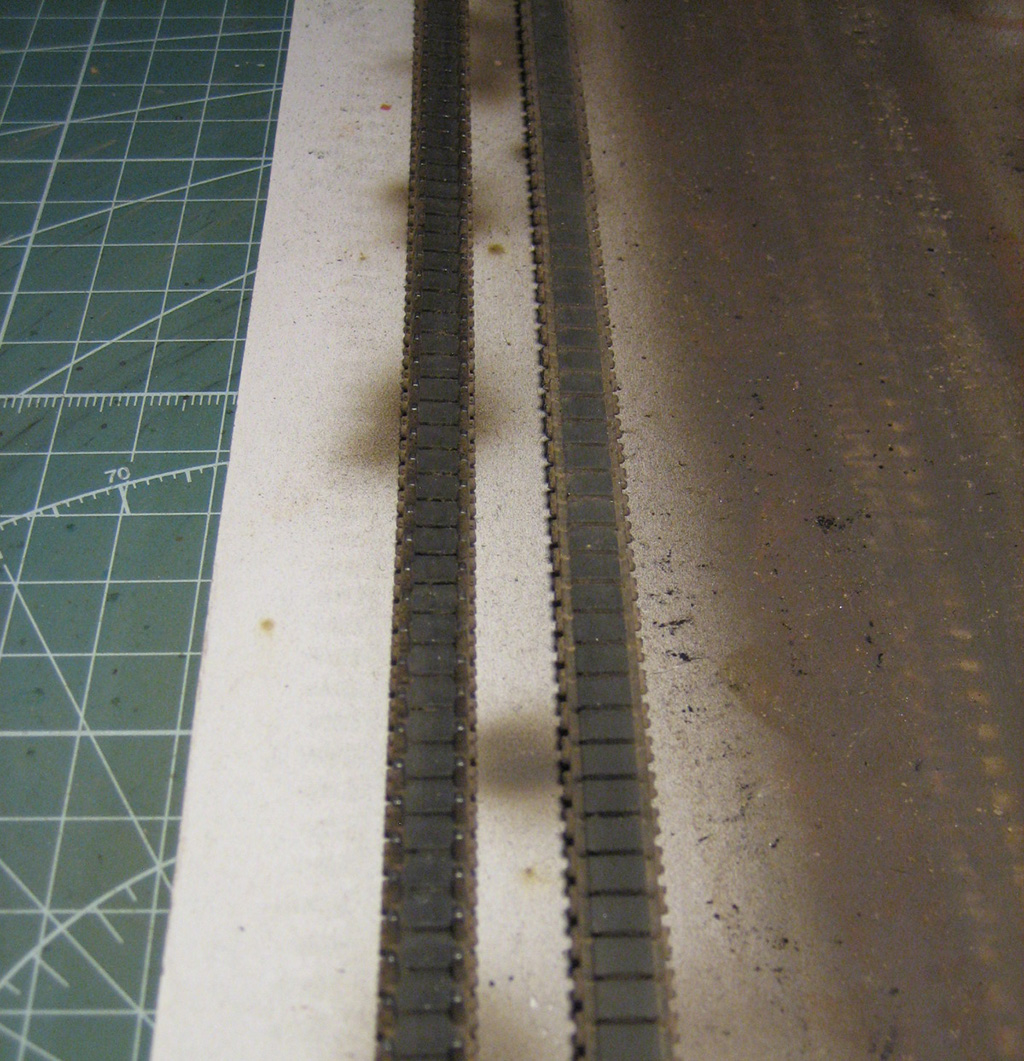
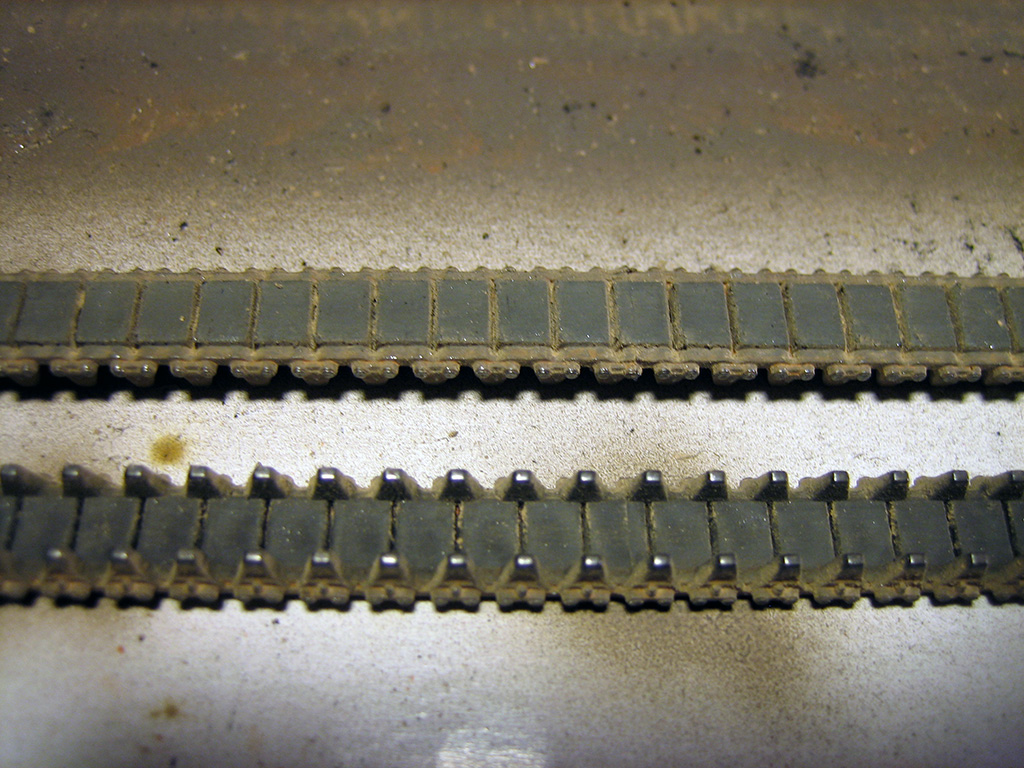
Some clean up on the whole vehicle and the tracks are in order now, before it's time for the OD.

The tracks are initially painted and weathered. The rest of the weathering will be performed once mounted to the vehicle so I can blend it all togheter.

Some pics...
Per-Erik Smile


If electricity comes from electrons, does morality come from morons?
  • Member since
    November 2009
  • From: SW Virginia
Posted by Gamera on Friday, December 9, 2011 11:39 AM

Wow, that's some fantastic work there! I had no idea the Academy kit was that sloppy, I've got two of the AFV Club kits, I hope they're more accurate.

"I dream in fire but work in clay." -Arthur Machen


  • Member since
    November 2004
  • From: Cat Central, NC
Posted by Bronto on Friday, December 9, 2011 12:37 PM

Nice work adding the details.

  • Member since
    September 2007
  • From: Fredrikstad, Norway
Posted by Stampede on Wednesday, December 21, 2011 2:53 PM

Thanx for the comments guys, much appreciated.

@Gamera: The AFV Club kits are more than great.

**********************************************************************************************************


Finally started the painting and weathering process, and that's always the fun part.


First a coat of  Tamiya primer.

Applied a preshade coat of Tamiya XF-61 Dark Green. Applied this color to get adark base for the shadow areas of the vehicle. I'll subsequently try to lighten and fade this base coat. The first step was a coat of OD from above. Trying to get it to blend into the darker base color on the lower areas of the vehicle.

Then I masked of the areas on the turret for the white band and the star. To paint this I used Panzer Aces #313 Stencil. Reversed the masking, applied two thin coats of Vallejo Air Olive Drab and two thin coats of OD and Vallejo Flat Yellow mixed to a shade I tought looked ok. Applied this lighter color along the edges and other places where the ligt would fall naturally. I mixed an even lighter shade that I applied with a brush to some of the parts "sticking out", like the gas caps, hinges, tie-downs and so on.

I then airbrushed two coats of MIG filters, first Green for Light Green and then Grey for Bright Green. I applied the grey filter to try to fade the OD even more.

Then I made my own filter of Abteilung Faded Grey and Odourless Turpentine which I applied with a brush on the entire vehicle.

Applied a coat of Vallejo Satin Varnish as a sealant of the filters.

Used MIG Dark Wash kinda like a rough pin wash. Jeez, there's a lot of rivets on this little tank!

When this job was done and dry I applied another coat of Vallejo Satin. So now she's ready for the next step of the weathering process.


Next in line are painting of the rubber on the running gear, and som other minor details before the rest of the weathering continues.

What's cool about these Fort Knox vehicles, according to the pictures I've seen, are that they are really dirty. They're loaded with some kind of "light-beige-brownish-earth-sand-mud-mix".

That should be a real treat to start with. Me like very much!


If electricity comes from electrons, does morality come from morons?
  • Member since
    November 2009
  • From: SW Virginia
Posted by Gamera on Saturday, December 24, 2011 8:45 AM

Great work! The pin wash really makes all those rivets pop!

And glad to know about the AFV Club kits, I need to pull one out and build it.....


"I dream in fire but work in clay." -Arthur Machen


  • Member since
    December 2002
  • From: Fort Knox
Posted by Rob Gronovius on Saturday, December 24, 2011 9:01 AM

Beautiful work. I've got a couple of the Academy Stuarts, yes, they are a mix of variants and while overall they are better than the 30-40 year old Tamiya kits, they are not 30+ years better in terms of molding, research and detailing.

AFV Stuarts are very nice too.

  • Member since
    July 2004
  • From: Sonora Desert
Posted by stikpusher on Saturday, December 24, 2011 4:17 PM

Stampede
 

Next in line are painting of the rubber on the running gear, and som other minor details before the rest of the weathering continues.

What's cool about these Fort Knox vehicles, according to the pictures I've seen, are that they are really dirty. They're loaded with some kind of "light-beige-brownish-earth-sand-mud-mix".

That should be a real treat to start with. Me like very much!


Here are a couple shots of what is probably Ft Knox... in any case it is a Stateside training area and terrain and soil throughout the South where this was taken is pretty similar...

BTW, VERY nice work so far Yes


F is for FIRE, That burns down the whole town!

U is for URANIUM... BOMBS!

N is for NO SURVIVORS...

       - Plankton

LSM


  • Member since
    June 2006
  • From: Michigan
Posted by ps1scw on Monday, December 26, 2011 12:53 PM

Looks great

  • Member since
    September 2007
  • From: Fredrikstad, Norway
Posted by Stampede on Wednesday, October 17, 2012 6:39 PM

Jeez! Last update on this thread was just before christmas LAST year, shame on me! Embarrassed

Thanx for the kind words regarding my build, even though you all wrote them almost a year ago. Smile

My building motivation this year has been way low, so I'll blame it on that, plus some building and redecorating projects on our home. And it's been summer and motorcycle riding season.

The thing that were missing on this build were some filters, washes and of course the weathering. I used MIG products for these stages, and my trusted pigment layering technique described in this thread http://www.militarymodelling.com/forums/postings.asp?th=27460.

I also dropped a little "tanker-dude" in the tower too. I got this kinda "rusty" feeling when I painted him up; "Ooh it's been a while since I painted something this small".

I've also done my first attempt on a small base for this little tank. The training facilities at Fort Knox in the 40's were quite dusty/muddy, at least so I've read, and hopefully I've captured that look somehow on my base. Critisism is of course welcome since this is my first attempt at making a base.

Well, enough talking. Here are some pictures of the finished little tank.

If electricity comes from electrons, does morality come from morons?
  • Member since
    July 2004
  • From: Sonora Desert
Posted by stikpusher on Wednesday, October 17, 2012 6:56 PM

Beautiful work there Stampede! YesYes

My only critique is the antenna mount... that little slot there should have been filled or removed, or whatever. But compared to the rest of your fabulous build, that is minute.

BTW, 40 to 60 years later every US Army post that I have been on in Europe and North America that has field training areas is muddy, dusty, or both,,, That's just part of the experience.


F is for FIRE, That burns down the whole town!

U is for URANIUM... BOMBS!

N is for NO SURVIVORS...

       - Plankton

LSM


  • Member since
    July 2004
  • From: Texas
Posted by wbill76 on Wednesday, October 17, 2012 7:16 PM

I'd say you captured the look you were after perfectly! Nice job getting this one done.

  • Member since
    March 2004
  • From: Spartanburg, SC
Posted by subfixer on Thursday, October 18, 2012 7:48 AM

Looks really real. Really!  YesYes

I'm from the government and I'm here to help.

  • Member since
    November 2009
  • From: SW Virginia
Posted by Gamera on Thursday, October 18, 2012 9:18 AM

I was wondering what happened to her, seemed like you almost done!

Great work, the M3 looks sharp and the mud looks really good.

"I dream in fire but work in clay." -Arthur Machen


  • Member since
    January 2011
Posted by fificat on Thursday, October 18, 2012 3:59 PM

Boy howdy!  This is real fine work.  Glad you finished it so well.  Thanks for the ride.

  • Member since
    November 2008
  • From: Central Florida
Posted by plasticjunkie on Thursday, October 18, 2012 4:17 PM

No critisism here. You have done a damned excellent job from the super detailing, building, painting and weathering. The base looks very realistic and you captured that muddy look perfectly! Toast

 GIFMaker.org_jy_Ayj_O


Too many models to build, not enough time in a lifetime!!

  • Member since
    July 2006
  • From: Philippines
Posted by constructor on Thursday, October 18, 2012 4:44 PM

I used an Eduard PE set for my built and it went well although I did not go this far as Stampede did.

  • Member since
    June 2009
Posted by Guney on Thursday, October 18, 2012 4:49 PM

Good one...:)

  • Member since
    September 2007
  • From: Fredrikstad, Norway
Posted by Stampede on Friday, October 26, 2012 12:29 AM

Thanx for the nice comments, guys! Highly appreciated. :)

If electricity comes from electrons, does morality come from morons?
  • Member since
    March 2003
  • From: Rain USA, Vancouver WA
Posted by tigerman on Friday, October 26, 2012 1:23 AM

Excellent attention to detail. You have far more patience correcting mistakes then I would.

BTW, tank and groundwork came out great. Cool build.

   http://i7.photobucket.com/albums/y269/wing_nut_5o/PANZERJAGERGB.jpg

 Eric 

  • Member since
    December 2004
  • From: ohio
Posted by vonryan on Friday, October 26, 2012 5:21 AM

VERY NICE BUILD Eric Yes who's figure did you use?? again AWESOME WORK.


Clay

  • Member since
    July 2012
Posted by magnum278 on Friday, October 26, 2012 3:19 PM

Love those color pictures! I'm pretty sure those are Fort Knox. They look pretty familiar. I remember the mud being nasty when it was damp. It looks really dry in those photos.

  • Member since
    December 2008
  • From: Northern Va
Posted by psstoff995's lbro on Friday, October 26, 2012 10:11 PM

Wow, that's awesome. I really like that base/build

-Will young modeler Test fit master
  • Member since
    September 2005
  • From: beacon falls , Ct.
Posted by treadwell on Saturday, October 27, 2012 9:19 PM

Really nice work on capturing the small details ! .... it makes a BIG difference Yes

tread Cool


  • Member since
    October 2009
Posted by PANZERWAFFE on Monday, October 29, 2012 10:45 AM

Was wondering what happened to this build.  Glad to see her finished and the details you have added does not go overlooked and came out great.  Overall finish looks very convincing and looks great on the base.  Nice job.

Rob

  • Member since
    September 2007
  • From: Fredrikstad, Norway
Posted by Stampede on Wednesday, October 31, 2012 10:12 AM

I really appreciate the comments guys, thanx again! Smile

@Clay: The figure is a Verlinden piece from their US tanker conversion set #2138

Per-Erik Smile

If electricity comes from electrons, does morality come from morons?
  • Member since
    February 2007
  • From: Brunswick, Ohio
Posted by Buckeye on Wednesday, October 31, 2012 11:39 AM

Very nice build and presentation.Yes

Mike

JOIN OUR COMMUNITY!

Our community is FREE to join. To participate you must either login or register for an account.

SEARCH FORUMS
FREE NEWSLETTER
By signing up you may also receive reader surveys and occasional special offers. We do not sell, rent or trade our email lists. View our Privacy Policy.