SEARCH FINESCALE.COM

Enter keywords or a search phrase below:

1/72 Panzer Zerstorer E-100

8550 views
21 replies
1 rating 2 rating 3 rating 4 rating 5 rating
  • Member since
    May 2012
1/72 Panzer Zerstorer E-100
Posted by Ninja-Viking on Monday, June 4, 2012 9:59 AM

I like doing strange un-usual subjects in 1/72 that I find in the 1/35 world.

While looking for something else, I stumbled upon this link in a French forum.

http://maquette-garden.forumactif.com/t10473-e-100

In case you can't get the link to open,

my project will look like this.
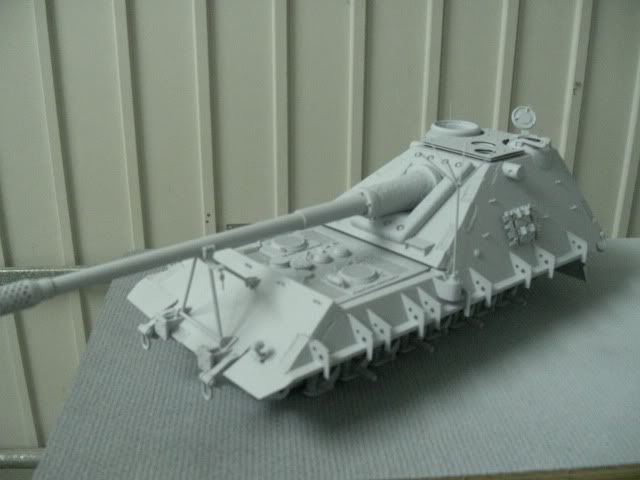
Now I have been inspired by two other 1/35 builds for the E-100 in the past.

One was by Michael Rinaldi when he did the E-100 Ausf B

(which has been Pirated by Trumpeter)

and the other was by Frank Forster when he did the Jagdpanzer E-100 "Krokodil".

(which I believe has also been Pirated by Trmpeter).

This one (unfortunately) I do not know the name of the model builder,

If anyone out there can come up with his name, please do, so that I may give proper credit.

Anyway, I thought this through, and decided to start with a cast of my E-100(B) hull,

and a 1/35 Jagdpanther gun barrel donated by a friend of mine.
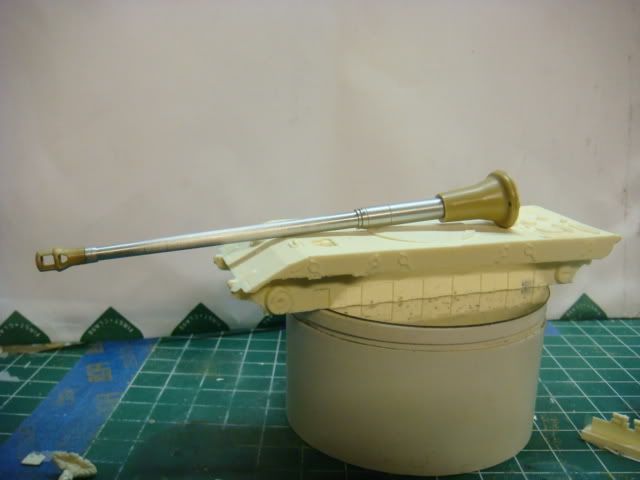
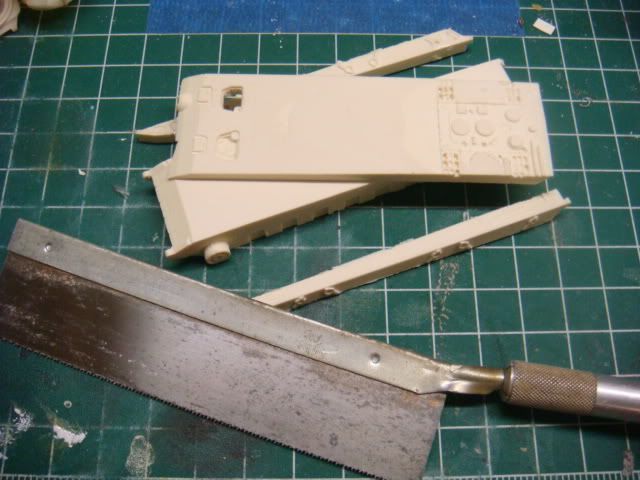
now to this properly, I needed to get rid of the "upper" portion of the hull,

so I "sawed" away as much as I could
and then sanded away the rest
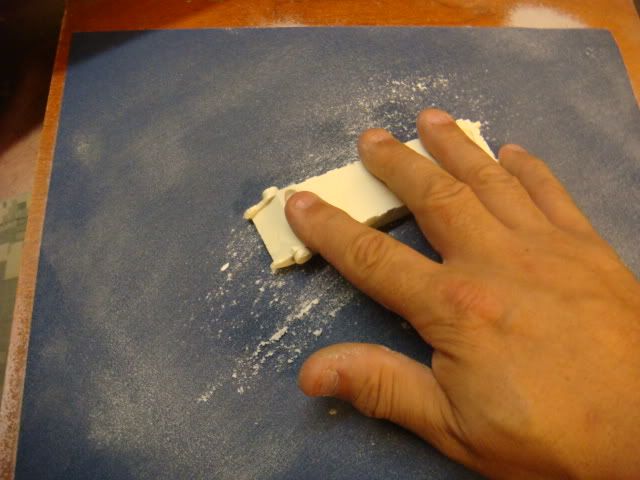
so here is the result and where I will start
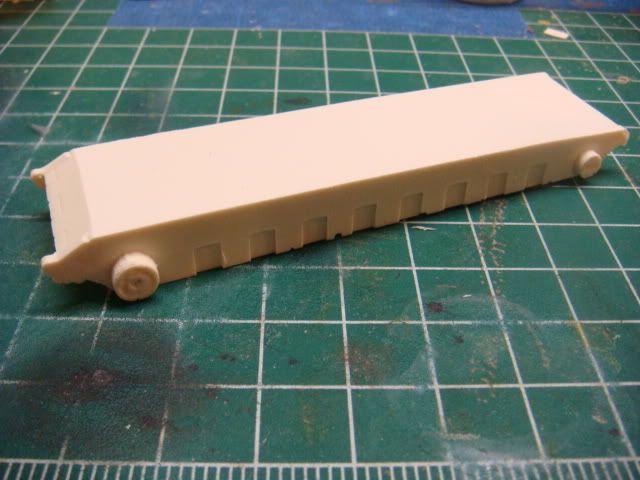
In the mean time I am rummaging through my spares to find an engine deck,

and picking through my modern (1/72) kits for ideas,

as to what to use for the remote controled gun turret for the top of the tank.


  • Member since
    December 2002
  • From: Bury St Edmunds, Suffolk, England
Posted by Bish on Monday, June 4, 2012 10:03 AM

Great project, looking forward to this come along.

I am a Norfolk man and i glory in being so


On the bench: Airfix 1/72nd Harrier GR.3/Fujimi 1/72nd Ju 87D-3

  • Member since
    March 2003
  • From: Rain USA, Vancouver WA
Posted by tigerman on Monday, June 4, 2012 12:09 PM

This looks like  a lot of work. Good luck.

   http://i7.photobucket.com/albums/y269/wing_nut_5o/PANZERJAGERGB.jpg

 Eric 

  • Member since
    July 2004
  • From: Texas
Posted by wbill76 on Monday, June 4, 2012 7:01 PM

Ought to be interesting when you're done...keep us posted on your progress.

  • Member since
    May 2012
Posted by Ninja-Viking on Tuesday, June 5, 2012 5:57 AM

Well I suffered a "slight" set-back,

It seems that the resin lower isn't going to work for me.

No matter how I try I am "not" getting a "true" flat surface,

one of the corners is off by 1-2 degrees.

So going through the scarp box I dug out a plastic E-100 hull,

took the trusty Dremel and cut it down.

So Now I am going to continue with this

This makes more since in the long run anyway,

since I plan on making a mold of the whole thing,

it's better to have an original piece, that Donnor can be glued to.

Now I've been stuying the engine deck, not being inpressed with Dragon's original,

I optted for a replacement, upon studying others......

I think I'll go for the Revell King Tiger.

The Only things I didn't like about the Revell one,

was that it had tools molded onboard and there are these little dimples,

 where some POS  screens are supposed to be glued on.

I didn't even like these  when I built that kit OOTB.

But anyway, enough rambling....on to the project.

  • Member since
    May 2012
Posted by Ninja-Viking on Tuesday, June 19, 2012 9:28 AM

Well.....off to a shamefull start.....
I started off OK, by building dams and filling the area with resin.
Then I decided ti saw off the exccess.....my mistake.
Now she's too narrow, so I'll have to build the sides up again to widden her out,
then try again, but at least the basic shape is starting to show through.

I know she is supposed to be called the Panzerzerstorer E-100,
but right now she's more like a PITA-POS


WEll as you can tell by the previous pic.....
I was screwing this baby up.
I had hoped to get another E-100 to help with judging the width,
But I could not just keep waiting.
I got the sides built back up, sanded smooth,
and soon will be ready for the side armor.
Anyway, here's how she looks for now.

Once I have the side armor on, the rest should fall into place.

  • Member since
    December 2002
  • From: Fort Knox
Posted by Rob Gronovius on Tuesday, June 19, 2012 10:57 AM

It looks like an ambitious project, perhaps I'll pick one up when Trumpeter pirates your kit Wink

Good work so far!

  • Member since
    May 2012
Posted by Ninja-Viking on Tuesday, June 19, 2012 12:14 PM

They just might, I'd best not sell to anyone in China/Hong KongWink

  • Member since
    May 2012
Posted by Ninja-Viking on Tuesday, June 19, 2012 3:56 PM

Progress for today.

here it is with the Panther Zerstorer, and the Krokodil.

more to fallow soon.

  • Member since
    May 2012
Posted by Ninja-Viking on Wednesday, June 20, 2012 5:52 PM

I'll soon show you the progress for today.
first I'll show again how it should look when done:

I will say that there be at least three differences from this to mine.
I will not have the spades in the rear, the side skirt armor, nor the bumper plates in the front.
With that being said, here is the day's work so far.


I'll post more when the time comes.

  • Member since
    July 2004
  • From: Texas
Posted by wbill76 on Thursday, June 21, 2012 12:18 PM

It's starting to come together pretty nicely...sure is a huge ugly beast!

  • Member since
    May 2012
Posted by Ninja-Viking on Saturday, June 23, 2012 8:31 PM

Well it's been a couple of days and here is where I am now.

and while I'm waiting for a 20mm to modify for the roof gun.
I played with putting a 1/87 Marder IFV turret on it.

Well that's all for now.
I'll be back soon.  ;)

  • Member since
    May 2012
Posted by Ninja-Viking on Monday, July 16, 2012 4:30 PM

Well here I am again....

Just want to show the progress to date.

I am still awaiting a 20mm to modify for the roof arament.


it's a slow task, but I like how it's turning out.

  • Member since
    May 2012
Posted by Ninja-Viking on Tuesday, August 14, 2012 8:05 PM

Ok....

Here is the progress I made as of yesterday.

i1060.photobucket.com/.../DSC08780.jpg

Here is the travel lock:

i1060.photobucket.com/.../DSC08776.jpg

Here is where I bored a spot to seat the 20mm platform:

i1060.photobucket.com/.../DSC08778.jpg

Here is the platform in place:

i1060.photobucket.com/.../DSC08777.jpg

and here is the "side mounted" anntena mount:

i1060.photobucket.com/.../DSC08779.jpg

Please tell me what you think. :)

  • Member since
    March 2003
  • From: Rain USA, Vancouver WA
Posted by tigerman on Wednesday, August 15, 2012 1:45 AM

Very ambitious project. I admire your determination. Much better then anything I could do.

   http://i7.photobucket.com/albums/y269/wing_nut_5o/PANZERJAGERGB.jpg

 Eric 

  • Member since
    May 2012
Posted by Ninja-Viking on Wednesday, August 15, 2012 2:55 PM

Today I reworked the Gun Mantlet.

With a little bit of large tubing, and a Lot of putty.

i1060.photobucket.com/.../DSC08781.jpg

i1060.photobucket.com/.../DSC08782.jpg

I used a "rattle can" spray primer,

tip was dirty so the can started to sputter a little.

Tell me what you think.

  • Member since
    May 2012
Posted by Ninja-Viking on Tuesday, August 28, 2012 7:18 AM

I don't know why my images aren't coming through.

I will attempt to edit, or repost later on.

Well the hull is ready for molding.

My next post will be with cast resin.

  • Member since
    May 2012
Posted by Ninja-Viking on Tuesday, August 28, 2012 7:19 AM

No I did NOT "Move or Remove" the image

Well the hull is ready for molding.

i1060.photobucket.com/.../DSC08846.jpg

i1060.photobucket.com/.../DSC08845.jpg

i1060.photobucket.com/.../DSC08848.jpg

i1060.photobucket.com/.../DSC08847.jpg

My next post will be with cast resin.

  • Member since
    May 2012
Posted by Ninja-Viking on Wednesday, August 29, 2012 5:05 AM

The Resin is Cast!

Here is the first cast of resin from the mold.

Alas it is only the Hull.

With this I'll continue my work on the rest of the pieces.

i1060.photobucket.com/.../DSC08849.jpg

i1060.photobucket.com/.../DSC08850.jpg

i1060.photobucket.com/.../DSC08851.jpg

i1060.photobucket.com/.../DSC08852.jpg

i1060.photobucket.com/.../DSC08853.jpg

i1060.photobucket.com/.../DSC08854.jpg

i1060.photobucket.com/.../DSC08856.jpg

i1060.photobucket.com/.../DSC08855.jpg

i1060.photobucket.com/.../DSC08858.jpg

sadly the antenna mast was snapped while extracting the pice from the mold.

When the build is done I shall replace it.

  • Member since
    May 2012
Posted by Ninja-Viking on Monday, September 3, 2012 9:14 AM

We I got a "little" farther on the gun.

  • Member since
    July 2004
  • From: Texas
Posted by wbill76 on Monday, September 3, 2012 1:33 PM

Definitely a massive monster! Nice job on the muzzle brake.

  • Member since
    May 2012
Posted by Ninja-Viking on Tuesday, September 4, 2012 7:12 PM

Well, I've been working real hard on other asspects of this thing.

Since the Dragon E-100 is nolonger being made,

I have decided to wofk on my own parts for it.

Here is the start of the tracks.

i1060.photobucket.com/.../DSC08893.jpg

i1060.photobucket.com/.../DSC08892.jpg

i1060.photobucket.com/.../DSC08891.jpg

Now the original Exhaust pipes were kinda plain, so I made two versions for my tank.

Here is one of the versions.

i1060.photobucket.com/.../DSC08894.jpg

i1060.photobucket.com/.../DSC08895.jpg

Whata y'all think?

JOIN OUR COMMUNITY!

Our community is FREE to join. To participate you must either login or register for an account.

SEARCH FORUMS
FREE NEWSLETTER
By signing up you may also receive reader surveys and occasional special offers. We do not sell, rent or trade our email lists. View our Privacy Policy.