SEARCH FINESCALE.COM

Enter keywords or a search phrase below:

M2A2 BRADLEY INFANTRY FIGHTING VEHICLE

14155 views
57 replies
1 rating 2 rating 3 rating 4 rating 5 rating
MrT
  • Member since
    December 2010
M2A2 BRADLEY INFANTRY FIGHTING VEHICLE
Posted by MrT on Wednesday, May 1, 2013 11:55 PM

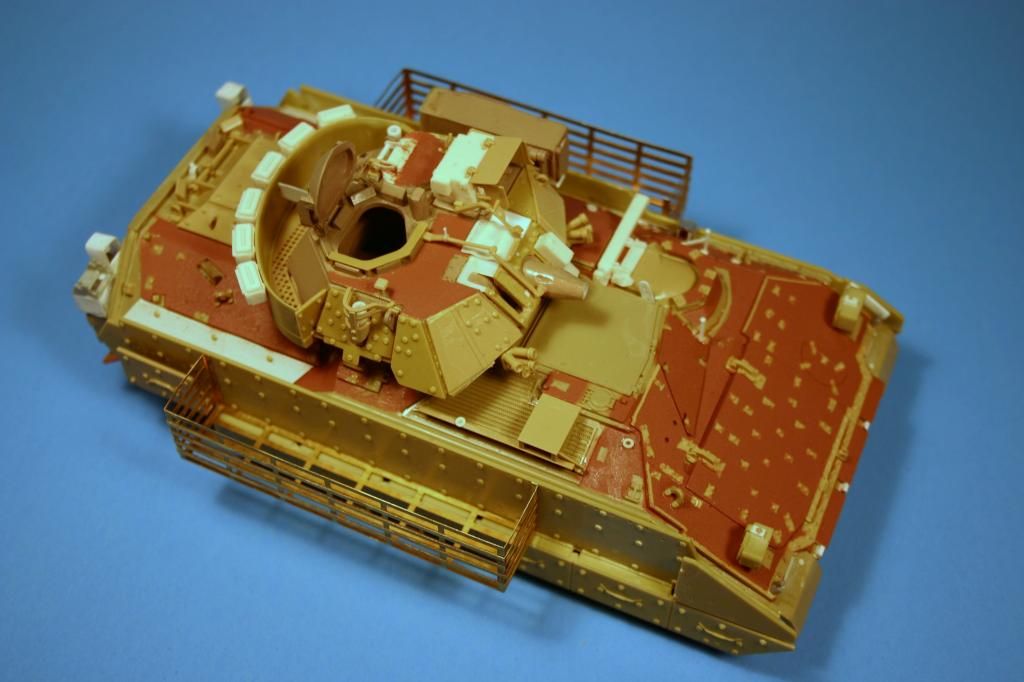
I just finished this Bradley.  Never done one before so it was a bit of a challenge as far as the color was concerned.  The Brad''s in the field show very little or no rust and chipping.  In fact the paint is designed to prevent that from happening.  So the challenge was how to weather without rust or chipping.  Here is my answer.  Let me know what you think.  Comments and suggestions are welcome.

Terry Cool

  • Member since
    March 2003
  • From: Rain USA, Vancouver WA
Posted by tigerman on Thursday, May 2, 2013 12:47 AM

Another fine effort Mr. T. I like all the gear and the weathering. Well done.

   http://i7.photobucket.com/albums/y269/wing_nut_5o/PANZERJAGERGB.jpg

 Eric 

  • Member since
    January 2003
  • From: Washington, DC
Posted by TomZ2 on Thursday, May 2, 2013 12:58 AM

And now for something completely different…


Occasional factual, grammatical, or spelling variations are inherent to this thesis and should not be considered as defects, as they enhance the individuality and character of this document.

  • Member since
    December 2002
  • From: Valrico, FL
Posted by HeavyArty on Thursday, May 2, 2013 5:07 AM

Looks pretty nice.  Good job at actually tieing the gear down.  The paint looks great too.  Overall, really nice.

One issue, I like how you tried to correct the top of the gun mantlet area, but it is still off.  Only the center section where the main gun is moves.  The two side sections are fixed.  You should have put two solid plates on the sides and the folded dust cover on the center, like below.

You can see it on my M7A2 BFIST build (which I need to get working on again).


Lastly, the vehicle is a little confused on when it represents.  You have used the markings for an M1A1 from 3-69 Armor Bn in OIF 1 (from Tamiya's M1A1/A2 OIF kit).  Ar Bns didn't have M2A2s organic to them before about '05 and this version of Bradley is an early '90s Brad, so the markings are off.  It should have markings for an Infantry Bn  (such as 3I 1-7I).  Also, much of the gear you have used wasn't around until the early 2000s as well, while others are much older.  For example, you have an early '90s MRE box (flatter rectangle as opposed to a cube) and the black sleeping bag stuff sack which wasn't issued until about 2000.  Also, the .50 cal ammo can behind the TC in the bussle rack is a side-opening WWII style, not a modern, end-opening type. 

Overall, a really nice build.  A couple minor corrections and it will look awesome.  Great job on it.

Gino P. Quintiliani - Field Artillery - The KING of BATTLE!!!

Check out my Gallery: https://app.photobucket.com/u/HeavyArty

"People sleep peaceably in their beds at night only because rough men stand ready to do violence on their behalf." -- George Orwell

MrT
  • Member since
    December 2010
Posted by MrT on Thursday, May 2, 2013 7:16 AM

HeavyArty

Looks pretty nice.  Good job at actually tieing the gear down.  The paint looks great too.  Overall, really nice.

One issue, I like how you tried to correct the top of the gun mantlet area, but it is still off.  Only the center section where the main gun is moves.  The two side sections are fixed.  You should have put two solid plates on the sides and the folded dust cover on the center, like below.

You can see it on my M7A2 BFIST build (which I need to get working on again).


Lastly, the vehicle is a little confused on when it represents.  You have used the markings for an M1A1 from 3-69 Armor Bn in OIF 1 (from Tamiya's M1A1/A2 OIF kit).  Ar Bns didn't have M2A2s organic to them before about '05 and this version of Bradley is an early '90s Brad, so the markings are off.  It should have markings for an Infantry Bn  (such as 3I 1-7I).  Also, much of the gear you have used wasn't around until the early 2000s as well, while others are much older.  For example, you have an early '90s MRE box (flatter rectangle as opposed to a cube) and the black sleeping bag stuff sack which wasn't issued until about 2000.  Also, the .50 cal ammo can behind the TC in the bussle rack is a side-opening WWII style, not a modern, end-opening type. 

Overall, a really nice build.  A couple minor corrections and it will look awesome.  Great job on it.

Thanks Arty!!  It is always great to get some first hand information.  The decals I used were from a Tamiya M113 from the gulf wars because the second hand Brad kits decals were missing.  The stowage came from the same M113 kit.  The mantlet cover info I'll work on.

Terry

  • Member since
    December 2002
  • From: Fort Knox
Posted by Rob Gronovius on Thursday, May 2, 2013 7:30 AM

HQ-35 isn't normally a tank number. the only two tanks in the HQs are 66 and 65 (or with 1st Cav -60 and -50).

The poles stored in the area below the shovel should be removed. They were for the swim barrier that was deleted from this version (too heavy to swim).

Overall, I still like your building style and I think it's a great job. A couple of us have a bit of time on these vehicles so we are a little more familiar with the vehicle than the average modeler (i.e. I took the second photograph that Gino posted).

I wouldn't worry about any of the issues we pointed out unless you were striving for a totally accurate model and not just a representative build for yourself.

  • Member since
    December 2002
  • From: Valrico, FL
Posted by HeavyArty on Thursday, May 2, 2013 9:11 AM

That's right, the Tamiya M113A3 (really an A2) also has 3-69 Armor decals for 3 ID during OIF 1 (2003).  

As Rob says though, what we pointed out are really pretty nit-picky and would go unnoticed by most.  It just depends on how accurate you want to make it.

Like I said above, great job overall.  Keep up the good work.

Gino P. Quintiliani - Field Artillery - The KING of BATTLE!!!

Check out my Gallery: https://app.photobucket.com/u/HeavyArty

"People sleep peaceably in their beds at night only because rough men stand ready to do violence on their behalf." -- George Orwell

MrT
  • Member since
    December 2010
Posted by MrT on Thursday, May 2, 2013 9:55 AM

Thanks Guys!

I try to be as accurate as possible, but sometimes I put too much confidence in the kit manufacturer.  I'm sure many of the details on the A2 have been passed down from Tamiya's earlier release of the M2 Bradley.  I'm going to try and remove the floatation equipment.  It didn't fit very well anyway.

Terry

  • Member since
    May 2013
Posted by connorMcclain on Thursday, May 2, 2013 11:38 AM

MrT that is amazing! so much detail and weathering its crazy! i think my dad may have see those cause he is in afganistan atm but coming home. but WOW im speachless haha

MrT
  • Member since
    December 2010
Posted by MrT on Thursday, May 2, 2013 12:48 PM

Connor,

It's great to here you're Dad is on the way home.  His service is greatly apprieciated.  Thank you for the compliments on the model!

Terry Cool

  • Member since
    May 2013
Posted by connorMcclain on Thursday, May 2, 2013 1:24 PM

yeah and thank you and no problem

  • Member since
    December 2002
  • From: Valrico, FL
Posted by HeavyArty on Thursday, May 2, 2013 5:03 PM

If you are going to remove the flotation support poles, also remove the rolled up flotation collar on the front slope (black, U-shaped piece).  

Connor, glad your dad is on his way home.  If he is in A'stan, he didn't see any Brads there.  There have been no Brads deployed to A'stan, only wheeled vehicles.

Gino P. Quintiliani - Field Artillery - The KING of BATTLE!!!

Check out my Gallery: https://app.photobucket.com/u/HeavyArty

"People sleep peaceably in their beds at night only because rough men stand ready to do violence on their behalf." -- George Orwell

  • Member since
    May 2013
Posted by connorMcclain on Thursday, May 2, 2013 11:12 PM

ah, he hardly tells me whats going on. but i know for a fact that they do have mraps and matv's which i wanna make a model of soon. then he sent me a pic when he was at training of a huge 155mm howitzer. i was shocked of how big our fire power is. specially with that

  • Member since
    March 2013
  • From: Puebla, Mexico
Posted by garzonh on Friday, May 3, 2013 10:56 AM

I think you should have fun with a HOBBY, is not like we are doing the actual vehicle. I dont like being perfectionist as to state "the hull is 0.0001mm off the real scale", Im in the Hobby to get out of the stress of work and daily tasks. So for me, your model is perfect!, the main question would be, did you have fun?, it the answer is YES, then mission accomplish.

MrT
  • Member since
    December 2010
Posted by MrT on Friday, May 3, 2013 1:27 PM

garzonh

I think you should have fun with a HOBBY, is not like we are doing the actual vehicle. I dont like being perfectionist as to state "the hull is 0.0001mm off the real scale", Im in the Hobby to get out of the stress of work and daily tasks. So for me, your model is perfect!, the main question would be, did you have fun?, it the answer is YES, then mission accomplish.

Thank you garzonh for your insight.  I am however a bit of a perfectionist and I don't like to make glaring mistakes.  I am under no stress and I am having fun.  Everyone has fun in their own way and no one way is the right way.  Modeling to me is not therapy it's skill....art.  In this case my model is not bad, but with a little more work it could be better and there is nothing wrong with anyone pointing out the things that could be done better. So I'm good you're good and let's get back to the bench.

Terry Cool

  • Member since
    December 2002
  • From: Fort Knox
Posted by Rob Gronovius on Friday, May 3, 2013 2:44 PM

garzonh

I think you should have fun with a HOBBY, is not like we are doing the actual vehicle. I dont like being perfectionist as to state "the hull is 0.0001mm off the real scale", Im in the Hobby to get out of the stress of work and daily tasks. So for me, your model is perfect!, the main question would be, did you have fun?, it the answer is YES, then mission accomplish.

This point has been brought up many times on as many modeling boards. To many modelers, striving to recreate an exact, miniaturized version of the prototype is "fun", and who are we to say they are wrong? I often use the analogy of lawn care to demonstrate this point. I use a zero turn mower and then I edge with a gas-powered edge trimmer. My next door neighbor uses a push mower and edges with a weed whacker. Another neighbor hires a lawn service. We all get the job done and none of us is doing it wrong, nor does it matter how our lawns got mowed.

To me, it depends on the subject. I'll build a German tank (working on one now) with minimal amount of extra detailing to suit my desires. I know I won't correct all of the deficiencies because I do not "care" enough about the subject to worry about them. I'm just going for an approximate representative of a German tank and it's close enough for me.

However, I tend to put a lot more effort into accurizing a US modern tank because I am very familiar with them since I spent nearly three decades on US armor. This is a mixed blessing because I often get caught up in detailing too much and just have to force myself to pass over items just to complete the darn tank!

I only brought up the accuracy points because I noticed Terry's eye for detail. He's doing a magnificent job on these models and adding missing details, additional stowage, superb weathering, etc. When someone is working that meticulously on a model kit, a fellow detailer notices these things. So you point out items that he missed. As I noted, the items I pointed out do not in any way detract from the workmanship of his model.

If he had posted a poorly painted glue bomb with misaligned parts and decals applied upside down, he would not have received this level of critique from fellow detailers.

Bottom line, we're trying to help him up his already great game.

MrT
  • Member since
    December 2010
Posted by MrT on Friday, May 3, 2013 4:53 PM

By the way some of those fixes are already underway.  I should have some pictures later.  Trying to get it ready for a contest tomorrow.  I don't know if I will get the mantlet changes in in time, but the floatation stuff is gone and doing some new stowage.

Terry

  • Member since
    March 2013
  • From: Puebla, Mexico
Posted by garzonh on Friday, May 3, 2013 7:03 PM

Hi, yes, I meant no intention to offend, it it sounded hars, please accept my apologies.

Im coming back to modelling after 25 years, so I dont want to be so strict with myself until I feel comfortable, so I do not get frustrated by having a model that is not perfect or has some flaws.

Currently working on a Tamiya Panzer Kampfwagen IV AusfD 1/35. Im basically building it to be straight out of the box, and with minimal weathering. Hopefully I can post some pictures when Im finished.

My next very ambicious model is a Tamiya Stalin IS-3, and I already bought 2 photo etch parts from Eduard. This one I want to make it perfect, so the Panzer will be my training model.

As Bob Ross would say.... happy modeling...well, sort of...

have  a great weekend.

Hugo

MrT
  • Member since
    December 2010
Posted by MrT on Friday, May 3, 2013 7:20 PM

garzonh

Hi, yes, I meant no intention to offend, it it sounded hars, please accept my apologies.

Im coming back to modelling after 25 years, so I dont want to be so strict with myself until I feel comfortable, so I do not get frustrated by having a model that is not perfect or has some flaws.

Currently working on a Tamiya Panzer Kampfwagen IV AusfD 1/35. Im basically building it to be straight out of the box, and with minimal weathering. Hopefully I can post some pictures when Im finished.

My next very ambicious model is a Tamiya Stalin IS-3, and I already bought 2 photo etch parts from Eduard. This one I want to make it perfect, so the Panzer will be my training model.

As Bob Ross would say.... happy modeling...well, sort of...

have  a great weekend.

Hugo

No worries Hugo!!  I look forward to seeing both.

Terry

MrT
  • Member since
    December 2010
Posted by MrT on Saturday, May 4, 2013 12:03 AM

I have made some of the suggested changes and added some more stowage.

Terry

  • Member since
    December 2002
  • From: Valrico, FL
Posted by HeavyArty on Saturday, May 4, 2013 9:37 AM

Looks even better.  Great job.

Gino P. Quintiliani - Field Artillery - The KING of BATTLE!!!

Check out my Gallery: https://app.photobucket.com/u/HeavyArty

"People sleep peaceably in their beds at night only because rough men stand ready to do violence on their behalf." -- George Orwell

  • Member since
    March 2004
  • From: Spartanburg, SC
Posted by subfixer on Saturday, May 4, 2013 11:48 AM

YesYesBig Smile

I'm from the government and I'm here to help.

  • Member since
    December 2002
  • From: Fort Knox
Posted by Rob Gronovius on Saturday, May 4, 2013 4:58 PM

Looks great, just as before. None of the issues any of us pointed out detracted from the original model.

MrT
  • Member since
    December 2010
Posted by MrT on Saturday, May 4, 2013 8:47 PM

Thanks Guys!!

Terry

  • Member since
    November 2009
  • From: SW Virginia
Posted by Gamera on Saturday, May 4, 2013 11:45 PM

Great job Terry!

Another reason for me to do off the wall subjects like Japanese armour that no one knows enough about to nitpick! Wink

"I dream in fire but work in clay." -Arthur Machen


MrT
  • Member since
    December 2010
Posted by MrT on Sunday, May 5, 2013 9:34 AM

Gamera

Great job Terry!

Another reason for me to do off the wall subjects like Japanese armour that no one knows enough about to nitpick! Wink

Hahahaha!!  Not a nitpick just sound advise.

Terry Cool

  • Member since
    December 2002
  • From: Fort Knox
Posted by Rob Gronovius on Sunday, May 5, 2013 11:33 AM

I love WW2 Japanese armor and have just about every kit by Fine Molds, Tamiya and Dragon. I just don't care enough about accuracy issues with them to want to correct them so I tend to build them OOB.

  • Member since
    April 2007
  • From: Twin Towns, MN
Posted by MAgather on Sunday, May 5, 2013 6:31 PM

Fantastic work. The weathering is very well done.

Good Modeling,
MrT
  • Member since
    December 2010
Posted by MrT on Sunday, May 5, 2013 7:51 PM

MAgather

Fantastic work. The weathering is very well done.

Thanks

Cool

  • Member since
    November 2009
  • From: SW Virginia
Posted by Gamera on Sunday, May 5, 2013 9:26 PM

Oh heck yeah, I'm joking, if anyone sees anything wrong with anything I post - nitpick away- only way I can learn not the make the same mistake again.

Rob: I need to break out some of my Japanese stuff, right now I'm still stuck on a Sherman Mk V I've been working on for months....

"I dream in fire but work in clay." -Arthur Machen


JOIN OUR COMMUNITY!

Our community is FREE to join. To participate you must either login or register for an account.

SEARCH FORUMS
FREE NEWSLETTER
By signing up you may also receive reader surveys and occasional special offers. We do not sell, rent or trade our email lists. View our Privacy Policy.