SEARCH FINESCALE.COM

Enter keywords or a search phrase below:

The original Super Sherman

3319 views
29 replies
1 rating 2 rating 3 rating 4 rating 5 rating
  • Member since
    February 2014
The original Super Sherman
Posted by USMC6094 on Wednesday, February 12, 2014 1:26 PM

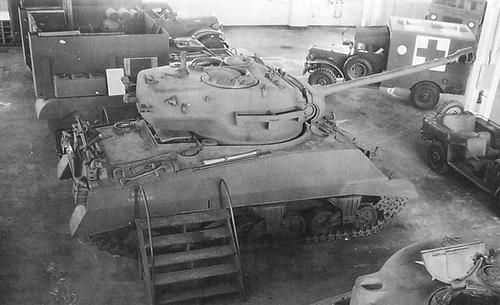
I got the urge back in 2012 to build a model of a what if Sherman armed with a 90mm gun that wasnt an M36B1, and luckily I have a great old Pershing booas well as its Sherman counterpart to use as references and I found a picture of the proposed vehicle, only it was a standard M4A3 hull with VVSS running gear and it had the standard M26 Perhing turret. Heres the picture.
As a basis for model I decided on the Cyber Hobby M4A3E8 chassis (little did I know what I had gotten myself into with that choice Hmm) and as the turret donor I used the Hobbyboss T26E4 late production kit.

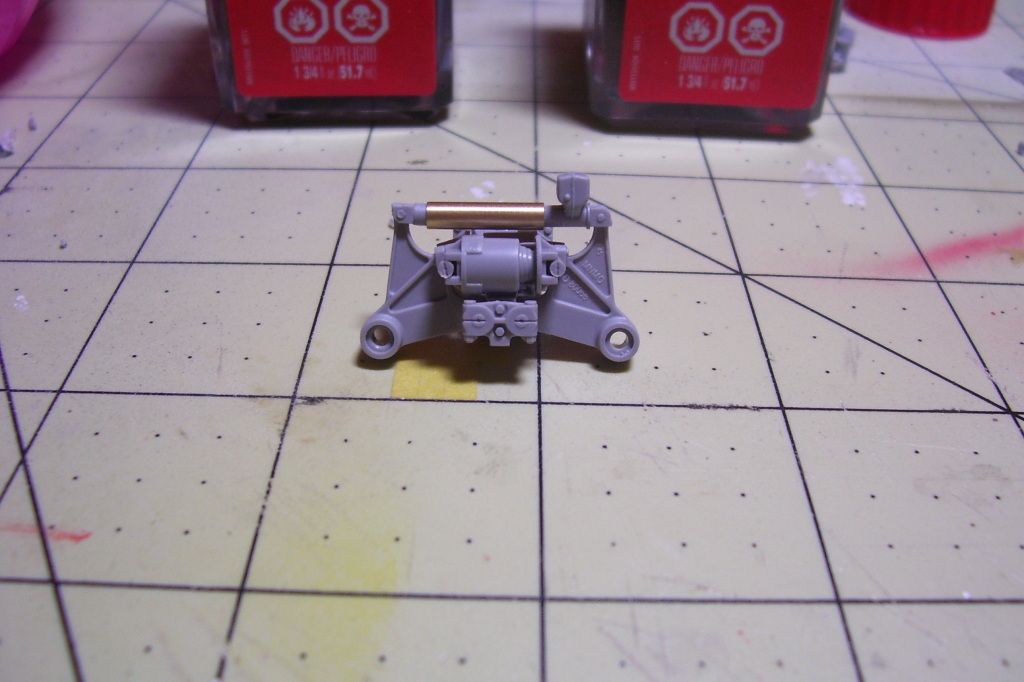
My headache began with the chassis, talk about lots of parts, somewhere along the way of a thousand plus parts in the hull and running gear. Each of the HVSS assemblies were almost 70 pieces each and theres six of those. The tolerances were so close on them that paint made them too tight to articulate, yes if theyre built right the suspension will articulate. Too bad it was my first BIG build after getting back into the hobby in 12', so mine dont articulate, oh well. The next pain was the tracks, each is a seperate run of the new cementable style that Dragon is putting with all its armor. Believe me theyre beautiful, but you have to cement each of the center guide teeth to both runs, and theres almost 160 of them between the two runs of track, YIKES. So I decided to go a different route with them but I'll get to that later.

Here are some of the in progress pictures I took early in the build (its still an in progress 13 months plus later)

One of the six suspension units
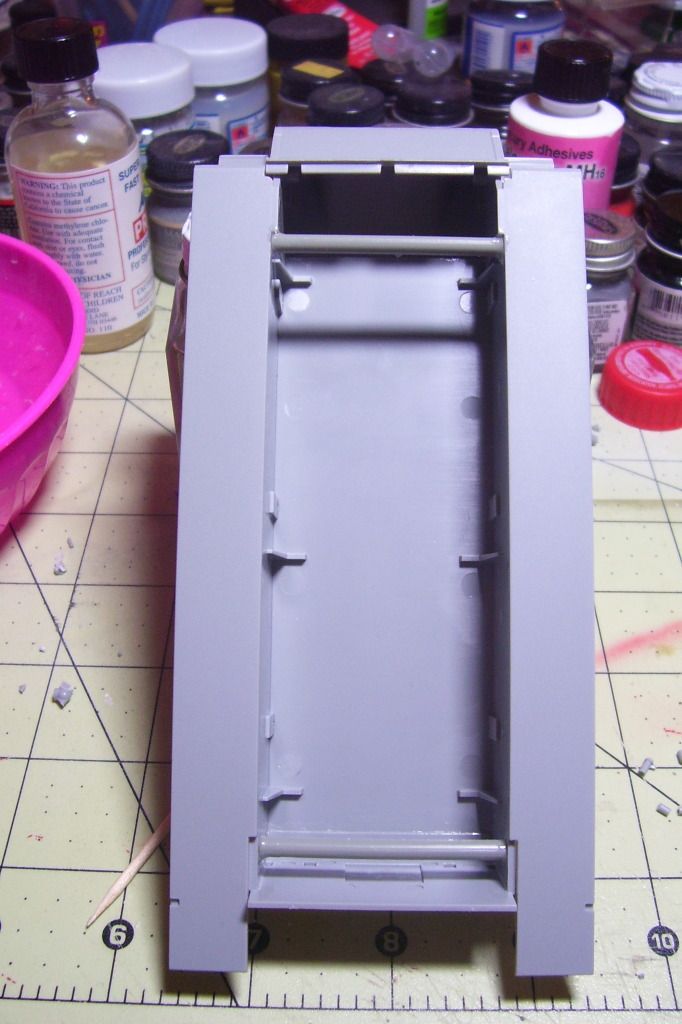
the spreaders I made for the lower hull to make it fit the sponsons of the upper hull
  • Member since
    February 2014
Posted by USMC6094 on Wednesday, February 12, 2014 1:29 PM

next is just a prgression of the build, theres too much to sit here and srite about, but the highlites are , replacement handles for all the molded on grab handles, made out of twist tie wire from bread bags.


  • Member since
    February 2014
Posted by USMC6094 on Wednesday, February 12, 2014 1:31 PM

  • Member since
    February 2014
Posted by USMC6094 on Wednesday, February 12, 2014 1:32 PM

and more

  • Member since
    February 2014
Posted by USMC6094 on Wednesday, February 12, 2014 1:34 PM

and it continues

  • Member since
    February 2014
Posted by USMC6094 on Wednesday, February 12, 2014 1:35 PM

I'll post some more of the in progress pictures a little later, I'm jones'n to look at some of the posts from other forum members and not looking at my own pictures LOL

  • Member since
    November 2005
Posted by T26E4 on Wednesday, February 12, 2014 3:06 PM

Cool stuff!  May I offer one observation and one tip?  The seam between the nose and the bolt strip should be filled.  The bolt strip was a part of the nose and not part of the hull.

Also, to get nicely squared replacement handles, find  serrated needle nose pliers.  Then pull the wire over one jaw's serration so you get squared cornered, U shape..  Find the right width you need, mark that serration with a marker and make all the rest of the wire handles, the same width.  Hope this helps.

Roy Chow 

Join AMPS!

http://www.amps-armor.org


  • Member since
    July 2003
  • From: On my kitchen counter top somewhere in central North Carolina.
Posted by disastermaster on Wednesday, February 12, 2014 3:49 PM

Cool project. This guy looks like a Ruff Stud.....http://i940.photobucket.com/albums/ad242/HavelockLEO/Sherman/T26_turret_on_M4_chassis_zpsf13ddb04.jpg

 http://www.elisanet.fi/mike.emery/Smilies/Smiley_BU_Rubbing_Chin.gif I actually considered doing this a couple of years ago but, since I couldn't bang it up and weather it to death I just let it go.

 I haven't  seen anyone else do this subject on the web so I look forward to seeing how this turns out.

 https://i.imgur.com/LjRRaV1.png


  • Member since
    July 2004
  • From: Sonora Desert
Posted by stikpusher on Wednesday, February 12, 2014 9:33 PM

Now if only they had mated that turret with a M4A3E2 hull, perhaps with a HVSS suspension... give them pesky Kitties something to think about


F is for FIRE, That burns down the whole town!

U is for URANIUM... BOMBS!

N is for NO SURVIVORS...

       - Plankton

LSM


  • Member since
    February 2014
Posted by USMC6094 on Wednesday, February 12, 2014 10:06 PM

@T26E4, thanks for the heads up about the final drive housing, I'll see what I can do about the seam.

Here are a few more inprgress pictures from the last.

Turret and upper hull

I robbed the turret ring off of the Shermanso the T26 turret would fit

  • Member since
    February 2014
Posted by USMC6094 on Wednesday, February 12, 2014 10:15 PM

I decided not to use the kit road wheels or tracks, I lucked into an already built Tamiya M51 Super Sherman at my clubs contest last summer and decided to part it out. I used its tracks and road wheels, might be tha lazy way, but I like the results so far.

These are the shots when I was fitting the Tamiya wheels to the Cyberhobby bogies.

  • Member since
    February 2014
Posted by USMC6094 on Wednesday, February 12, 2014 10:17 PM

The other side

  • Member since
    February 2014
Posted by USMC6094 on Wednesday, February 12, 2014 10:19 PM

As the paint was applied

  • Member since
    February 2014
Posted by USMC6094 on Wednesday, February 12, 2014 10:21 PM

Pioneer tools and rear decking

before paint

and after

  • Member since
    February 2014
Posted by USMC6094 on Wednesday, February 12, 2014 10:24 PM

rear decking, I used Lamp Black water color mixed with water and a drop of liquid dish soap to darken the louvers

  • Member since
    February 2014
Posted by USMC6094 on Wednesday, February 12, 2014 10:25 PM

I'll post some more pictures tomorrow . photobucket and the picture loader on this forum is giving me fits lol

  • Member since
    November 2009
  • From: SW Virginia
Posted by Gamera on Wednesday, February 12, 2014 10:28 PM

Love it! Just a little top-heavy but cool!

Nice work on the tools, you're making great progress.

"I dream in fire but work in clay." -Arthur Machen


  • Member since
    November 2005
Posted by T26E4 on Wednesday, February 12, 2014 10:34 PM

A couple of tool nitpicks for you: the engine crank handle that DML has you storing behind the rear "luggage rack" is incorrect and should be omitted.  The crank was only used on the M4 or M4A1 radial-engined tanks.

Also the pry bar on the right upper edge: the two end sections are actually mounting slots, welded to the hull roof and painted OD.  See here:

http://toadmanstankpictures.com/m4a376hvss_04.jpg

Roy Chow 

Join AMPS!

http://www.amps-armor.org


  • Member since
    February 2014
Posted by USMC6094 on Thursday, February 13, 2014 9:28 AM

thanks for the information on the A3 variant T26E4, the mistakes are all part of the learning process, I'm pretty much an aircraft modeler and like to do armor to break up the monotony, and boy let me tell you this build did that. The really funny thing is is that this is one of only two Shermans I have in my collection, I have Pershings, Pattons, Russian and Japanese armor in greater numbers than I have Shermans lol. Before I got out of the hobby in 2006 I probably has two dozen Shermans.

The real problem with this one is the model is pretty much finished, I just have one or two things to add that I havent had a chance to get to yet, but once I get back to the house I'll see if I can formulate a plan to address the pointed out issues.

Thanks again for the feedback

  • Member since
    February 2014
Posted by USMC6094 on Friday, February 14, 2014 2:53 PM

some more pictures, the turret, I know, I know, the commanders cupola is slightly off, that was my not paying close enough attention to the directions

The donated Tamiya tracks


  • Member since
    February 2014
Posted by USMC6094 on Friday, February 14, 2014 2:57 PM

up on her wheels and tracks, but not permanantly attached


  • Member since
    February 2014
Posted by USMC6094 on Friday, February 14, 2014 3:01 PM

Bogies and running gear

again not completed when the pictures were taken, but I've made a lot of progress since these were taken  

  • Member since
    September 2005
  • From: Illinois: Hive of Scum and Villany
Posted by Sprue-ce Goose on Friday, February 14, 2014 3:02 PM

USMC6094

Thanks for posting this build.

I was unaware of this Sherman variant and may eventually try my hand at building one should the components become inexpensively available at swap meets.

As for mistakes, I am still very much a noob where Shermans are concerned so i wouldn't have known.

Your work still looks good to meBig Smile

  • Member since
    February 2014
Posted by USMC6094 on Friday, February 14, 2014 3:03 PM

and the last picture I took before school started

  • Member since
    February 2014
Posted by USMC6094 on Friday, February 14, 2014 3:05 PM

I've added the return tollers and done some light dry brushing to bring out the cast texture I added to the final drive housing and turret.

  • Member since
    November 2005
Posted by T26E4 on Saturday, February 15, 2014 6:10 AM

Don't worry about the commander's cupola being askew.  It was rotatable. Keep up the good work -- I like the ground-level picture.  It looks like a beast!

Roy Chow 

Join AMPS!

http://www.amps-armor.org


  • Member since
    February 2014
Posted by USMC6094 on Saturday, February 15, 2014 6:30 AM

Again thanks for the compliments fellas, and let me tell ya, this thing is a bruiser, it slid off the front seat of my car and hit the passenger door and all it lost was a fender bracket, lol.

@Sprue-ce Goose, you can build this model pretty on the cheap if you shop around, the Pershing kit was about 27 dollars shipped and the Sherman was about ten dollars more , though I might recommend a less complex chassis for the build...........

  • Member since
    September 2005
  • From: Illinois: Hive of Scum and Villany
Posted by Sprue-ce Goose on Saturday, February 15, 2014 7:01 AM

USMC6094

@Sprue-ce Goose, you can build this model pretty on the cheap if you shop around, the Pershing kit was about 27 dollars shipped and the Sherman was about ten dollars more , though I might recommend a less complex chassis for the build...........

A shame I no longer have the AURORA armor collection I once possessed.
I " may "  have been able to modify the Sherman hull and M-46 turret.
If nothing else,  two swap meets will occur this year.; summer and autumn.
maybe someone will sell old kits cheap during the last hour.Hmm
  • Member since
    April 2013
Posted by SchattenSpartan on Saturday, February 15, 2014 7:06 AM

Great looking build so far! I definitely have to build this vehicle at some point. It's a very interesting subject for sure!

Cheers, Clemens

  • Member since
    February 2014
Posted by USMC6094 on Saturday, February 15, 2014 8:50 AM

well my next one, yep gonna build another, is going to be more along the lines of what may have actually been developed had the war dragged on. In an earlier post someone talked about an A3E2 Jumbo with E8 suspension and an M26 turret. Well if I can find two of the Tamiya Jumbos, one for this build and another as a stock build, I'm going to use one with double duck bill VVSS suspension and a standard M26 turret. Used to be finding a Pershing in 35th was the issue, now the older Tamiya kits are the scarce scores

JOIN OUR COMMUNITY!

Our community is FREE to join. To participate you must either login or register for an account.

SEARCH FORUMS
FREE NEWSLETTER
By signing up you may also receive reader surveys and occasional special offers. We do not sell, rent or trade our email lists. View our Privacy Policy.