Hi there guys!
I built Dragon's King Tiger for Eric's (tigerman) Steel Cats GB last year and I got asked quite a few times on how I painted the winter camo on that model. I thought it might be a good idea to share my technique with you guys in case anyone is intersted.
When I first attempted to paint a model in winter camo I was really scared of ruining it and I think there are several other modellers out there who are thinking just the same. Enough rambling, let's get the tut started!
First of all you have to understand what "whitewash camo" really is:
It is a chalk paint applied to vehicles in snowy enviroments to make them less visible to the enemy. That paint is designed to be easily removable once the snow starts melting and the vehicle has to have it's old camo again. The paint itself was applied to vehicles with whatever the crew had at hand: Brushes in all possible sizes, primitive airbrushs, brooms, etc... Sometimes the paint was simply poured all over the tank. That combined with the fact that the paint was easily worn/washed off resulted in an uneven and worn-off finish.
What are you going to need?
- a model to paint (duh)
- your camouflage colors of choice
- a good, tough clear coat
- Vallejo Air White
- Vallejo airbrush thinner
- your preferred dullcoat
- Oil paints (black, dark brown and white)
Step 1) Painting the camoflage and sealing your paint job:
After priming the model, you start off by painting it as usual. In case of my King Tiger that is a nice 3-tone camo scheme:
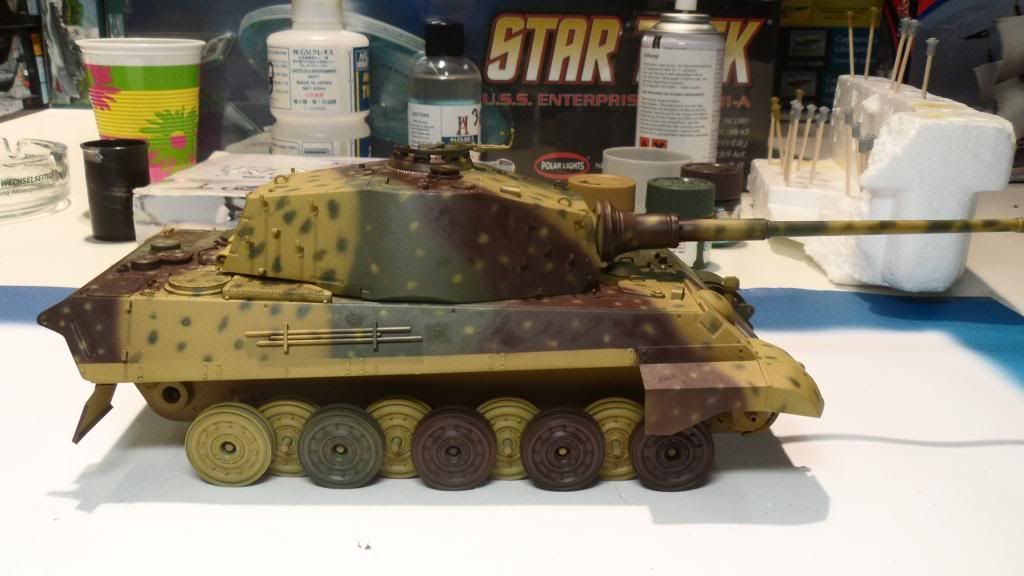
I chose not to blend the colors together in order to make the camo pattern more visible after the whitewash was applied.
The next step is to spray the whole model with your clear coat. I used Alclad's Gloss Coat. It doesn't really matter wht clear coat you use, jsut make sure it won't get dissolved by the vallejo thinner. Make sure the gloss coat covers the entire model, or you will ruin your paint job. I handled the turret and hull separately and I'd advise you to do the same.
Step 2) Spraying the entire model white:
After giving the gloss coat plenty of time to cure (48 hours were more than enough for the Alclad to dry, but the drying time may vary if you use a different product), spray the entire tank with the white Vallejo paint. Build up the paint in thin, blotchy layers. I normally hate the way Vallejo's white sprays but it is perfect for this task IMO.
This is the most intimidating part of this technique because you are basically covering your entire camo work with an uneven, sloppy looking layer of white paint, but believe me, that's going to cahnge very soon.
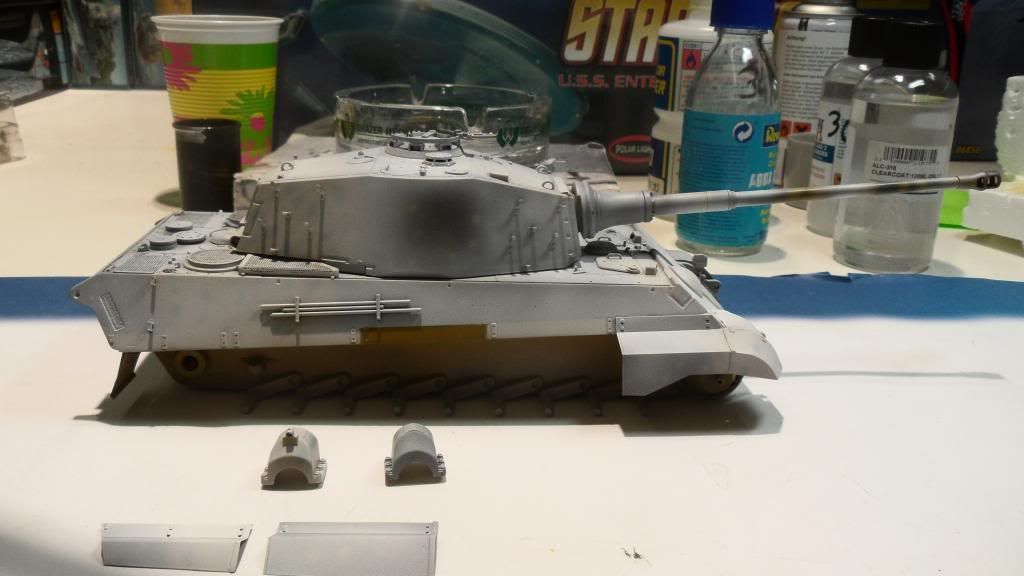
Step 3) Removing the white paint:
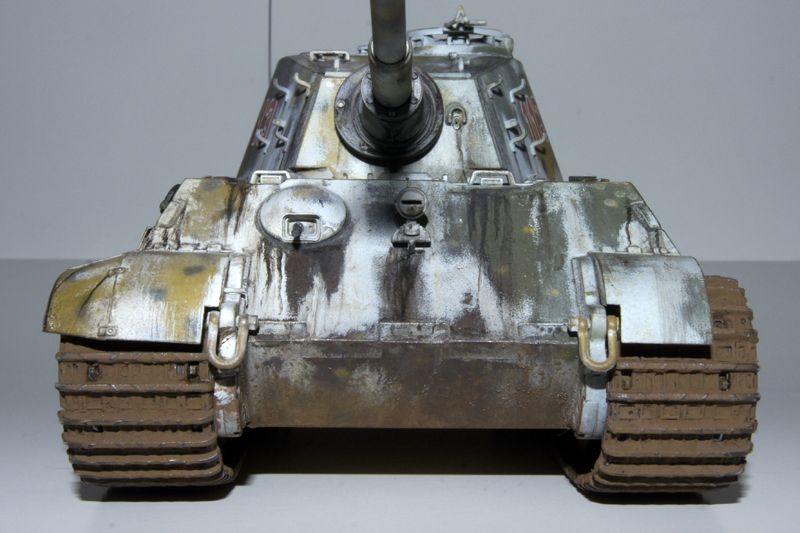
Let the white paint dry completely and then start removing it again. Simply take one or two large brushes (I used a very stiff one and a normal flat brush) and dip them into the Vallejo thinner. Then start rubbing/scraping the white away while keeping the brushes wet with thinner. You can slowly build up the effect and easily control the amount of white paint you are removing once you get the hang of it (it shouldn't take longer than a few minutes to get familiiar with this step). rub the paint away in random patterns on the top surfaces and avoid going in the same direction all the time and try to keep the brush strokes vertical on all the side surfaces. Focus on areas that get a lot of wear (areas around hatches, raised parts of the tank,...)
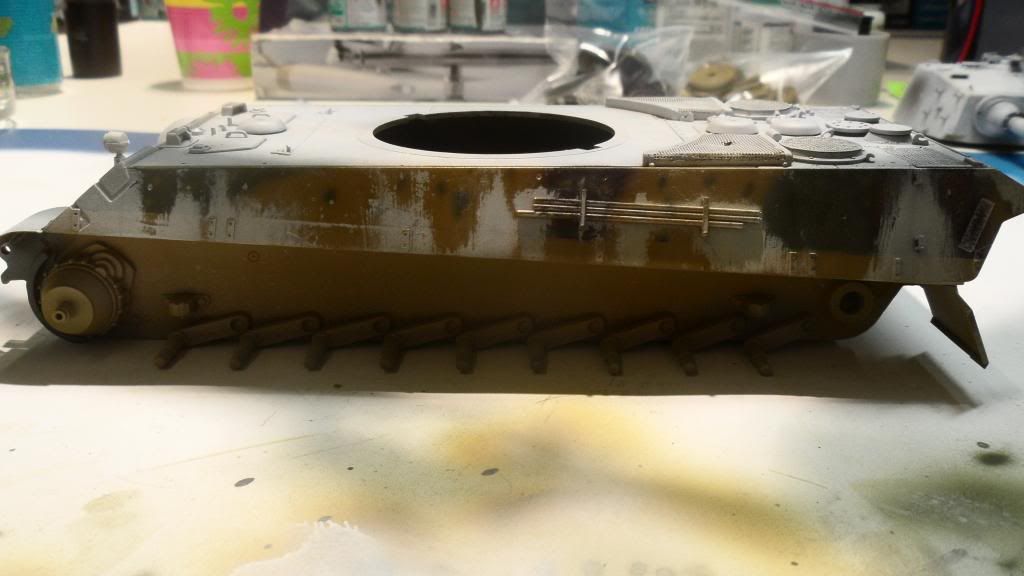
I decided to go for a well-weathered look on my King Tiger, so I removed quite a lot of the white paint, but the amount of paint removed depends on how you want the tank to look like.
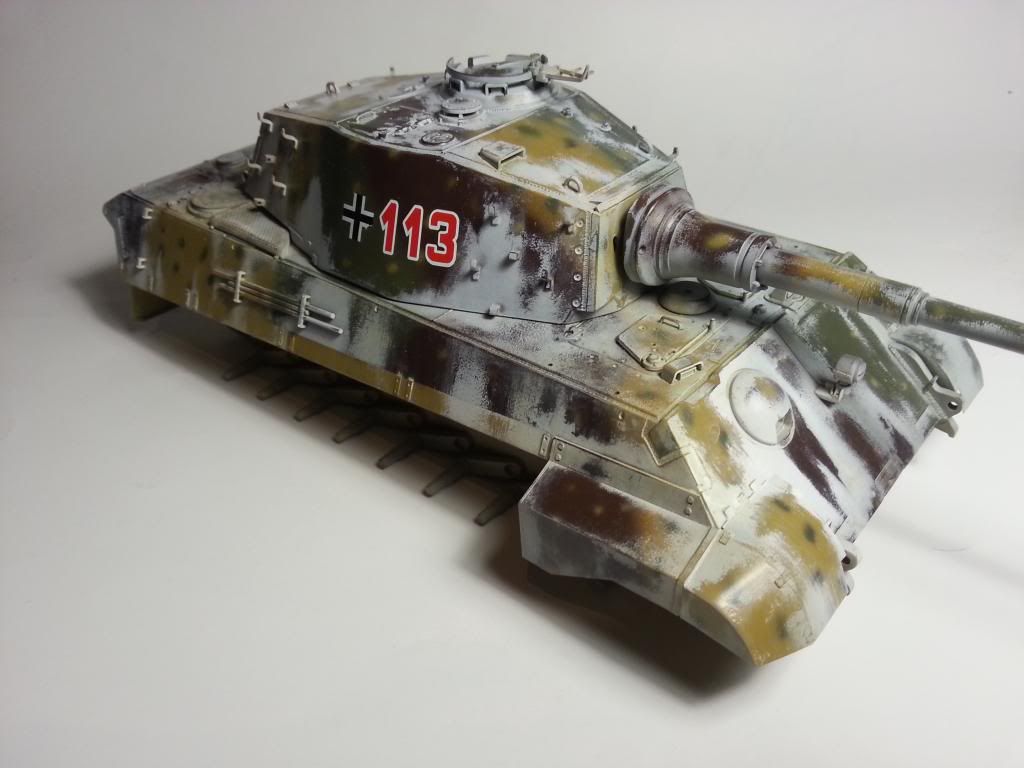
Step 4)Additional grime/streaking to the model:
White paint doesn't stay white for long under the conditions those vehicles operated in, so you want to dirty it up a bit. This is probably the most time consuming step, but it really makes the finish look worn and dirty (you don't want the white to look clean). Take a fine brush and start adding some straking to the model using black and brown oil paints. Simply put a dot of oil paint on the model and slowly "pull" it down using the brush untill it creates nice streaking effects. You can use a bit of thinner here, but don't use too much or you'll simply wipe the oil paint away. Once you're done with the streaking, add some mud splashes at the rear of the vehicle and the lower glacis by "flicking" a pigment/water mix onto the model. You can also add a sludge wash to make the whiste look dirtier, but I only did that on the engine deck.
When you're happy with the way your model looks, apply a final dullcoat to seal everything.
Here are a few more pics of the finished kitten:
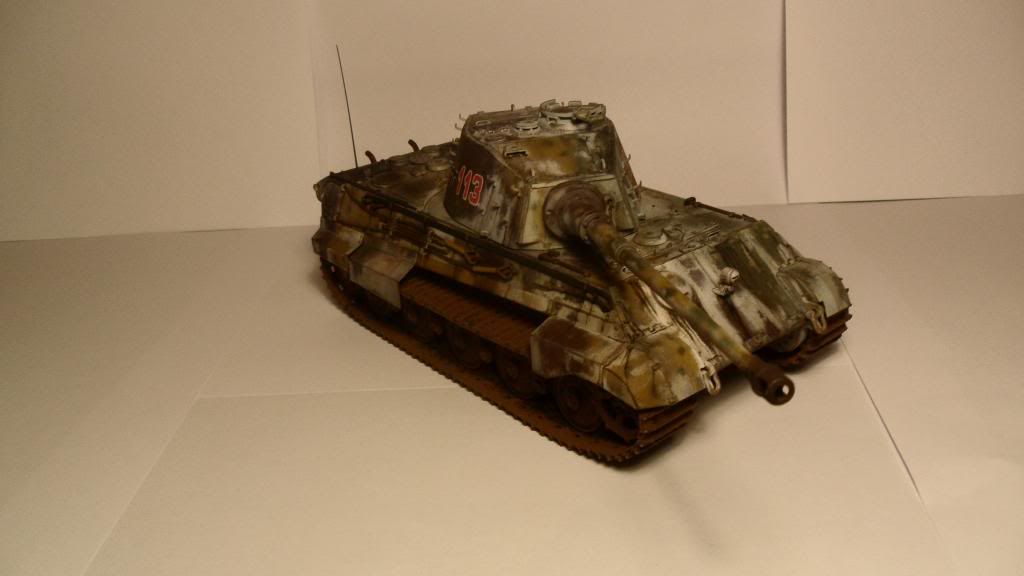
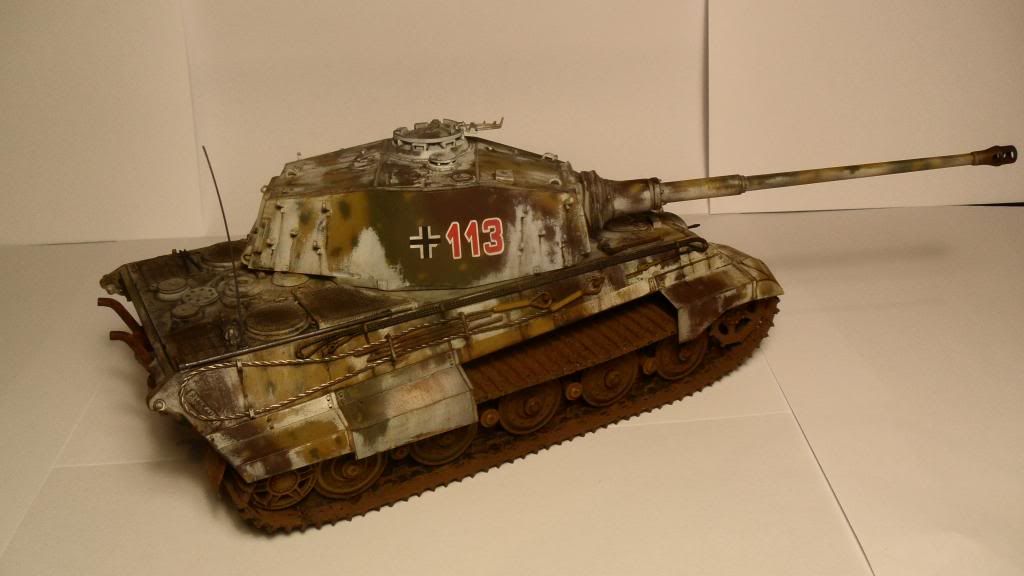
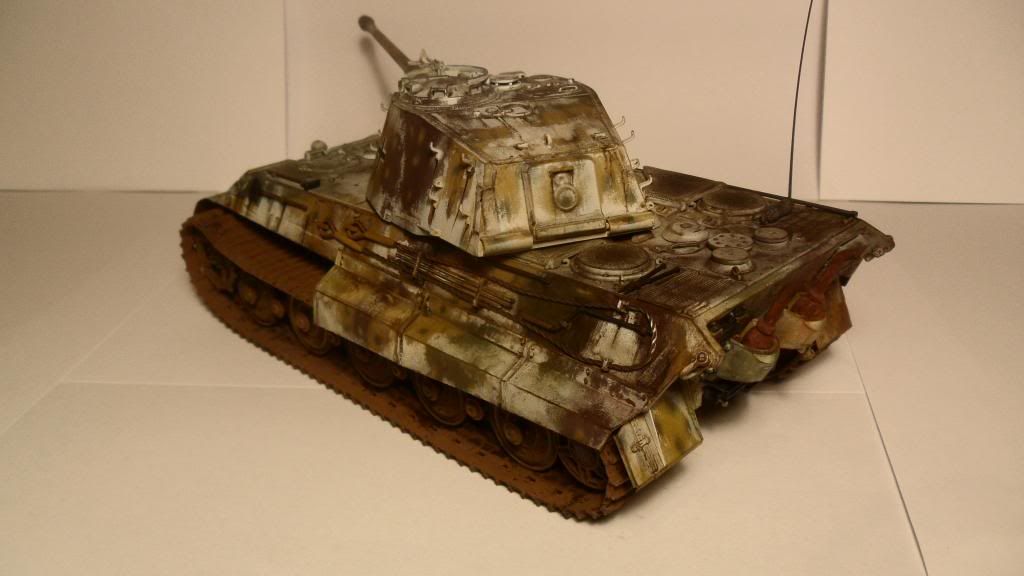

The pictures look really drak, but the white is only a very little bit brighter in person.
My apologies for not posting that many photos. all the pictures in this tutorial are basically WIP pictures of the actual build and I didn't think of making a tutorial back then. I'm currently working on a Flakpanzer I and I'm thinking of giving that little bugger a whitewash camo too, so if I do so, I'll post some better step-by-step pics here.
I hope you like it nonetheless...
Cheers, Clemens