SEARCH FINESCALE.COM

Enter keywords or a search phrase below:

Meng's Minenraumer Finished

2238 views
9 replies
1 rating 2 rating 3 rating 4 rating 5 rating
  • Member since
    August 2004
  • From: Forest Hill, Maryland
Meng's Minenraumer Finished
Posted by cwalker3 on Sunday, May 4, 2014 1:45 PM

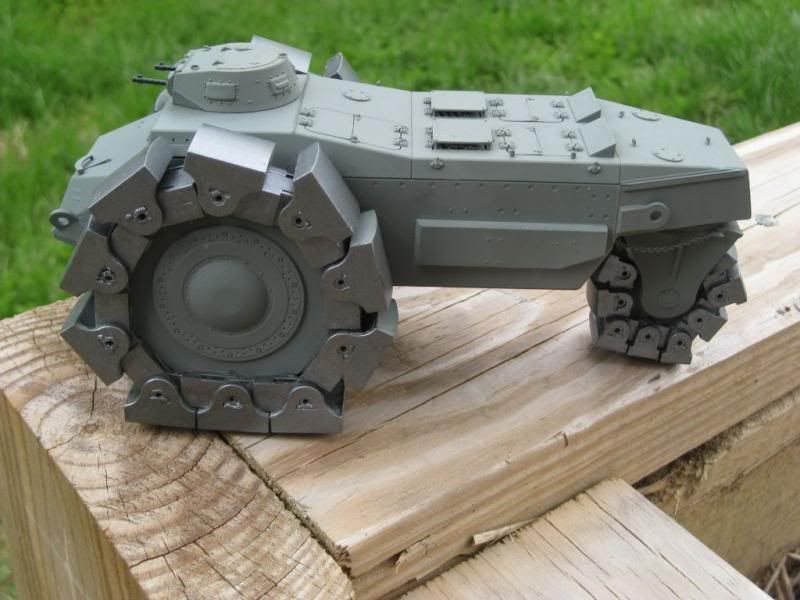
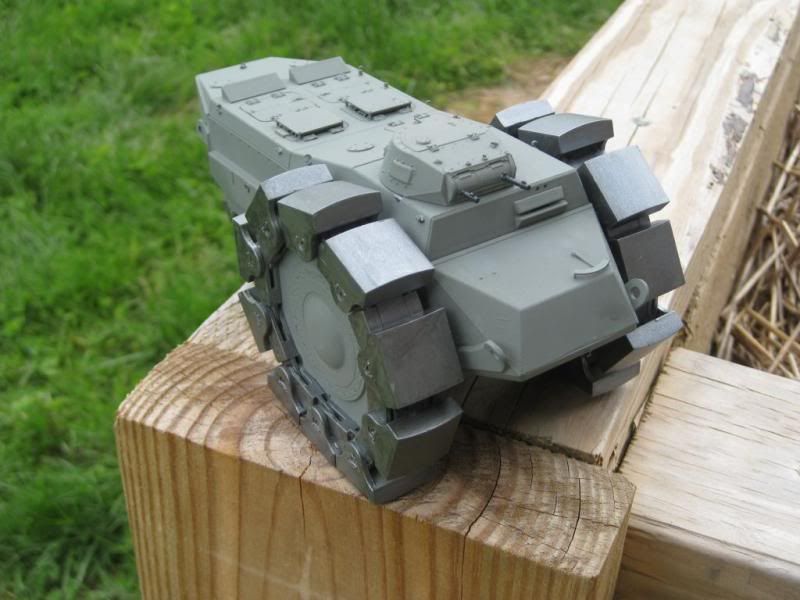
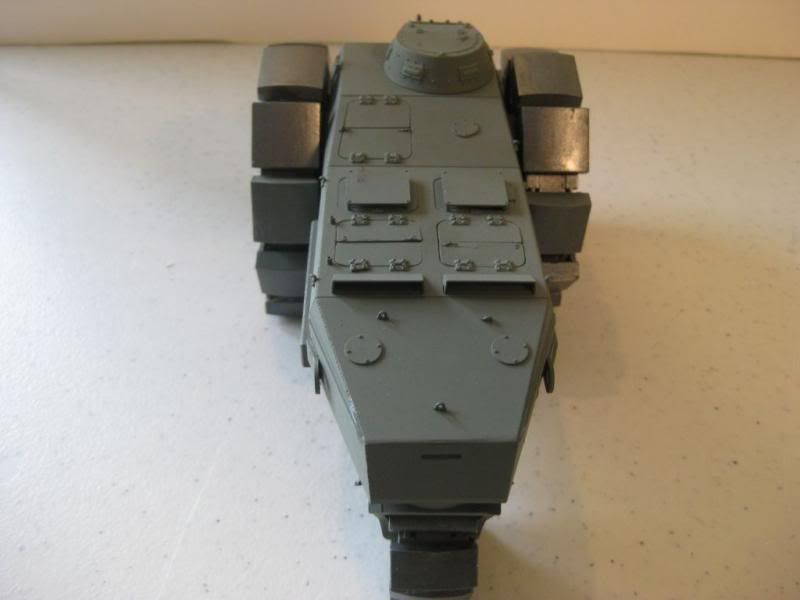
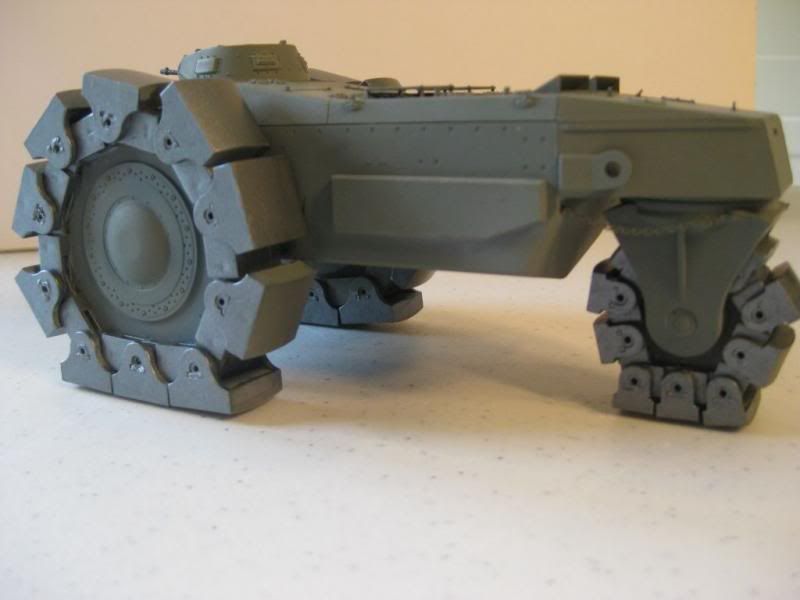
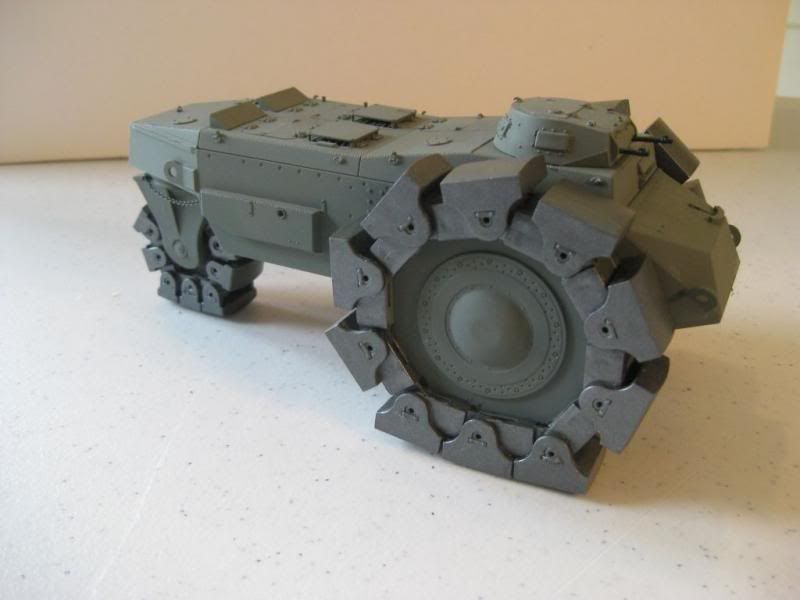
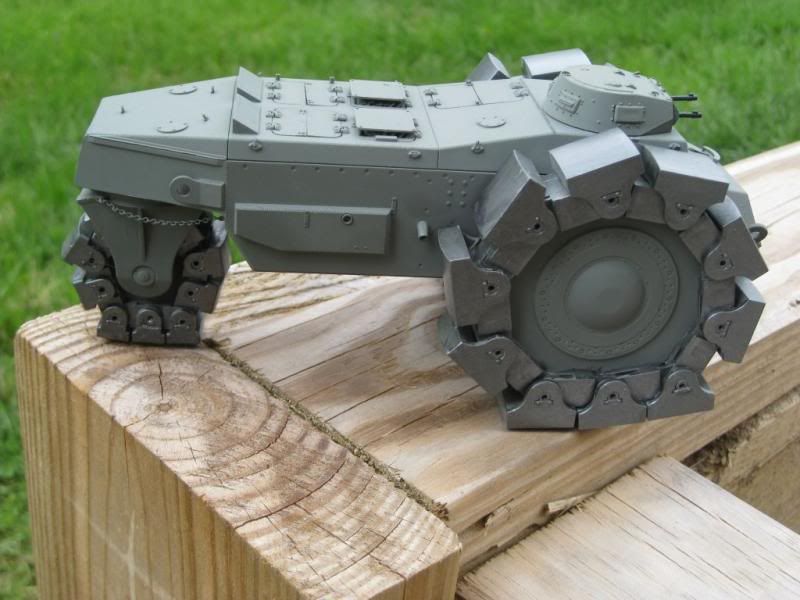
Here is Meng's 1/35 Minenraumer that I've recently completed. I have been in love with this machine ever since I first saw RPM's old kit. After attempting two of them I finally gave up and moved on. And then along came Meng. What a world of difference this kit is from RPM's. Parts actually fit, there's no distortion of parts, instructions are legible and the numbering actually matches the ones on the sprues.

Now about the kit. I was pleased to see that the large box was not packed full of sprues. The size of the box is mostly because of the excellent way in which they packaged the parts. And speaking of parts, there weren't that many. And the track links made up about half of them. The tracks are huge compared to other 1/35 AFV's and are workable as long as you are careful with gluing. And while easy to put together you need to be careful when assembling them. Just pay attention, take your time and reference the instructions.

Pay attention to the assembly procedure. For instance the first few steps call for the attachment of the smallest parts of the kit. Leave these off until the very end. I didn't and ended up breaking a few of the hooks attached to the hull. These things are incredibly small and try as I might I couldn't reproduce them. Also, I would paint the tracks before putting them on the wheels and paint the wheels before putting on the tracks.

Finally, painting the beast is left up to your own imagination. They included three variations in the instructions. One is plain grey (I used Tamiya RLM Grey) and a two tone and three tone camo schemes. Since whether or not this machine ever made it out of trials, and that depends on what you read, I chose to paint it grey because I had already installed the tracks and that scheme was easier. And one thing that I remembered while taking the pics was that I had forgotten to apply a coat of Dullcote which I'll get to if the rain ever stops here.

And now, onto the pics.
Cary


  • Member since
    December 2002
  • From: Bury St Edmunds, Suffolk, England
Posted by Bish on Sunday, May 4, 2014 1:50 PM

Now I really like that. I have been planning on getting one of these for a while. Nice build and some great heads up. Thanks for posting these.

I am a Norfolk man and i glory in being so


On the bench: Airfix 1/72nd Harrier GR.3/Fujimi 1/72nd Ju 87D-3

  • Member since
    August 2004
  • From: Forest Hill, Maryland
Posted by cwalker3 on Sunday, May 4, 2014 1:56 PM

Thanks Bish. It was a fun kit and I would definitely recommend it.

Cary


  • Member since
    July 2008
  • From: Vancouver, the "wet coast"
Posted by castelnuovo on Sunday, May 4, 2014 2:47 PM

Looks super cool Smile, kinda Star War-ish Big Smile. I have ordered (and received) my stash for the next year or so but this one will certainly be in the next box as I like unusual vehicles.

Cheers...Toast

  • Member since
    January 2013
Posted by jibber on Sunday, May 4, 2014 9:06 PM

What a cool vehicle, but looking at it I would think it's an airbrushing nightmare. Getting inside and around those tracks looks difficult? Nice job on the build and what an interesting subject.

  • Member since
    January 2006
  • From: California
Posted by SprueOne on Sunday, May 4, 2014 9:18 PM

nice!

This is one of those kits in my stash I haven't opened up yet.

Yours looks like a fun build Yes 

Anyone with a good car don't need to be justified - Hazel Motes


Iron Rails 2015 by Wayne Cassell Weekend Madness sprueone

  • Member since
    February 2010
  • From: Maine
Posted by Stage_Left on Monday, May 5, 2014 11:21 AM

Very nice job on an unusual subject! Glad to read another good review Yes

Dave

  • Member since
    August 2004
  • From: Forest Hill, Maryland
Posted by cwalker3 on Monday, May 5, 2014 12:29 PM

Jibber, in my case painting was no big deal. I just painted everything grey and then hand painted the tracks. They are so large they are very easy to get to. If I had it to do again I would leave the tracks off before painting and airbrush the tracks separately. Also in a do-over, I'd paint it in one of those camo schemes. They grey just doesn't allow some of the detail to pop like a lighter color would.

Cary


  • Member since
    April 2005
  • From: Gothenburg
Posted by JohanT on Monday, May 5, 2014 12:44 PM

Hi  cwalker3

That is an amazing vehicle, the Mark II turret looks totally out of proportions!

What did they power the thing with?

Thank you for sharing your review and congratulations to your build!

Maybe some metal wear on the tracks, by the looks they would have been pretty beaten by shear weight .

Thank you for sharing!

Very Best Regards

Johan

  • Member since
    August 2004
  • From: Forest Hill, Maryland
Posted by cwalker3 on Monday, May 5, 2014 2:38 PM

Hi Johan. Thanks for your props. I'm not sure what the powerplant in this beast was. And while I was building this thing I was content to finish it in dark grey with little or no weathering. I figured since it was a "one of" vehicle, I didn't think a lot of weathering would be appropriate. The more I look at it though, the more I wished I had painted it dunkelgelb with some minor weathering. I don't know. I'll think about it a little more.

Cary


JOIN OUR COMMUNITY!

Our community is FREE to join. To participate you must either login or register for an account.

SEARCH FORUMS
FREE NEWSLETTER
By signing up you may also receive reader surveys and occasional special offers. We do not sell, rent or trade our email lists. View our Privacy Policy.