SEARCH FINESCALE.COM

Enter keywords or a search phrase below:

Egyptian Army SU 152

3426 views
13 replies
1 rating 2 rating 3 rating 4 rating 5 rating
  • Member since
    March 2003
  • From: Rain USA, Vancouver WA
Posted by tigerman on Thursday, March 5, 2015 12:51 AM

Hey Bill, glad to see this one. Glad you dabbled with the dark -side as well. Hope to see more from you.

   http://i7.photobucket.com/albums/y269/wing_nut_5o/PANZERJAGERGB.jpg

 Eric 

  • Member since
    April 2006
  • From: Denver, Colorado
Posted by waynec on Wednesday, March 4, 2015 10:50 PM

love the sun and the big shadows. a little photoshop magic and you could pass it off for a real picture.

Никто не Забыт    (No one is Forgotten)
Ничто не Забыто  (Nothing is Forgotten)


  • Member since
    September 2012
Posted by GMorrison on Wednesday, March 4, 2015 2:48 PM

Hey thanks silk-guy.

We all had a good time in the Orphaned Armor GB.

I was scared of building any armor because it's been a while and everyone here is so good.

It's a Dragon 3 in 1 kit that wasn't very expensive and came with a Russian sniper figure set and a set of Magic Tracks. I also ordered an Aber 152mm barrel set at the same time. When I got the model I'd have to say, the aluminum barrel is gorgeous, but the kit barrels (including a couple of 122's) were also perfectly usable.

I remembered Karl Logan had a tutorial of individual track length construction, so I looked that up. It worked well, gluing all the links together, waiting 45 minutes and wrapping them around the wheels. My only goof there was that he suggested leaving the outer halves of the wheels off. I put it all together before I read the articles, but it still was pretty easy to get to work.

My weathering skills are definitely "needs more rust". I am an old "sludge washer".

So the bug bit, sure.

I'm looking at a Centurion, or perhaps an Egyptian Sherman, the one with the AMX turret.

 Modeling is an excuse to buy books.


  • Member since
    July 2004
  • From: Sonora Desert
Posted by stikpusher on Wednesday, March 4, 2015 2:22 PM

Well done on that ugly beast! Way off the beaten path to see pretty much anything Egyptian on here!


F is for FIRE, That burns down the whole town!

U is for URANIUM... BOMBS!

N is for NO SURVIVORS...

       - Plankton

LSM


  • Member since
    September 2012
Posted by GMorrison on Wednesday, March 4, 2015 11:30 AM

Thanks yes I think "recruited will work". Add a tanker and I'll be in business.

 Modeling is an excuse to buy books.


  • Member since
    September 2006
  • From: Dripping Springs, TX, USA
Posted by RBaer on Wednesday, March 4, 2015 11:24 AM

Well done!

There are lots of suitable figs out there wearing the appropriate head gear, and I suppose it could be possible to pose the figs you have as "observing" infantry, or recruited" to help load ammo....

Apprentice rivet counter.

  • Member since
    March 2003
  • From: Western North Carolina
Posted by Tojo72 on Sunday, March 1, 2015 2:41 PM

Great looking scene.Love the SU,nice seeing the diffrent markings and setting.Which Dragon kit ?

  • Member since
    November 2005
Posted by T26E4 on Sunday, March 1, 2015 10:56 AM

I love oddball, out of the way subjects!  I don't have an ISU-152 in my stash but looking at yours, made me start researching other Egyptian army vehicles -- maybe I can find something that wouldn't require me to go out and buy another kit....

Roy Chow 

Join AMPS!

http://www.amps-armor.org


  • Member since
    September 2012
Posted by GMorrison on Sunday, March 1, 2015 10:04 AM

Thanks for the props.

Roy, that's good to know and thank you.

The inside hatch color is a subtlety I would never have figured out.

As for the guys and their gear, I got carried away looking at a bunch of pictures of infantry rounded up by guys with Uzis.

I'd suspect their headgear is all wrong for tanker crews too, probably should be those ribbed Russian helmets.

I'll probably ditch them or reassign them to an infantry weapon.

 Modeling is an excuse to buy books.


  • Member since
    November 2005
Posted by T26E4 on Sunday, March 1, 2015 9:34 AM

Very interesting subject matter!  Bravo!

May I make two suggestions?  The inside face of the roof hatch would not be painted white -- but the same as the exterior color.  The white would make it too visible to enemy observation.  

Secondly, tank and artillery crews typically did not wear any sort of webbing or canteens or pouches hanging off their belts.  Working inside an AFV or near an artillery piece, you want nothing that can snag the moving parts around you.  The Tamiya mortar crew, while found in the SP Mortar carrier, were deemed armored infantry and were so equipped b/c they were to operate on the ground rather than as APC crewmen.

Roy Chow 

Join AMPS!

http://www.amps-armor.org


  • Member since
    January 2013
Posted by BlackSheepTwoOneFour on Sunday, March 1, 2015 8:56 AM

It's nice to see a different variation like an Egytian SU-152. Well done!

  • Member since
    May 2006
  • From: East Coast
Posted by CarnivourousDonut on Sunday, March 1, 2015 6:41 AM

For a moment I thought those were pics of the real thing, very impressive!

Let's rattle the cage, crack the machine. Let 'em know who you are, shine to be seen.

  • Member since
    February 2011
  • From: St louis
Posted by Raualduke on Sunday, March 1, 2015 4:18 AM

Looks great! Nice job!

  • Member since
    September 2012
Egyptian Army SU 152
Posted by GMorrison on Sunday, March 1, 2015 1:47 AM

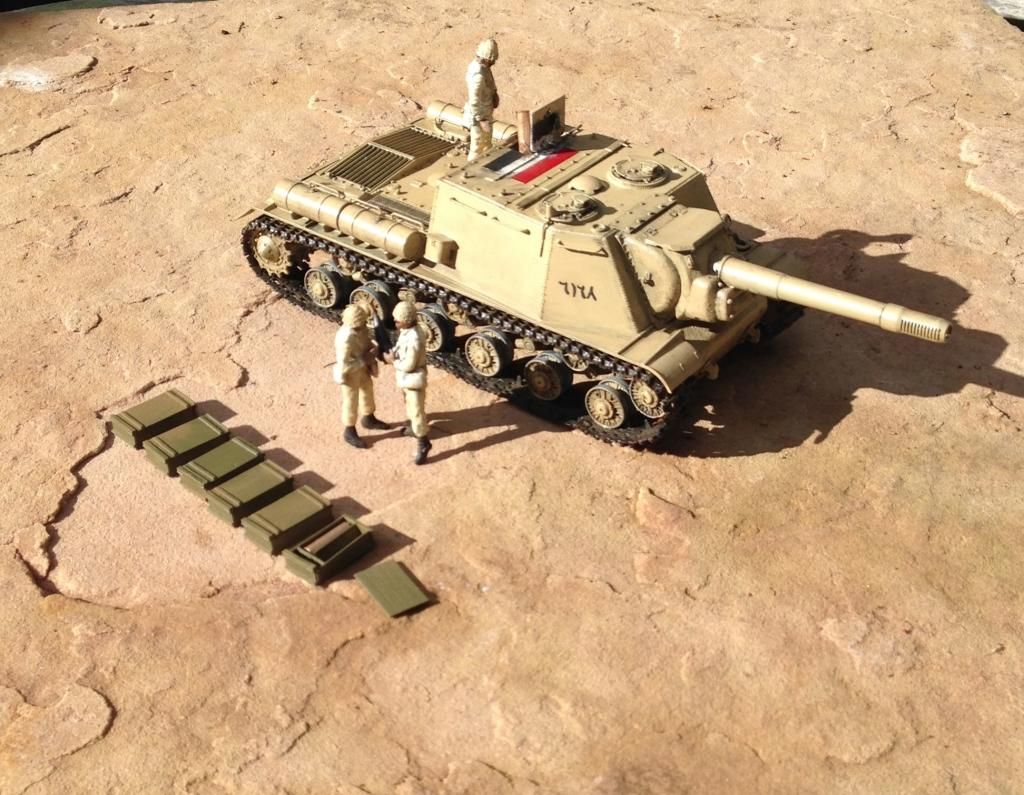
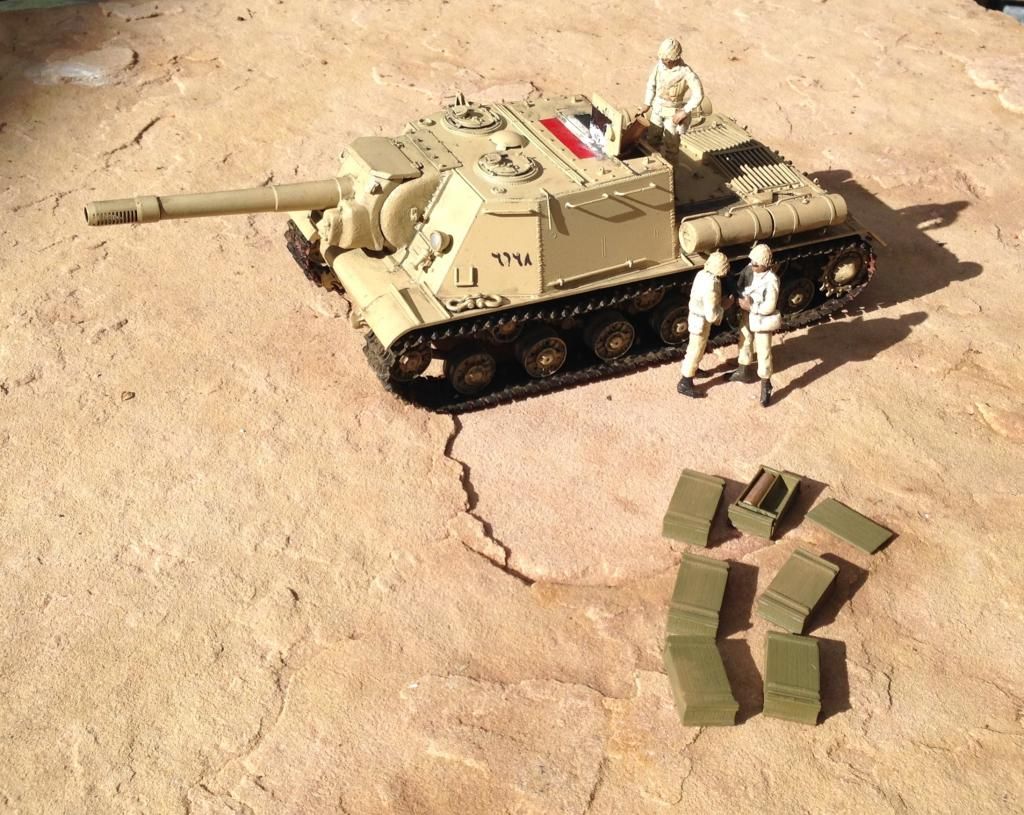
SU-152 "8717" providing artillery support from the West side of the Suez Canal on day 3 of the war.

Dragon 1/35.

I haven't built an armor model in a while, so I tried this for the latest FSM GB.

Squirrely elements were the holes in the hull didn't allow for the hull fittings, so I had to shave off the lugs on the back of the little parts.

Otherwise, I am truly awed at how part casting technology has surpassed the Tamiya kits I built in the 1980's.

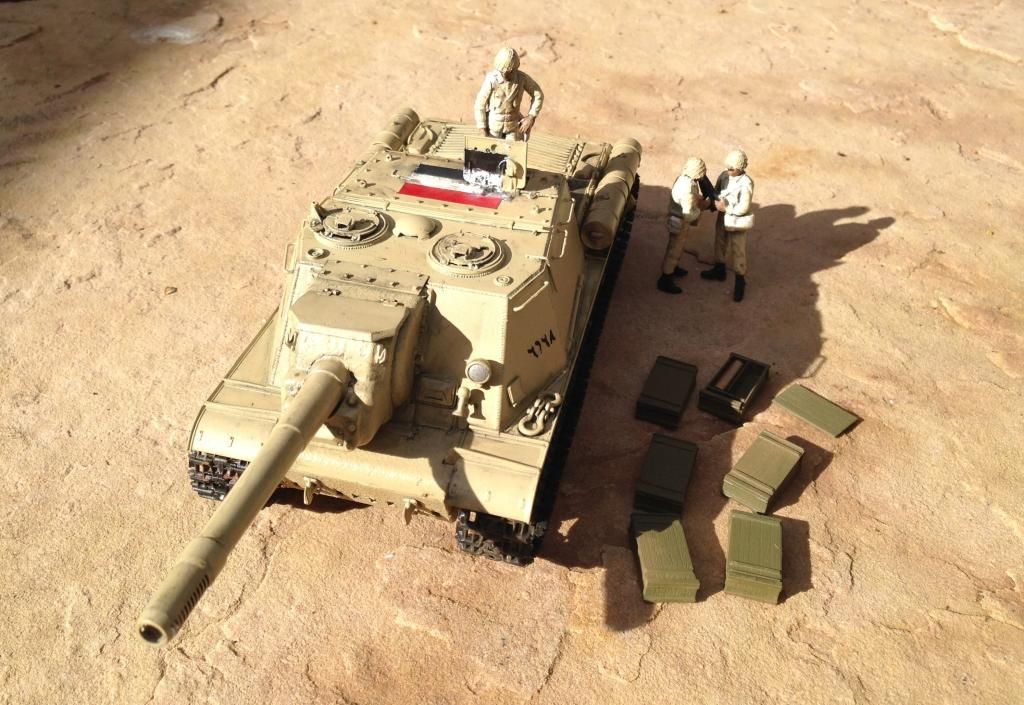
Aber barrel kit, otherwise stock.

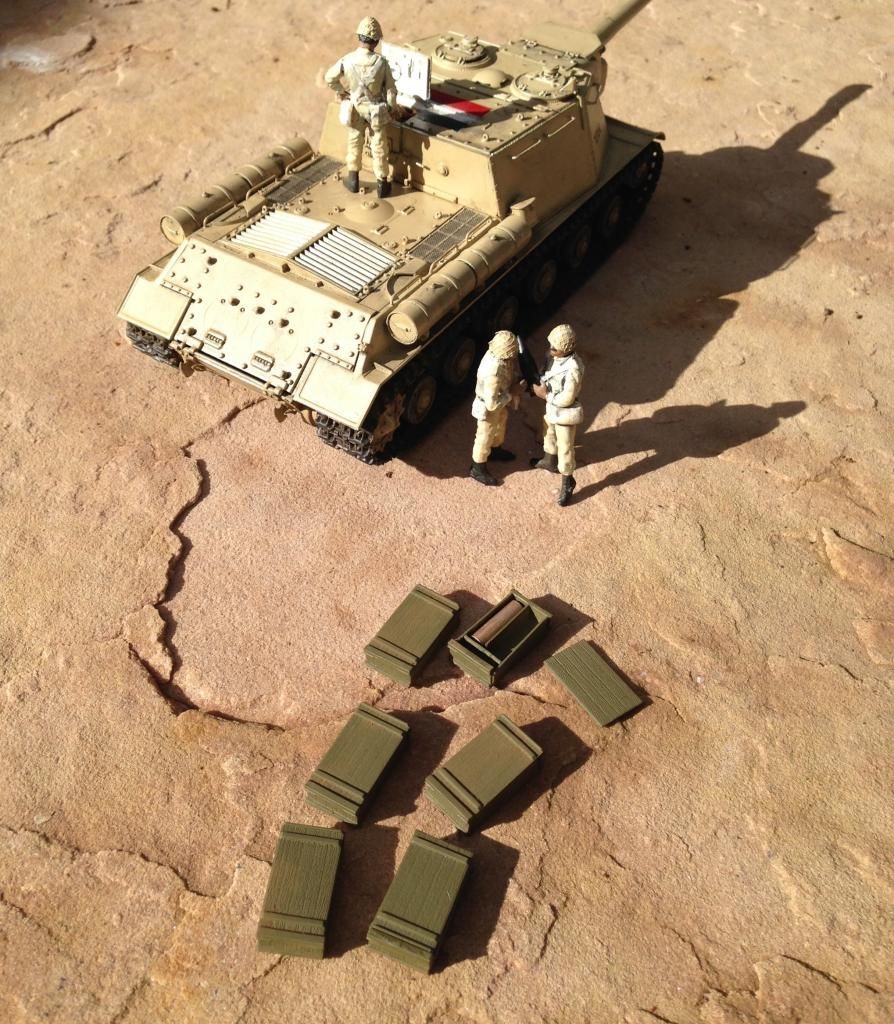
The Magic tracks snapped together perfectly. Thanks to Karl's tutorial, I glued them up and shaped them on to the rollers after 45 minutes, it worked well.

I had a lot of fun with the figures.

After a lot of research, I used the Tamiya US Army 107 mm mortar team for the bodies because of the bloused pants and boots, added shirt tails and epaulettes, helmets and soft gear from the Zvezda 1980 Afghanistan Soviet Paratroop set, Tamiya tape webbing and Sculpey dittey bags.

152 mm ammunition from a mini models set.

 Modeling is an excuse to buy books.


JOIN OUR COMMUNITY!

Our community is FREE to join. To participate you must either login or register for an account.

SEARCH FORUMS
FREE NEWSLETTER
By signing up you may also receive reader surveys and occasional special offers. We do not sell, rent or trade our email lists. View our Privacy Policy.