SEARCH FINESCALE.COM

Enter keywords or a search phrase below:

Takom 1/16 FT-17 Renault

7981 views
43 replies
1 rating 2 rating 3 rating 4 rating 5 rating
  • Member since
    January 2012
Takom 1/16 FT-17 Renault
Posted by catdude01 on Friday, April 15, 2016 2:15 PM

Hi all!

This month I started a new challenge, my very first kit in 1/16 scale and on top of that from World War One, the Takom 1/16 FT-17 Renault! At first I was reluctant to choose this kit, since I have no experience on that scale and I have read about WWI in the past, but never work a kit from that era, so I'm on uncharted waters in many ways. I order the kit with a book reference which I receive from Spruebrothers in just 4 days! (consider that I’m out of the States in the Caribbean, Puerto Rico).

 Started right away to look at the parts and get familiarized and also look at the information and pictures of the reference book. So I started now calling this a Char, not a panzer, not a tank, that’s the word for tank in French. Also found that this tank was call during WWI just as FT! The FT-17 name was later after the war due to the amount of variants and other French’s projects related. This Char was considered the first tank ! and was used in many conflicts and many countries, so I found a lot of references for the colors.

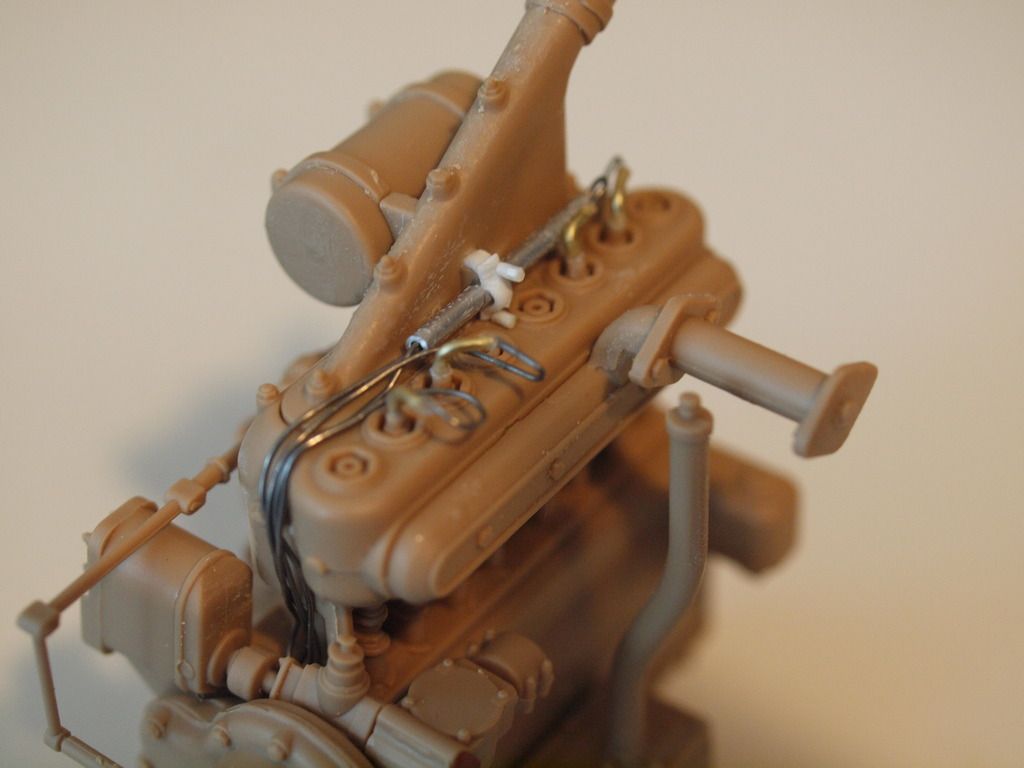
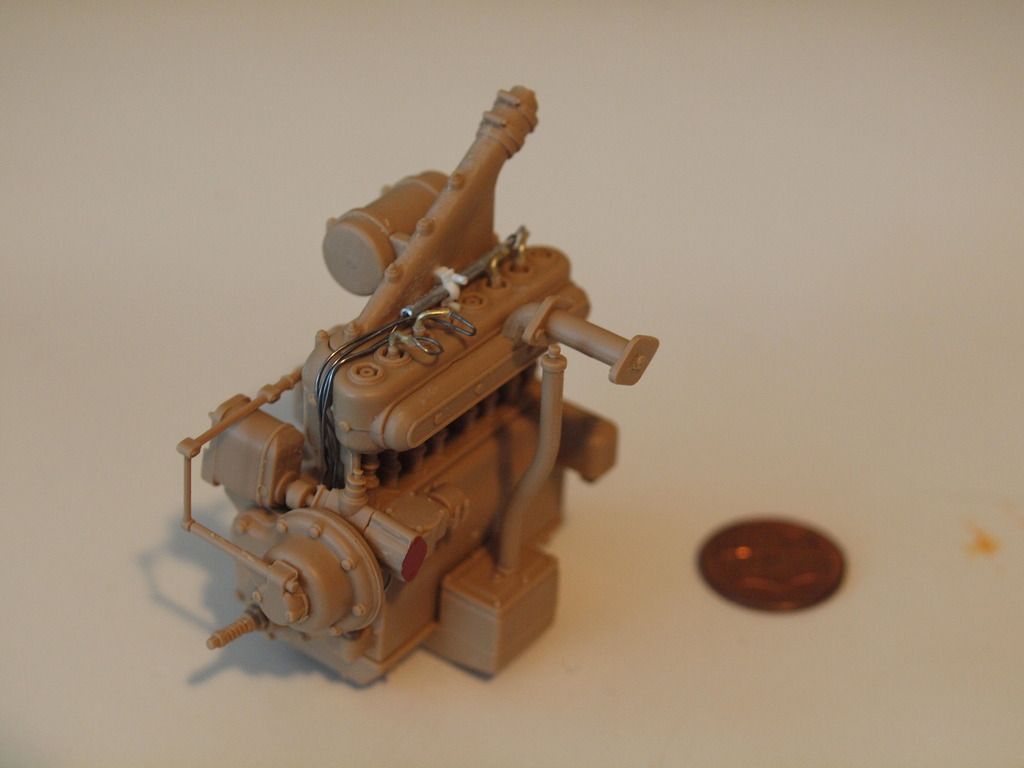
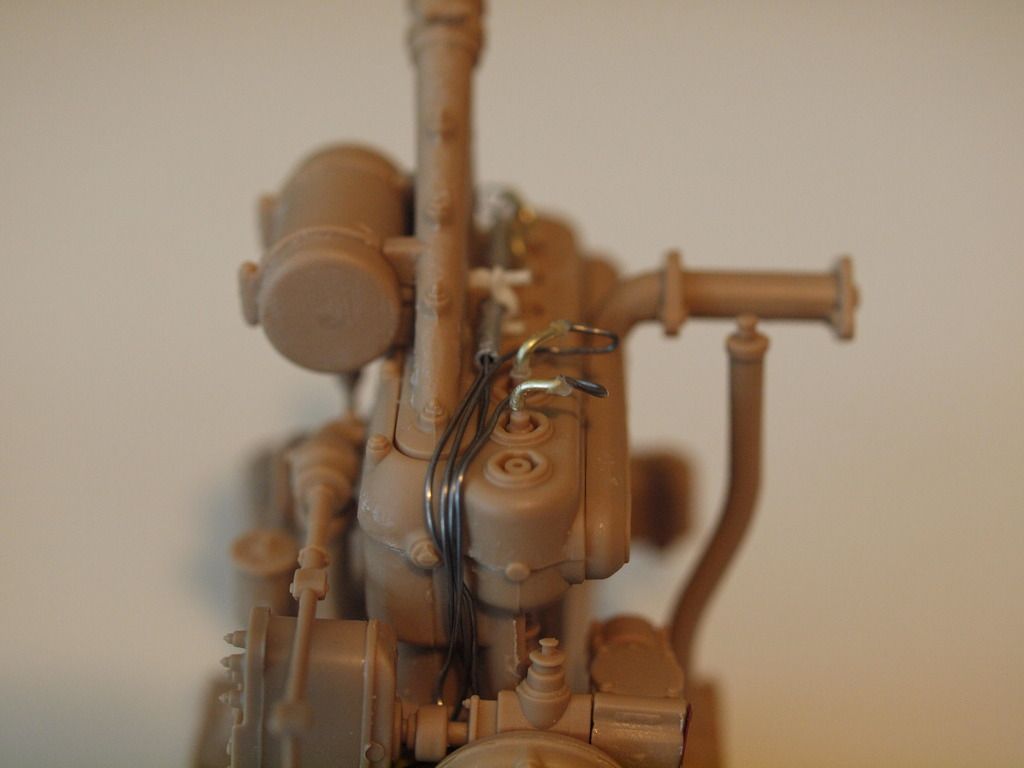
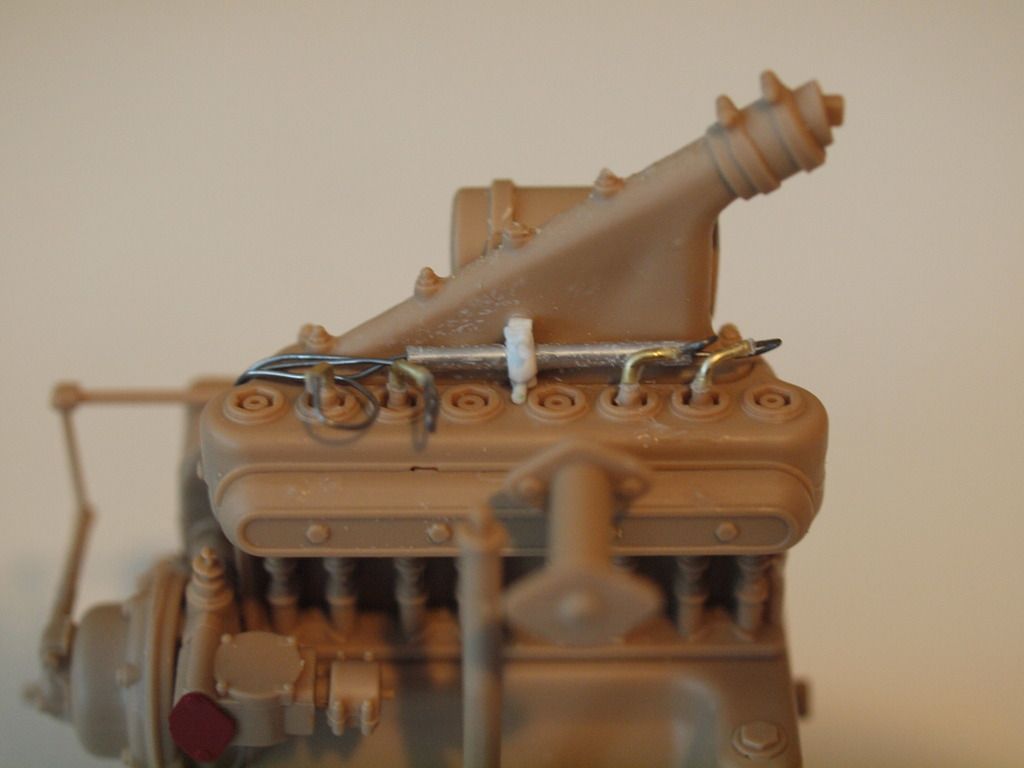
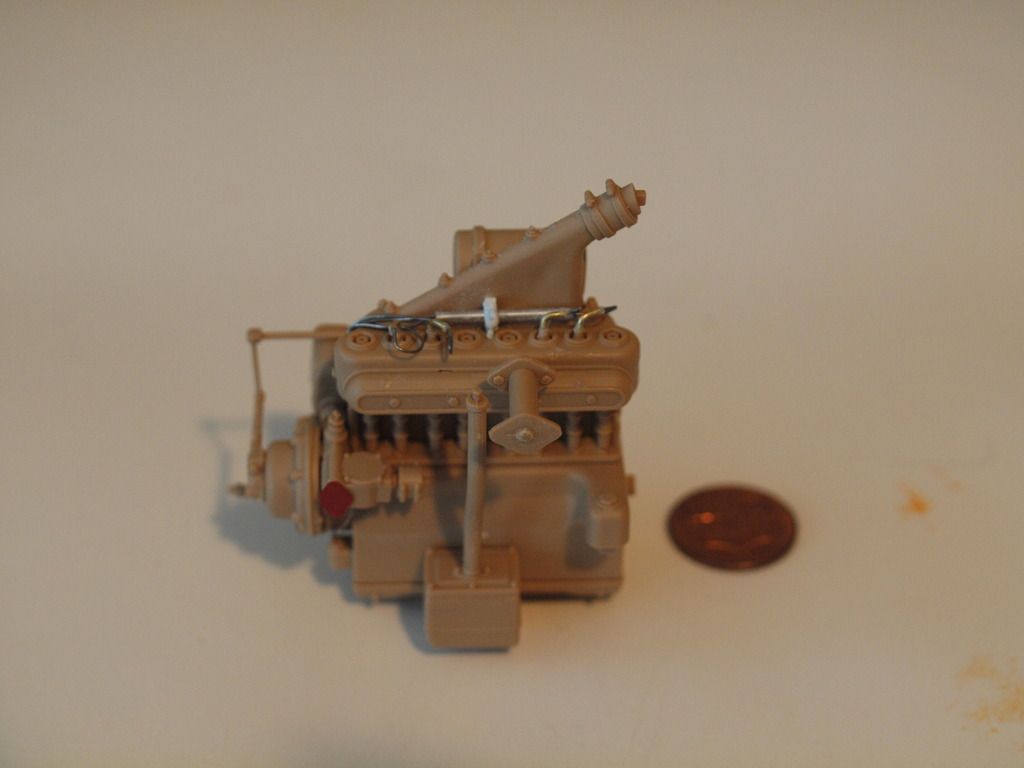
 I started right away with the engine, at first the pictures were difficult to find, and even I confuse the American version with the french one.

 The engine its just called 4 HP Renault engine, the american one is the BUDA HU engine.

 The building its very straight forward, some cleaning is needed, but is minimal, the fitting is perfect. I added the cabling, the sparks plugs and some metal tubbing to represent it as much real as possible.

Renault 4HP engine

  • Member since
    January 2012
Posted by catdude01 on Friday, April 15, 2016 2:15 PM

Primer was next in black and for that task I used Krylon black color in a can. The cover is great and its dries in 15-20 minutes.

  • Member since
    January 2012
Posted by catdude01 on Friday, April 15, 2016 2:16 PM

The instructions give you a guide of color for the engine, but I used instead the pictures of the reference book.


  • Member since
    January 2012
Posted by catdude01 on Friday, April 15, 2016 2:17 PM

Weathering of the engine started with a wash of black, then another with burnt umber.

  • Member since
    January 2012
Posted by catdude01 on Friday, April 15, 2016 2:17 PM

Test fitting of the hull, always do this from time to time to detect any issue before you get to a more complicated stage.

Beautiful fitting, like a glove, and look at the size! okay is smaller than almost all the tanks but still is a great one.

  • Member since
    January 2012
Posted by catdude01 on Friday, April 15, 2016 2:21 PM

For the next part I started weathering the engine compartment, I wanted to show a lot of everything but not in a exagerated way, so with that in mine I used a very fine wash of burnt umber to tone down the white, chipping and scratch marks using a mix of black and burnt umber applied with a toothpick, a fine brush and a sponge. Later I added stains and some 3 tones of rust due to water exposure, etc.

On the other side, that reside inside the tank's belly, the story is a different one. The rust is not present, only stains, scratches and grime.

The driver floor also receive a similar treatment as the previous parts, except for the rust.

  • Member since
    January 2012
Posted by catdude01 on Friday, April 15, 2016 2:22 PM

This recipe is repeated to the interior walls of the tank, then I added the pedals, the seat, and all the small details on the driver's area, and glued in place the complete engine. Here I put one side to test again the fitting, and still perfect. A lot of retouches were done overall to match the tones between the parts.

  • Member since
    August 2014
  • From: Willamette Valley, Oregon
Posted by goldhammer on Friday, April 15, 2016 2:42 PM

Very nice work.  The wear and weathering is top notch, and I love the worn paint on the gear shift.   Just a thought...maybe add some wear to the pedals and the seat, depending if they are going to be visable after assembly.

  • Member since
    July 2003
  • From: On my kitchen counter top somewhere in North Carolina.
Posted by disastermaster on Friday, April 15, 2016 2:44 PM
https://encrypted-tbn1.gstatic.com/images?q=tbn:ANd9GcQxgMpUYOoDHeW0aheJc1K22c8oLpRPUUXQLh56F9gMpwwogFk

What a treasure!
That motor is just awesome.

Sherman-Jumbo-1945

"I was so much older then, I'm younger than that now"


  • Member since
    March 2003
  • From: Rain USA, Vancouver WA
Posted by tigerman on Saturday, April 16, 2016 8:14 PM

Really solid work so far. This should be a beauty in the end.

   http://i7.photobucket.com/albums/y269/wing_nut_5o/PANZERJAGERGB.jpg

 Eric 

  • Member since
    July 2004
  • From: Texas
Posted by wbill76 on Sunday, April 17, 2016 5:41 PM

Turning out a nice bit of work on this beauty. 1/16 really is ideal for this particular subject considering how small the original is. 

  • Member since
    January 2012
Posted by catdude01 on Tuesday, April 19, 2016 7:57 AM

After inspecting the tracks vs the reference I found that they were casted and the textured was missing in my plastic kit. So for this task I used the Tamiya Thin glue and cover the whole track, then I used a stiff brush to tap all the track, showing the following result. ( I think I overdo this one, but the next ones are ok)

  • Member since
    January 2010
Posted by CrashTestDummy on Tuesday, April 19, 2016 3:50 PM

Nice work.  I'm working through the Meng 1/35 scale version of this little jewel.  Having fun with all the paint finishes.  I also added wiring.  Unfortunately, my reference was bad, so the little 4-cyl has 2 plugs per hole.  Oh well, few will even bother to count, and I'm still having fun!  You've added some very nice weathering effects. 

Gene Beaird,
Pearland, Texas

G. Beaird,

Pearland, Texas

  • Member since
    November 2009
  • From: SW Virginia
Posted by Gamera on Wednesday, April 20, 2016 8:54 AM

Wow, I hope the engine hatch can be posed open to show off all that work you did, the engine looks so good I'd be tempted to display it beside the tank as a model in itself. 

And nice work there on the tracks, that's one of the things I always seem to overlook. 


"I dream in fire but work in clay." -Arthur Machen


  • Member since
    January 2012
Posted by catdude01 on Friday, April 22, 2016 7:05 AM

FT-17: gun barrel. I found that the gun barrel was wrong in shape in comparison with the book reference so I decide to switch to brass tube for the gun and for the sight. Also drill the hole for the periscope too, still need a flat ring to make a better look on it. Here you can see the results, I think they look much better. Next the turret!

  • Member since
    September 2015
Posted by Terry Murphy on Saturday, April 23, 2016 8:46 PM
Just finished the Meng version, love'n yours.

Its all fun!

Terry


  • Member since
    January 2012
Posted by catdude01 on Monday, April 25, 2016 1:28 PM

I'm still thinking in what colors & nation I would paint this fella.

I'm Between a Polish Version I found named "Janka" (take a good look at the wheels, they look like in bare wood)


or a postwar option in Japan under testing. (1919-1930)(type 79 Kogata)

For this one I was thinking to make the wheels in bare wood, and Kanji marking like the one done in militar weapons on that era.

With this Legend I can decifer the type of Equipment . For example here in the gun sight means " Type 44"

  • Member since
    January 2012
Posted by catdude01 on Monday, April 25, 2016 2:57 PM

More evidence that this fella at some stage of production was used with unpainted wooden wheels.

And another good reference for the Japanese version. Look at the Kanji at the side of the hull.

  • Member since
    January 2012
Posted by catdude01 on Wednesday, April 27, 2016 6:59 AM

Just a small update.

I remove the numbers from a sprue using a new blade and here is the result after applying it to the track.

  • Member since
    November 2009
  • From: SW Virginia
Posted by Gamera on Wednesday, April 27, 2016 7:46 AM

Really nice work Yes

And gee friggin' whiz those wheels do look like unpainted wood. 

"I dream in fire but work in clay." -Arthur Machen


  • Member since
    January 2012
Posted by catdude01 on Thursday, April 28, 2016 7:41 AM

I just received the last piece I needed for this work, the resin wheels simulating wood. Thanks Todd Michalak and Inside the Armour for a fantastic piece!

Starting the painting with a white primer, pieces are loose, just put it in position for the picture.


  • Member since
    January 2012
Posted by catdude01 on Thursday, April 28, 2016 7:45 AM

Following my previous work on a Sherman howitzer, I wanted to start the kit in Black & White too. This help me a lot to know were I'm going with the painting and weathering of the kit.

Here is the First Step of the Black & White process, started in white, then black for deep shadows, they will soften on the next steps, more to come.

  • Member since
    February 2011
Posted by knox on Thursday, April 28, 2016 7:51 AM

I'm really enjoying this wip.  Very nice work!                        gk


  • Member since
    January 2012
Posted by catdude01 on Wednesday, May 4, 2016 8:30 AM

I ordered the resin to cast the wheels, but while waiting I wanted to experiment a bit painting the wood grain and see the results.

Started imitating the lines using a fine brush and Tamiya Linoneum deck brown xf-79,

Then I sealed using satin varnish so I can start with the first wash using black very diluted.

Here I experiment using filters of yellow and brown applied by brush, then another thinned black wash, and painted the metal parts.

  • Member since
    January 2012
Posted by catdude01 on Wednesday, May 4, 2016 8:33 AM

For the base color I was looking for a inital color use in japanese war machines, Steven Zaloga have some articles about the theme, and also found some more inf here (http://matadormodels.co.uk/tank_museum/xcamo_ww2japan.htm)

So after a research I decided to go with a very light Olive Drab. So I use the Color Modulation set from AMMO for the task.

Here the results using the Basic Highlight Olive Drab.

  • Member since
    January 2012
Posted by catdude01 on Wednesday, May 4, 2016 8:34 AM

Here some practice of the Kanji before applying it. Some retouches to the wheels, installed as well but not glued, only for fitting purposes. Also painted with a tamiya flat earth xf-52 the tracks to initiate a more weathered look.


  • Member since
    January 2012
Posted by catdude01 on Thursday, May 5, 2016 7:43 AM

Starting the initial dust using a mix of Tamiya Buff, Deck Tan and Flat earth. Still a long way to go.


  • Member since
    January 2012
Posted by catdude01 on Thursday, May 5, 2016 1:04 PM

Detailing of the layers of dust, dry and wet mud in process using the whole line of Dust & Mud from Ammo.

  • Member since
    January 2012
Posted by catdude01 on Thursday, May 5, 2016 1:06 PM

here is the progress on the tracks too, still in half-stage of weathering process, more details to come.


Also the side with the Kanji


  • Member since
    November 2009
  • From: SW Virginia
Posted by Gamera on Thursday, May 5, 2016 2:47 PM

Wow, that's some sharp work! Yes

"I dream in fire but work in clay." -Arthur Machen


JOIN OUR COMMUNITY!

Our community is FREE to join. To participate you must either login or register for an account.

SEARCH FORUMS
FREE NEWSLETTER
By signing up you may also receive reader surveys and occasional special offers. We do not sell, rent or trade our email lists. View our Privacy Policy.