SEARCH FINESCALE.COM

Enter keywords or a search phrase below:

Finnish BAB B armoured car 1941 - completed photos

1673 views
7 replies
1 rating 2 rating 3 rating 4 rating 5 rating
  • Member since
    April 2006
  • From: ON, Canada
Finnish BAB B armoured car 1941 - completed photos
Posted by jgeratic on Saturday, October 15, 2016 4:43 PM

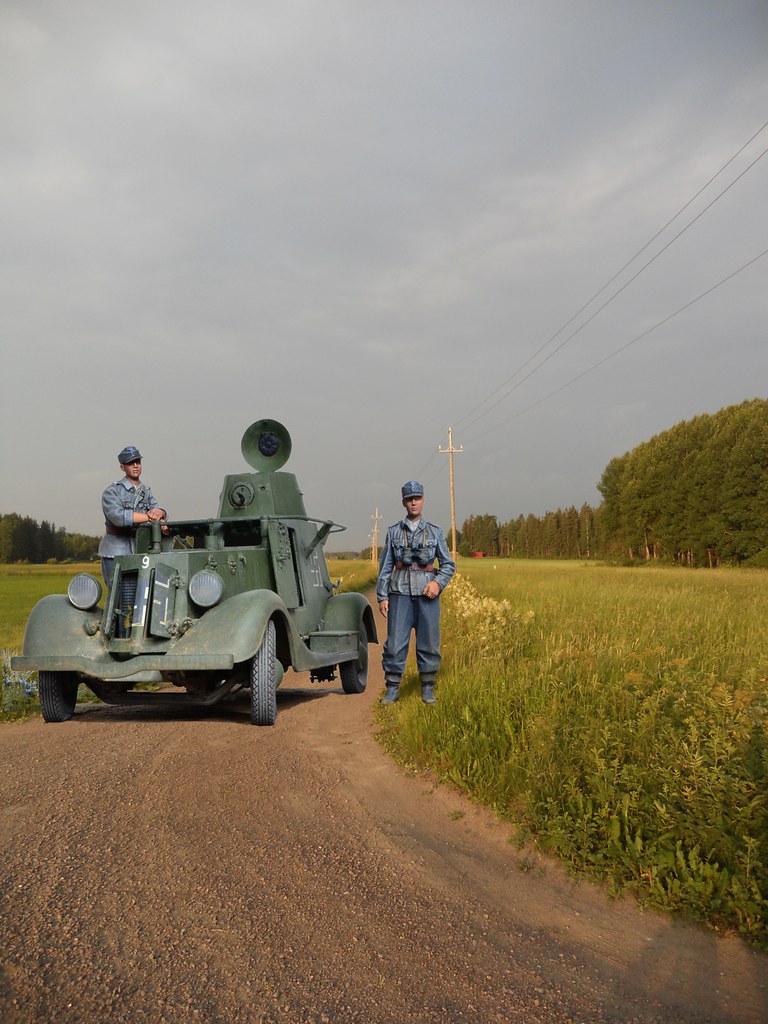
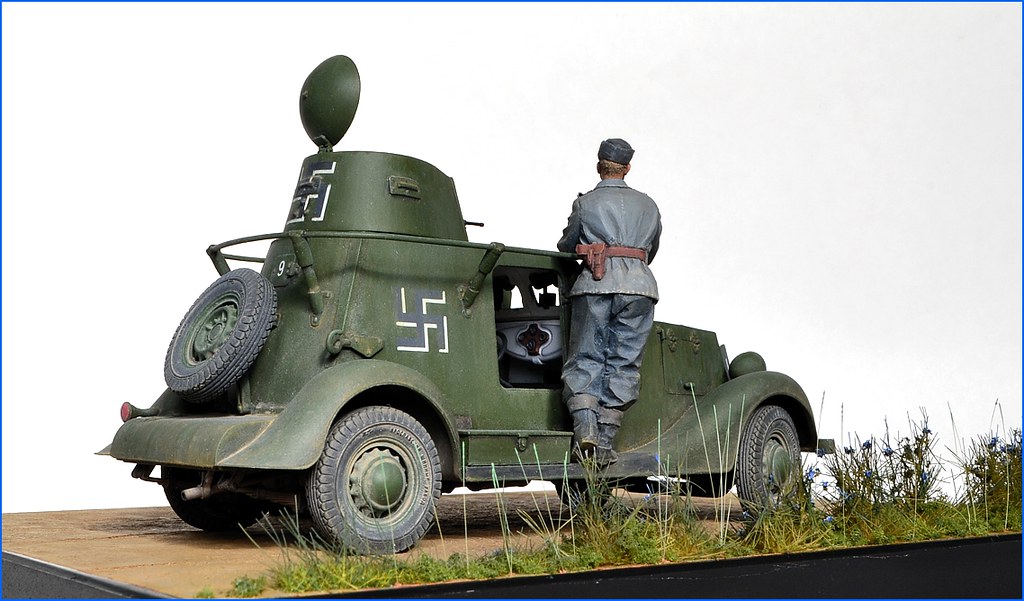
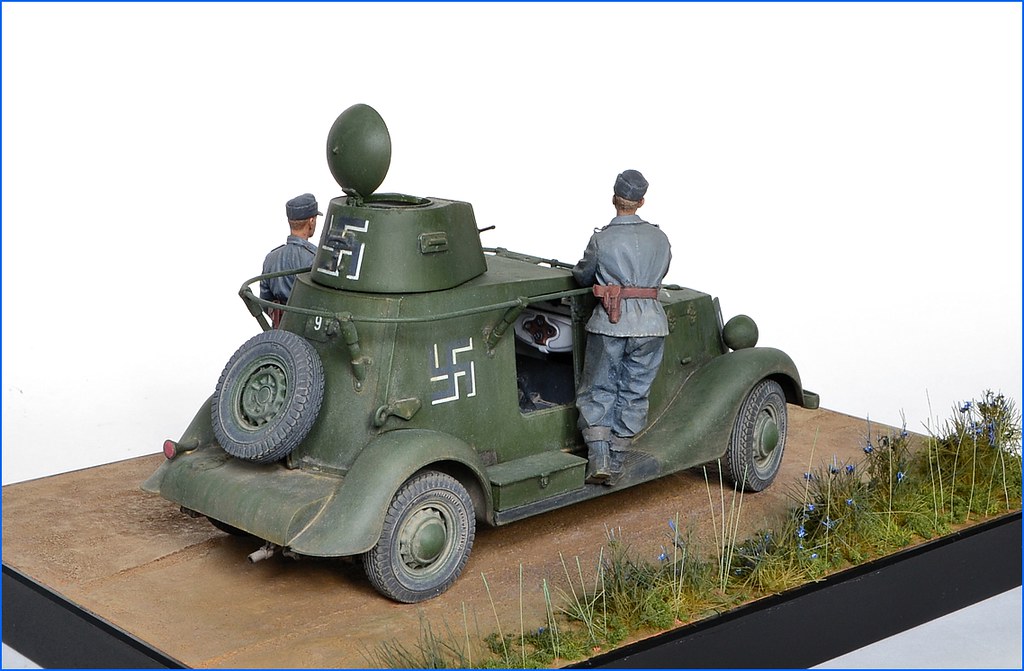
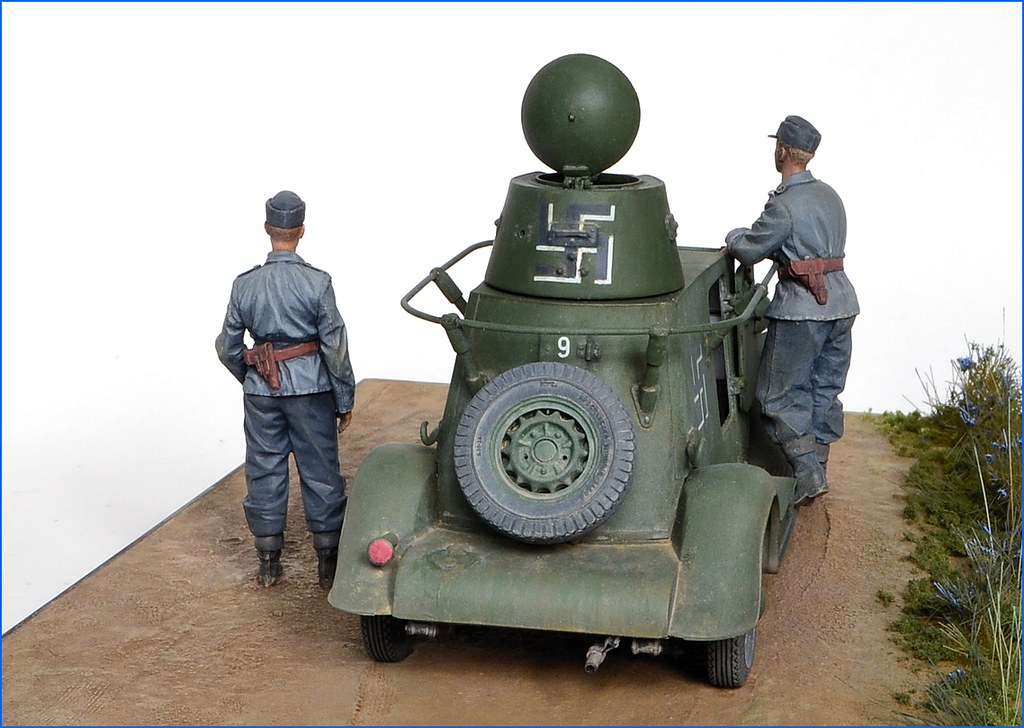
Finnish Army BAB B armoured car

(captured Soviet BA-20)

Continuation War, Summer 1941


30345443695_dc492d7612_b.jpg

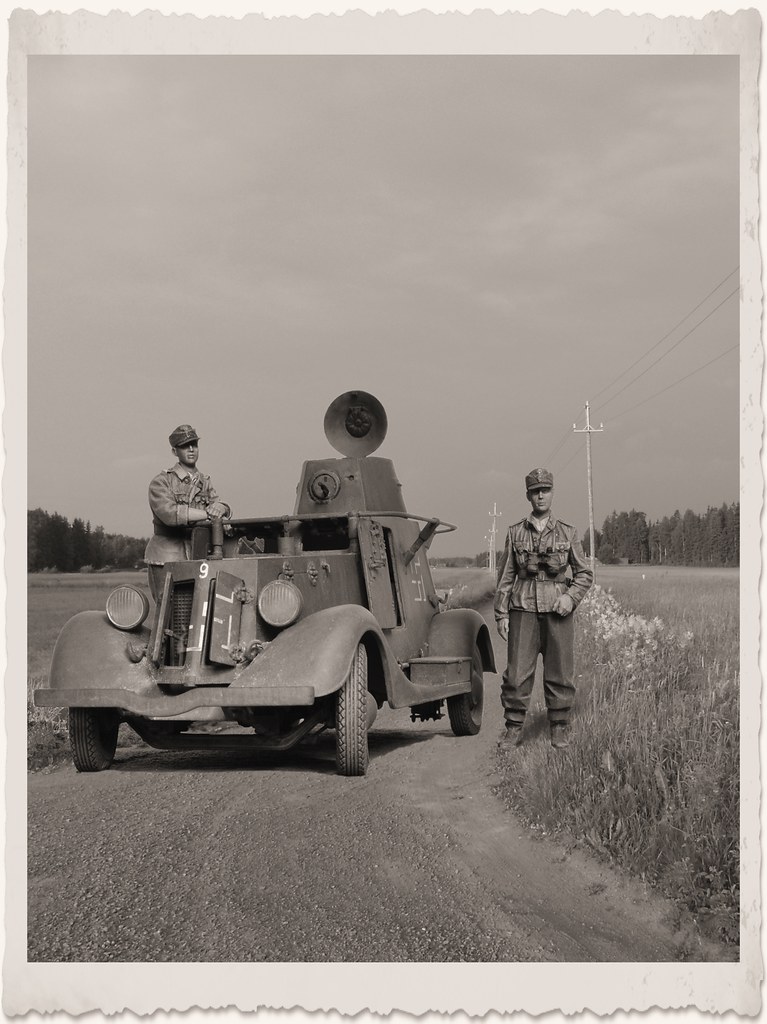
A variety of these lightly armed cars were in use by the Finnish Army, exact number is not known, but at least 18 were on hand at the start of the Continuation War.  They appear to have been used mainly as liaison/dispatch and command vehicles.


30229305912_f67cc14b58_b.jpg

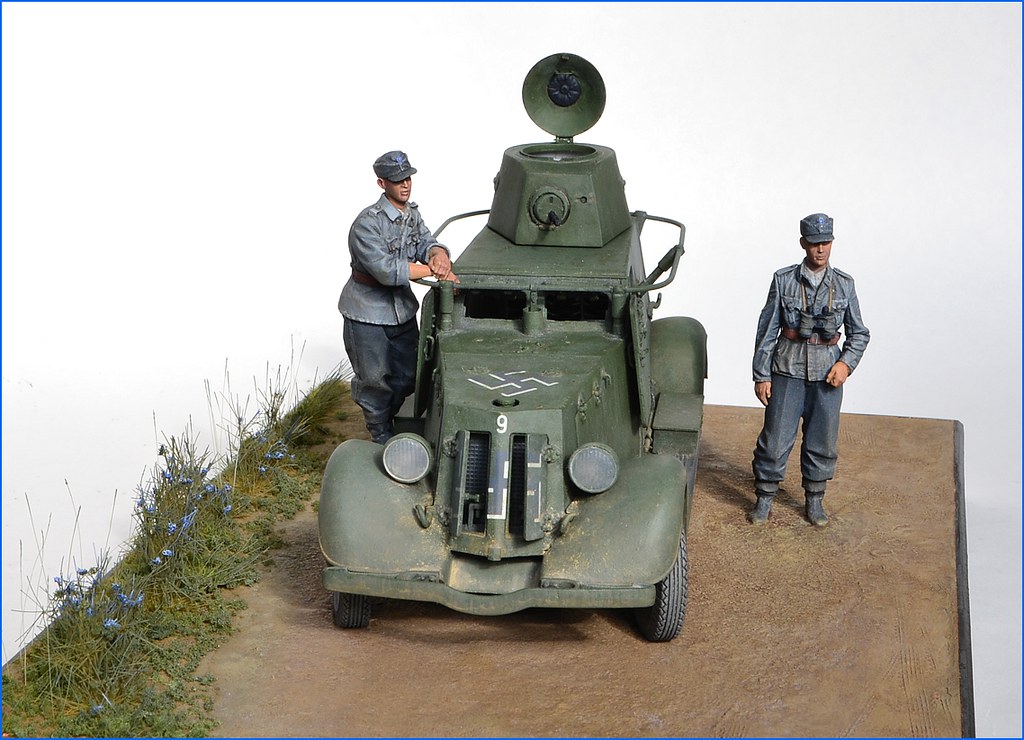
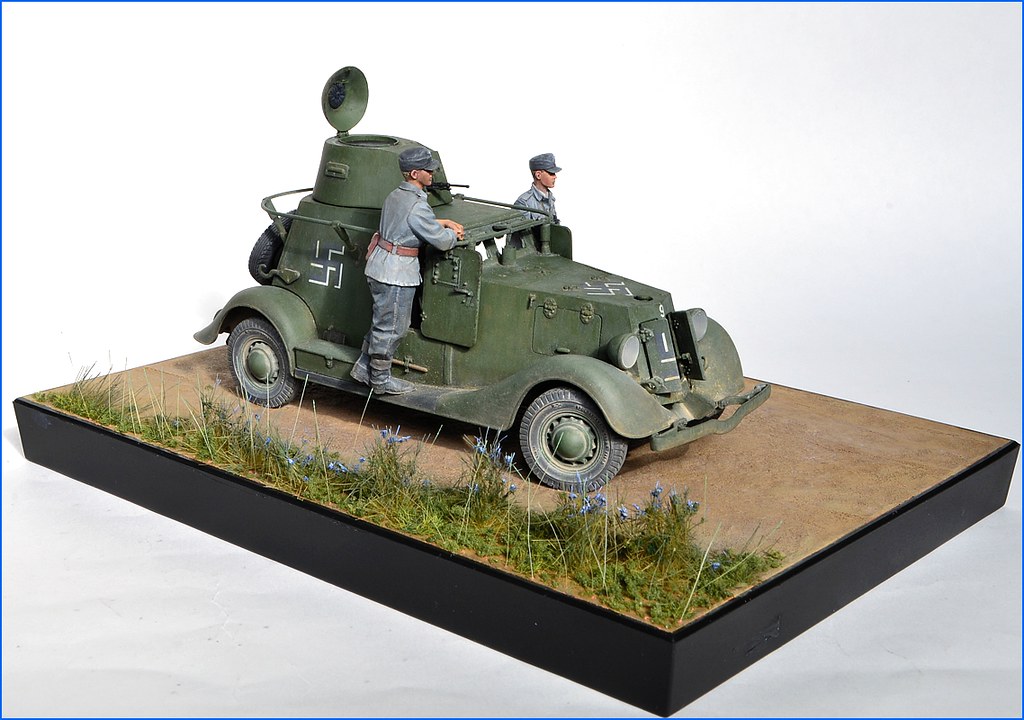
kit: HobbyBoss Soviet BA-20 Armoured Car Mod.1937

Decals: Star Decals 35-895 Finnish Tanks in WW2

figures: converted Alpine WSS crewmen,  plus Hornet heads

extras: DEF Models resin tires (for Tamiya GAZ car)

Some dimensional/shape corrections done to kit.

30259592231_407e15f354_b.jpg

29714201763_28ae696b6f_b.jpg

30345461975_5fb462299a_b.jpg

30345455515_473307d6f4_b.jpg

29714223083_8f510a3e25_b.jpg

29715432824_52f3da5791_b.jpg

29715435294_68f7fcf57c_b.jpg

29714212673_e1e280d3a8_b.jpg

regards,
Jack

  • Member since
    March 2003
  • From: Rain USA, Vancouver WA
Posted by tigerman on Saturday, October 15, 2016 5:25 PM

Wow friend, that is cool. I like the different subject. Excellent photoshop skills too btw. I like the weathering you did. Maybe a little glossier on the red light? Figures are awesome. You are one of the solidest builders on this site

   http://i7.photobucket.com/albums/y269/wing_nut_5o/PANZERJAGERGB.jpg

 Eric 

  • Member since
    November 2009
  • From: SW Virginia
Posted by Gamera on Saturday, October 15, 2016 9:31 PM

Awesome Jack, love the car and the figures!

"I dream in fire but work in clay." -Arthur Machen


  • Member since
    September 2016
Posted by Raindog9 on Sunday, October 16, 2016 11:28 AM

Jack awesome work! Really beutiful armoured car.

  • Member since
    April 2006
  • From: ON, Canada
Posted by jgeratic on Sunday, October 16, 2016 1:50 PM

Thank you Eric, Cliff, and Raindog9.

Agreed, that tail light does look lifeless.  So took a look at some museum photos of the vehicle to see what I could add to it.  Using flat paint, added detail in the form of colour shapes:

regards,

Jack


  • Member since
    September 2016
Posted by Raindog9 on Sunday, October 16, 2016 6:36 PM

I really like that your decals look painted on. Is there a chemical you're using? Also, did you dust on the brown color with a watered down paint, or did you use pigmants? Really impressive work.


It does look like they're waiting for the specialized maintence crew to come fix them up though. Only problem with those fancy german vehicles.

  • Member since
    April 2006
  • From: ON, Canada
Posted by jgeratic on Sunday, October 16, 2016 6:58 PM

Hi Raindog9,

Thanks for your continued interest on this one.  The decals were applied over a gloss coat of future/pledge acrylic clear.  To get rid of the edges of the decal film, I did a number of rounds of clear coating, followed up with light sanding.  As soon as the surface appears dull, apply another coat - going any further and you risk defacing the actual decal.  This basically builds up the acrylic around the decal edges, resulting in an even slope towards the model surface.

I used  weathering powders, both wet and dry.  Also enamel wash - mostly ochre, but also some brown in shadow areas.  MiG filters was the actual product.

The vehicle is actually a captured Soviet built BA-20, but the Finns did use some German equipment.

regards,

Jack

  • Member since
    September 2016
Posted by Raindog9 on Sunday, October 16, 2016 7:13 PM

jgeratic

Hi Raindog9,

Thanks for your continued interest on this one.  The decals were applied over a gloss coat of future/pledge acrylic clear.  To get rid of the edges of the decal film, I did a number of rounds of clear coating, followed up with light sanding.  As soon as the surface appears dull, apply another coat - going any further and you risk defacing the actual decal.  This basically builds up the acrylic around the decal edges, resuting in an even slope towards the model surface.

I used  weathering powders, both wet and dry.  Also enamel wash - mostly ochre, but also some brown in shadow areas.  MiG filters was the actual product.

The vehicle is actually a captured Soviet built BA-20, but the Finns did use some German equipment.

regards,

Jack


Thats something I'm hoping to expand into. I'm ordering my first set of pigmants off Lastcavalry, and really need to up my weathering game. Thanks for the info Jack! Look foreward to seeing your future projects.

all the best,

-Raindog

JOIN OUR COMMUNITY!

Our community is FREE to join. To participate you must either login or register for an account.

SEARCH FORUMS
FREE NEWSLETTER
By signing up you may also receive reader surveys and occasional special offers. We do not sell, rent or trade our email lists. View our Privacy Policy.