SEARCH FINESCALE.COM

Enter keywords or a search phrase below:

Heuschrecke IVb 1/35 prototype

2807 views
8 replies
1 rating 2 rating 3 rating 4 rating 5 rating
  • Member since
    April 2014
Heuschrecke IVb 1/35 prototype
Posted by Razzie43 on Sunday, August 6, 2017 11:55 PM

The Heuschrecke IVb was a prototype of 3 models.

Starts in 1943 with the serialnr 582501-582502-582503

Only one survive the war,it's full restored in the museum of Oklahoma.

The real name was

"105mm leichte Feldhaubitze 18/1 L/28 Auf waffenträger geschutzwagen IV b"

design by KRUPP in Magdeburg

Chassis is from "Panzerkamfwagen IV" and the "Hummel"

Almost the same as sdkfz 165/1 Sonderkraftfahrzeug.


Look at the sprocket wheel and notice the photo below...


The heuschrecke in action : 


The Trumpeter has no interior like the dragon kit has!

It has 672 parts in grey plastic,photo etch,and the copper chain!

Tracks come in 2 kinds:1 rubber - 256 track by track(magic tracks)


The bars to remove the turret are now moveable,so i can use them in different ways!

My collection of tanks :
http://rascarcapaco.blogspot.be/

  • Member since
    December 2002
  • From: Bury St Edmunds, Suffolk, England
Posted by Bish on Monday, August 7, 2017 4:15 AM

Nice choiceof subject, keep meaning to get theDragon one of these. Will be following this.

I am a Norfolk man and i glory in being so


On the bench: Airfix 1/72nd Harrier GR.3/Fujimi 1/72nd Ju 87D-3

  • Member since
    April 2014
Posted by Razzie43 on Monday, August 7, 2017 11:46 AM

Bish

Nice choiceof subject, keep meaning to get theDragon one of these. Will be following this.


Thank you Bish!

I forgot to take photo's between the build/red primer and the worn effect...

now i'm so far that the tank is almost finish..

The elevator for the turret is not what i want!

The superglue was still wet when i try to fit those arms...but it still ok to move around.

On this photo below i remove the tool to get a shadow on the tank.

Here on this one i left up the elavator with the chains(still not rusty)

I try with coca-cola/thinner/acetone,...even vinegar doens't work.

Then i decide to paint them by hand with a sponge and a brush!

My collection of tanks :
http://rascarcapaco.blogspot.be/

  • Member since
    December 2002
  • From: Bury St Edmunds, Suffolk, England
Posted by Bish on Monday, August 7, 2017 1:41 PM

Great job on the rusted look. Are you displaying this as an abandoned vehicle.

I am a Norfolk man and i glory in being so


On the bench: Airfix 1/72nd Harrier GR.3/Fujimi 1/72nd Ju 87D-3

  • Member since
    May 2015
Posted by Griffin25 on Monday, August 7, 2017 3:02 PM

That's some of the best rust under chipping I have ever seen. Did you use a chipping medium? Can you explain how it was done? Please Smile


Griffin

  • Member since
    April 2015
Posted by Mopar Madness on Monday, August 7, 2017 10:03 PM

Yes, please share your technique for your great rust! Looks fantastic.

Chad

God, Family, Models...

At the plate: 1/48 Airfix Bf109 & 1/35 Tamiya Famo

On deck: Who knows!

  • Member since
    April 2014
Posted by Razzie43 on Tuesday, August 8, 2017 1:42 AM

Mopar Madness

Yes, please share your technique for your great rust! Looks fantastic.


Thanks all,it's not easy to explain.Let me try..

You need to known how rusty metal looks like.
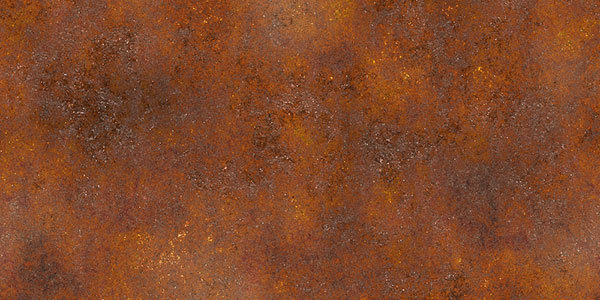
Then i buy all kinds of colors that are simular to it.

First layer : Vallejo rust(airbrush)

Second layer: Lifecolor rust1 nr LC32 ,with a sponge from the dishes!

 

Sometimes the paint disapear,that means u need to be gentle with it.

I drop some little drops and go over it with the sponge to become  better effect.

The next color :Lifecolor nr LC05 orange and the 4th Rust2 of lifecolor  nr LC38

To finish i put some German black brown camo of vallejo nr70822.

You need to be very thin and fine and restore your mistakes with another color!!

And it depends what kind of rusty metal you need.....with color paint blue/grey or with afrika corps color...below was my first model i ever try...

There are so many ways i try,but this one was the fastest way to paint.

I hope it was usefull information i give you.


Greetings Razz

My collection of tanks :
http://rascarcapaco.blogspot.be/

  • Member since
    April 2015
Posted by Mopar Madness on Tuesday, August 8, 2017 4:07 PM

Most helpful!!  I am new to armor modeling so I am excited to see this. Thank you so much for sharing! Beer

Chad

God, Family, Models...

At the plate: 1/48 Airfix Bf109 & 1/35 Tamiya Famo

On deck: Who knows!

  • Member since
    November 2009
  • From: SW Virginia
Posted by Gamera on Wednesday, August 9, 2017 10:59 AM

Looks great Razz and thanks for the walk-though on the rust!

"I dream in fire but work in clay." -Arthur Machen


JOIN OUR COMMUNITY!

Our community is FREE to join. To participate you must either login or register for an account.

SEARCH FORUMS
FREE NEWSLETTER
By signing up you may also receive reader surveys and occasional special offers. We do not sell, rent or trade our email lists. View our Privacy Policy.