SEARCH FINESCALE.COM

Enter keywords or a search phrase below:

My first AFV, any helpful pointers welcome

2764 views
12 replies
1 rating 2 rating 3 rating 4 rating 5 rating
  • Member since
    June 2017
My first AFV, any helpful pointers welcome
Posted by jlee9 on Sunday, October 1, 2017 9:53 PM

Hi All,

I've just assembled my first AFV.  After extensive experience with model cars (read: 2 kits completed LOL!!), I've decided to try my hands at an AFV (due to finding a someone's collection at Value Village).  I've started with the Tamiya M8 used d spray cans to get most of the colour and used brushed acrylics for the smaller pieces.  I ran out of gray, so I just kept it as regular primer (I know, I know, I just wanted to have something completed).  My technique needs work as some of the parts didn't line up and I still am planning on doing decals.  

I was planning on doing some basic weathering.  However, it seems that a lot of weathering uses enamel paints.  

1.  Can I use enamel over the lacquer paint on this kit?  

2.  What is your recommended first steps in weathering?  What's easiest and such?  

Also, I do not as of yet own an airbrush, so any techniques would have to be done without that equipment (although I'm planning on getting an airbrush set up in a year or two).  


Thanks in advance,

Joe

  • Member since
    December 2002
  • From: Bury St Edmunds, Suffolk, England
Posted by Bish on Monday, October 2, 2017 2:10 AM

I generally start off with dry bruishing followed by dot filtering with oil paint. At that stage i apply a clear coat, but i spray that on, i am not sure hoiw the oil filter would react under brushing a clear. You would have toi leave it several days at least.

I am a Norfolk man and i glory in being so


On the bench: Airfix 1/72nd Harrier GR.3/Fujimi 1/72nd Ju 87D-3

  • Member since
    September 2013
  • From: San Antonio, Texas
Posted by Marcus McBean on Monday, October 2, 2017 6:57 AM

I built this kit and found it to be a nice build.  Almost forgot to install the tracks before I put the upper hull on top of the lower hull.   I believe you can put enamel over lacquer, but not lacquer over enamel.  You really are going to need to put on a clear coat  before adding the decals and do the weathering. 

  • Member since
    September 2011
  • From: Stevens Point, Wisconsin, USA
Posted by Tom Hering on Monday, October 2, 2017 7:38 AM

How you finish your armor models is a matter of personal taste. Myself, I avoid advanced painting techniques like the plague (but then, I'm just a hobbyist who doesn't enter competitions). After thirty years of building armor models, I still stick to a very basic method.

(1.) Pin wash. Use a small, pointed brush and just touch the tip to inside corners and raised details, letting the wash flow along and around by itself. On an olive color base coat, I use a 50/50 mix of black and burnt umber artist oils, thinned to a wash with Winsor & Newton Sensodor - a very weak solvent that makes the wash faster drying (get thee to an arts and crafts store) so you can flip the different sides of the model up without having to wait too long. Because you've used a mix of different paints for your base coat, first give your model a light, overall spray of Testor's Dullcoat (clear flat laquer). This will protect the base paints from the solvent-based wash.

(2.) Drybrush. Use a Filbert style brush - a flat brush with a semicircular tip. I use an oil-based paint (like Model Master) that matches (or is close to) my base color, and lighten it with white (or other light color) artist oil rather than hobby paint (because artist oil prevents the mix from drying on the brush). Remove as much paint from your brush as you can by vigorously rubbing it on a piece of cloth or paper, and then lightly brush all the edges and raised details on your model. Go easy and don't overdo it (avoid a heavy application). If you want to, you can use this same mix and a detail brush to highlight tiny things like bolts and rivets.

(3.) Decals. I apply a little Future acrylic floor polish to the spots where I'm going to apply decals (the clear decal film will end up looking fogged if applied directly on flat paint). Be sure to use a decal solvent.

(4.) Weathering. Unless you're making a diorama or displaying your model on a landscaped base, I don't see the point of fully weathering a model. But this is 100% a matter of personal taste. I usually limit my weathering to minor things like exhaust stains, a rust wash on tracks, and replicating bare metal on tread teeth and sprockets.

(5.) Finish with a light, overall spray of Testors Dullcote. A heavy application will dry with a sheen. Multiple applications will dry with more and more sheen. This is because repeated coats fill in all the pores of your flat finish - the very thing that makes a finish look flat. Remember that some armor, especially modern subjects, have a semi-gloss finish (so multiple coats of Dullcote might be just the thing).

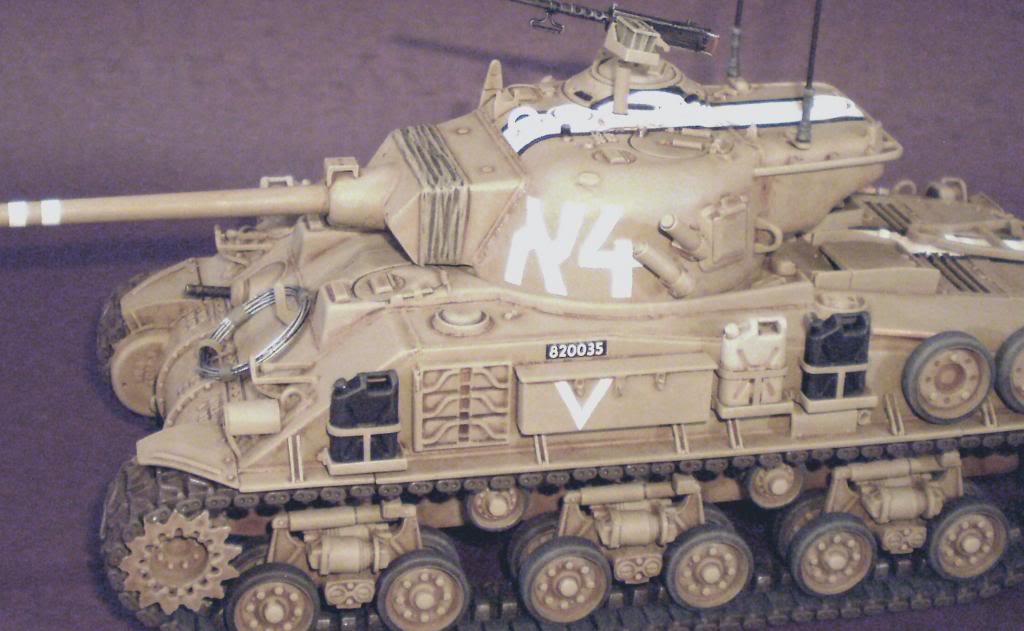
There are other techniques you can use (dot filters, pre-shading, post-shading, color modulation), and you might want try them to see what you enjoy. But I think my very basic method is a good way to start, even if it doesn't end up being your favorite method. Here's a finished example (in this case, because desert sand was the base color, my pin wash was four parts burnt umber and one part black):
"A little more persistence, a little more effort, and what seemed hopeless failure may turn to glorious success" - Elbert Hubbard

"Perfect is the enemy of good" - attributed to Voltaire

  • Member since
    December 2002
  • From: Fort Knox
Posted by Rob Gronovius on Monday, October 2, 2017 11:48 AM

It looks like a solid build. I would lean towards browns and earth tones for the tracks. The light gray seems too bright and uniform. While this is a restored museum tank, you can see some variation in the tracks with the rubber portions and metal portions and how they take on earth tones vs. just gray. The stored track grousers on the turret are restored to black; that's the original tacky preservative coating put on many tracks from the manufacturer. After usage, the coating would wear off and they would gain a rust color similar to bulldozer tracks. Remember, these are similar to tire chains used in the winter and get a little rusty.

There are also variations in vehicle tools like the shovel and pick axe handle. Sometimes they are left in natural wood, other times they are painted black or green. It just gives some visual variations.

  • Member since
    April 2015
Posted by Mopar Madness on Monday, October 2, 2017 12:42 PM

I am relatively new on the armor seen too. I believe you picked the right manufacturer to begin your armor building endeavors.  Those Tamaya kits go together so well! It looks like you’re off to a good start. Have fun, looking forward to see your next project. Beer

Chad

God, Family, Models...

At the plate: 1/48 Airfix Bf109 & 1/35 Tamiya Famo

On deck: Who knows!

  • Member since
    September 2017
  • From: HTX
Posted by Kien on Monday, October 2, 2017 2:44 PM

In general, it is ideal to apply decals over a glossy surface, and then recover them with either a gloss cote or dull cote before weathering. This helps decals adhere to the surface, and also protect them during the weathering stages. 

For weathering, since you are new to armor, I would recommend starting off with a wash. Use an enamel wash, they are much better than acrylic (I use mig enamel washes now, which I find better than my other vallejo acrylic ones). When applying a pin wash with mig enamel washes around detail like bolts etc... you can remove excess with some enamel thinner, this helps avoid tide marks. 

Then after washes do some chipping around edges with either a steel paint (like a graphite pencil color) or you can chip using the base color of your model lightened with some white. 

Lastly some pigments can add a nice effect, dry dust or dirt pigments around the lower hull and around nooks and crannies is an easy way to show the vehicle in the field. 

When you get more comfortable with weathering, try out oil paints. They are great for streaking and color modulation. 

Kien


 Youtube Channel:                                                       https://www.youtube.com/channel/UCkcc2P3-PluSdehvVCEKLdw

  • Member since
    June 2017
Posted by jlee9 on Monday, October 23, 2017 1:18 AM

Good evening everyone,

So, in an update to what I've done in the last couple of weeks is the following:

1.  Tried putting on the decals, didn't work.  I bought this kit from a thrift store, so I'm assuming the kit was old and the decals simply fell apart in the water (I've done decals before, so I'm guessing it's the age).

2.  Did a pin wash.  My son helped and I think it turned out well.  I used brown mixed with black oil paints with some solvent.  Pretty straight forward and I think it came out well for my first try.

My next step will be to try chipping and then some dot filtering.  I've got a lot to work on in my assembly and painting steps, but I'm very excited to try.  Any tips or advice would be great.


Thanks,
Jo

  • Member since
    December 2010
  • From: Salem, Oregon
Posted by 1943Mike on Monday, October 23, 2017 5:26 PM

Joe,

I'm building my first armor kit just now so most of the threads I see on this site are of interest to me - certainly yours is. However I don't see any pictures on your last post - just circles with a white bar in the middle and a white stripe around the inside circumfrence of the roundel. Would it be too much to ask to repost the images? And if you do, would you be kind enough to make the images a bit larger?

What I see from your first post is that you have talent and you've obviously some interest in armor. I'd love to see more of what you're doing.

Mike

"Le temps est un grand maître, mais malheureusement, il tue tous ses élèves."

Hector Berlioz

  • Member since
    June 2017
Posted by jlee9 on Monday, October 23, 2017 10:06 PM

Hi Mike, 

did the one above work?  If it does, I'll add the rest, if it doesn't I'll have to figue another way.  I can see the pics on my end, let me know.

  • Member since
    November 2009
  • From: SW Virginia
Posted by Gamera on Monday, October 23, 2017 11:25 PM

Great advice from the guys. All I can add is don't be afraid to mess around, play with different techniques, and experiment. There are several guys here that go with 'realistic' paint schemes that are pretty straight forward and then there are others like The Doog that go with an 'artistic' technique. I've been going sorta down the middle. Just try things different ways and come up with a solution that works for you.  If you don't like the looks of the finished product you can always just paint over it, strip it and repaint or if you going with cheaper kits like the vintage Tamiya just break it down for spare parts.

"I dream in fire but work in clay." -Arthur Machen


  • Member since
    September 2016
  • From: Albany, New York
Posted by ManCityFan on Tuesday, October 24, 2017 9:33 AM

jlee9

Hi Mike, 

did the one above work?  If it does, I'll add the rest, if it doesn't I'll have to figue another way.  I can see the pics on my end, let me know.


The pic isn't showing on my work computer.  But the earliest pics you posted are showing.

Dwayne or Dman or just D.  All comments are welcome on my builds. 

  • Member since
    December 2010
  • From: Salem, Oregon
Posted by 1943Mike on Tuesday, October 24, 2017 2:43 PM

Joe, Sorry, still not seeing anything but circles. However, what Dwayne said is true for me also. Your first post I see fine.

Mike

"Le temps est un grand maître, mais malheureusement, il tue tous ses élèves."

Hector Berlioz

JOIN OUR COMMUNITY!

Our community is FREE to join. To participate you must either login or register for an account.

SEARCH FORUMS
FREE NEWSLETTER
By signing up you may also receive reader surveys and occasional special offers. We do not sell, rent or trade our email lists. View our Privacy Policy.