SEARCH FINESCALE.COM

Enter keywords or a search phrase below:

[WIP] Fujimi 1:76 Tiger II (76001)

2201 views
12 replies
1 rating 2 rating 3 rating 4 rating 5 rating
  • Member since
    August 2016
[WIP] Fujimi 1:76 Tiger II (76001)
Posted by scaler on Wednesday, April 22, 2020 9:57 PM

Hello,

This is going to be my first "serious" build. I bought this kit almost 20 years ago and put it together back then, but then abandoned it.
 
Box art
 
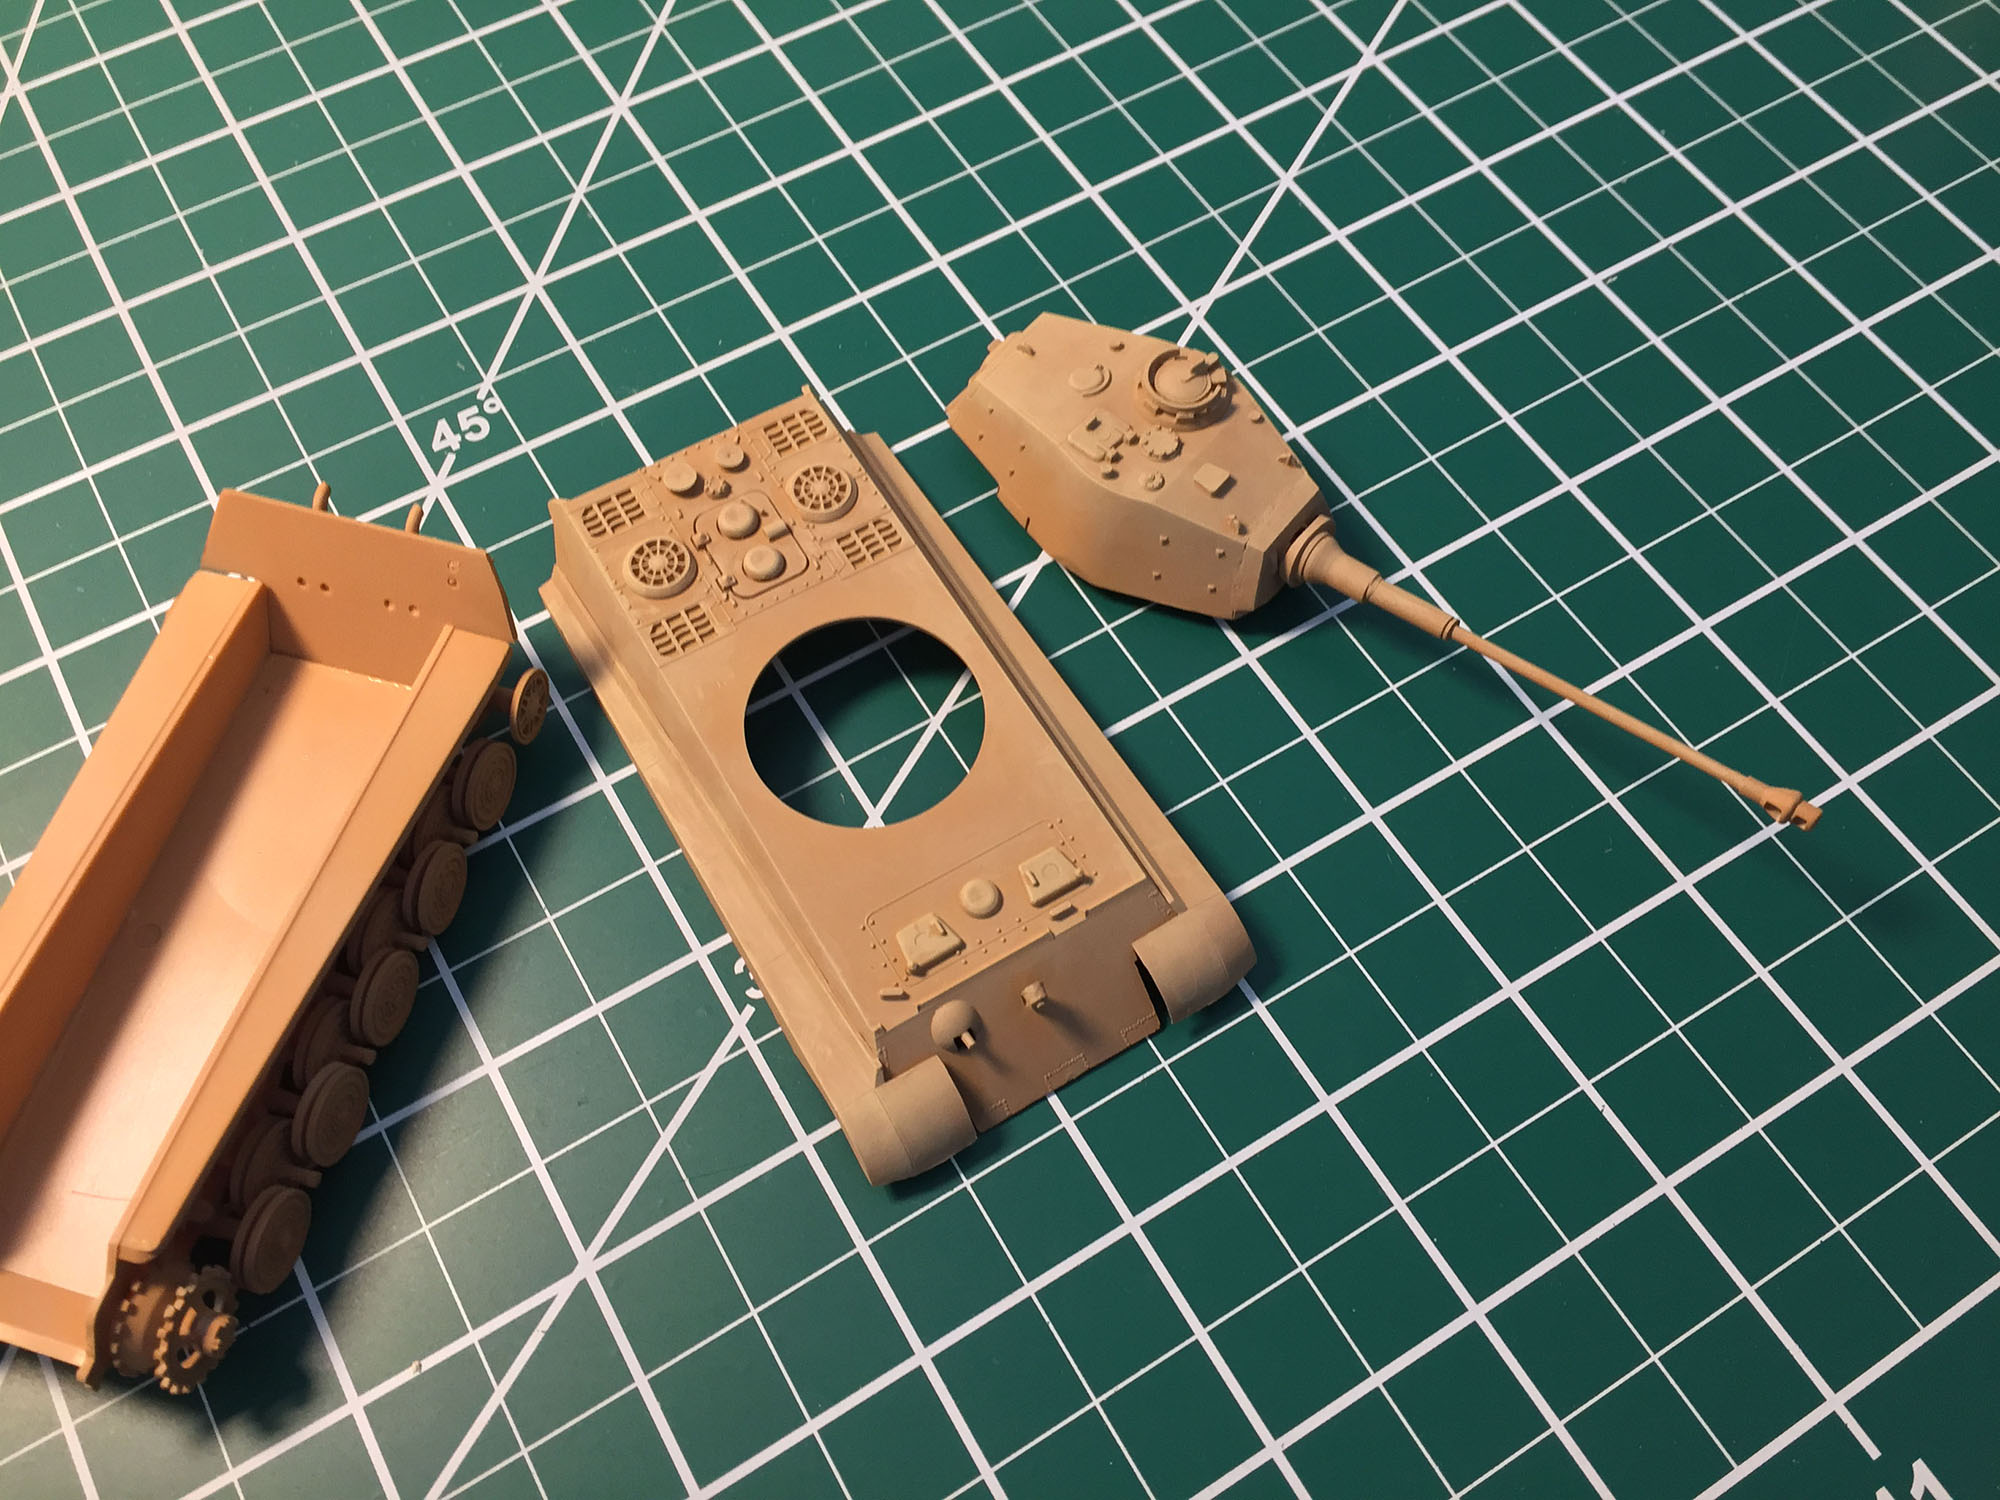
This kit was made in Japan; it is rather simple, yet well detailed. It consists of only 30+ parts and 44 wheel parts. There is also a little figurine included. No accessories are supplied with this kit, however.
 
My goal is to paint and finish this kit. For simplicity, I am going to skip doing anything advanced, such as adding Zimmerit, altering any of the components or obtaining and using aftermarket parts. I will, however, try to scratch-build a shovel, towing cables and crank handle later on.
 
Any comments and suggestions would be appreciated, even if you happen to find my approach utterly blameful. Embarrassed
 
First, I airbrushed the plastic assembly and both vinyl tracks with Tamiya Liquid Primer (not shown), then applied base coats – XF-59 Desert Yellow and XF-1 Flat Black respectively. Everything was diluted with Pactra RC95 Lacquer Thinner, designed for polycarbonate parts. That turned out just fine, from what I can tell, resulting in some nice hard coating:
 
Base coats

I then tried to apply some initial highlights to the body and turret. (Is that what they call "color modulation"?) I decided to do that freehand, using Citadel Morghast Bone (base) paint I had laying around. It turned out to be way more subtle than I intended, but what the heck. You gotta start somewhere!

Highlights

Next: Apply camouflage and weather the tracks. Smile
Some think this is actually fun!
  • Member since
    August 2016
Posted by scaler on Wednesday, April 22, 2020 10:15 PM

First serious mistake: It turned out that I assembled both driving sprockets incorrectly when I was putting the kit together all those years back! The outer halves were meant to be installed facing the other way. It is now hard to imagine that I didn’t even bother to dry fit the tracks back then, and only now tried to do so! I am only glad that I found out this now, before the tank has been nearly finished or even glued together.

Luckily, I didn’t glue the sprocket halves together back then, but now both wheel shafts are ruined. They are both 1.5 mm in diameter. The styrene rods that I have laying around are way too soft to be used as the new shafts, so I will have to come up with something else. Technically, the sprockets do not have be movable, so I have some flexibility in that area.

Broken shafts

Hmm

Some think this is actually fun!
  • Member since
    December 2002
  • From: Fort Knox
Posted by Rob Gronovius on Thursday, April 23, 2020 12:01 PM

Is this the version with an interior? I know Fujimi also too over Nitto molds and with their full interiors. Many times the interiors would not fit inside the kit with the hull attached. It usually required some trimming of the bulkhead walls.

A lot of time these older kits' vinyl tracks will not fit along the suspension. They could be too tight or too loose. You've often got to adjust the sprocket or idler wheel to add slack or tighten the tracks. Do this by relocating the idler or sprocket inwards or outwards depending on whether you need to loosen or tighten.

  • Member since
    August 2016
Posted by scaler on Thursday, April 23, 2020 12:06 PM

There is no interior; this is a rather basic kit.

Thank you for the warning. I am not sure how much room I have to adjust the sprockets or idler wheels. From what I can tell, the tracks are going to be pretty tight, with no slack at the top.


Some think this is actually fun!
  • Member since
    November 2009
  • From: SW Virginia
Posted by Gamera on Thursday, April 23, 2020 12:38 PM

The paint looks good. As you say just cementing the drive spockets in place should care of the problem. If nothing else the skirts will cover a lot of problems here. 

"I dream in fire but work in clay." -Arthur Machen


  • Member since
    August 2016
Posted by scaler on Friday, May 8, 2020 6:33 PM

Sorry, I had to put this activity on hold, but now I got back to it.

Both sprockects have been repaired. I used pieces of styrene tubing to reinforce the joins, and I saved the wheel hubs:

Repair


I then painted the camouflage. Not sure whether I like the colors, they seem a bit too dark; I used the Normandy front paint scheme suggested by Fujimi: Gunze H17 Cocoa Brown and H73 Dark Green, which cross reference to Tamiya XF-64 Red Brown and XF-61 Dark Green. I used a thin paintbrush, and it took me quite a while. I did not apply camouflage to the wheels, though:


Camo


Now I would like to ask for some advice on how to proceed. I plan to apply Testors Glosscote finish first and then do the decals and weathering (dry-brushing, chipping, pigments...). Then apply Dullcote. Yet I would like to get some input first. Is that a feasible approach?

Thank you!

Some think this is actually fun!
  • Member since
    January 2015
  • From: Tumwater, WA.
Posted by M. Brindos on Saturday, May 9, 2020 2:06 PM

Sounds like a solid plan.

The subtle modulation is perfect. Everyone has their own prefernces for how light or heavy that effect is. I prefer light modulation to help trick the eyes into seeing the curves and angles better while keeping the overall tone.

You can use that effect best on solid paint schemes. 

I've got an old fujimi 1/76 "Battle Set" with a Matilda, an 88, and some little figures. I'm still working on the Matilda.

These Fujimi kits are neat, but I'm not digging the tracks.

- Mike Brindos "Lost Boy"

  • Member since
    August 2016
Posted by scaler on Thursday, May 21, 2020 7:19 PM

Update:

- Applied a bit of sand-colored mist from the top

- Airbrushed Pledge/Future

- Applied decals. The yellow regiment and tactical marks on the front panel are barely visible. Should have used dark background for those Tongue Tied

- Sealed decals with Future


Decals


- Washed the whole thing, using Winsor & Newton 'Winton' oils and mineral spirit. (Ivory Black/Burnt Umber/Raw Sienna). A bit too heavy for my taste, but the coarse pigments in these oils helped add a little grime:


Wash


Next: add chipping, weather tracks.

Any feedback would be welcome. This is my first attempt at building a model "a proper way."  Thanks!

Tags: Wash , decal , oil
Some think this is actually fun!
  • Member since
    November 2008
  • From: Central Florida
Posted by plasticjunkie on Friday, May 22, 2020 8:40 AM

You are doing a great job on this little fellow.

The good thing about using oils is that you can come back and adjust things here and there. You can drag a flat brush mointened in thinner and drag it down to reproduce rain and streak marks. You want to get a subtle effect and nothing stark. The brush needs to be damp to get tonal effects.   

As for track sag, you can drill into the the side hull and strategically place pins to produce the slack on the rubber band tracks. The pins will hold the rubber tracks down and will be hidden with some weathering pigments.

 GIFMaker.org_jy_Ayj_O


Too many models to build, not enough time in a lifetime!!

  • Member since
    November 2009
  • From: SW Virginia
Posted by Gamera on Friday, May 22, 2020 8:48 AM

The camo does look really good! 

I agree with PJ here, probably the easiest and best way to keep the rubber tracks down is simply to drill a couple of holes in the side of the tank and stick wire in there to hold them down. Straightened paper clips are cheap and easy to find.

"I dream in fire but work in clay." -Arthur Machen


  • Member since
    August 2016
Posted by scaler on Friday, June 5, 2020 1:10 PM

plasticjunkie
As for track sag, you can drill into the the side hull and strategically place pins to produce the slack on the rubber band tracks. The pins will hold the rubber tracks down and will be hidden with some weathering pigments.

That's a great idea, although I am worried that the idler wheels are way too fragile to withstand any additional tension. They will have to be removed and reinforced, similarly to what I've done to the sprockets. The tracks are pretty tight already, to the point that it is pretty hard to put them on.

Some think this is actually fun!
  • Member since
    August 2016
Posted by scaler on Monday, June 8, 2020 11:33 PM

Added chipping using Tamiya XF-63 German Grey and a bit of red pigment:

Chipping


Added streaks using Burnt Umber oil and mineral spirit:

Streaks 

Next: weather the tracks, wheels and hull/turret with pigments.

Not sure what to set the pigments with, though. I tried mineral spirit, but that doesn't seem to hold. Any suggestions?

Some think this is actually fun!
  • Member since
    January 2015
  • From: Tumwater, WA.
Posted by M. Brindos on Tuesday, June 9, 2020 5:22 AM

scaler

Added chipping using Tamiya XF-63 German Grey and a bit of red pigment:

Chipping


Added streaks using Burnt Umber oil and mineral spirit:

Streaks


Next: weather the tracks, wheels and hull/turret with pigments.

Not sure what to set the pigments with, though. I tried mineral spirit, but that doesn't seem to hold. Any suggestions?


Diluted Elmer's white glue will bind the pigments. Just make a wash with it.

- Mike Brindos "Lost Boy"

JOIN OUR COMMUNITY!

Our community is FREE to join. To participate you must either login or register for an account.

SEARCH FORUMS
FREE NEWSLETTER
By signing up you may also receive reader surveys and occasional special offers. We do not sell, rent or trade our email lists. View our Privacy Policy.