SEARCH FINESCALE.COM

Enter keywords or a search phrase below:

Tamiya M3 Lee

4189 views
18 replies
1 rating 2 rating 3 rating 4 rating 5 rating
  • Member since
    September 2006
  • From: Dripping Springs, TX, USA
Tamiya M3 Lee
Posted by RBaer on Sunday, February 14, 2021 1:27 PM

Since my local hobby guy has closed back up (Covid) and I can't browse, and I've wanted to do a Takom Lee for while, this was the next best thing. Plus, I have a bunch of Sherman parts handy right now, and I had the Lee kit still in the wrap with a $9 price tag on it, from a show purchase who knows how long ago. Like a lot of people, I've built this kit several times already, and in fact have a couple down in the bottom the my small display case that I did as painting exercises, with the rear hull "corrected" somewhat. But this time, I'm going to try and fix as much as I can and do it before King's opens back up and I buy a Takom kit. So far I have the lower hull well along using road wheels from Tamiya's M4 "early" kit, Tasca sprockets and tracks and a 75 mm barrel from RB. I found a turret on Ebay (Panzer Art) pretty cheap so it's on, and I've used a rear hull plate from Italeri and bits and pieces from whatever box is open in front of me.

 IMG_6850 by Russel Baer, on Flickr

 IMG_6851 by Russel Baer, on Flickr

I also have some Eduard PE just for fun.

Apprentice rivet counter.

  • Member since
    November 2009
  • From: SW Virginia
Posted by Gamera on Sunday, February 14, 2021 5:42 PM

Cool, love the Shermans and nice seeing a Lee join them. Yes

"I dream in fire but work in clay." -Arthur Machen


  • Member since
    July 2004
  • From: Sonora Desert
Posted by stikpusher on Sunday, February 14, 2021 6:54 PM

I like it! Youre giving this kit just what it needs. Yes 


F is for FIRE, That burns down the whole town!

U is for URANIUM... BOMBS!

N is for NO SURVIVORS...

       - Plankton

LSM


  • Member since
    December 2002
  • From: Fort Knox
Posted by Rob Gronovius on Monday, February 15, 2021 12:49 PM

Doing anything to the Tamiya Grant or Lee is considered a "labor of love."

Awesome kits back in the day, but better versions are available for the cost of plus ups added to the old kits.

But, if you got it, build it with what you have on hand! Hat's off to you; it's looking good.

  • Member since
    September 2005
  • From: Groton, CT
Posted by warshipguy on Monday, February 15, 2021 6:55 PM

Looking GREAT!

Bill

  • Member since
    May 2011
  • From: Honolulu, Hawaii
Posted by Real G on Tuesday, February 16, 2021 11:07 AM

What an inspiring build of that old horse!  I'm bulding the same kit, sans corrections.  I did fall into the aftermarket trap though, when I bought tracks and suspension kits.  The tracks have stalled me, as they are a pig to assemble.  Looking forward to seeing your build up!

“Ya ya ya, unicorn papoi!”

  • Member since
    August 2020
  • From: Lakes Entrance, Victoria, Australia.
Posted by Dodgy on Tuesday, February 16, 2021 5:22 PM

Love your work RB. I have the old Academy version with interior. I'm not very familiar with Shermans or Lee/Grants, so I've no idea how good the kit is, but whatever I do, I doubt that its going to come close to your standards.

I long to live in a world where chickens can cross the road without having their motives questioned

  • Member since
    February 2011
Posted by GreySnake on Saturday, February 20, 2021 2:41 PM
Looking great!
  • Member since
    September 2006
  • From: Dripping Springs, TX, USA
Posted by RBaer on Saturday, February 20, 2021 4:35 PM

Well, goll-ee! Thanks all. I admit to having a soft spot for the kits I built as a kid, or some of them anyway. I built a Monogram M4A1 a couple of years ago, just for the sheer "fun" of it, ended up giving it to a neighbor's kid who actually put it on a sheld without "field testing" it. Anyway, I'm having fun, and of course I'll probably go buy one of the Takom kits before I finish this, but it's all for fun, right?

I forgot to post this pic of the underside earlier, which is just some basic corrections since Tamiya Kitted the M3A5, which I may build later if I can score another one of these kits as cheap as I got this one for.
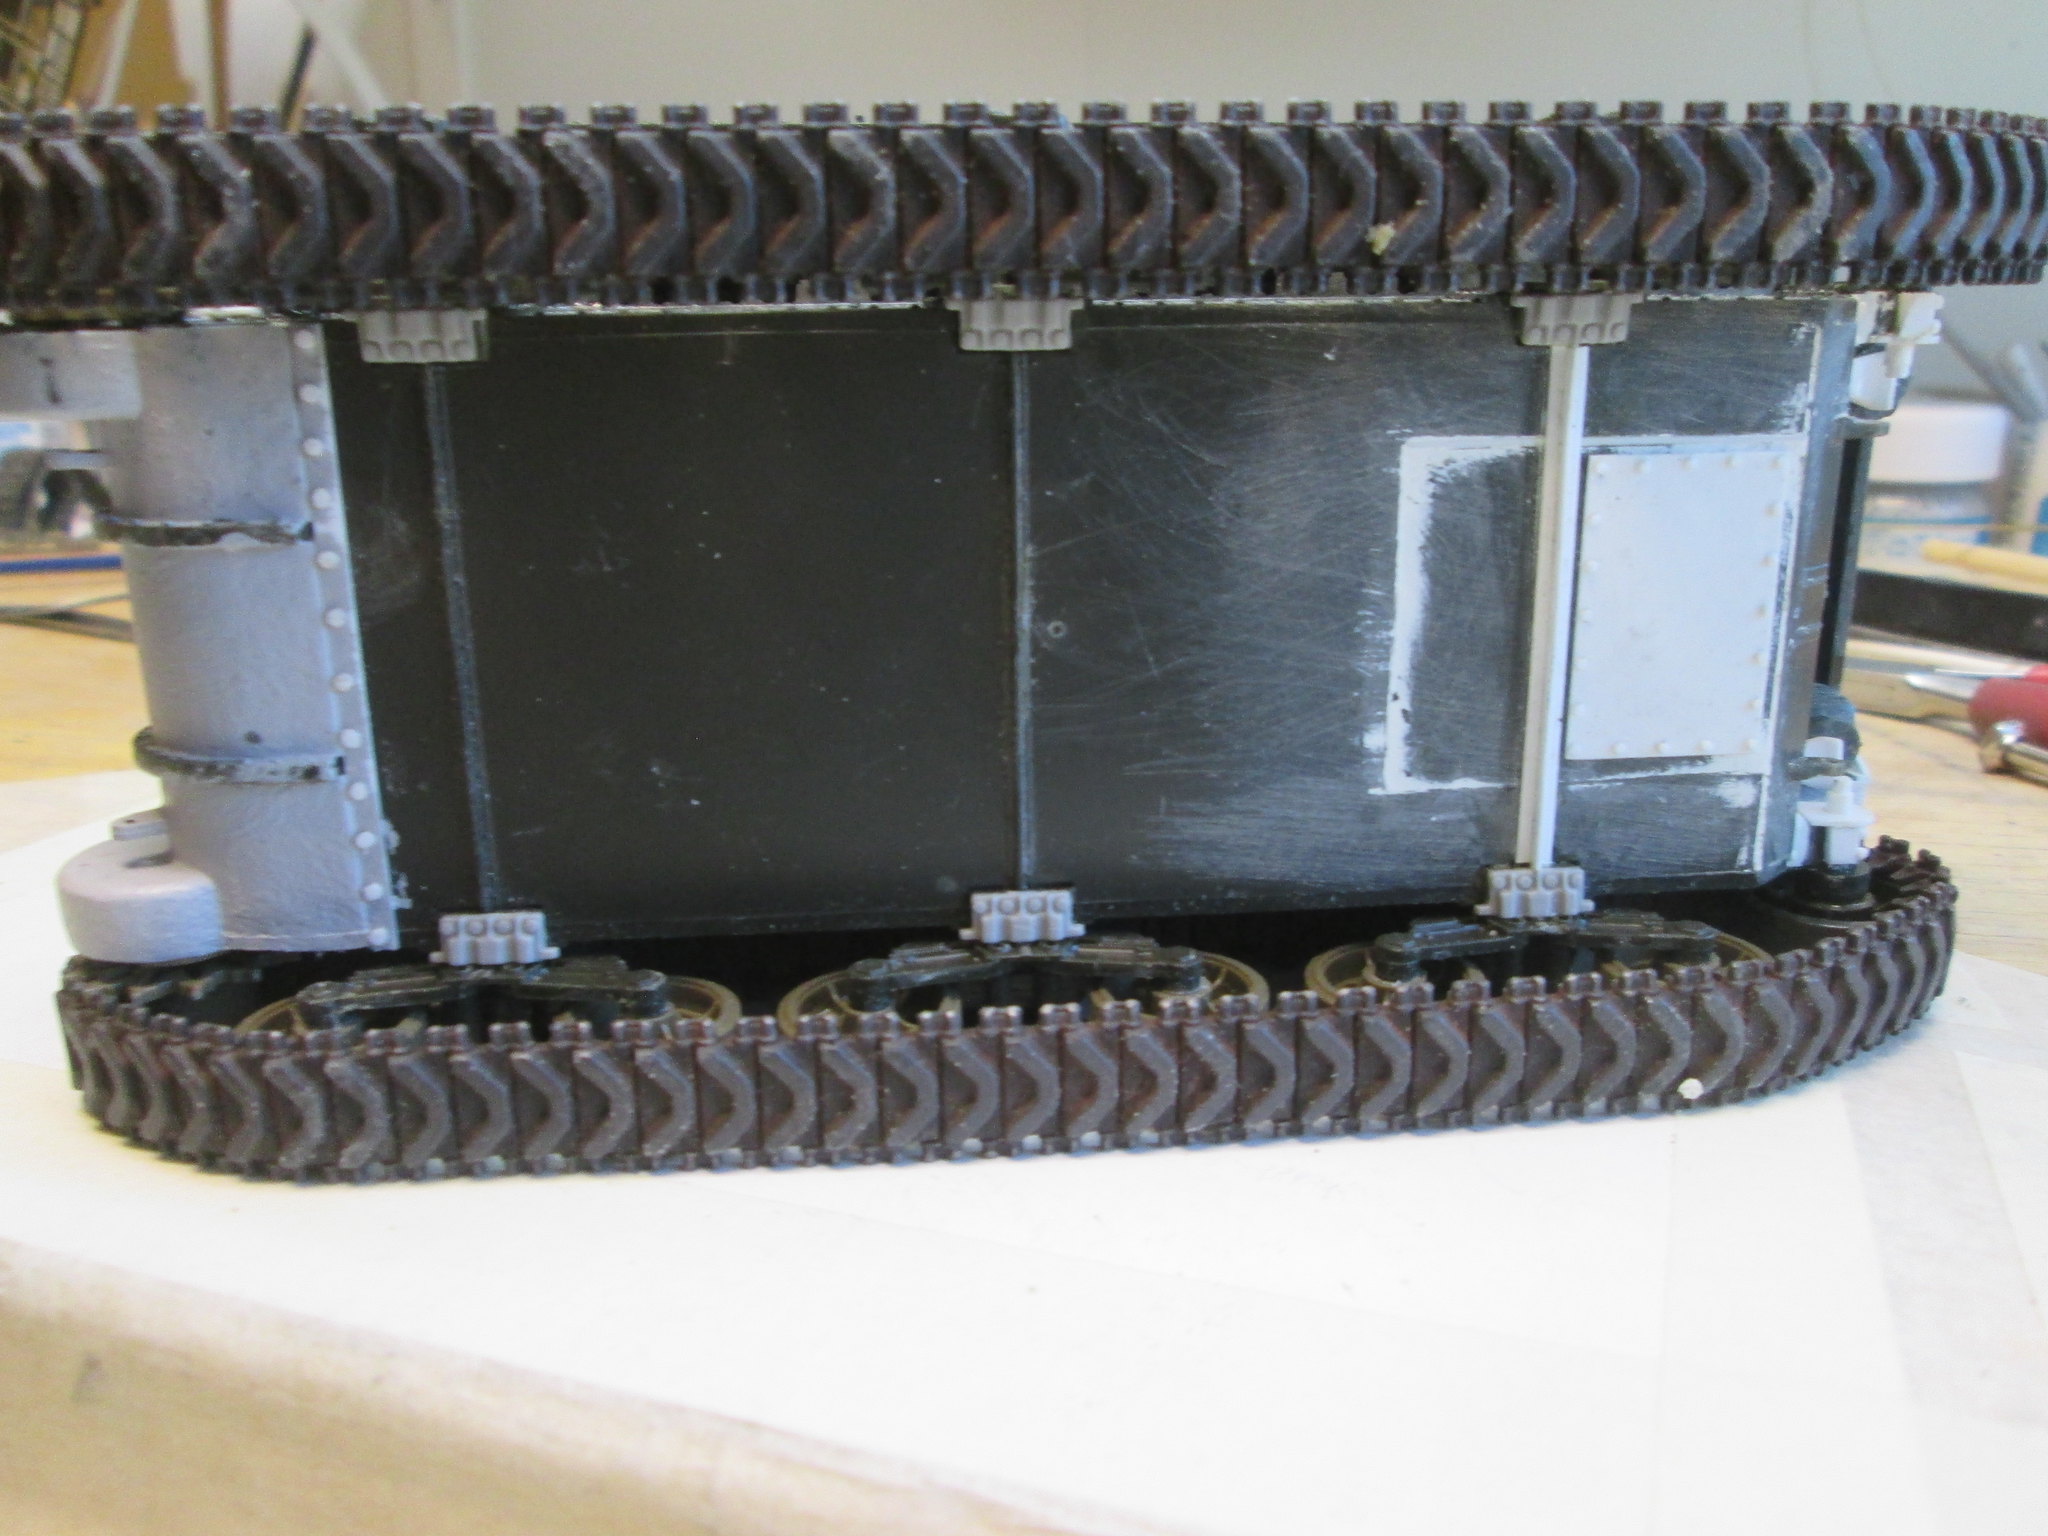
 IMG_6869 by Russel Baer, on Flickr

And then there's the rear deck. I did buy the "new" Eduard PE set, and I'm doing my level best to use most of it. This is one area where the kit really shows it's age, with huge locating pins and some really chunky details. The shovel is Dragon, the pry bar brass tube. Under the engine air intake, I just carved out the kit's plastic mesh and painted the recessed area flat black, which saved me having to "represent" the top of the engine and other stuff.

 IMG_6867 by Russel Baer, on Flickr

On the front, I'm using lots more PE than my usual, but again, it's so much better than the kit parts. Pick head is Dragon, wire cutters from the kit with the mounts carved off.

 IMG_6868 by Russel Baer, on Flickr

And yes, I used up an hour of my life wiring the head lights and siren, but what the heck, I'm in this far.....

Apprentice rivet counter.

  • Member since
    September 2006
  • From: Dripping Springs, TX, USA
Posted by RBaer on Sunday, February 28, 2021 9:07 AM

Counting rivets.....

 IMG_7140 by Russel Baer, on Flickr

And adding very small weld beads to the tool boxes:

 IMG_7143 by Russel Baer, on Flickr

I'm expecting another M3 book soon, who knows what I'll find, but I did add a turret splash ring from steam-curled plastic stock, along with welds, too much fun.


Apprentice rivet counter.

  • Member since
    November 2009
  • From: SW Virginia
Posted by Gamera on Thursday, March 4, 2021 11:40 AM

You're doing a great job on that grand old kit. 

"I dream in fire but work in clay." -Arthur Machen


  • Member since
    September 2006
  • From: Dripping Springs, TX, USA
Posted by RBaer on Thursday, March 4, 2021 5:01 PM

Thanks! I realize it's not going to be super accurate, but I'm enjoying the process. Maybe I'm losing it, but I thought about correcting the size of the rivets, slapped myself, and moved on.

Apprentice rivet counter.

  • Member since
    September 2006
  • From: Dripping Springs, TX, USA
Posted by RBaer on Friday, March 12, 2021 3:47 PM

Redy for paint:

 IMG_8046 by Russel Baer, on Flickr

 IMG_8044 by Russel Baer, on Flickr

 IMG_8045 by Russel Baer, on Flickr

I'm accumulating a few that are "ready for paint".

Apprentice rivet counter.

  • Member since
    February 2011
Posted by GreySnake on Saturday, March 13, 2021 5:18 PM
Very nice work, you’ve really improved the old Tamiya kit.
  • Member since
    September 2006
  • From: Dripping Springs, TX, USA
Posted by RBaer on Tuesday, April 13, 2021 3:44 PM

Thanks!

And at long last, paint:

 IMG_8914 by Russel Baer, on Flickr

I used Vallejo US OD in the can, good stuff, dries quick, flat and thin. I really don't care about the flat so much since I'll have to gloss coat it before decals, but the same in the can Valljo clear flat is really, really flat too.

Apprentice rivet counter.

  • Member since
    January 2015
  • From: Tumwater, WA.
Posted by M. Brindos on Tuesday, April 13, 2021 4:24 PM

It's awesome to see an old kit like this get some much needed attention to the details. She looks amazing.

- Mike Brindos "Lost Boy"

  • Member since
    September 2005
  • From: North Pole, Alaska
Posted by richs26 on Wednesday, April 14, 2021 12:43 PM

Excellent work on the M3, but I have one question:  how do you plan on painting the rubber on the roadwheels?

WIP:  Monogram 1/72 B-26 (Snaptite) as 73rd BS B-26, 40-1408, torpedo bomber attempt on Ryujo

Monogram 1/72 B-26 (Snaptite) as 22nd BG B-26, 7-Mile Drome, New Guinea

Minicraft 1/72 B-24D as LB-30, AL-613, "Tough Boy", 28th Composite Group

  • Member since
    November 2009
  • From: SW Virginia
Posted by Gamera on Thursday, April 15, 2021 11:36 AM

She looks great in paint! Yes

"I dream in fire but work in clay." -Arthur Machen


  • Member since
    September 2006
  • From: Dripping Springs, TX, USA
Posted by RBaer on Friday, April 16, 2021 11:09 AM

richs26

Excellent work on the M3, but I have one question:  how do you plan on painting the rubber on the roadwheels?


I do it with a brush, done now actually. I got seriious the other day, did this one, two HVSS and two VVSS Shermans all at once. Tedious but not hard.

Apprentice rivet counter.

JOIN OUR COMMUNITY!

Our community is FREE to join. To participate you must either login or register for an account.

SEARCH FORUMS
FREE NEWSLETTER
By signing up you may also receive reader surveys and occasional special offers. We do not sell, rent or trade our email lists. View our Privacy Policy.