SEARCH FINESCALE.COM

Enter keywords or a search phrase below:

Amusing Hobby Sho't Kal Aleph

4269 views
23 replies
1 rating 2 rating 3 rating 4 rating 5 rating
  • Member since
    September 2006
  • From: Dripping Springs, TX, USA
Amusing Hobby Sho't Kal Aleph
Posted by RBaer on Thursday, August 17, 2023 6:03 PM

Different in that it's not based on anything US, but same since it's IDF, so almost something different for me. It's this kit:

 IMG_4001 by Russel Baer, on Flickr

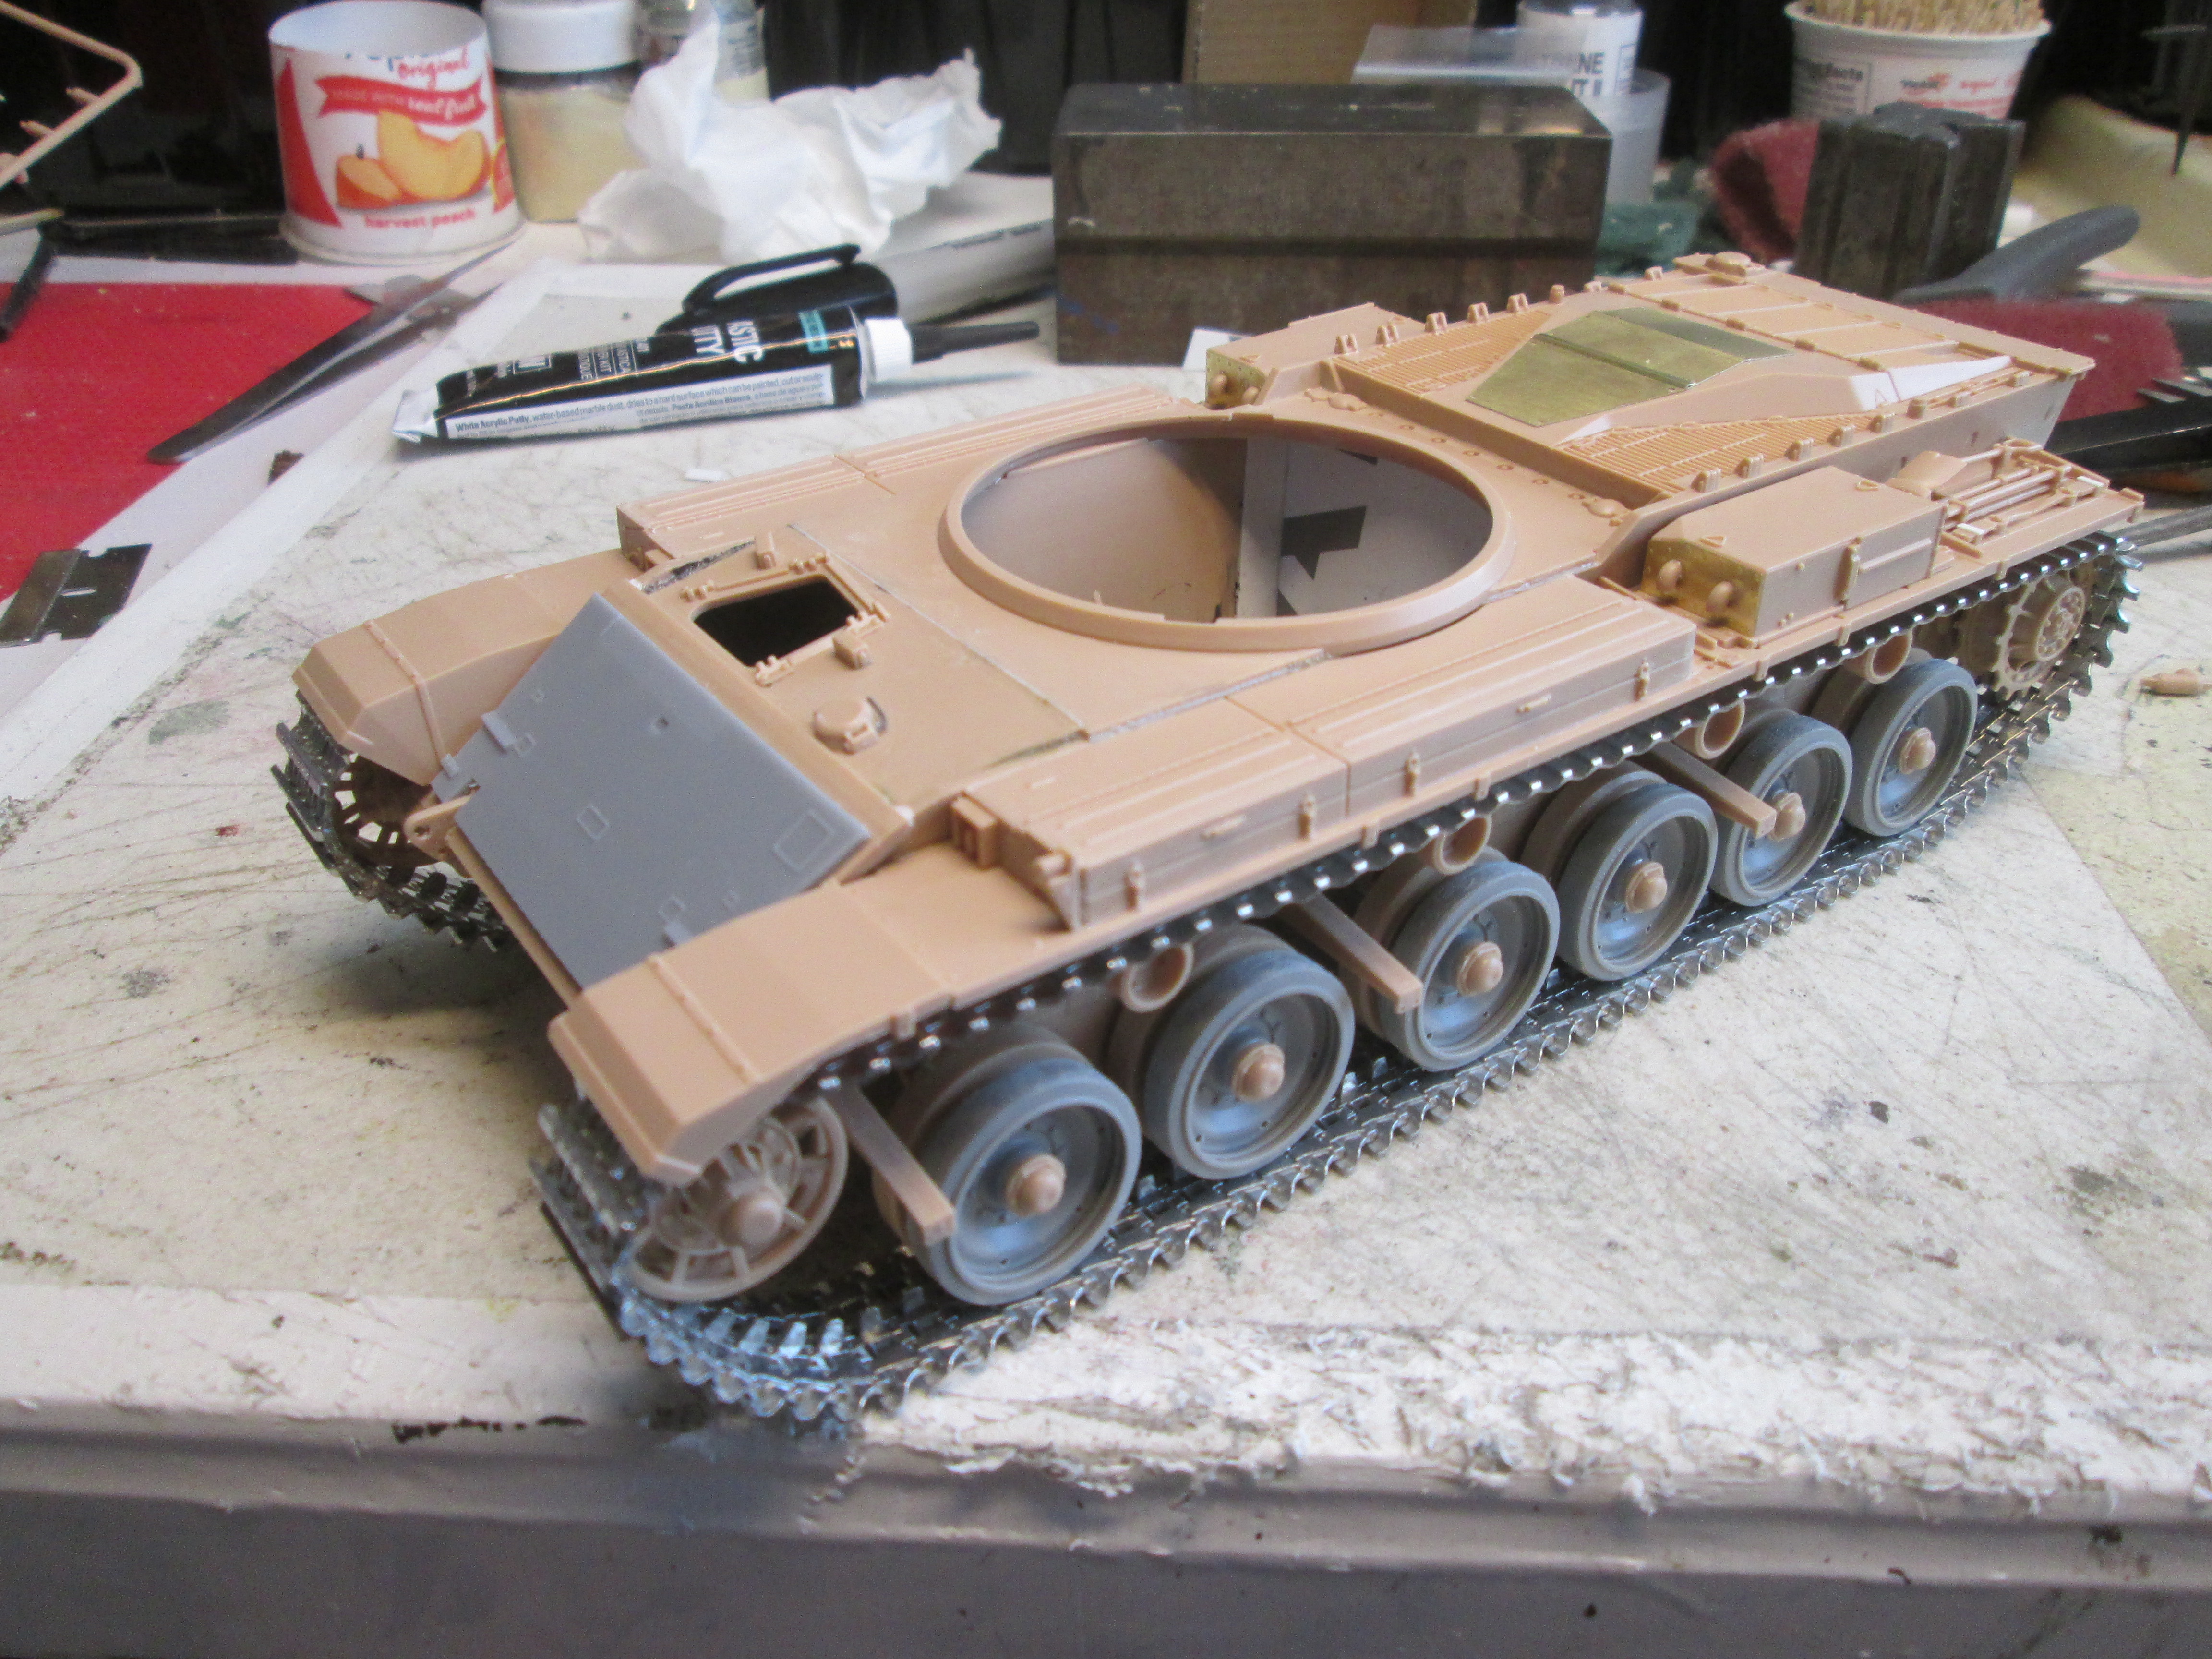
I bought it last winter in KC and have kind of been anxious to get into it. I also bought San Xin tracks and a DEF Models canvas covered mantlet, so last week I jumped in. First thing, AM (Amusing Hobby) doesn't do the reinforcing ribs on the inside of the road wheel rims. I tried doing one myself and it came out okay, but then I remembered the Takom Chieftain Marksman kit I bought a while ago just for the turret. It was a lot easier to use the Takom wheels, so I did, leaving the one AM wheel on because I seem to have lost one of the Takom wheels. I give up.

After that it's just a matter of assembly, the hull going together nicely including the included 3D printed glacis armor. I just added welds from stretched sprue.

 IMG_4012 by Russel Baer, on Flickr

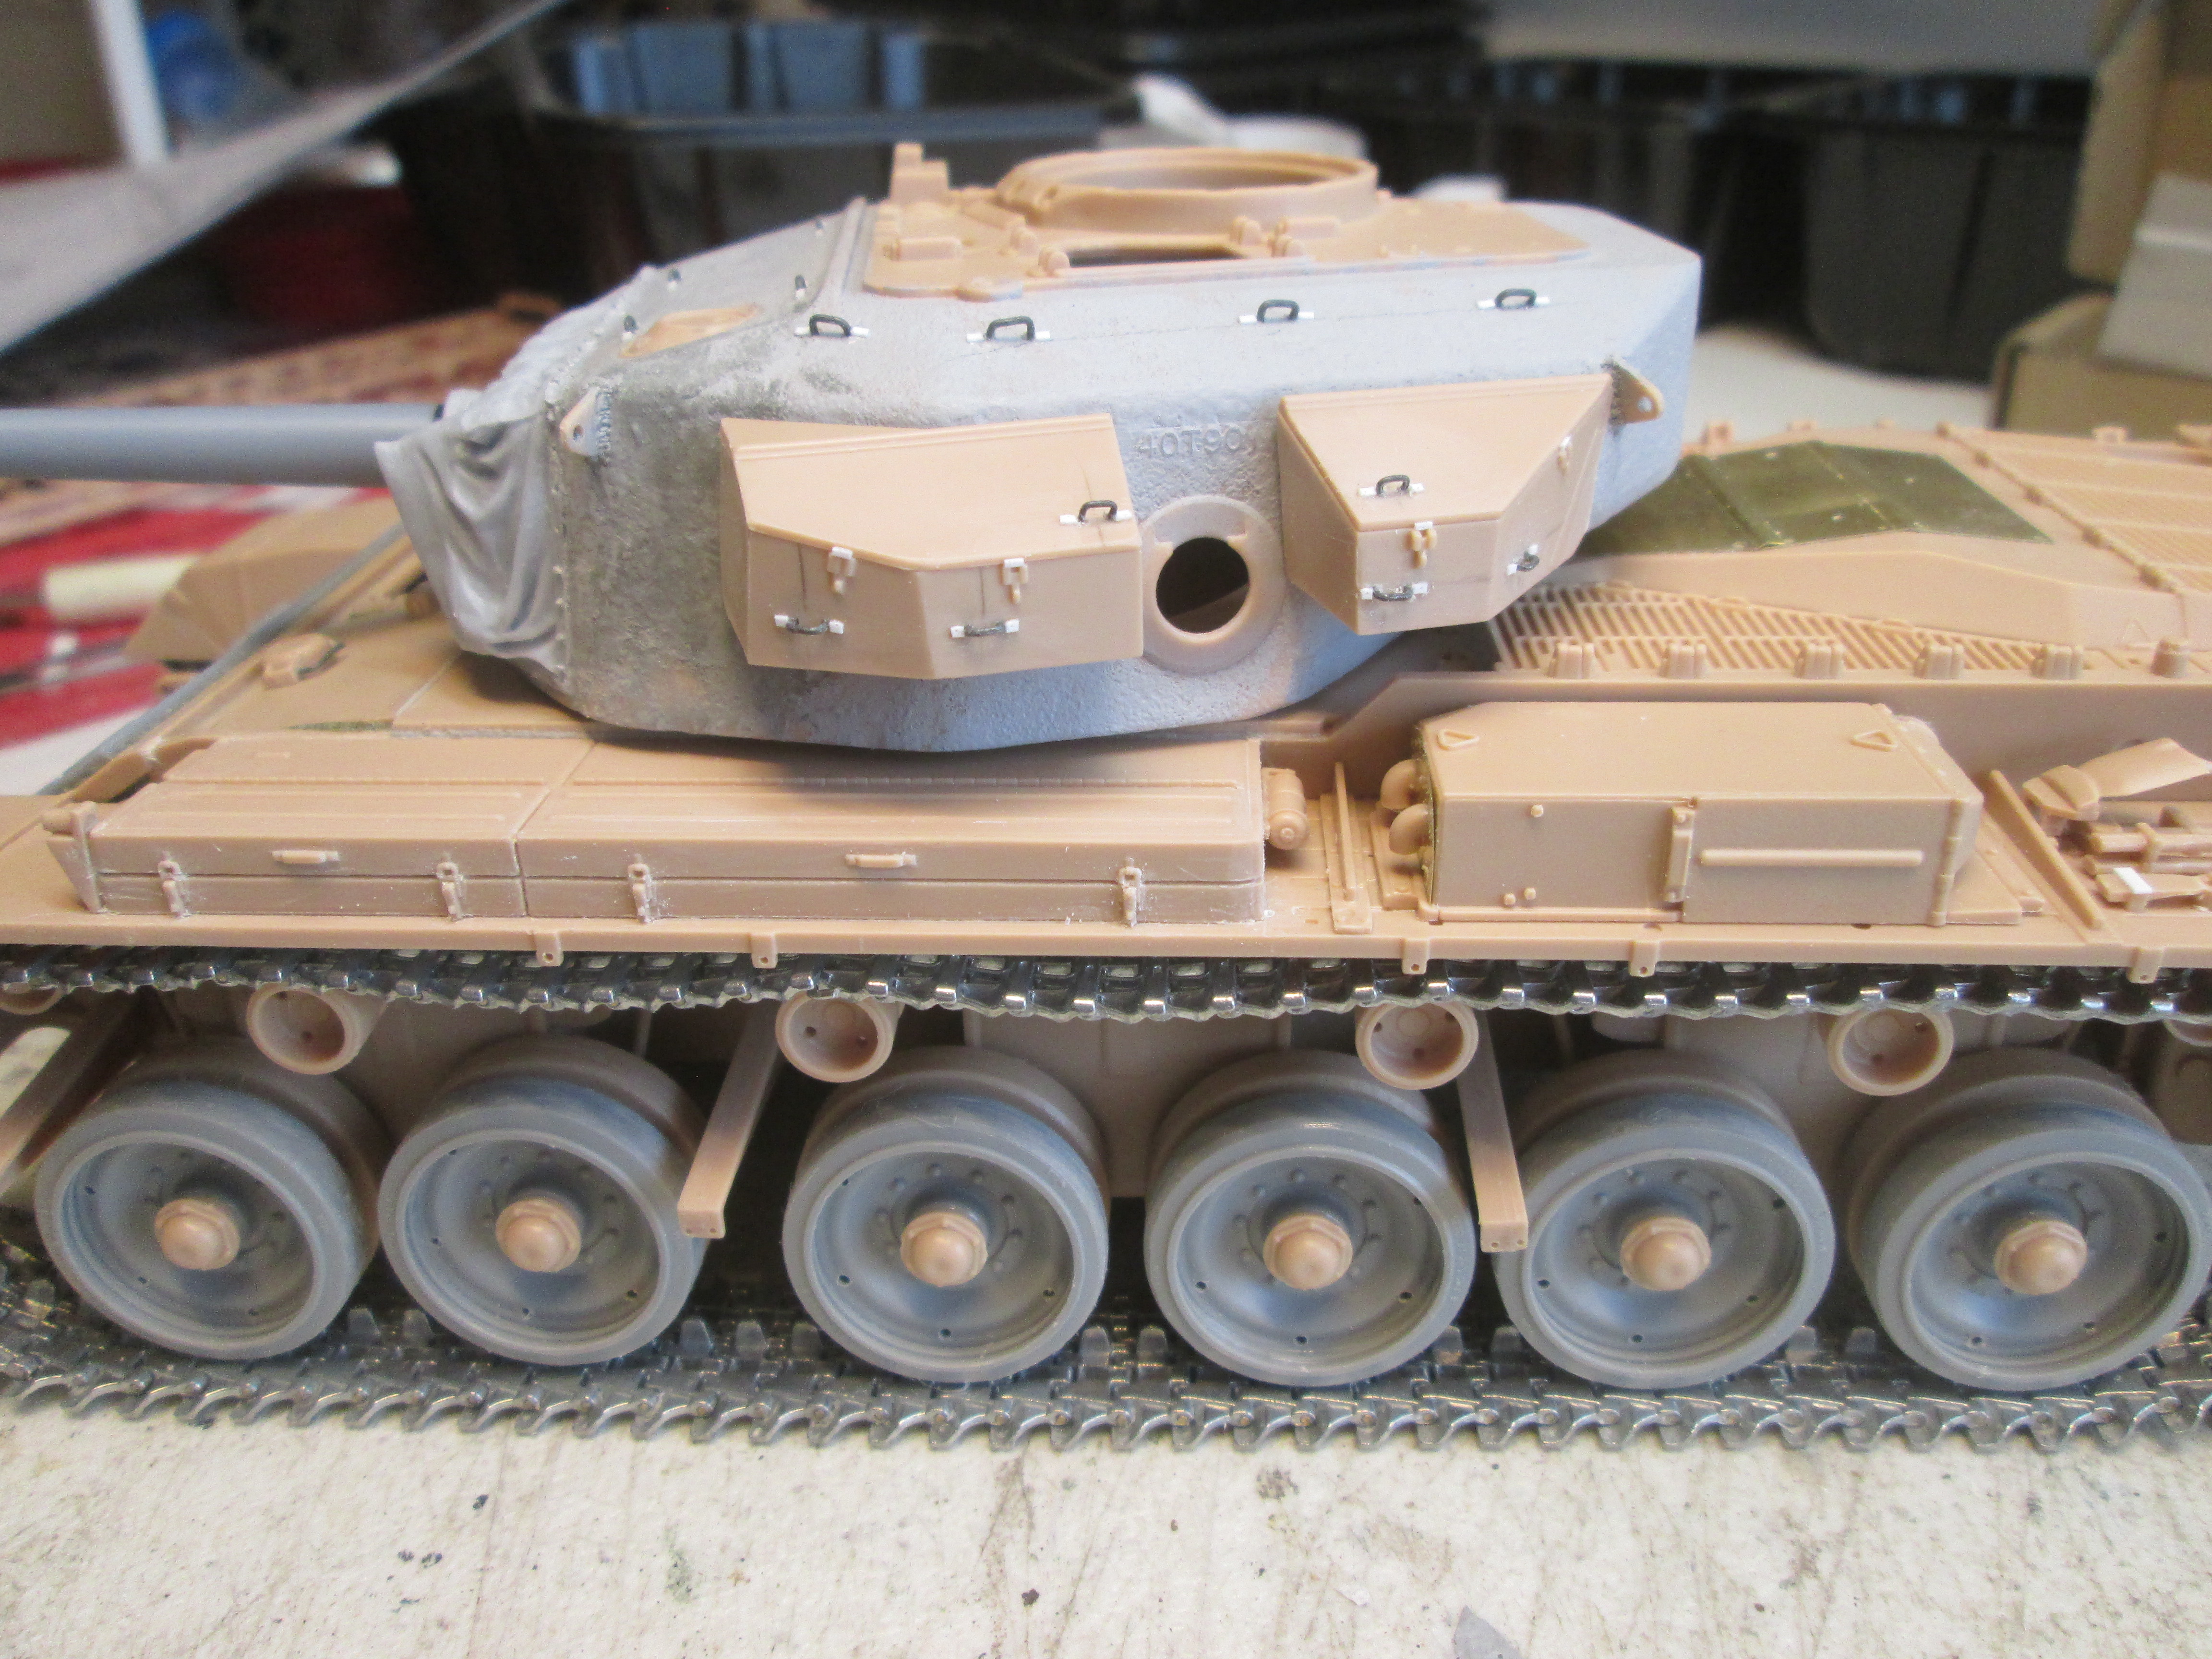
I boxed in the driver's area so I could add a fig later. Then on to the turret. There was a slight fit difference between the top and sides, no biggie to fix. I did have to re-texture after though. Storage bins and turret have had all the tie down loops replaced with wire and I still need to add the weld bead around the turret's top. The DEF mantlet cover fit, sort of, but since I think it was designed for the AFV Club kit, I'm happy.

 IMG_4016 by Russel Baer, on Flickr

 IMG_4015 by Russel Baer, on Flickr

The kit comes with a three piece gun tube which works fine. It's kind of neat to be doing something so nearly out of the box for a change but I'm a little wigged out by how fast it's coming together. I get about an hour and a half to two hours at the bench, four times a week maybe, so compared to my usual builds, this thing is flying together all by itself. Even the tracks went together quickly, very nicely cast, polished so no flash, with pre-cut brass pins. I had two runs of 102 links each done in under an hour. 


Apprentice rivet counter.

  • Member since
    May 2009
  • From: Poland
Posted by Pawel on Thursday, August 17, 2023 8:10 PM

Hello Russ!

Cool to see you tackle another one!

But the rear deck houses a US engine, or is it an earlier one?

I plan to build a Vietnam Centurion one day, too. One thing I would like to do on mine would be to replace the AFV-Club road wheels, they have separate rubber tires - I prefer to have one piece styrene tires.

Somehow I also have a Nagmachon in my stash, maybe I'll build this some day, too!

Good luck with your build and have a nice day

Paweł

All comments and critique welcomed. Thanks for your honest opinions!

www.vietnam.net.pl

  • Member since
    September 2006
  • From: Dripping Springs, TX, USA
Posted by RBaer on Friday, August 18, 2023 3:06 PM

Pawel, this is the one with the US engine. You can tell by the engine deck's resemblance to the M48/60 series. 

I'm not a big fan of the rubber tires AFV Club used in their kits either, but at least they were accurate. I'm glad I had the Takom kit to plunder for this one.

Apprentice rivet counter.

  • Member since
    November 2009
  • From: SW Virginia
Posted by Gamera on Friday, August 18, 2023 7:23 PM

Looks cool! Nice work on texturing the turret! Yes

"I dream in fire but work in clay." -Arthur Machen


  • Member since
    September 2006
  • From: Dripping Springs, TX, USA
Posted by RBaer on Saturday, August 19, 2023 10:06 AM

Thanks G. I would have done it even if I didn't have to fix the fit since the kit texture made me think of AFV Clu's texture on their M60 series kits: it looked like a cross-section of termite tracks in dead wood.

More done, bringing the hull close to completion last night. Some of the parts on the glacis were very fragile, and me and my sausage fingers managed to break a track holder and one headlight guard, but it's done now. I also re-did some things in strip that were a little soft on the kit parts.

 IMG_4017 by Russel Baer, on Flickr

 IMG_4018 by Russel Baer, on Flickr

Parts locations in the instructions tend to be a bit vague in places but having pics of the actual thing helps. I removed the conduit molded on to the turret for the smoke dischargers as I have pics of Cents without it and I don't like molded-on conduit. All the tie downs, with the exception of the various hatch covers, are now replaced, and now I'm debating using the side skirts. Not only do I like the look of Cents without them, they have LOTS of lifting handles. Hmmm...


Apprentice rivet counter.

  • Member since
    September 2006
  • From: Dripping Springs, TX, USA
Posted by RBaer on Friday, August 25, 2023 4:06 PM

Still very nearly OOB, but I did scratch the storage bin for the old French style searchlight, hung to the left of the turret basket.

 IMG_4029 by Russel Baer, on Flickr

 IMG_4030 by Russel Baer, on Flickr

After the tracks loosened up a bit I had to reposition the idlers, not a major undertaking but worthwhile.

 IMG_4024 by Russel Baer, on Flickr

There's just a few small things to do now, and I may actually be painting soon. I have the Legends stowage set on the way, but if it doesn't get here soon I may do something different for me and paint before I add stowage.


Apprentice rivet counter.

  • Member since
    June 2004
  • From: East Stroudsburg, PA
Posted by TigerII on Friday, August 25, 2023 9:47 PM

This is coming along nicely. I like the rear stowage bin with the PE netting? Definitely plenty of grab handles. Looking forward toward the next phase.

Achtung Panzer! Colonel General Heinz Guderian
  • Member since
    September 2006
  • From: Dripping Springs, TX, USA
Posted by RBaer on Thursday, September 7, 2023 8:44 PM

T2: Thanks. I have it ready for paint now, after making a couple of changes to more accurately reflect equipment carried duning the YKW, namely removing the crew personal weapons and the spare 30 cal ammo stowage.

 IMG_4031 by Russel Baer, on Flickr

 IMG_4032 by Russel Baer, on Flickr

Tow cables are made up too:

 IMG_4034 by Russel Baer, on Flickr


I used the kit ends with Eureka wire and splices.


Apprentice rivet counter.

  • Member since
    May 2009
  • From: Poland
Posted by Pawel on Friday, September 8, 2023 2:33 AM

That Shot is looking good, and I'm looking forward to seeing some paint on it! Good luck with your build and have a nice day!

Paweł

All comments and critique welcomed. Thanks for your honest opinions!

www.vietnam.net.pl

  • Member since
    April 2016
  • From: N. Burbs of ChiKawgo
Posted by GlennH on Sunday, September 10, 2023 1:41 PM

It's looking great. I have seen stuff by this manufacturer but never chanced it. How would you say their kits are quality wise compared to some of the bigger names?

A number Army Viet Nam scans from hundreds yet to be done:

https://www.flickr.com/photos/southwestdreams/albums/72157621855914355

Have had the great fortune to be on every side of the howitzers.

  • Member since
    November 2009
  • From: SW Virginia
Posted by Gamera on Tuesday, September 12, 2023 9:36 PM

She's lookin' superb! 

Always liked the looks of Cold War British and Israeli tanks. 

"I dream in fire but work in clay." -Arthur Machen


  • Member since
    September 2006
  • From: Dripping Springs, TX, USA
Posted by RBaer on Wednesday, September 13, 2023 5:16 PM

Thanks all! Pics with paint (first color coat) below...

In regards to the kit quality, I would say very close to "Tamiya-like" kit but with somewhat vague instructions, making me think "Dragon".  Overall, I'd be willing to try something else from them.

 IMG_4036 by Russel Baer, on Flickr

Over Tamiya primer from the can I shot the last of my old Testors US Modern Sand and ran out before I was happy with the coverage. I'm no longer a fan of the old ModelMaster cans anyway, so after letting it cure for 24 hours, I went over it all lightly with Vallejo "White Bone", a fantasy color in a can that's an almost exact match. That's curing now while I paint tracks and stowage items. Decals will be from SabingaMartin, my first time using them.


Apprentice rivet counter.

  • Member since
    November 2009
  • From: SW Virginia
Posted by Gamera on Wednesday, September 13, 2023 8:05 PM

She looks good! 

I've only built a few kits by Amusing but was really happy with them. I started the Tiger I from Border Models and it's okay, but I'd call the Amusing kits generally much better quality though the detail is about the same.  

"I dream in fire but work in clay." -Arthur Machen


  • Member since
    September 2006
  • From: Dripping Springs, TX, USA
Posted by RBaer on Thursday, September 14, 2023 6:10 PM

I haven't built anything from Border but who knows? 

Apprentice rivet counter.

  • Member since
    September 2006
  • From: Dripping Springs, TX, USA
Posted by RBaer on Tuesday, September 19, 2023 10:36 PM

Painting progresses, initial wash is done and pin washes nearly so.

 IMG_4058 by Russel Baer, on Flickr

The mantlet cover will be quite a bit lighter when done. I have the Legends stowage set primed, just deciding which items in it are from the proper time frame.

Apprentice rivet counter.

  • Member since
    September 2006
  • From: Dripping Springs, TX, USA
Posted by RBaer on Sunday, September 24, 2023 9:31 AM

Weathering done except for dust which I'll add after stowage bits and tow cables are on.

 IMG_4059 by Russel Baer, on Flickr

Apprentice rivet counter.

  • Member since
    May 2009
  • From: Poland
Posted by Pawel on Sunday, September 24, 2023 3:23 PM

Lookin' good! The wash really did its job here! Good luck with your build and have a nice day

Paweł

All comments and critique welcomed. Thanks for your honest opinions!

www.vietnam.net.pl

  • Member since
    November 2009
  • From: SW Virginia
Posted by Gamera on Tuesday, September 26, 2023 8:04 PM

Yeah wow she's almost done now! Great job on the weathering, she's got that grimy dirty look for sure! 

"I dream in fire but work in clay." -Arthur Machen


  • Member since
    June 2004
  • From: East Stroudsburg, PA
Posted by TigerII on Tuesday, September 26, 2023 9:51 PM

Yes, I must concur with Pawel, the washes really brought out the features of this tank.

Achtung Panzer! Colonel General Heinz Guderian
  • Member since
    September 2006
  • From: Dripping Springs, TX, USA
Posted by RBaer on Wednesday, September 27, 2023 5:04 PM

Thanks y'all!

I now have it dusted and stowage on, and after adding a couple of small bits and antenna masts, it's ready for the local IPMS deal next week. Crew figs will have to wait until I can get some more heads in.

 IMG_4065 by Russel Baer, on Flickr

 IMG_4064 by Russel Baer, on Flickr

 IMG_4063 by Russel Baer, on Flickr

 IMG_4062 by Russel Baer, on Flickr

 IMG_4060 by Russel Baer, on Flickr

While it's not quite finished, it's close enough for me to say it was a very satisfying build and while the Amusing Hobby kit was fun, the next one will be AFV Club. I already have another set of the San Xin tracks, another DEF mantlet cover and some Scorpion Model Miniatures replacement tires on hand. The comparison should be fun. The AFV Club kit has about twice as many parts. Good or bad, I don't know yet. But first I'll finish the AMX-13 and maybe the M60 "slick" I started back when I started this thing.

Or I'll get distracted by another shiny object. Geeked


Apprentice rivet counter.

  • Member since
    September 2006
  • From: Dripping Springs, TX, USA
Posted by RBaer on Sunday, October 8, 2023 2:10 PM

Done and in the bag. Pics are on one of my "generic" bases, apologies in advance if the signage is off, but I think they should be appropriate for the Golan during the YKW period.

 IMG_4087 by Russel Baer, on Flickr

 IMG_4081 by Russel Baer, on Flickr

 IMG_4082 by Russel Baer, on Flickr

 IMG_4083 by Russel Baer, on Flickr

 IMG_4084 by Russel Baer, on Flickr

 IMG_4085 by Russel Baer, on Flickr

Thanks to all who watched, now on to the AMX-13 and something else, TBD.


Apprentice rivet counter.

  • Member since
    September 2006
  • From: Dripping Springs, TX, USA
Posted by RBaer on Sunday, October 8, 2023 7:02 PM

Oops. That black blob of craft paint on the gun tube is gone now. And wouldn't you know it, I took it to the local IPMS show Saturday with that blob on it. That's what I get for waiting till the morning of to pack up.


Apprentice rivet counter.

  • Member since
    November 2009
  • From: SW Virginia
Posted by Gamera on Sunday, October 8, 2023 8:47 PM

Oh wow she looks great! Even with the black blob! Nice work on the storage! 

"I dream in fire but work in clay." -Arthur Machen


  • Member since
    September 2006
  • From: Dripping Springs, TX, USA
Posted by RBaer on Wednesday, October 11, 2023 9:11 PM

Thanks G.

Apprentice rivet counter.

JOIN OUR COMMUNITY!

Our community is FREE to join. To participate you must either login or register for an account.

SEARCH FORUMS
FREE NEWSLETTER
By signing up you may also receive reader surveys and occasional special offers. We do not sell, rent or trade our email lists. View our Privacy Policy.