SEARCH FINESCALE.COM

Enter keywords or a search phrase below:

fruil modelismo. pin type question

742 views
5 replies
1 rating 2 rating 3 rating 4 rating 5 rating
  • Member since
    November 2005
fruil modelismo. pin type question
Posted by Anonymous on Monday, September 8, 2003 3:15 PM
just got a set of fruil tracks for a jagdtiger,pin type.
theres a small not to well translated instruction sheet inside.
the last part on the sheet says "detailed instructions on back of tracks" i suppose they mean on box.there is no other instructions with mine.is this the same with everyone else or just mine.the problem i have is, should one side on each on each trtack lenth be blocked.or do you clear all the holes.
thanks.

gazza.
  • Member since
    January 2003
  • From: Utah - USA
Posted by wipw on Monday, September 8, 2003 4:09 PM
gazza, I haven't used that particular set, but it sounds similar to the one I used on my panzer II. It also said there were detailed instructions somewhere that didn't exist.
DO NOT!!! drill out the links all the way through. That would be a bad thing. The "blocked" end of the link is a representation of the end of the bolt used to hold the tracks together on the real McCoy. My set was "sided", meaning that there was one bag of links for the left side and another for the right. The difference being that the cast on bolt details are on the opposite side of the links. This allows you to insert the wire pin from what will be the inside for both sides of the track. I hope that makes sense. It reads kind of funny, but I can't think of how else to word it.
When I did my tracks (which were very small compared to a jadtiger, I pinned between 10 and 20 links at a time, then I'd link those sections into larger ones. That way, I didn't have to sit and hold big, long links of track for a long time, which get way heavier than you'd think. Also, I put a drill bit in a pin vice that was just a touch bigger than the wire for the pins. I made sure the bit didn't extend out of the pin vice far enough to go through the cast bolt detail on the links, then I used the drill to "clean out" the holes on each link. I'd do up 10 to 20 at a time, pin and glue them, then drill out another set of 10 to 20. It made life much easier. Quite a few of the links had "flash" over at least one of the holes. Use thick ca to glue the pin in. Just touch a bit of the glue to where the pin goes into the two links. If you use the thin stuff, it will wick down to where the "tab" and "slot" of the links are, and the links will not articulate. I would hold the two links together and slide the wire into and through the linking holes, then cut off the wire about 1/8 inch from the outside of the link and touch the ca to the pin next to the hole. Then after the ca had a chance to set up, I'd cut off the excess pin with a pair of small wire cutters. (Don't use your sprue cutters, you'll ruin them.)

Others have said they figure out how long the pin needs to be, cut it just a little shorter than that, and cut all the pins to that length first, then insert the pins and glue them in. That way the end of the pin is just inside the edge of the link and it makes for a neater job. I haven't tried that method, yet.

Best of luck with this. I hope I've helped out a little.

Bill
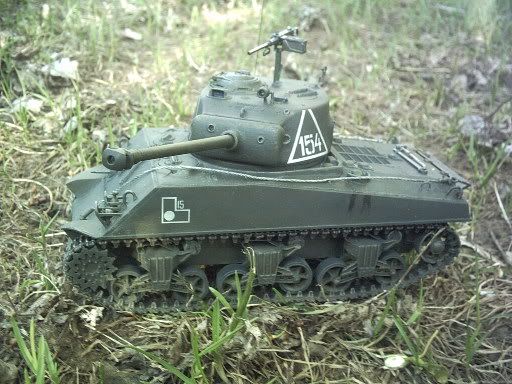
Bill ========================================================== DML M4A2 Red Army ========================================================== ========================================================== -- There is a fine line between "hobby" and "mental illness". (Author unknown)
  • Member since
    April 2003
  • From: Central Wisconsin
Posted by Spamicus on Monday, September 8, 2003 5:42 PM
I just put together a set of these tracks. Wipw is correct don't drill all the way through the blocks with guide teeth, the other one must be drilled all the way through. I didn't have any detailed instructions either. I cut my pins once they were in and tapped them down flush, then put a tiny drop of Zap a Gap on each one to help hold it in. I am very impressed with the results, I think you will be too. These tracks are awesome.

Steve

  • Member since
    November 2005
Posted by Anonymous on Tuesday, September 9, 2003 3:16 AM
thanks guys,two excellent replys.all is clear.
will start on them tonight.

gazza.
  • Member since
    February 2003
Posted by ponch on Tuesday, September 9, 2003 7:37 PM
Wow!!! I came into the forum today to ask the exact same question!! I just got my first set of friulmodel tracks ever, I'm building Maquette's PzKpfw 38T, and I got the same cryptic "detailed instructions on back of tracks". Gazza got to it first...Smile [:)]


  • Member since
    November 2005
Posted by Anonymous on Wednesday, September 10, 2003 10:31 AM
I agree with all the above. But would like to add one thing. If your planning to use the "Blacken-It" to "paint" your tracks (which gives a WONDERFUL weathered effect, including rust) do all your drilling and trimming of the track links, wash the lengths by shaking them in a small bottle filled with water and detergent, THEN use the blacken it. Once your links are "painted", then assemble as detailed in the above comments. Otherwise the spots that have the glue will not blacken. Even if your real careful with the glue, it will leave a tiny spot of silver which does not look right, the end of the bolt would be one of the last places to not rust on the real thing. If you plan to use real paint, then just ignor all this. By-the-way, the only place I have found the Blacken-IT so far is hometown-hobbies.com.
JOIN OUR COMMUNITY!

Our community is FREE to join. To participate you must either login or register for an account.

SEARCH FORUMS
FREE NEWSLETTER
By signing up you may also receive reader surveys and occasional special offers. We do not sell, rent or trade our email lists. View our Privacy Policy.