SEARCH FINESCALE.COM

Enter keywords or a search phrase below:

painting steel tracks?

835 views
7 replies
1 rating 2 rating 3 rating 4 rating 5 rating
  • Member since
    November 2005
painting steel tracks?
Posted by Anonymous on Monday, September 29, 2003 11:19 AM
I know this is going to get a lot of different answers but I forgot how to do it after 20yrs!

How do you paint and weather steel track? Question [?]

I’m not that keen on the rusted look myself, i all ways think that any tank in combat use is not going to sit around long enough for the tracks to get too rusty.

Secondly: Barrels, How on earth do you glue them together and get a good finish? Angry [:(!]
It was one of the things I never quite managed to get the hang of, even after 8yrs.
If you over fill and file then you can end up with flat spots that you can’t see until you paint!
Not sure I want to splash out on an after market barrel all the time!
  • Member since
    November 2005
Posted by Anonymous on Monday, September 29, 2003 11:32 AM
You're right, no rust on running tracks. However, just plain steel paint, although sometimes correct, looks like poo. (technical term for garbage). I like to apply a wash of either a darker color or even muddy them up with an earth tone. I've used tinted putty, ground up soil nuked, then mixed into a glue goop... what ever seems to work!

ooops, break is over, back to work! More later
  • Member since
    November 2005
Posted by Anonymous on Monday, September 29, 2003 11:37 AM
I've had good success with using a flat black base, drybrushed with steel or silver, then a light wash of black again. Gives it a slightly worn look, without the rust. Like others, I don't like rust on my treads, either.

demono69
  • Member since
    February 2003
  • From: Tochigi, Japan
Posted by J-Hulk on Monday, September 29, 2003 11:44 AM
Good advice there, box1.

Another thing to consider is that any vehicle that has been in the field for any appreciable length of time invariably gets an overall earthy color on its trax and running gear and lower hull. Check out color photos of armor in the field, and more often than not ,the trax, road wheels, and in fact, the whole vehicle essentially becomes one dusty, earthy color. Depends on many factors, of course, such as the terrain, the weather, time in the field, etc., but I think a very realistic look is that overall one dusty, dirty color. Some may find it boring, but I reckon that's what they look like!
~Brian
  • Member since
    November 2005
Posted by Anonymous on Monday, September 29, 2003 11:48 AM
All the tracks I've seen in real life after one or two days operations become very rusty. Often the new tanks delivered straigth out of the factory were rusty too. So what do I do is to give them a coat with a rust color (Modelmaster rust is ok with me), then a nice dark wash with oils (burnt umber or blak or a mixture of both) and then a drybrush wit silver to tone them down.


This is after the base coat


This is after the whole treatment

I hope this can help
  • Member since
    January 2003
  • From: Utah - USA
Posted by wipw on Monday, September 29, 2003 12:16 PM
Dave;

Looks like you've got a lot of good advice on tracks.

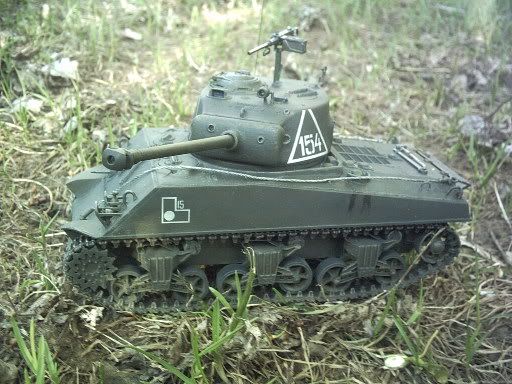
As for the barrels, I like to use the aftermarket turned aluminum or brass ones. If you can't, don't want to, or just want to have the fun of building up the plastic halves:

1- clean the barrel halves of flash, mold parting lines, sprue attachment points, etc.

2- tape or hold the barrel halves together

3- slide a single edge razor blade between the barrel halves on one side.

4- using liquid styrene cement, touch the brush on the razor blade near the barrel halves. Capilary action will draw the cement from the razor blade and into the joint. Try to get enough glue on so that as the plastic softens, a little of it "guishes" (another technical term) out of the seam, but not too much to be messy. Be careful not to let anything touch the soft plastic.

5- move the razor blade down the length of the barrel a bit and apply more glue.

6- keep doing this until you've worked your way around the barrel and have glue through the whole joint.

7- align the barrel halves so they are in alignment and round for the whole barrel.

8- carefully clamp it and check the alignment again.

9- Let the glue set hard.

10- unclamp the barrel, scrape, then sand and polish the joint all the way around carefully to not get flat spots (flex-i-files are supposed to be fantastic for this).

Doing it this way, you shouldn't have to use any filler, and it's really easy to scrape the excess plastic from the joint.

Good luck

Bill
Bill ========================================================== DML M4A2 Red Army ========================================================== ========================================================== -- There is a fine line between "hobby" and "mental illness". (Author unknown)
  • Member since
    November 2005
Posted by Anonymous on Monday, September 29, 2003 12:26 PM
Wipw mentions a great item for barrels, the Flexfiles work very well for them and are worth the price if you dont want to use aluminum barrels.
  • Member since
    January 2003
Posted by shermanfreak on Monday, September 29, 2003 1:07 PM
Box 1 - For the tracks - base coat of gun metal, dry brush with rust, then dry brush ver that with steel and finally a burnishing with ground pencil lead.

For the barrels - flex files do the trick quite well. Ensure that the joint is completely filled, then carefully sand being careful not to make any flatspots on the barrel.

Fabio - you must have your lights back on !!!!

Happy Modelling and God Bless Robert
JOIN OUR COMMUNITY!

Our community is FREE to join. To participate you must either login or register for an account.

SEARCH FORUMS
FREE NEWSLETTER
By signing up you may also receive reader surveys and occasional special offers. We do not sell, rent or trade our email lists. View our Privacy Policy.