SEARCH FINESCALE.COM

Enter keywords or a search phrase below:

1/35 Sherman 75mm (WIP)

2120 views
31 replies
1 rating 2 rating 3 rating 4 rating 5 rating
  • Member since
    April 2008
Posted by The 3rd Placer on Sunday, July 20, 2008 10:51 AM

Thanks Panzerguy...to lazy to remove the handles. This is my 1st armor model in a very long time, I just wanted to get it assembled quick so I could get back in the groove. I can see my next builds getting more and more detailed than this one. I club member pointed out some "blocks" that are near the tools and mirrored on the other side that will allow the engine deck doors to rest on when opened...oh well next time.

Ryan

 panzerguy wrote:


 Man this is looking really good 3P. This will be a big help for when I do a rebuild of this kit. One thing you might want to do is shave off those nasty molded on grab handels and replace them with some made from wire it will really make a big differance.

  • Member since
    January 2008
  • From: Bournemouth UK
Posted by Bodge on Sunday, July 20, 2008 10:30 AM
Looking swell,.
  • Member since
    October 2007
  • From: N.H.
Posted by panzerguy on Sunday, July 20, 2008 10:23 AM


 Man this is looking really good 3P. This will be a big help for when I do a rebuild of this kit. One thing you might want to do is shave off those nasty molded on grab handels and replace them with some made from wire it will really make a big differance.

"Happiness is a belt fed weapon"

  • Member since
    April 2008
Posted by The 3rd Placer on Sunday, July 20, 2008 8:26 AM

One more....stowage close up.

Ryan

  • Member since
    April 2008
Posted by The 3rd Placer on Sunday, July 20, 2008 8:21 AM

Getting closer to paint.....I have arranged the stowage pattern I am going to go with.

It is mixture of kit items and a VP set. The tracks went on perfectly, with no splay at the rear end. I cut up one of the drivers periscope included with the kit and used it at the commanders hatch.

Note some of the stowage is not finished yet, some parts need pcs. glued on, and the resin needs some sanding and refinement.

Thanks for looking

Ryan

  • Member since
    April 2008
Posted by The 3rd Placer on Sunday, July 13, 2008 4:24 PM

I had planned on using the commander figure included with the kit. I made this figure painting rig from a block of wood and (2) 1/16" diameter metel rods. I sunk the rods about 1" into the wood and epoxied them tight.

The rods are from a grab bag set purchased from Micro Mark.
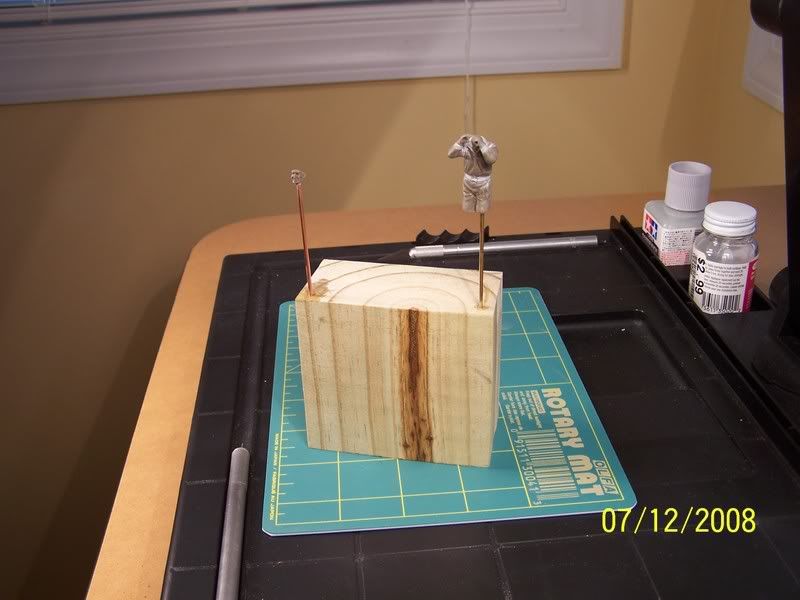
The figure went together fine, I rescribed the elastic detail on the collar, arm cuff, and the bottom of the jacket. the molded in detail was a little soft to take painting, so I carved here and there to make some features stand out more. The grey is thined Tamiya putty to fill in the arm seams etc. I drilled a hole in the torso and here you are....
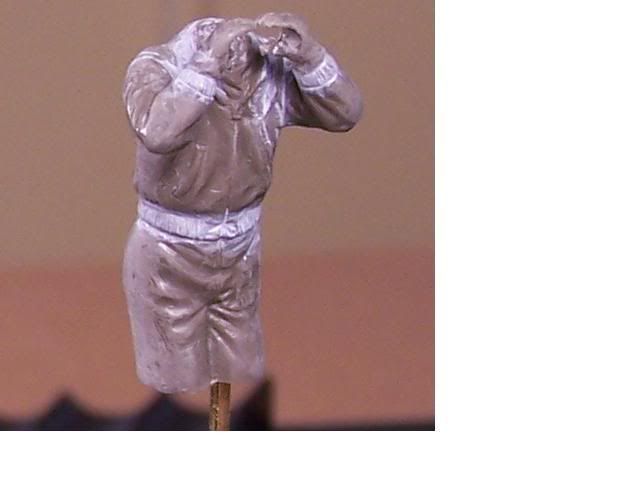
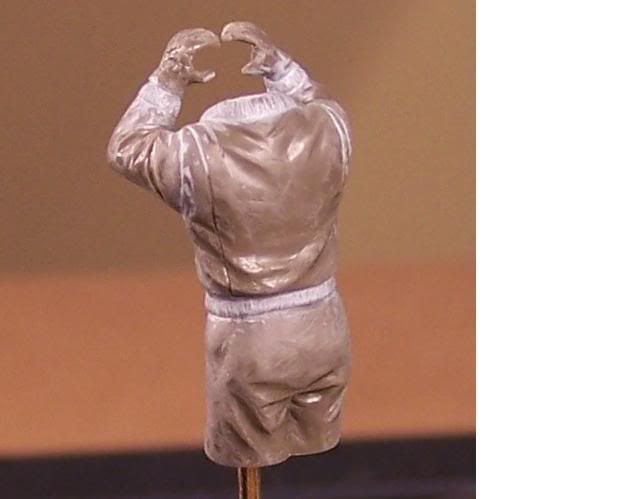
 

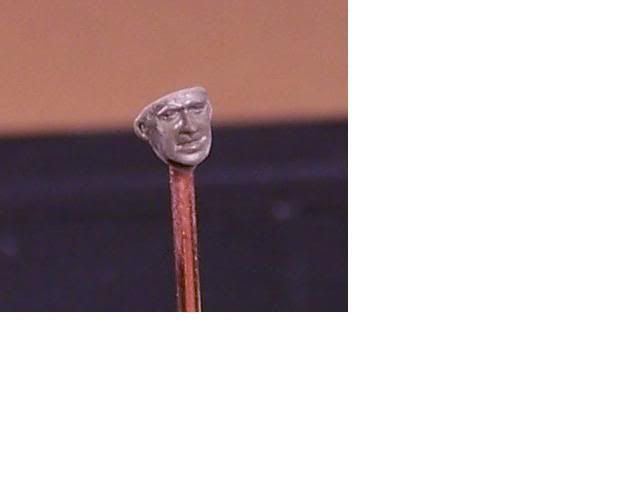
The commander seems pleased.Cool [8D] I haven't painted a figure in many years this should be interesting.
  • Member since
    April 2008
Posted by The 3rd Placer on Sunday, July 13, 2008 4:09 PM

I aslo painted the interior white after a base shading coat of Nato Black.

  • Member since
    April 2008
Posted by The 3rd Placer on Sunday, July 13, 2008 4:08 PM

Here is the new textured shell ejector chute door, I did some subtle texturing...I still wanted to see the outline of the part somewhat.

  • Member since
    April 2008
Posted by The 3rd Placer on Wednesday, July 9, 2008 8:22 AM

Hello All,

I have re-textured the turret to better represent the single casting detail at the spent shell chute....pics to follow.

I was noticing other builds and it seems I am missing the periscope assembly...I see one on the tree, is that to go on the inside of the open commamders hatch? The directions do not mention this.

Thanks Ryan

  • Member since
    April 2008
Posted by The 3rd Placer on Thursday, June 26, 2008 7:41 AM
 Phil_H wrote:

Here's a pic to help clarify what Disastermaster was talking about re the "pistol port"

http://data3.primeportal.net/tanks/greg_smith/m4a1/images/m4a1_17_of_18.jpg

It should be faired smoothly into the turret side, not appear as a discrete frame around the port.

What a picture, yes it seems I have a little more work with my toxic texturing soup before painting.

Thanks Ryan

  • Member since
    August 2005
  • From: Sydney, Australia
Posted by Phil_H on Wednesday, June 25, 2008 8:55 PM

Here's a pic to help clarify what Disastermaster was talking about re the "pistol port"

http://data3.primeportal.net/tanks/greg_smith/m4a1/images/m4a1_17_of_18.jpg

It should be faired smoothly into the turret side, not appear as a discrete frame around the port.

  • Member since
    April 2008
Posted by The 3rd Placer on Wednesday, June 25, 2008 5:35 PM

Question for All,

Up till know I have left the road wheels and the return rollers movable, I have discovered a little play in each unit.....Should I glue the wheels so they are tight to the face of the unit or the rear. I don't dare leave them movable...a lot easier to paint fixed.

Thanks Ryan

  • Member since
    October 2004
  • From: League City, Texas
Posted by sfcmac on Wednesday, June 25, 2008 2:57 PM
 Looking swell by me! I like Shermans and the Tamiya kit is a classic along with the old Italerie beastie. Amazing effect with the texturing goo! Thumbs Up [tup]
  • Member since
    April 2008
Posted by The 3rd Placer on Wednesday, June 25, 2008 2:49 PM
 disastermaster wrote:
 The 3rd Placer wrote:
 disastermaster wrote:
 The 3rd Placer wrote:

The image “http://smilies.sofrayt.com/%5E/_950/wink.gif” cannot be displayed, because it contains errors. Make sure to fair in the port framing on the turret as it was one with the structure. 

                                                                                   DISASTERMASTER
 

You lost me Disastermaster...what do you mean?

 The image “http://img463.imageshack.us/img463/6357/huh4lc.gif” cannot be displayed, because it contains errors. Some people call it the pistol port and some call it the shell ejector port..... in either case, I'm refering to the square hatch on the side of the turret (located in this picture near the lower bottom right quadrant).

 The framework is cast with the turret, not as a separately added part.  

                 The image “http://img52.exs.cx/img52/271/l9iblush.gif” cannot be displayed, because it contains errors. Hope this clears it up.

Also, there is a area of "silver-shine" on the recoil area of the main gun which is inherent to the Sherman, Lee and Grant series. Of course this replication comes later on in the build process.

                                                                                     DISASTERMASTER


Crystal clear, thanks

Ryan

  • Member since
    July 2003
  • From: On my kitchen counter top somewhere in central North Carolina.
Posted by disastermaster on Wednesday, June 25, 2008 1:11 PM
 The 3rd Placer wrote:
 disastermaster wrote:
 The 3rd Placer wrote:

The image “http://smilies.sofrayt.com/%5E/_950/wink.gif” cannot be displayed, because it contains errors. Make sure to fair in the port framing on the turret as it was one with the structure. 

                                                                                   DISASTERMASTER
 

You lost me Disastermaster...what do you mean?

 The image “http://img463.imageshack.us/img463/6357/huh4lc.gif” cannot be displayed, because it contains errors. Some people call it the pistol port and some call it the shell ejector port..... in either case, I'm refering to the square hatch on the side of the turret (located in this picture near the lower bottom right quadrant).

 The framework is cast with the turret, not as a separately added part.  

                 The image “http://img52.exs.cx/img52/271/l9iblush.gif” cannot be displayed, because it contains errors. Hope this clears it up.

Also, there is a area of "silver-shine" on the recoil area of the main gun which is inherent to the Sherman, Lee and Grant series. Of course this replication comes later on in the build process.

                                                                                     DISASTERMASTER


 https://i.imgur.com/LjRRaV1.png


  • Member since
    April 2008
Posted by The 3rd Placer on Wednesday, June 25, 2008 12:56 PM
 RBaer wrote:

Different question: I've never seen a Tamiya Sherman in tan plastic. Different release or market? Same as what we get in the states?

BTW, looks like a great build.

It is green, poor lighting.....

Ryan

  • Member since
    April 2008
Posted by The 3rd Placer on Wednesday, June 25, 2008 12:55 PM
 disastermaster wrote:
 The 3rd Placer wrote:

The image “http://smilies.sofrayt.com/%5E/_950/wink.gif” cannot be displayed, because it contains errors. Make sure to fair in the port framing on the turret as it was one with the structure. 

                                                                                   DISASTERMASTER
 

You lost me Disastermaster...what do you mean?

  • Member since
    September 2006
  • From: Dripping Springs, TX, USA
Posted by RBaer on Wednesday, June 25, 2008 12:14 PM

Different question: I've never seen a Tamiya Sherman in tan plastic. Different release or market? Same as what we get in the states?

BTW, looks like a great build.

Apprentice rivet counter.

  • Member since
    July 2003
  • From: On my kitchen counter top somewhere in central North Carolina.
Posted by disastermaster on Wednesday, June 25, 2008 12:14 PM
 The 3rd Placer wrote:

The image “http://smilies.sofrayt.com/%5E/_950/wink.gif” cannot be displayed, because it contains errors. Make sure to fair in the port framing on the turret as it was one with the structure. 

                                                                                   DISASTERMASTER
 

 https://i.imgur.com/LjRRaV1.png


  • Member since
    November 2005
Posted by T26E4 on Wednesday, June 25, 2008 9:35 AM


 Rob Gronovius wrote:
Mirrors were a post war addition. I believe to assist the crew when maneuvering on streets with civilian traffic.

 Hi Rob: I have wartime photos of some M4A3E8s that clearly show the mirrors in place (folded away to protect them of course) 


Roy Chow 

Join AMPS!

http://www.amps-armor.org


  • Member since
    April 2008
Posted by The 3rd Placer on Wednesday, June 25, 2008 7:45 AM

 Thanks Roy, I did fill that seem although not really visible in this shot because of the light source. Thanks for your input, I was wanderin' how that was attached in reality.

Thanks Manstien, I would be happy with just "A placer"

Ryan

 T26E4 wrote:

Looking good.  Despite its age, the Tamiya M4A3 kit has a special place in my heart being that it was for such a long time, one of the few Sherman kits extant.  One quick and easy fix you might want to do is to fill the seam where the transmission cover abuts the bolt strip affixed to the glacis.  That bolt strip was integral to the trans cover and not to the glacis.  Hope this helps.

(From toadman's site) 

  • Member since
    December 2002
  • From: Fort Knox
Posted by Rob Gronovius on Wednesday, June 25, 2008 7:31 AM
Mirrors were a post war addition. I believe to assist the crew when maneuvering on streets with civilian traffic.
  • Member since
    June 2005
  • From: NJ 07073
Posted by archangel571 on Tuesday, June 24, 2008 11:58 PM
 T26E4 wrote:

(From toadman's site) 

Hey Roy, the HVSS one in your picture has those side mirrors hanging out the front glacis.  Is that a common thing?  I think I entirely missed those in all the pictures I've looked at. 

-=Ryan=- Too many kits... so little free time. MadDocWorks
  • Member since
    November 2005
Posted by Anonymous on Tuesday, June 24, 2008 10:42 PM
Sweet job with the texturing...looks like a potential "first-placer"...
  • Member since
    November 2005
Posted by T26E4 on Tuesday, June 24, 2008 10:34 PM

Looking good.  Despite its age, the Tamiya M4A3 kit has a special place in my heart being that it was for such a long time, one of the few Sherman kits extant.  One quick and easy fix you might want to do is to fill the seam where the transmission cover abuts the bolt strip affixed to the glacis.  That bolt strip was integral to the trans cover and not to the glacis.  Hope this helps.

(From toadman's site) 

Roy Chow 

Join AMPS!

http://www.amps-armor.org


  • Member since
    September 2007
  • From: Relocating
Posted by Mobious on Tuesday, June 24, 2008 9:12 PM

I'm not a Big Sherman fan, but your build looks pretty good. I like the cast texture. Very well done, this coming from a guy on the other side of the isleWhistling [:-^] Keep posting and I'll have to build one of these Shermies to see what all the fuss is.Big Smile [:D]

It looks good,

best regards and happy modelling

"It's a problem of applied physics" Roy Brown

  • Member since
    March 2007
  • From: NJ
Posted by JMart on Tuesday, June 24, 2008 8:54 PM
Um, be careful with that method, you are generating volatile toulene byproducts by dissolving the putty in liquid cement.. respirator a must....


  • Member since
    April 2008
Posted by The 3rd Placer on Tuesday, June 24, 2008 8:51 PM

 wing_nut wrote:
Never been a huge fan of the Sherman.., then agin... I was building armor 'til recnelty, but this does look interesting.  I will eventually run out of German armorWhistling [:-^] how did you add the texture?  Looks good so far.

I covered a paper plate with alluminum foil then put a blob of the grey Tamiya putty on the foil. The next part is smelly...you take a bottle of Testors liquid cement and dip a medium sized round tipped brush into the glue then brush into the putty. The glue will dissolve the putty long enough for you to paint it onto the model. It takes some practice not to leave brush marks, but it is not to difficult.

The glue will also clean the brush after you are done, so no ruined brushes.

Use plenty of ventilation as the glue will start making you see two models after a while.Dead [xx(]

Ryan

  • Member since
    April 2005
  • From: Piscataway, NJ!
Posted by wing_nut on Tuesday, June 24, 2008 8:40 PM
Never been a huge fan of the Sherman.., then agin... I was building armor 'til recnelty, but this does look interesting.  I will eventually run out of German armorWhistling [:-^] how did you add the texture?  Looks good so far.

Marc  

JOIN OUR COMMUNITY!

Our community is FREE to join. To participate you must either login or register for an account.

SEARCH FORUMS
FREE NEWSLETTER
By signing up you may also receive reader surveys and occasional special offers. We do not sell, rent or trade our email lists. View our Privacy Policy.