SEARCH FINESCALE.COM

Enter keywords or a search phrase below:

1/24-1/25 scale Ford Expedition Rescue Vehicle (Reference and WIP Pics)

5647 views
15 replies
1 rating 2 rating 3 rating 4 rating 5 rating
  • Member since
    December 2003
  • From: Colorado
1/24-1/25 scale Ford Expedition Rescue Vehicle (Reference and WIP Pics)
Posted by psstoff995 on Monday, January 26, 2009 7:24 PM

Here are a few shots I took of our actual Rescue Vehicle to use for reference of my 1/24-1/25 scale copy.
It’s going to be a lot of scratch-work...

Sorry dial up guys!

The real one:


And here’s my version:


It's going to be my project for the College Student GB as this Vehicle is operated by University students (including myself) who are a member of the EMS service that is provided to the campus as a subunit of the University Police Department. As a Criminal Justice major- this is a pretty cool deal anyway you cut it.

Thanks for checking it out! Any tips or tricks of the Auto trade would be much appreciated, as I am first and foremost an Armor modeler.

(You can tell this is my first time using a Razor Saw- I had a run in with the windshield frame and some of the cuts in general are a little rougher than I would have liked, but overall I think I did a pretty decent job- all the white plastic is evergreen strip styrene and I’m looking forward to the heavily modified end result... Assuming it can look like what I have pictured in my head!)

Smile [:)]

-Chris

US Army Infantryman

dmk
  • Member since
    September 2008
  • From: North Carolina, USA
Posted by dmk on Wednesday, January 28, 2009 3:32 PM

What were you doing with the masking on the windows?  Is that to do black coloring some vehicles have around the edges of the glass or are you tinting the back windows?


  • Member since
    December 2003
  • From: Colorado
Posted by psstoff995 on Thursday, January 29, 2009 11:15 AM

Yeah you got it, it's for the black edging that goes around the rear windows. IMO the kit has it molded in too far into the center of the window, but short of Vac-Forming a whole new piece I have no idea how I'd fix it.

The real one is simply tinted however Revell-Monogram decided they would mold it in with a grainy texture, so I'm just going to spray it black. I also masked around molded on details like latches and hinges for the trunk window and the bars on the two bench seat windwos (that separate the static glass from the glass that would roll down)

Thanks for stopping by!

-Chris

US Army Infantryman

dmk
  • Member since
    September 2008
  • From: North Carolina, USA
Posted by dmk on Thursday, January 29, 2009 12:15 PM

Thanks

 I'm looking foreward to seeing how this one progresses.

  • Member since
    December 2003
  • From: Colorado
Posted by psstoff995 on Thursday, January 29, 2009 7:51 PM

Thank you, it's a little out of my normal safety zone, I'm a 1/35 armor guy and usually despise the clear parts, one of those things if you mess up painting... that's it.

But I run rescue on this Expedition and I just got my EMT-B certification so I'm really going to put everything I can into it.

I'm going to try and mold little belt buckles and use foil for the belts and so on etc.

What's going to be hard is all the cross bars on the inside (like between the doors and everything) aren't molded in, no part for a rearview mirror... lot of problems with the kit (it's actually older than our rescue vehicle- a 98)

Because it's part of a GB I should finish it a little quicker than my usual builds too! haha

-Chris

US Army Infantryman

  • Member since
    December 2003
  • From: Colorado
Posted by psstoff995 on Saturday, January 31, 2009 4:18 PM

Here's a few minor updates- I'm switching over to the figures for this one at the moment, I'm kind of stuck with how to move forward with the Ford Confused [%-)]

I was proud of the safety vests I molded in Tongue [:P]

There's some seat buckles now and the bench seat up front is finished as far as the "seat" part goes- still needs the folding arm-rest/seat-back portion.

The passenger door now has all the protocol  and hazmat flipbooks

This was kind of the idea for the set up of the finished product I'm playing around in my head with.

Thanks for looking Smile [:)]

-Chris

US Army Infantryman

  • Member since
    December 2003
  • From: Colorado
Posted by psstoff995 on Thursday, February 12, 2009 10:36 PM

Some more work on the figures- haven't had much time for anything else unfortunitly- but hey- there's my patch Tongue [:P]

How to on the tattoo


-Chris

US Army Infantryman

  • Member since
    July 2003
  • From: Dahlonega, Georgia
Posted by lizardqing on Wednesday, March 11, 2009 10:24 PM

Looking great.

Where did you find the figures?

  • Member since
    December 2003
  • From: Colorado
Posted by psstoff995 on Wednesday, March 11, 2009 10:36 PM

Thanks! They were a mechanic set made by Fujimi Models (good thing you asked online, if I had to say that out loud I think I'd give up).

http://www.scalehobbyist.com/catagories/Scale_Figures/FUJ00011003/product.php?s=0&t=5&pg=1&ppp=24&sb=stocknumber&so=a&sc=24,25 

There a few more sets on the same website if you search for 1/24 figures. I had to make a lot of modifications to the shirts and in one instance change the sex of one of the providers.

Thanks for checking it out, it's over on SFH if you haven't seen it there.

-Chris

US Army Infantryman

  • Member since
    July 2003
  • From: Dahlonega, Georgia
Posted by lizardqing on Wednesday, March 11, 2009 11:00 PM

Thats what I thought they were.

 Saw it over there, jsut happened to be cruiseing through here when the question popped in my head. Smile [:)]


  • Member since
    December 2003
  • From: Colorado
Posted by psstoff995 on Wednesday, March 11, 2009 11:07 PM
Good eye Smile [:)]

-Chris

US Army Infantryman

  • Member since
    December 2003
  • From: Colorado
Posted by psstoff995 on Thursday, March 19, 2009 11:54 PM
Quick update, waiting on some sheet styrene. Figured I’d glue in the side panels to the top half to make painting easier...? Not sure if that was the right route or not, main thing I’m worried about is getting the detail for the cross bars and ...hmm thinking more about this I might pop them back out and glue them to the floor, then try and fit in the top after I stick the glass in...  We’ll see- also added in the siren. Had to do some scratch and detail work to it to get it to sit down more realistically, also moved the bars way out to the sides as opposed to the more central locations they were originally designed to go in.


And a close up


Overhead


Inside


-Chris

US Army Infantryman

  • Member since
    December 2003
  • From: Colorado
Posted by psstoff995 on Friday, March 20, 2009 12:07 AM
FYI- on the front half, opposite the amber lights seen on the back, are two white scene lights similar to the right alley light in the above pictures.

-Chris

US Army Infantryman

  • Member since
    December 2003
  • From: Colorado
Posted by psstoff995 on Wednesday, April 1, 2009 4:38 PM

Quick update- got some primer and colors down.


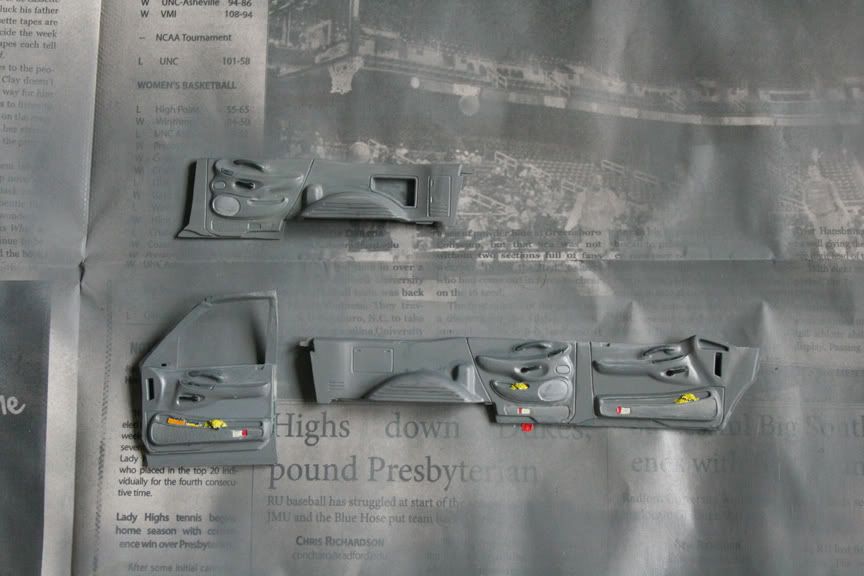
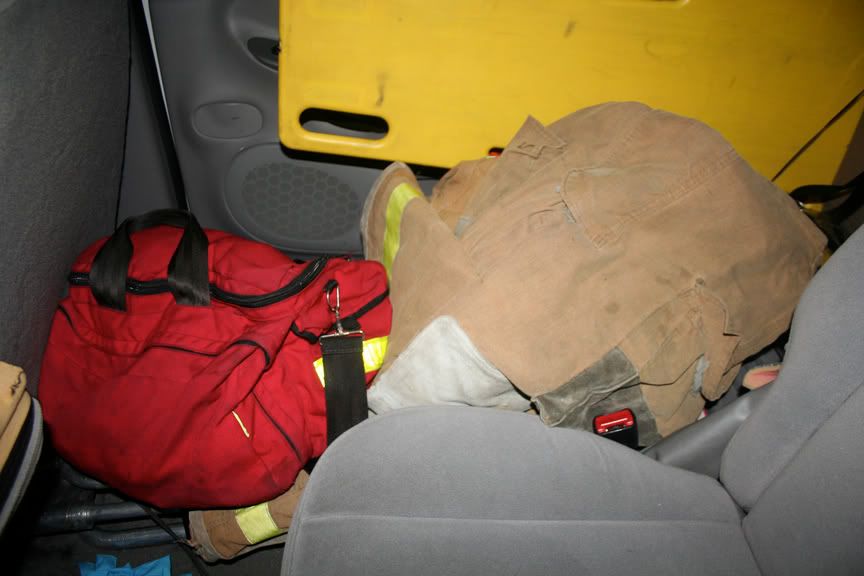
For the one side, it’s going to have an elevator rescue bag, back board and a bunch of other stuff so I didn’t bother with the base colors. Also I messed up the back door on the opposite side, it was supposed to be solid red, I added in the white reflector, however it will be behind the seat so it’s not a big issue.

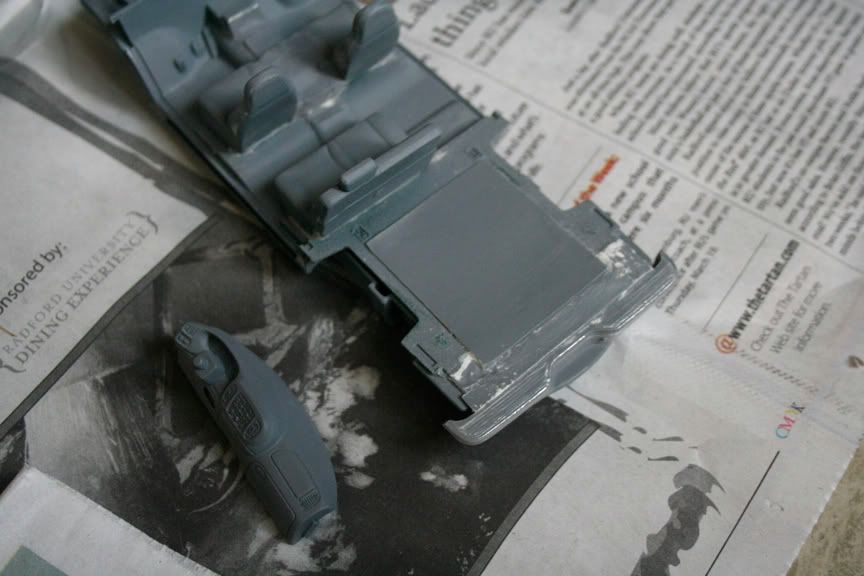
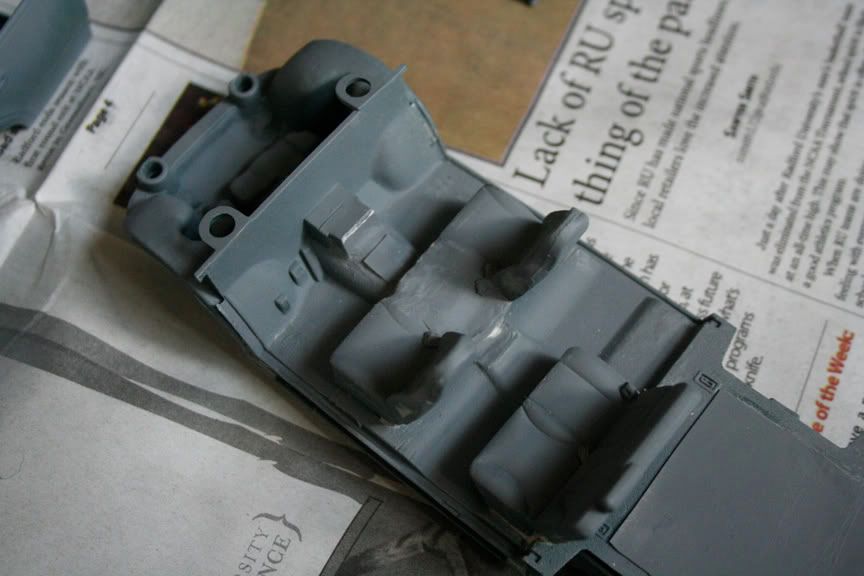
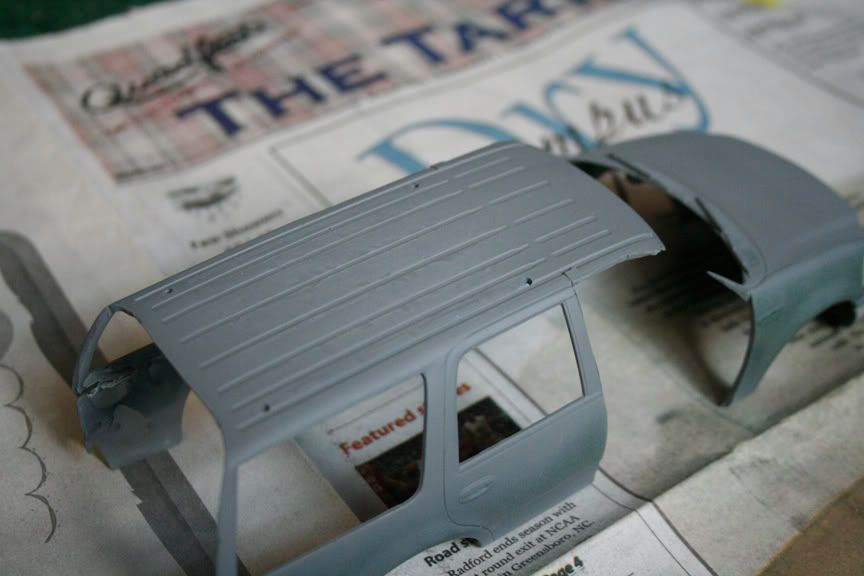
Here’s a bunch of just primer coats, you can see the rough spots... after some more sanding, primer and paint, I hope it will smooth out somewhat.

Thanks for checking it out

-Chris

US Army Infantryman

  • Member since
    March 2009
  • From: Saint Marys, OH
Posted by Ivawoody on Wednesday, April 1, 2009 5:14 PM
Lookin' good Chris. Thumbs Up [tup]
-Woody Follow my Viper RT/10 build here: http://cs.finescale.com/forums/1107466/ShowPost.aspx See my Huey project here: http://cs.finescale.com/forums/1105968/ShowPost.aspx
  • Member since
    December 2003
  • From: Colorado
Posted by psstoff995 on Wednesday, April 1, 2009 6:23 PM
Thanks a lot Smile [:)]

The detail work isn't as clean as your Viper from what I can tell, but it’s a fun project, I’m enjoying it.

-Chris

US Army Infantryman

JOIN OUR COMMUNITY!

Our community is FREE to join. To participate you must either login or register for an account.

SEARCH FORUMS
FREE NEWSLETTER
By signing up you may also receive reader surveys and occasional special offers. We do not sell, rent or trade our email lists. View our Privacy Policy.