SEARCH FINESCALE.COM

Enter keywords or a search phrase below:

Update on Ferrari powered '32 Ford

1390 views
2 replies
1 rating 2 rating 3 rating 4 rating 5 rating
fox
  • Member since
    January 2007
  • From: Narvon, Pa.
Posted by fox on Sunday, March 24, 2013 12:38 PM

Very sorry guys, I guess I've got a problem with Photobucket AGAIN. Will try to get the pics up a little later this afternoon.

Jim Captain

Edited on 3/26/13 :-  Got problem with photobucket fixed and the above post has the pics now. Sorry about that guys. I'm one of those "old F****" who doesn't get along well with these new fangled gadgets.

Jim Captain

 Main WIP: 

   On the Bench: Artesania Latina  (aka) Artists in the Latrine 1/75 Bluenose II

I keep hitting "escape", but I'm still here.

fox
  • Member since
    January 2007
  • From: Narvon, Pa.
Posted by fox on Saturday, March 23, 2013 5:53 PM

Hi guys. Been really busy lately but I got a little work done on the Hot Rod. Here you can see that the starter now is in line with the flywheel.

[V[IMG]http://i150.photobucket.com/albums/s103/Fox063/Ferrari%20Testarosa%20Engine/DSCN2276.jpg]

The spacer between the starter and the flywheel fit nicely and after all the equipment on top goes on, it won't be noticeable.

Here I've placed the alternator and A/C compressor (I think), the fuel injectors (I'm guessing), and the intakes on top of the block to get a good idea of how much room I'm going to need for the engine compartment.
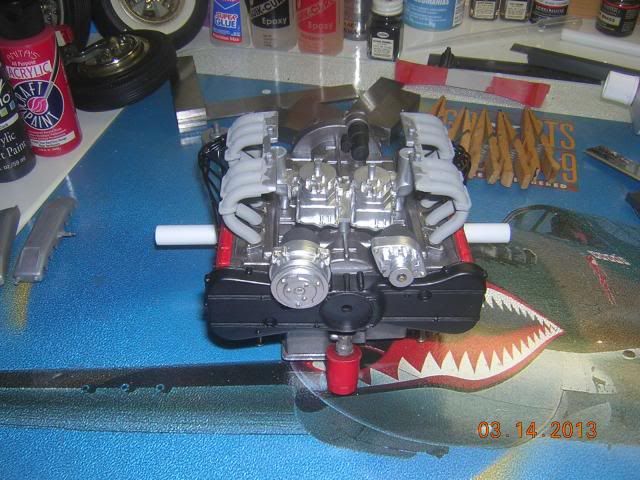
Here's a look at the gearbox end of the block. All you mechanics out there please correct me if I'm calling parts by the wrong names. As I've said, I'm not a mechanic, never have been and never will be. I used to be able to change the oil, spark plugs, and tires. Wouldn't try to do any of them on these new cars. Anyhow, I put the intakes on dry to see how much height I'll need to have.
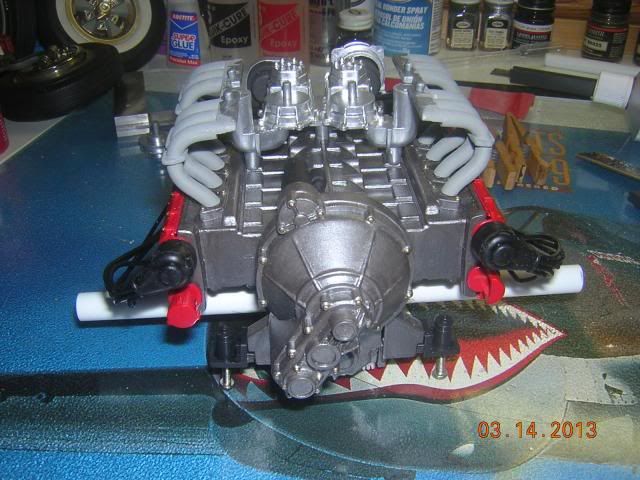
Don't know what these boxes on top of the intakes are but that's where the directions say they go.
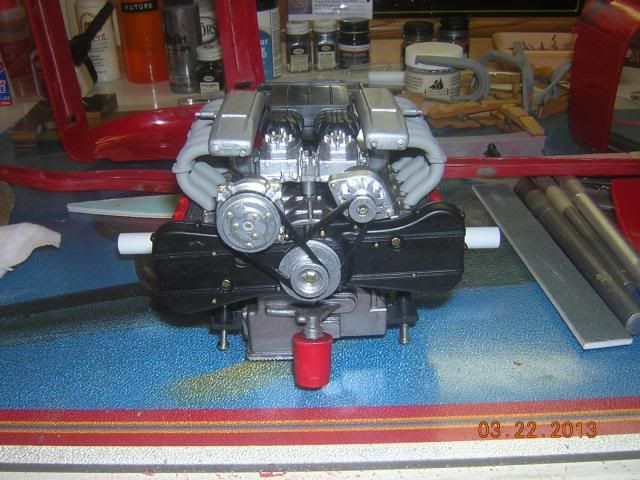
I believe the black box on top is the air inlet.
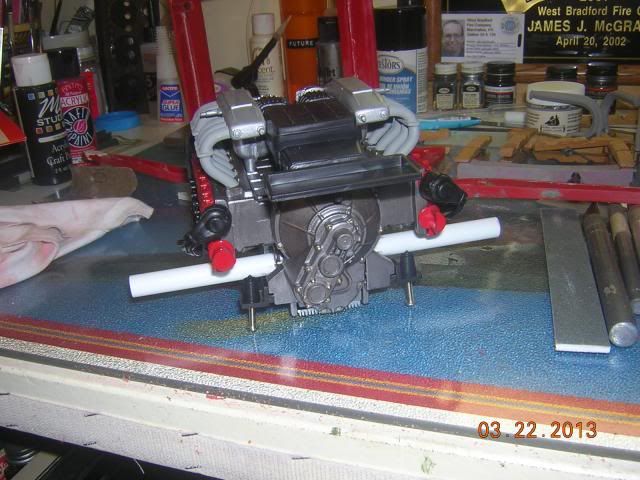
If you google a Ferrari Testarossa engine, you will see all of the piping and wiring that will go on the engine once I get it set up in the frame. I have started to clean up all the body parts too. That old glue that we used to use "back in the days" really ate into the plastic. I have a lot of filling and sanding to do.
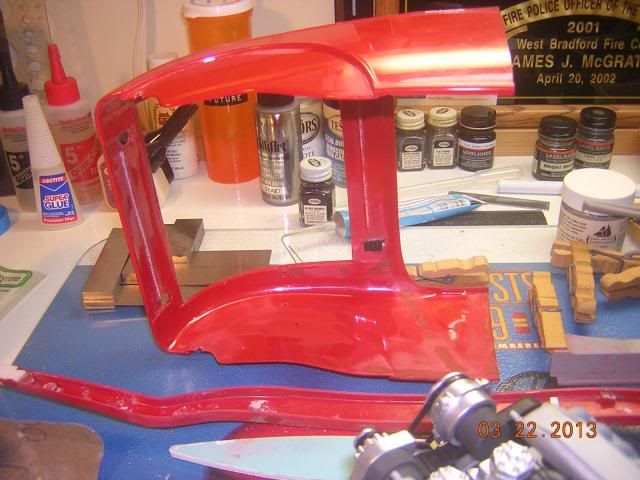
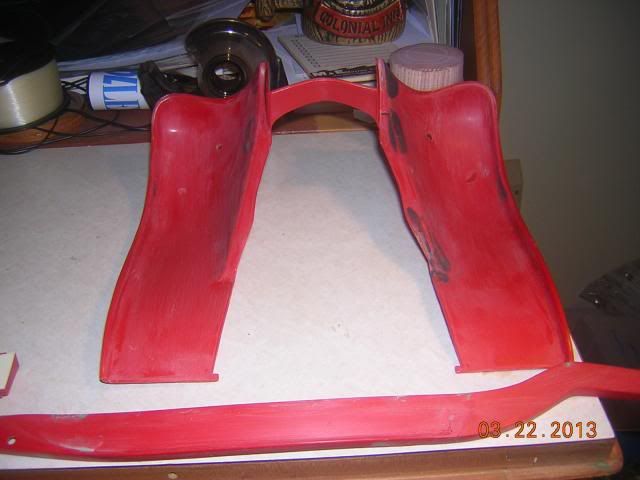
Well, that's all for now. Any critiques or suggestions are gratefully accepted. Thanks for looking.

Jim Captain 

 Main WIP: 

   On the Bench: Artesania Latina  (aka) Artists in the Latrine 1/75 Bluenose II

I keep hitting "escape", but I'm still here.

fox
  • Member since
    January 2007
  • From: Narvon, Pa.
Update on Ferrari powered '32 Ford
Posted by fox on Tuesday, March 12, 2013 8:55 PM

Here's the latest on the '32.

Pic #1 - Page of the instructions. Did not need the crossbrace in the center with the opening for the driveshaft. Cut out the lower center section and filled with scrap plastic.

Pic #2 - Center section filled in.

Pic #3 - Trial fit of the Starter motor. Mounting holes did not put starter in-line with flywheel. Will have to move the front of the starter over slightly by enlarging the front mounting hole. Pic #4 shows the same thing only from a different angle. Also had to add a thin spacer (plastic card) to the starter because it did not fit flush with the flywheel cover.Fit was OK so I smoothed it to the starter and painted it flat black. Can't see any seam around the front of the starter so that's OK. Will straighten out the starter tomorrow.

Pic #5 - Made a jig to help get the frame lined up correctly. Front and middle braces will now fit. Rear brace will have to be scratchbuilt.

Also started filing some of the sharp edges on the body. Have a hunch that I'll have to make the rear half of the body with the rumble seat cover installed and smoothed. That brings up the question of whether to make the rear of the body lift forward or tilt towards the rear. Maybe I could have it tilt sideways, that would be different looking. The belt driven pulleys were also test fitted to see if all is OK.

Ran out of my Acryl Blue glazing and spot putty yesterday.  so took a trip to the local auto store. No Acryl Blue. Only kind they had was Bondo red. Bought it and tried it out on some spots on the body. Goes on real smooth and is sandable in 5 to 10 minutes depending on how thick you put it on. Sands great. The large tube should last me quite a while. 

Well, that's it for now. Planning to get more work done tomorrow. Take Care. Happy building.

Jim Captain

 Main WIP: 

   On the Bench: Artesania Latina  (aka) Artists in the Latrine 1/75 Bluenose II

I keep hitting "escape", but I'm still here.

JOIN OUR COMMUNITY!

Our community is FREE to join. To participate you must either login or register for an account.

SEARCH FORUMS
FREE NEWSLETTER
By signing up you may also receive reader surveys and occasional special offers. We do not sell, rent or trade our email lists. View our Privacy Policy.