SEARCH FINESCALE.COM

Enter keywords or a search phrase below:

Airfix 1/32nd Bugle Buggy

3883 views
10 replies
1 rating 2 rating 3 rating 4 rating 5 rating
  • Member since
    December 2008
  • From: UK
Airfix 1/32nd Bugle Buggy
Posted by PatW on Wednesday, May 21, 2014 10:13 AM

As I'm into beach buggies (see my 4X4 Manx nearby) I've just started this one....................

It's a 1970's kit in white plastic witha few clear bits.

As you can see the engine - gearbox unit is about one and half inches long..................

and nearly the same widthways with the exhaust on.................

Remember , common sense is not common.

  • Member since
    December 2008
  • From: UK
Posted by PatW on Wednesday, May 21, 2014 10:13 AM

A few more pics..................

I'm getting some of the hand painting done.....................

The first coat of the factory gloss Orange......................

A few more pics to come...........

Remember , common sense is not common.

  • Member since
    December 2008
  • From: UK
Posted by PatW on Wednesday, May 21, 2014 10:17 AM

and some more pics..............

The matt black floorpan............

Wheels sprayed silver........

The engine with it's first coat of Orange on the fan housing.........

And the completed front beam with shocks, steering and double nerf bars all in black gloss....

Now that's yesterday, see below for today..........

Remember , common sense is not common.

  • Member since
    December 2008
  • From: UK
Posted by PatW on Wednesday, May 21, 2014 10:23 AM

A couple of pics from today's work........

Putting the chassis together................

As it's hot today in the UK, the second coat of gloss Orange on the bodyshell has dried so I've laid up the first coat of clear.

Hopefully that will dry overnight so that I can get on and do some more tomorrow.

Remember , common sense is not common.

  • Member since
    December 2008
  • From: UK
Posted by PatW on Wednesday, May 21, 2014 2:15 PM

On the positive side I've been able to get out into the cabin this evening and put the wheels and tyres together (being plastic the tyres come in two halves each) and hang them on the axles.

But on the negative side if you look at the paintwork the Orange paint has the Orange Peel effect!

I've put my cabin heater on a low setting overnight to further harden the paint. 

I will look at it closely in the morning to decide whether to take it all off or be able to carefully rub it out!

The sides of the body are OK but the front and back (bonnet & boot) are most affected.

But either way it's going to be a long day tomorrow.

Remember , common sense is not common.

  • Member since
    December 2008
  • From: UK
Posted by PatW on Thursday, May 22, 2014 5:02 AM

Well I've tried to remove the paint which came off better than expected with the good old brake fluid.

But the soapy water was a shade too hot for the shell as you can see.........

So as even used kits of this model are going on ebay at nearly £80 here in the UK, it looks like it's game over!

Remember , common sense is not common.

  • Member since
    December 2008
  • From: UK
Posted by PatW on Friday, May 23, 2014 1:59 PM

Well I have a reprieve, a lifeline.

I've just fought a battle with a few others on ebay UK for another kit and won!

I'm pleased though that I didn't pay anywere near as much as one that went last week for £77!

I shall keep the wrecked shell for a possible diorama and a reminder.

I shall wash the new kit in WARM soapy (Not HOT you twerp) water, rinse, dry, warm the Orange rattle can in some HOT water test and spray the shell.

As I will have a new complete chassis, engine and gearbox, I have invested in a new resin shell which a guy here in the UK makes for slot-cars, with lexan glass and interior ( which I won't need).

As the Porsche 914 race/ rally shell has wide arches small modifactions will be made, plus as the Porsche was mid- engined I may have to turn the engine/gearbox round to be authentic.

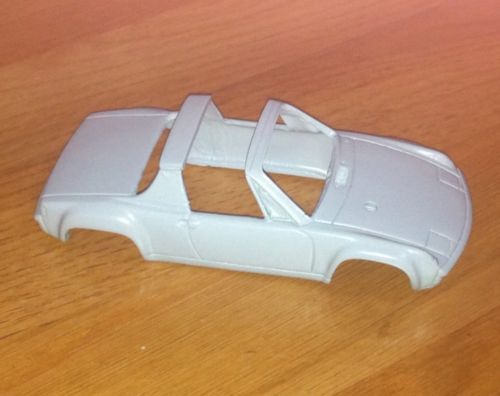
Well all about this one will be on another thread in a couple of weeks time when the guy has made the shell.

Remember , common sense is not common.

  • Member since
    December 2008
  • From: UK
Posted by PatW on Saturday, May 31, 2014 4:48 PM

Well here we are with another body, from the second Bugle Buggy kit, suitably and carefully painted.

I've also had to add a plasticard rim to the floorpan after test fitting the body and finding that it touched the tyres. I've painted the packing matt black to go with the floorpan and added the body, the dash and both front and rear screens...............

All I have to do now is fit the lights and number plates to finish.

Remember , common sense is not common.

  • Member since
    December 2008
  • From: UK
Posted by PatW on Sunday, June 1, 2014 6:33 AM

Here we are, the last three pics on this one.................

Remember , common sense is not common.

  • Member since
    January 2006
  • From: Pineapple Country, Queensland, Australia
Posted by Wirraway on Monday, June 2, 2014 2:41 AM

Bought that one back from the dead  ! Nice work Pat.  I I feel your pain about plastic body parts and HOT water- I still have an Airfix 1/24 Me109 without an engine cowling.  I'd buy another one if Hornby didnt want 5 pounds for it !!

"Growing old is inevitable; growing up is optional"

" A hobby should pass the time - not fill it"  -Norman Bates


GIF animations generator gifup.com

  • Member since
    December 2008
  • From: UK
Posted by PatW on Monday, June 2, 2014 4:37 PM

Yes Wirraway, I know how you feel. I bought the 2nd Bugle kit on ebay UK but didn't pay anywhere near the £77 that someone paid for another Bugle buggy kit  the week before!!

Remember , common sense is not common.

JOIN OUR COMMUNITY!

Our community is FREE to join. To participate you must either login or register for an account.

SEARCH FORUMS
FREE NEWSLETTER
By signing up you may also receive reader surveys and occasional special offers. We do not sell, rent or trade our email lists. View our Privacy Policy.