SEARCH FINESCALE.COM

Enter keywords or a search phrase below:

1/48 Roden Staggerwing

3186 views
13 replies
1 rating 2 rating 3 rating 4 rating 5 rating
  • Member since
    September 2013
1/48 Roden Staggerwing
Posted by DeafAviator on Thursday, September 19, 2013 11:47 AM

Hey everybody! My first post here (other than my introduction post over at the new fish forum Wink) is going to be all about showing off my newest completion. Hot off the line and ready to be delivered to a dear friend is my 1/48 Roden Staggerwing!

Done up in said friend's dream colors with his custom N-number and whatnot - this is what he said would be his "If I won the lottery..." aircraft. Well apparently he won the lottery because he's getting his dream bird!! Okay well maybe that isn't quite what he had in mind but he doesn't seem to be complaining - seems to be quite excited about how this thing turned out. Anyways - onto the interesting part!

I'd like to start off with showing a few behind-the-scenes stuff then wrap it up with some final shots of the finished product - enjoy!
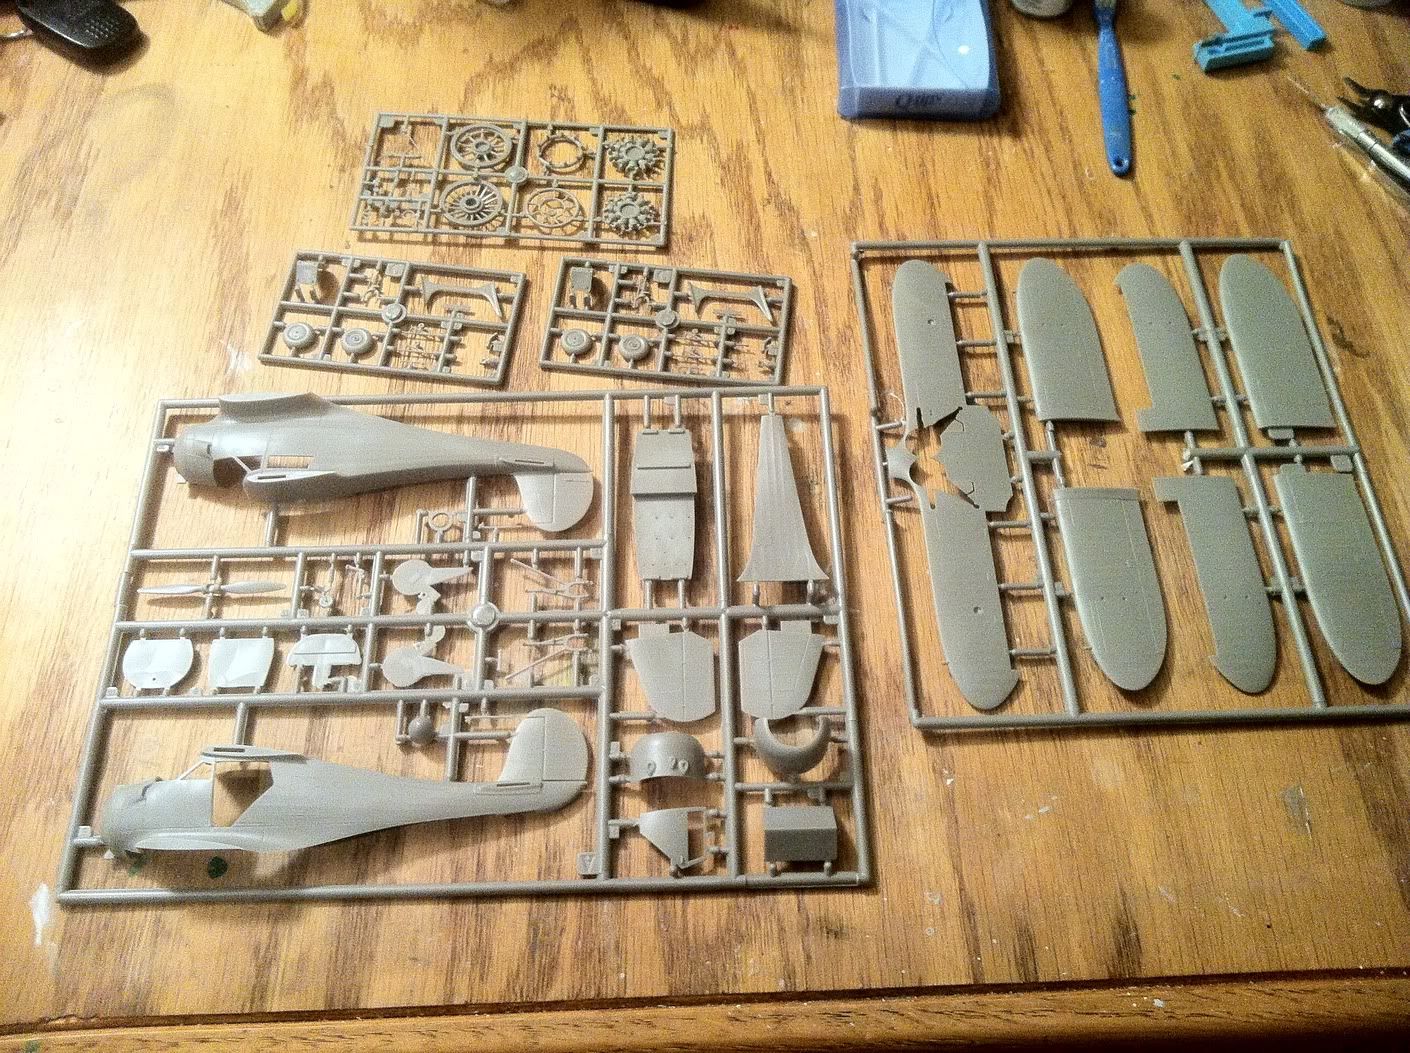

Diving in!

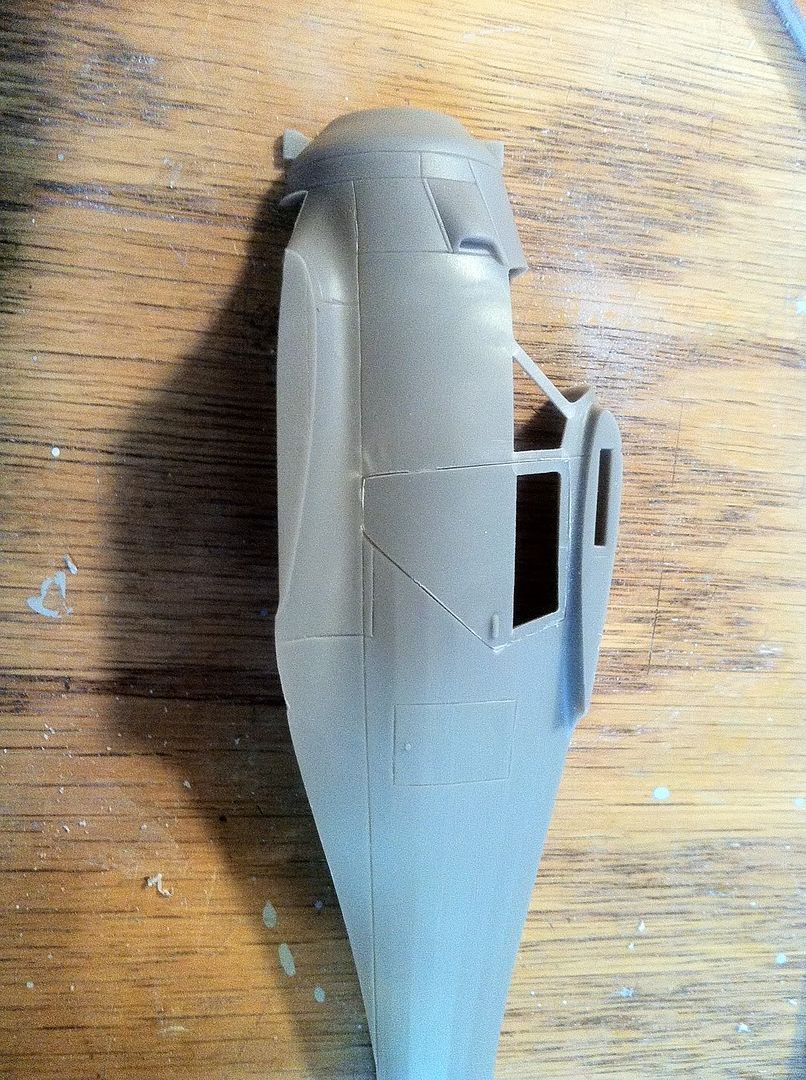
Door installation - the fit was quite excellent and with the simple shape of the door, it was incredibly easy to sand to fit perfectly.


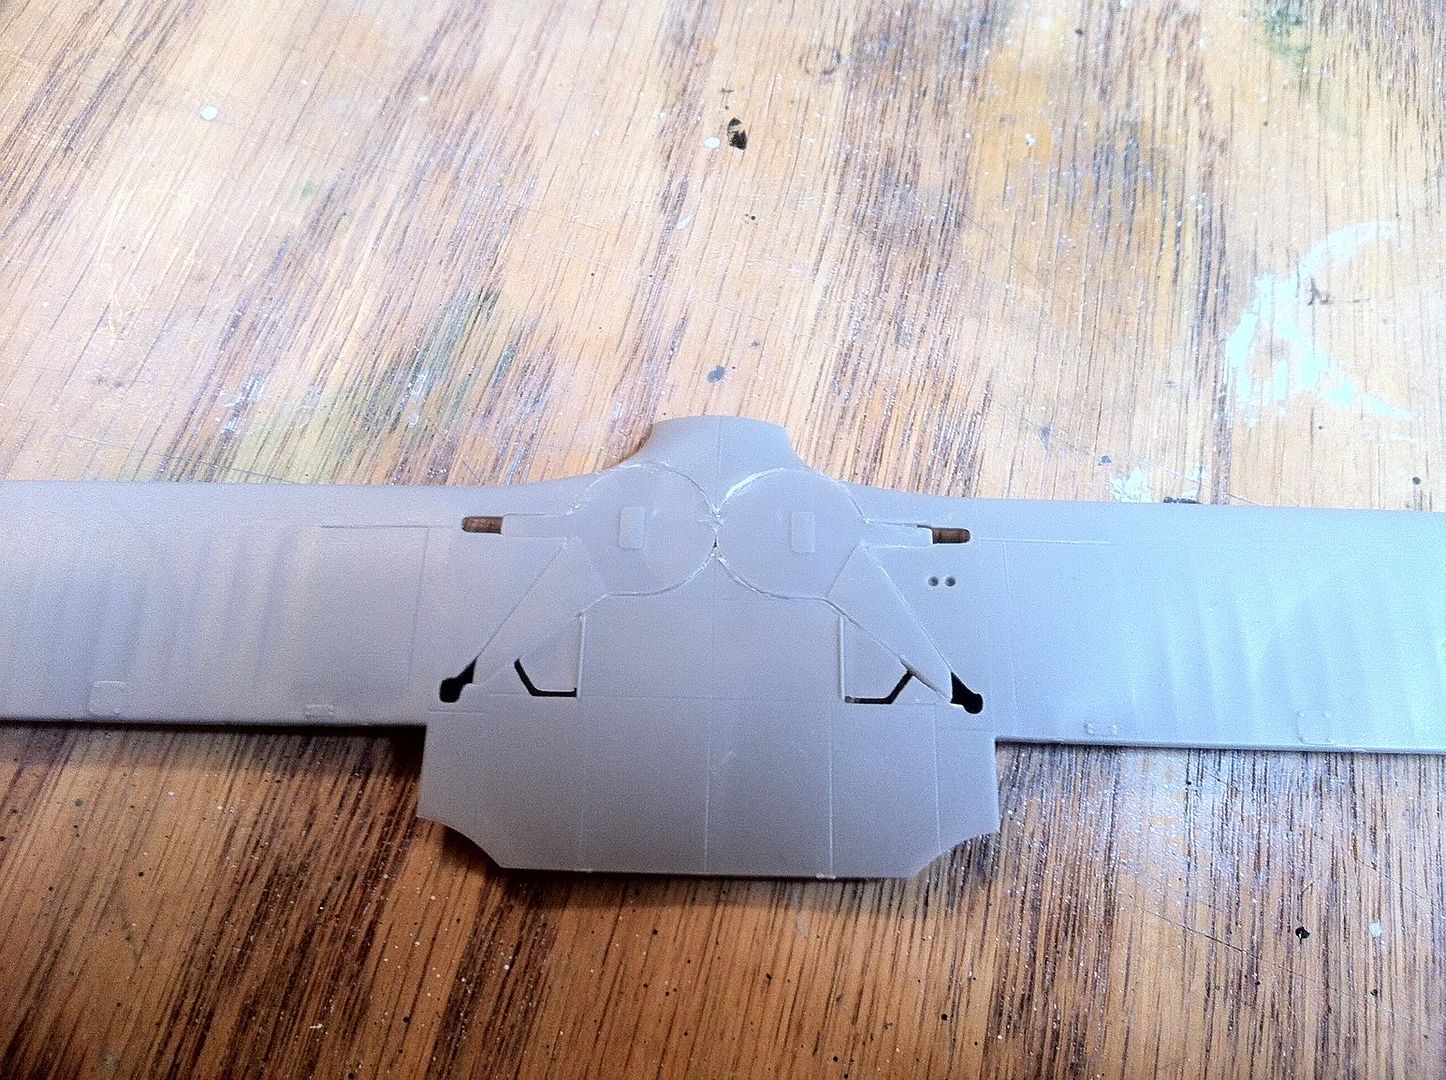
Closing up the gear doors - this was a little more difficult than the cabin door but was not too testing for my patience - just repeatedly sand and fit until it worked!


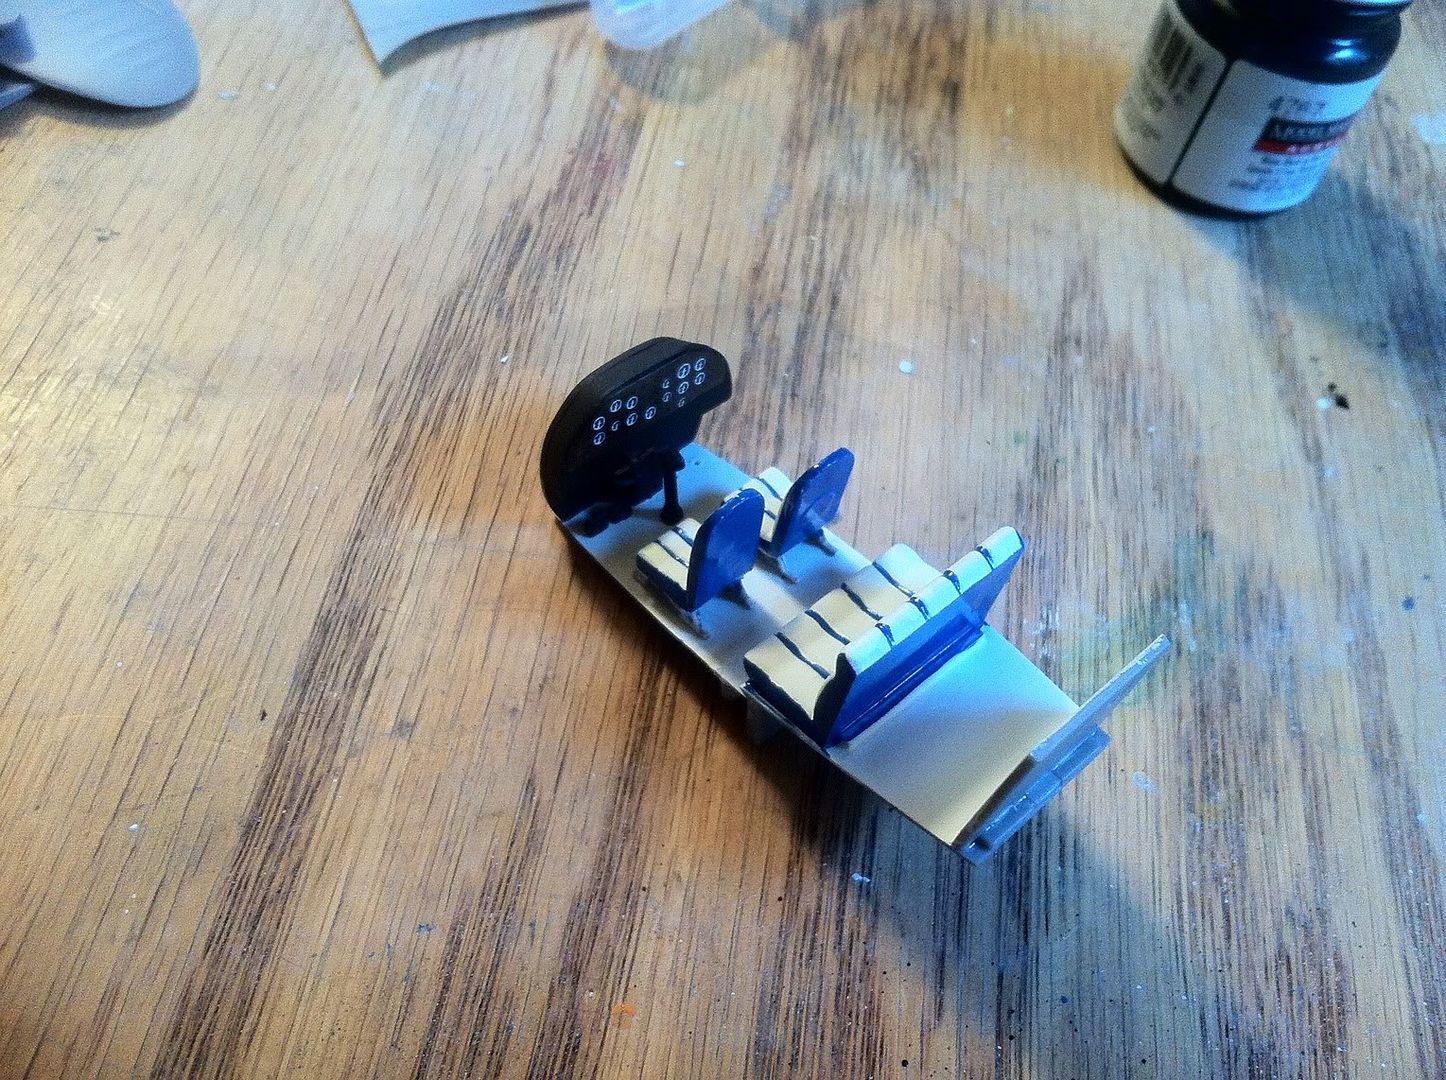
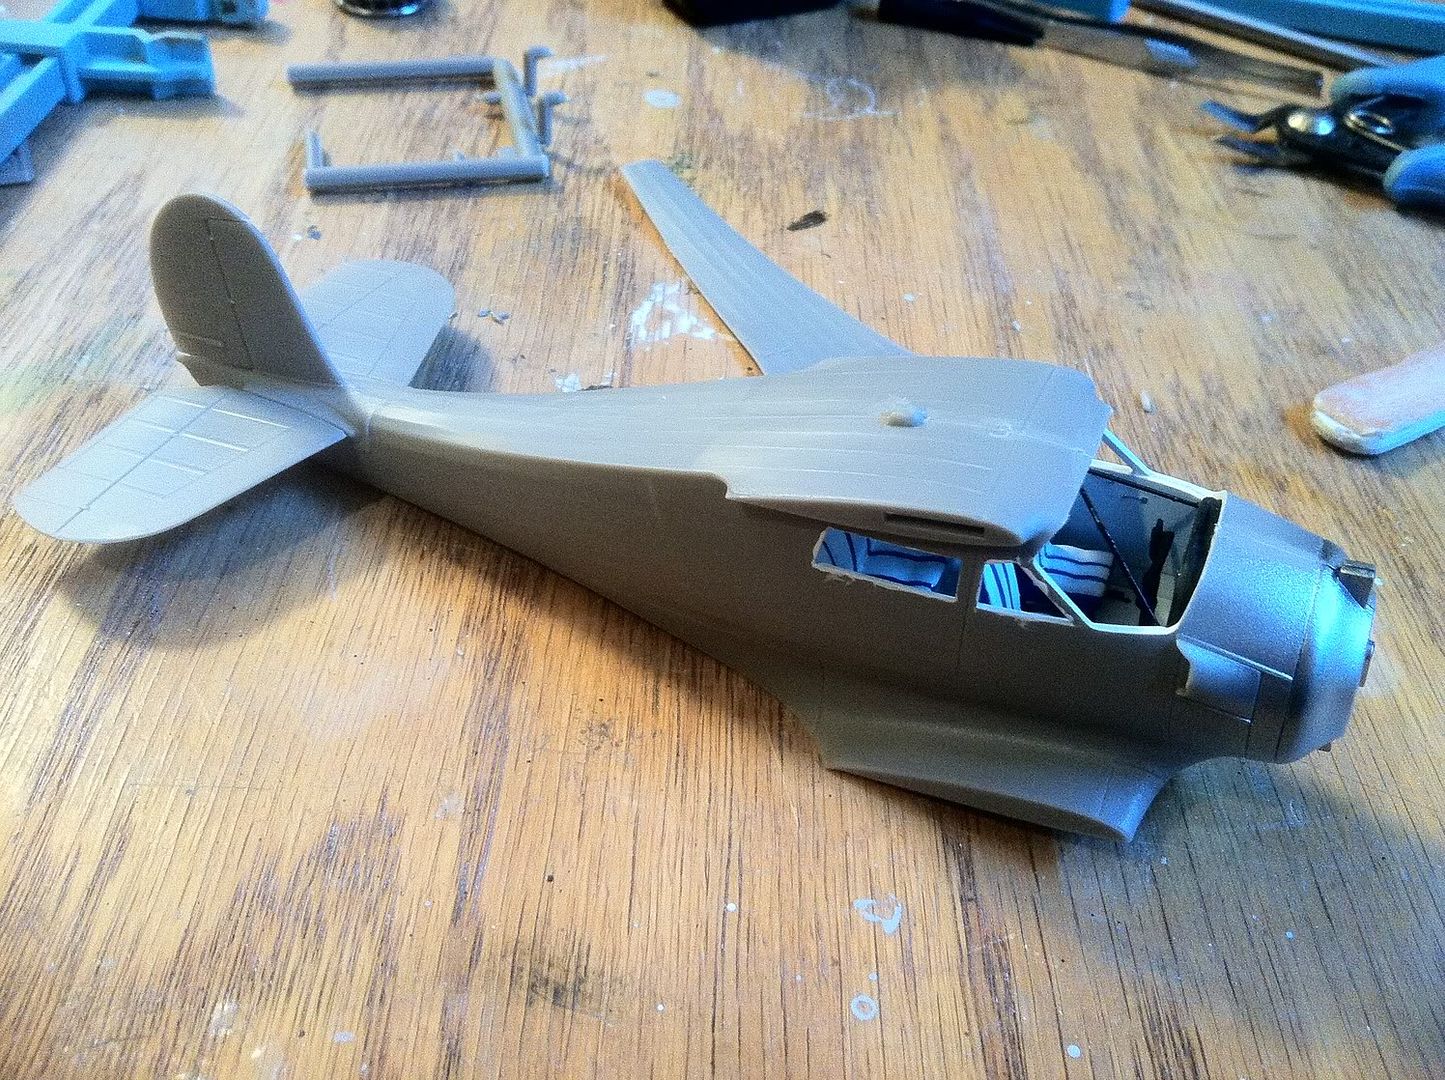
Stock (and very basic stock at that) cockpit complete - I did not want to spend a lot of time on the interior of this aircraft so I kept everything out-of-box and simple. I want to build another kit of this aircraft for myself, and that example will be getting the full treatment, with the door open and all.


Starting to look like... something! Again, fit was actually quite excellent here - actually did not use hardly any filler at all at this stage. Filler came into play when the wing was installed - but even then, not much compared to some other kits I've built.


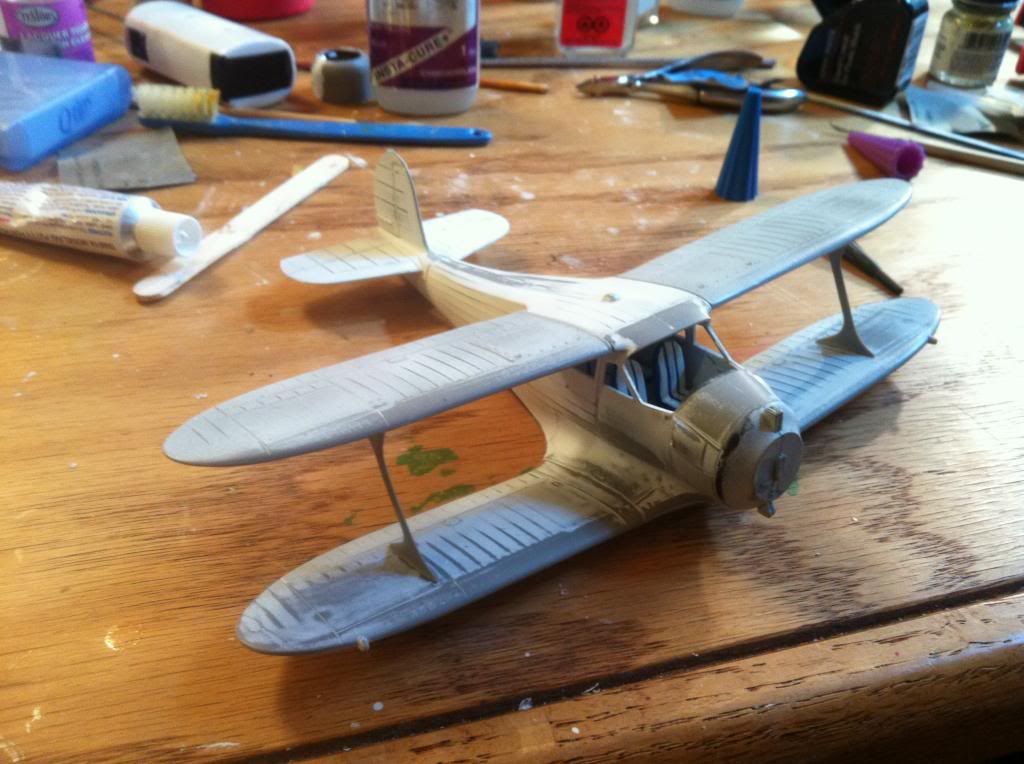
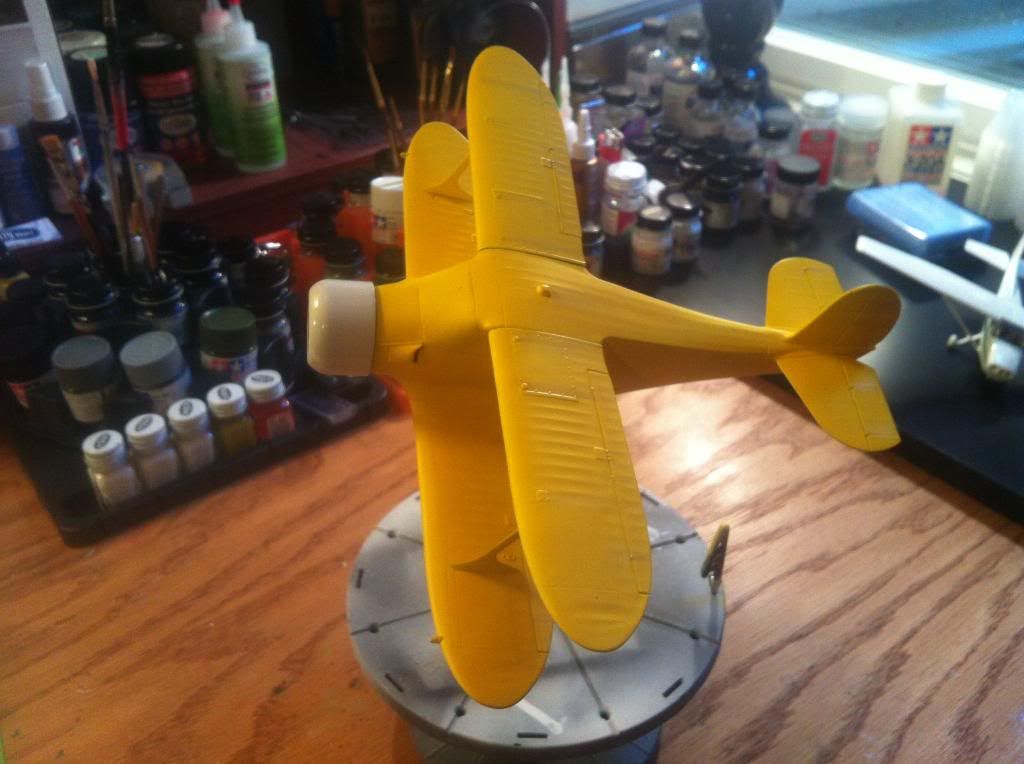
That's more like it... starting to look like an airplane now! Top wings have been dry-fitted - they are not permanently installed until the end of the build. The only things that happened after putting the wings on for good was rigging and odds-n-ends (antennas and whatnot). But anyways, dry-fit looks good - I need to be a little more careful with my sanding around wing roots if I am going to be putting off wing installations like this in the future though - join edges were a little rounded and this shows in the final build but it could be a LOT worse.


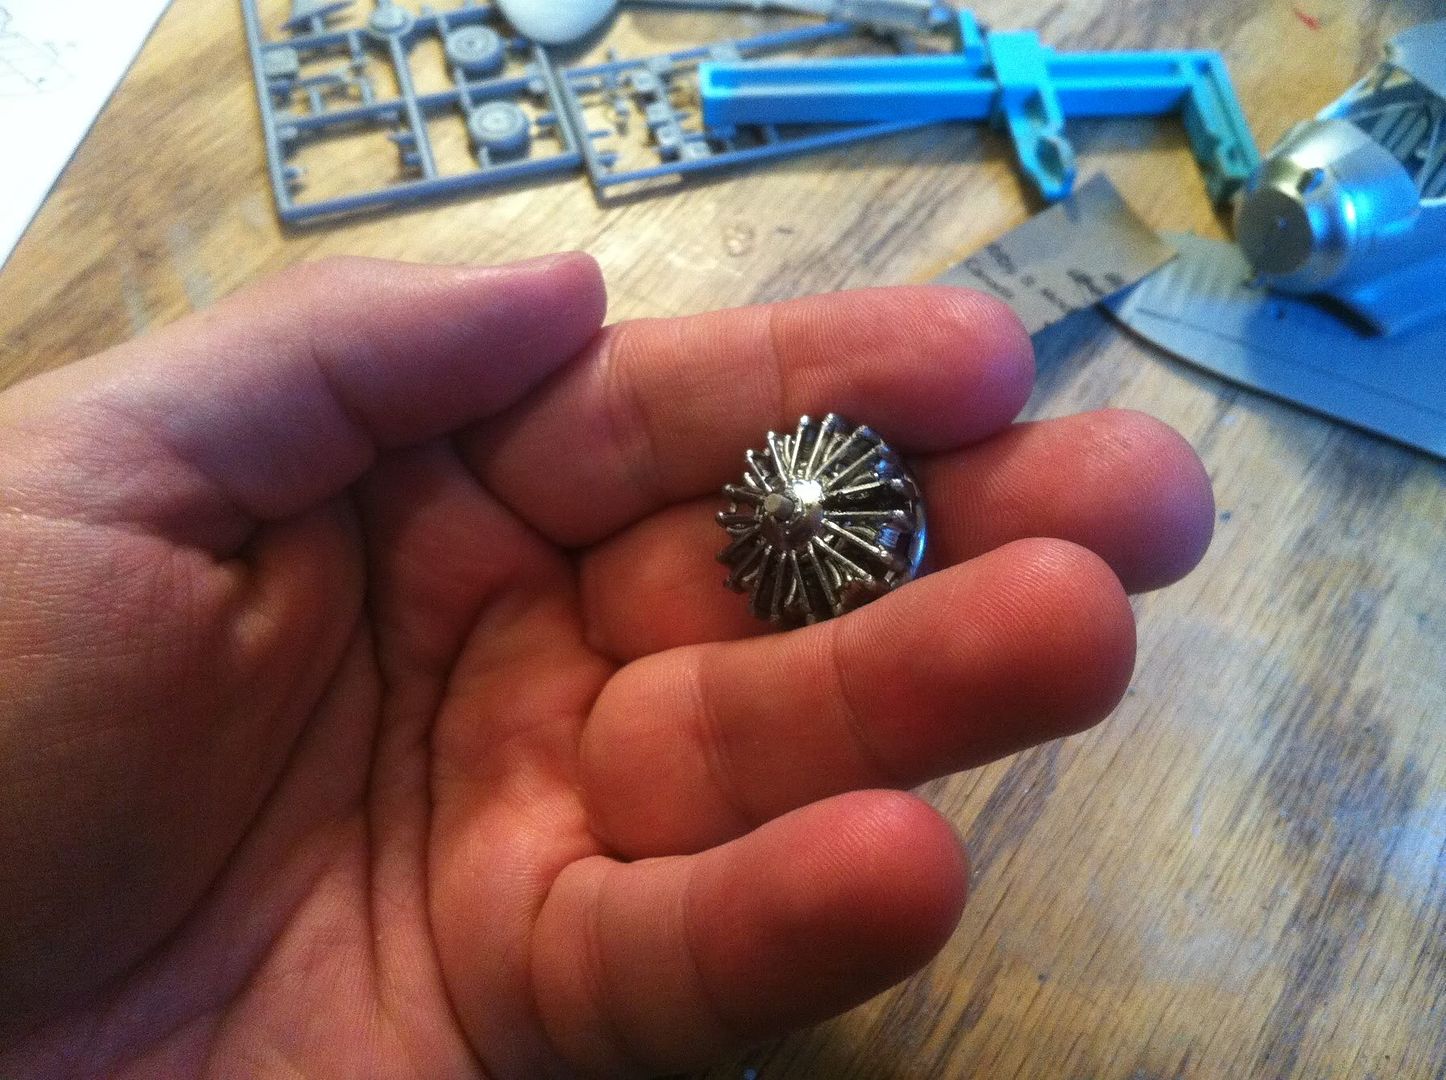
The engine - completely stock. Painted with Alclad chrome and aluminum and detailed with Model Master colors.


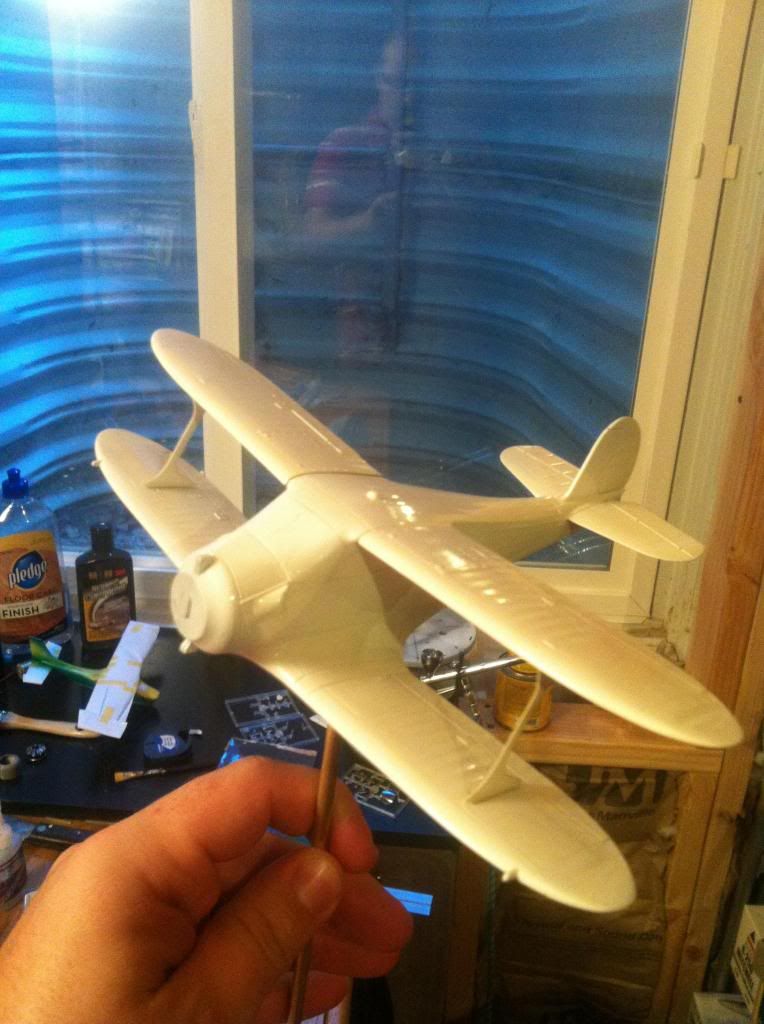
White base coat - After shooting some flat white primer followed by some more sanding and making sure everything was buttoned up well, I went for some shiny new white paint, with a lovely ghost of a man taking a picture in the background... spoooooky... Okay okay sorry just ramping up for Halloween next month Wink  Base coat went VERY well... actually wished I was done with painting! Cool But it was destined to be a purdy yellow, courtesy of my first try with Vallejo Model Air. Base white was Testors enamel. Been strugging with Model Masters so I wanted to try some other stuff... Vallejo was great but wouldve been nice if they came in gloss options. I have actually since moved onto Tamiya... I think that's the ticket for me. Nothing has worked as well as Tamiya is working for me now.


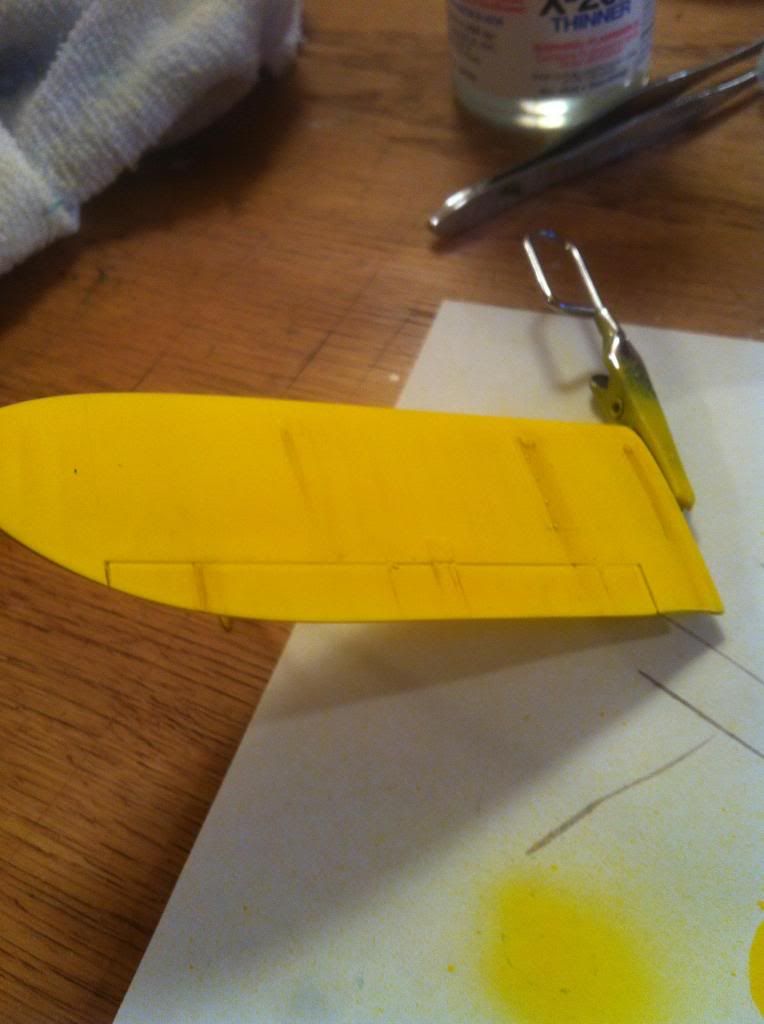
And here she is in yellow! This picture was also taken after the weathering was done as well. Cowling is dry-fitted only. Really should've painted it together with the rest of the plane as in the end it turned out to be a slightly different shade of yellow... lesson learned!


Working on light weathering using a mix of black, white and brown pastels. Pretty darn happy with how this looks! Probably actually a little on the heavy side but I wasn't sure how the gloss clear would conceal it (I know I know, it's clear... but you know what I mean - the shine of the gloss can sometimes "hide" subtle and faint weathering and paint shades) so I made sure it wasn't TOO subtle. In the end, this was actually perfect - it's there but it doesn't jump out. You notice the airplane first and then the more you look at it, THEN you start to notice the streaks and whatnot - exactly what I wanted.


Another angle on the weathering...


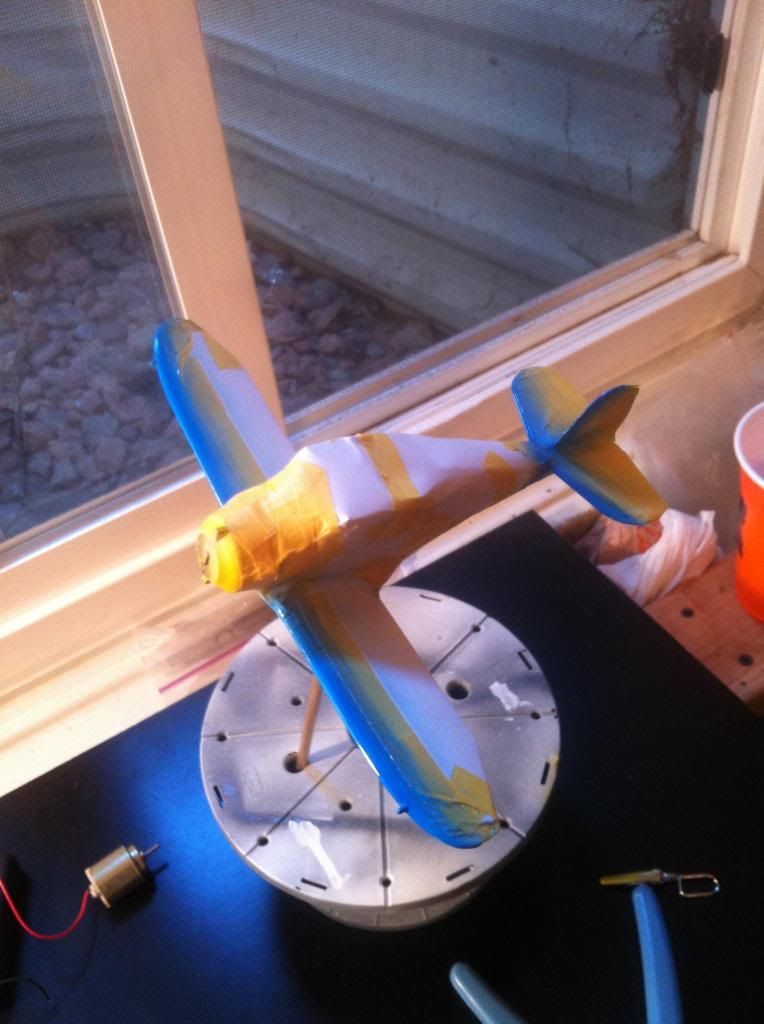
Time for some blue trim! Shot with Testors Gloss Blue enamel - was a perfect match for the blue kit decals. I never seem to have much good luck with masking but this time it went pretty well... no bleeds! On me or the aircraft...


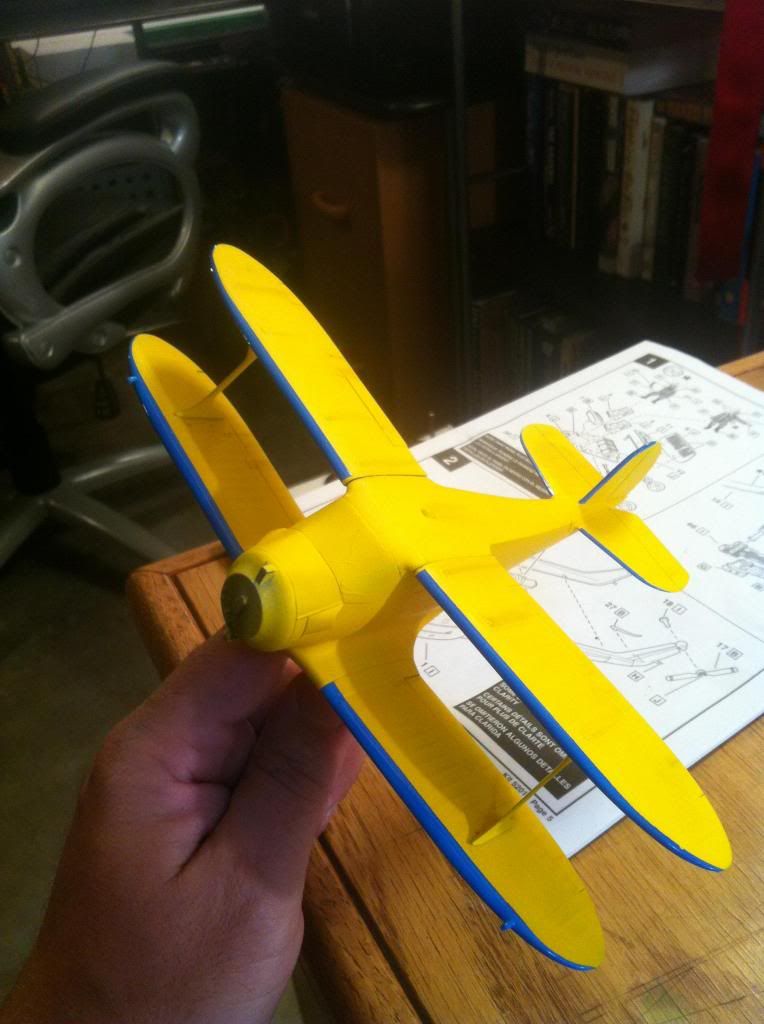
Voila! I think it looks stunning, if I do say so myself. This build is turning out to be some of my best work yet! The blue does look a tad "shocking"... almost like a neon, but that is due to the photo. In person, it is actually really pleasant. 


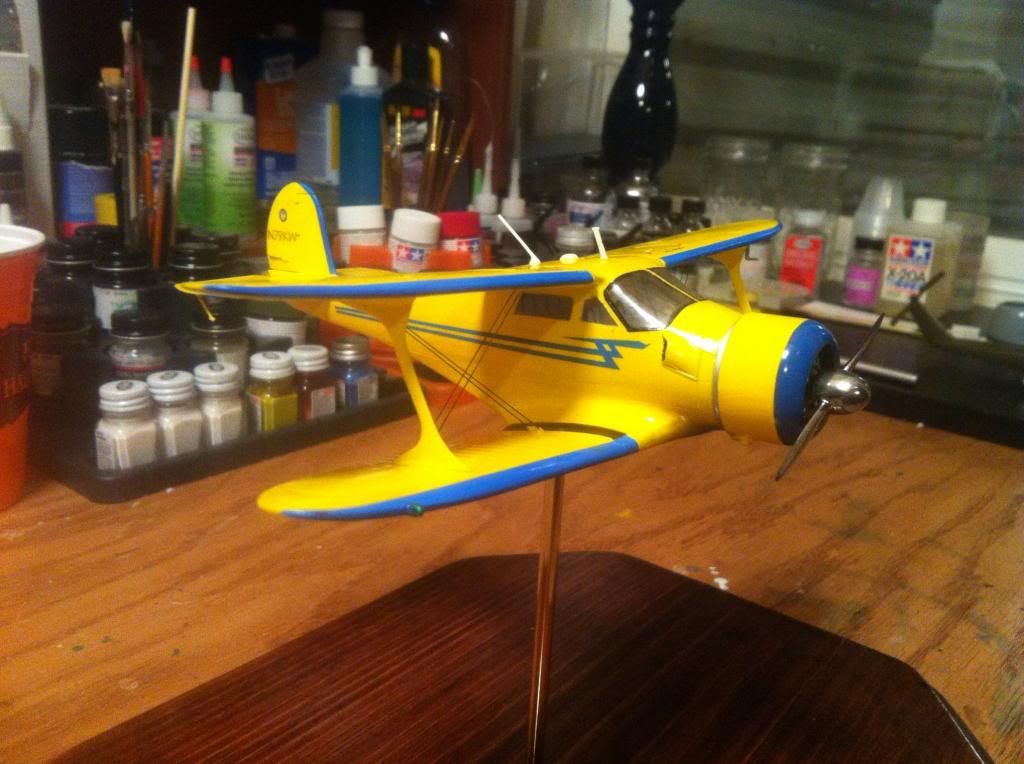
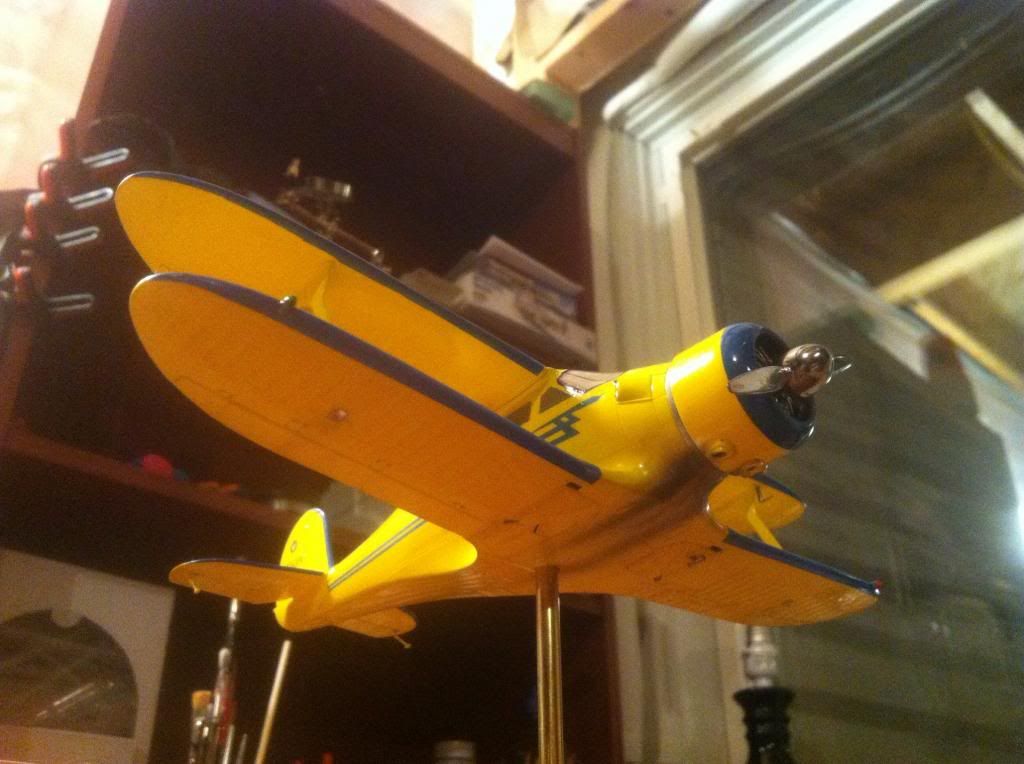
And now, ladies and gentlemen, what you have all been waiting for (you didn't know you were waiting for it... but trust me... you were), the final result! Rigging done with superglue/accelerator and ..008 monofilament. Prop/Spinner done with Alclad Chrome. Decals are kit (stripes) and custom (tail N-number and logo). Clear gloss is done with Model Masters Acryl. Mount is brass rod, and base is from Hobby Lobby stained in Red Mahogany, then clear varnished.


This was the first time for me to try the method of lights by painting silver then clear red/green - love the results!


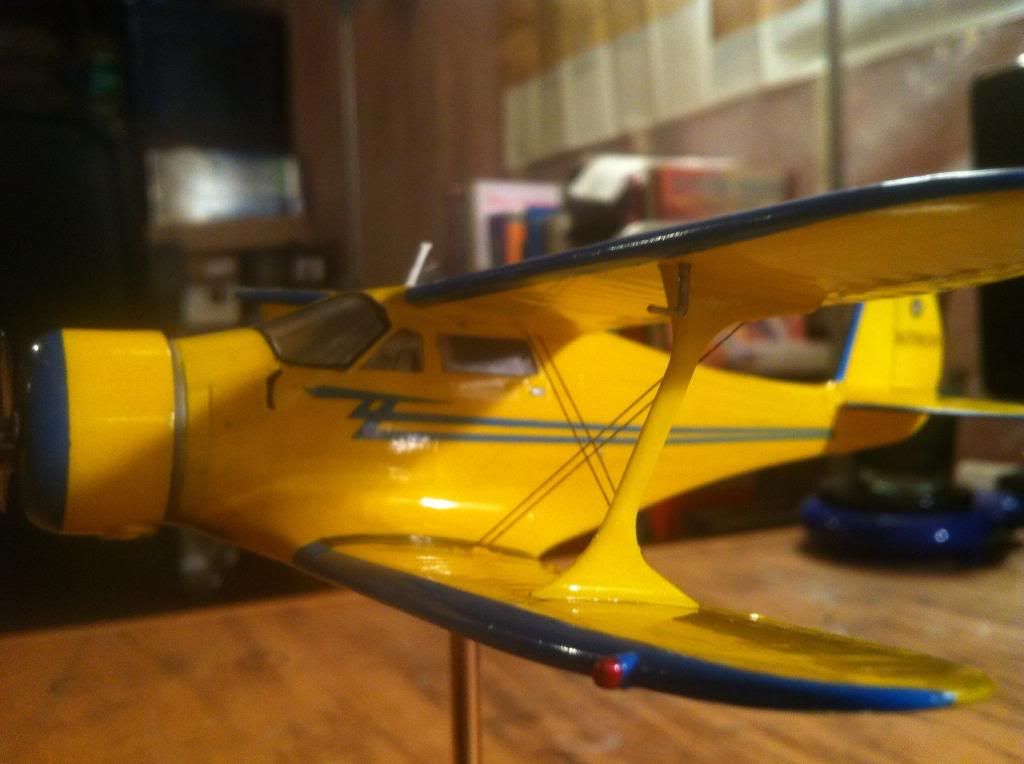
Exhaust staining - this was yet another first for me. I have never airbrushed anything other than paint jobs - so this was an entirely new try for me, and the result is nice but overdone. I think I needed to use a thinner paint at a lower pressure. I wanted more of a light exhaust soot effect instead of "I never clean my aircraft's belly" look. But hey... trial and error right?


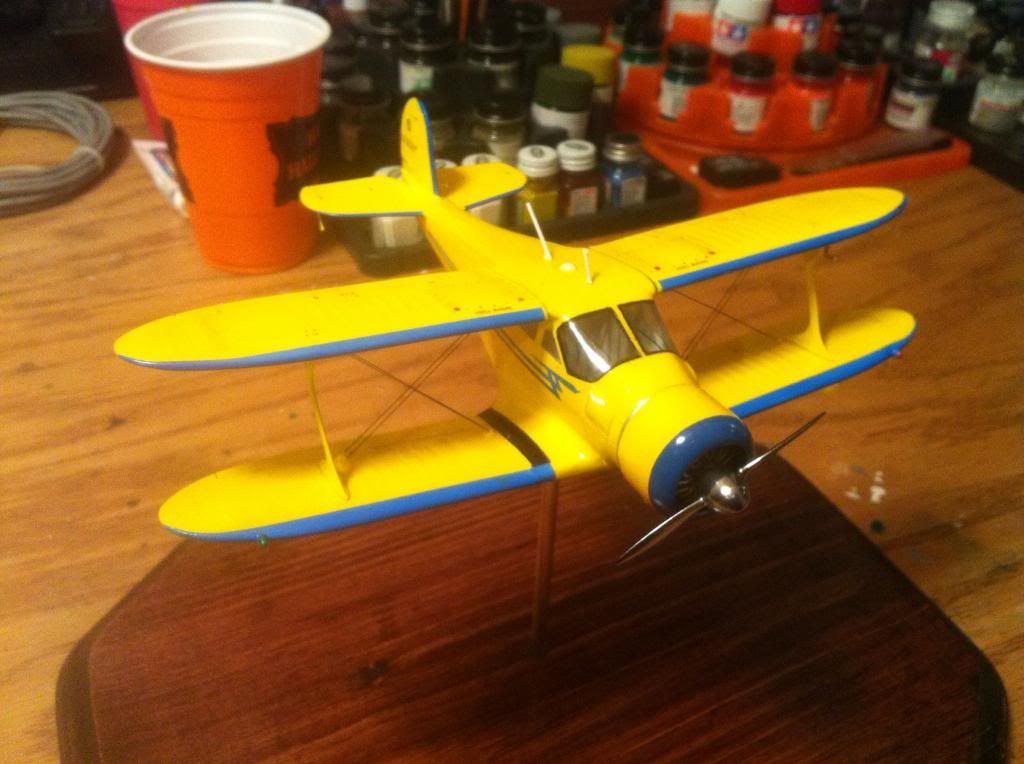
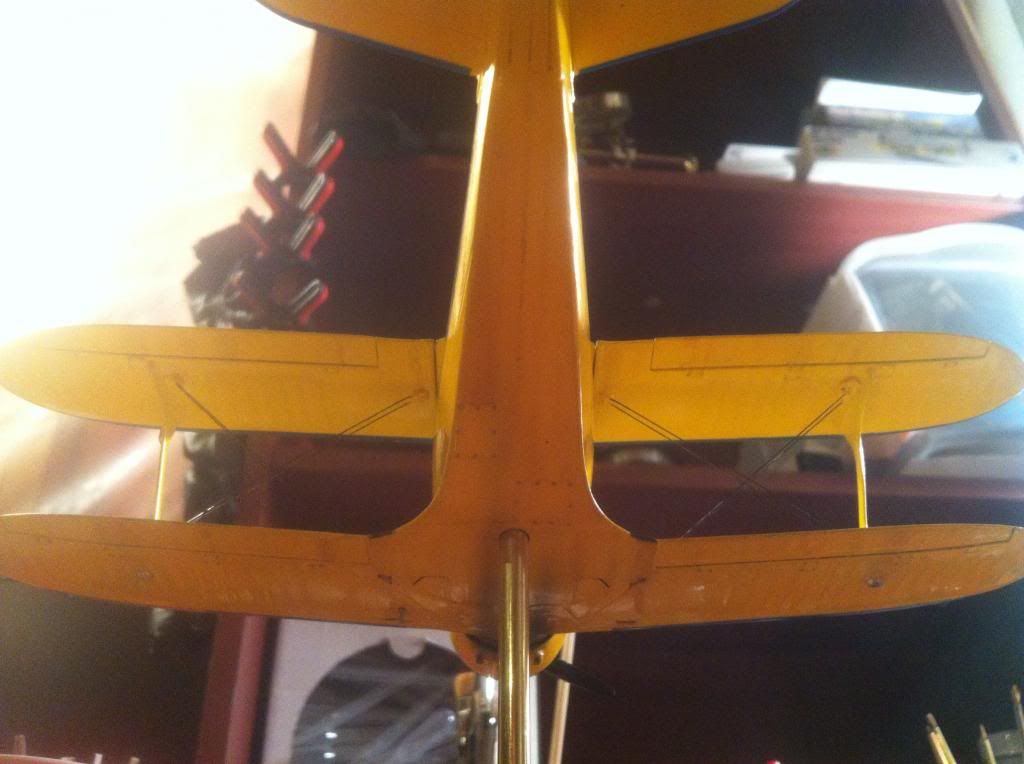
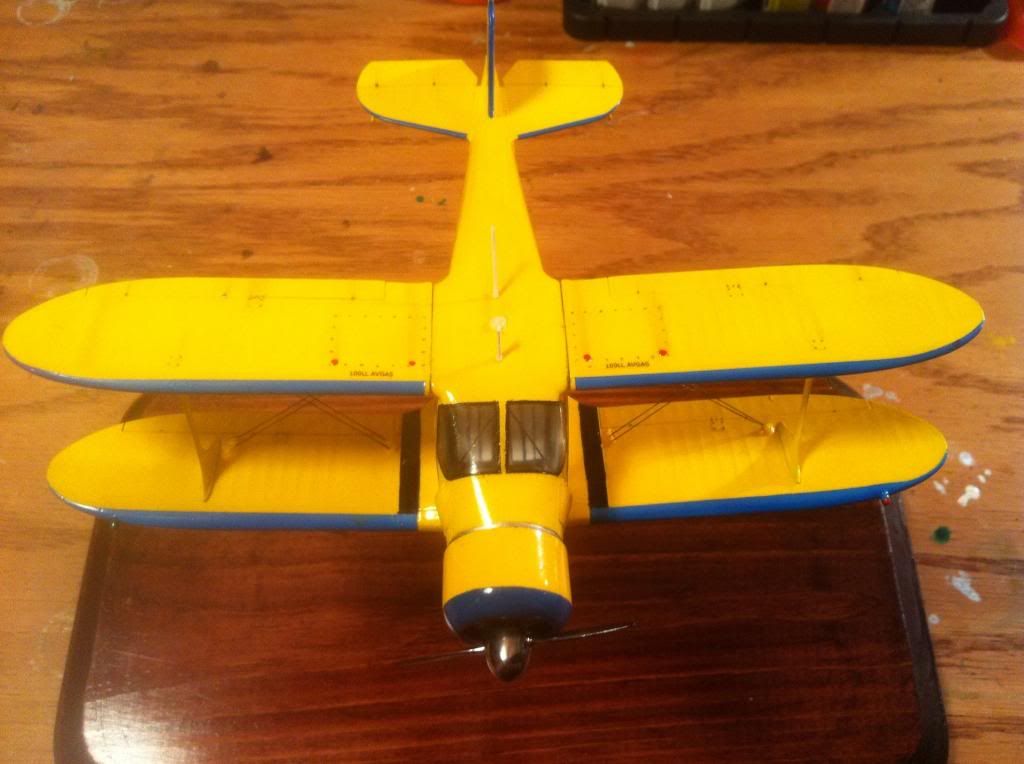
An overhead look - you can see how the weathering got toned down by the gloss, just as I intended. Looking good! Theres lots of these light streaks all over the aircraft - all the control surfaces and all the panels have this going on, but it's subtle enough that its mostly only seen when you're looking at the aircraft in person - pretty hard to capture in pictures.


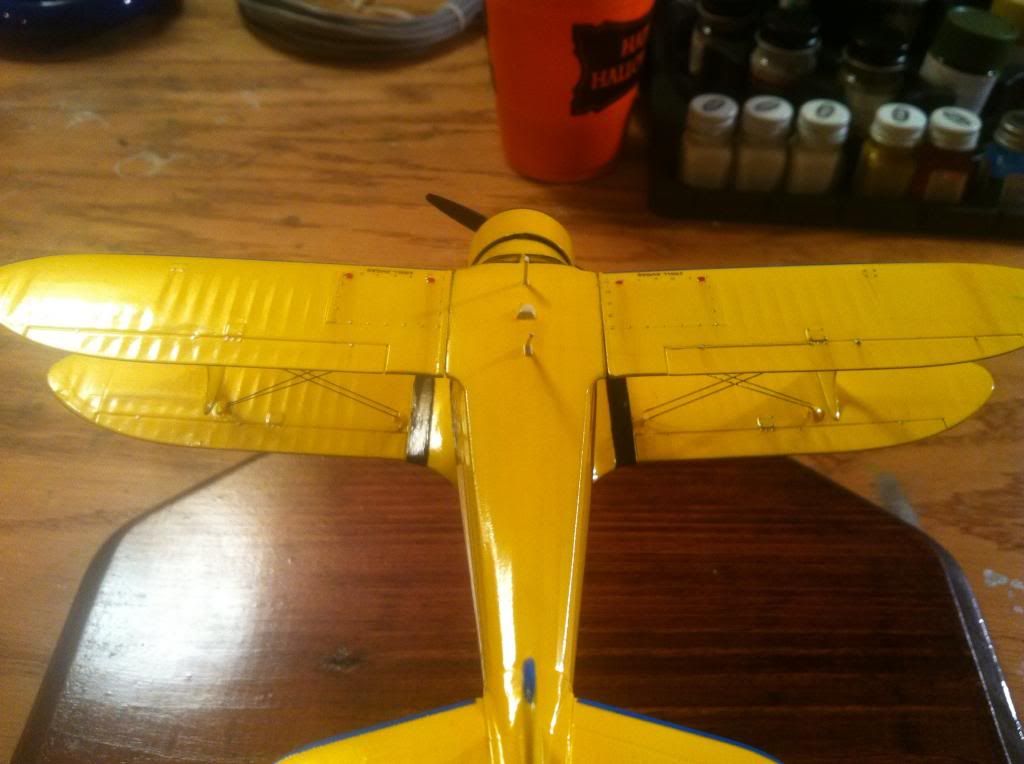
Note streaking from the gear doors as well as control surfaces, lights, etc.


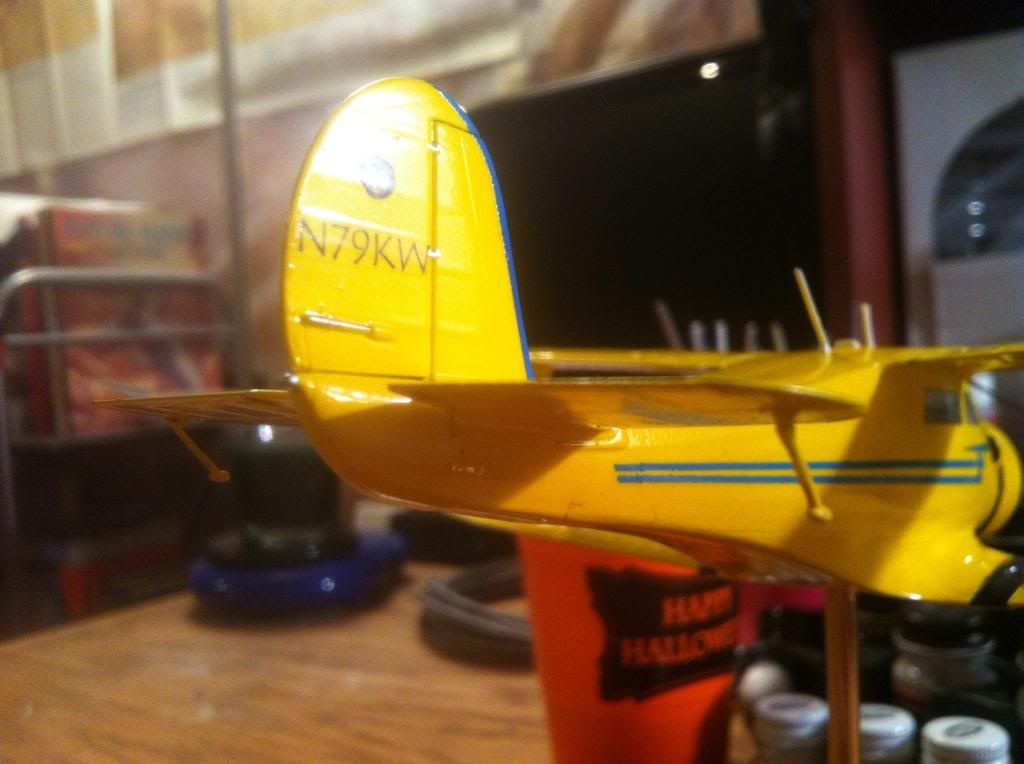
Custom N-number and logo. The logo is actually for the Deaf Pilots Association, an organization that not only we are both a part of (I am a current member but previously held a board position. My friend who this aircraft is for, is currently president.) but we also met and developed our friendship through activities and events hosted by them. www.deafpilots.org


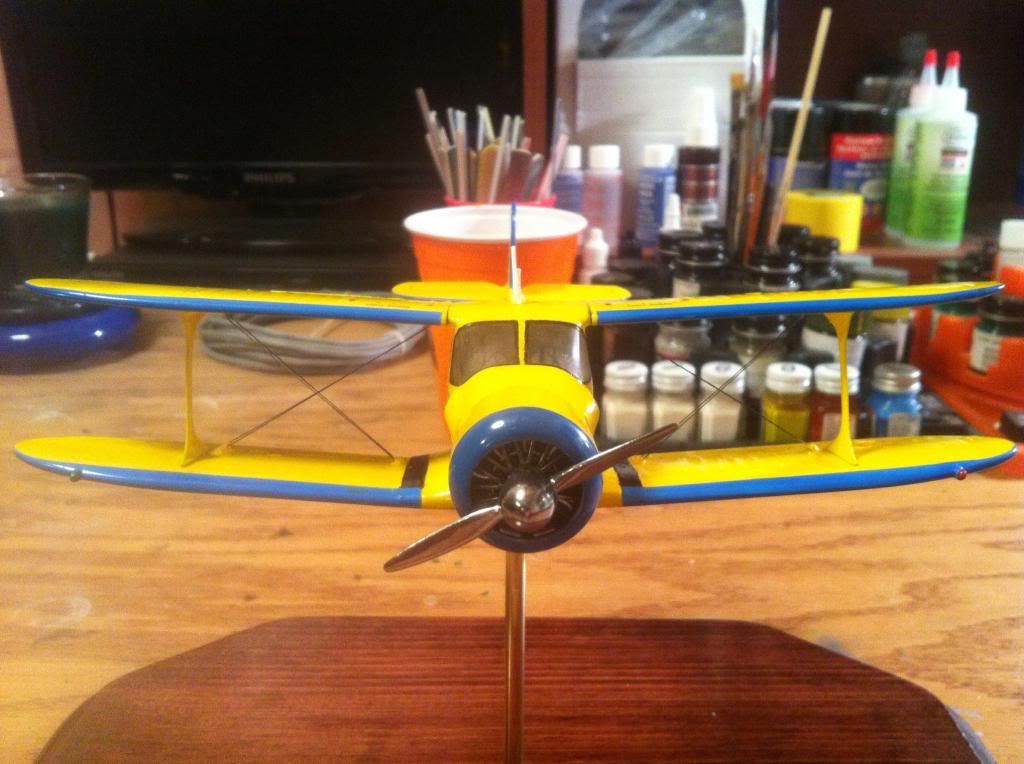
One last shot before I go Propeller


Thanks for looking and I hope you enjoyed my inaugural post! Looking forward to posting more and hearing feedback from y'all. Until then, keep the blue side up!


Todd Barker - Colorado Springs, CO

Current Projects:

  • 1/48 Beechcraft Bonanza - N51HM (Commission)
  • 1/48 B-25 Mitchell - Back Burner/Scheme TBD
  • Member since
    November 2009
  • From: Twin Cities of Minnesota
Posted by Don Stauffer on Friday, September 20, 2013 9:12 AM

I also built that kit.  I got the first version that only had military and non-US decals, but I wanted the US registration numbers and speedbird, so had to do my own decals. That kit is great, one of the best Roden kits I have ever done.  Here is how mine turned out.  So glad Roden took on a Golden Age kit, a type and era sadly under-represented in the kit market.

Don Stauffer in Minnesota

  • Member since
    September 2013
Posted by DeafAviator on Friday, September 20, 2013 2:13 PM

Very nice bird there Don! I actually had a feeling you'd be the first to respond since I've been looking at a lot of your General Aviation work here on this forum, including the Staggerwing (can't remember if I ever saw pictures of it though). Love the colors! The black looks really sharp. What did you use for your yellow and clear? Looks like youve got a really nice shine on that. Mine does too but with using the Vallejo and then not wanting to polish it because enough detail has already been lost, I had to work pretty hard to get mine up to where it is now, sparkle-wise. 

Like I said, I definitely plan on building this one again - I want to use Eduard's photoetch details next time around and with a couple of spare window sets that I have (Roden sent me a few replacements since the windshields kept arriving to me broken) I want to see if I can do some work on getting the windows to be really clear and flawless for the next one - they arent too bad but like you can see in both of our Stags, the windows could be a lot better. Need lots of sanding and polishing. However, with the cost of this kit plus the Eduard stuff, I am looking at a pretty pricey setup, so I think I am going to finish what I have on the production line first and then go for that. The additional practice and experience will really help too to make sure that money doesnt go to waste. 

But anyways, I really was very happy with this kit... is this similar to the quality of other Roden kits?


Todd Barker - Colorado Springs, CO

Current Projects:

  • 1/48 Beechcraft Bonanza - N51HM (Commission)
  • 1/48 B-25 Mitchell - Back Burner/Scheme TBD
  • Member since
    September 2013
Posted by DeafAviator on Friday, September 20, 2013 2:17 PM

Oh and Don, how did you do your rigging? I think I like my monofilament but I was NOT happy with how much superglue ended up piling up at the ends of the rigging... FAR too much, really. This was my first go at rigging (other than using some hard music wire on a Gee Bee a few years ago, which was super easy). and it really could be done better. 

If you look at the picture below you can see what I am talking about. So how did you do yours?


Todd Barker - Colorado Springs, CO

Current Projects:

  • 1/48 Beechcraft Bonanza - N51HM (Commission)
  • 1/48 B-25 Mitchell - Back Burner/Scheme TBD
  • Member since
    January 2010
Posted by CrashTestDummy on Friday, September 20, 2013 2:34 PM

Beautiful work, and thank you for the informative yet entertaining WIP writeup.  That spinner looks like the polished metal it's supposed to be.  That's a beautiful finish.  I, too like Tamiya paints, but shoot them mostly from the can.  

It's nice to see Roden step up in the quality.  They have some very cool subjects, but are usually pretty hard to assemble properly with no alignment pins, and part halves that sometimes don't match up well.  Additionally, I find the styrene they use to be a bit soft/rubbery.  

Gene Beaird,

Pearland, Texas

G. Beaird,

Pearland, Texas

  • Member since
    July 2004
  • From: Sonora Desert
Posted by stikpusher on Friday, September 20, 2013 2:47 PM

Beautiful build DA! Probably one of my favorite civil aircraft. That is a great gift build for your friend.

It looks a LOT like one of those that cruises around on here on occasion...


F is for FIRE, That burns down the whole town!

U is for URANIUM... BOMBS!

N is for NO SURVIVORS...

       - Plankton

LSM


  • Member since
    August 2007
  • From: back country of SO-CAL, at the birth place of Naval Aviation
Posted by DUSTER on Friday, September 20, 2013 5:39 PM

Impressive build.

Well Done.

Steve

Building the perfect model---just not quite yet  Confused

  • Member since
    September 2013
Posted by DeafAviator on Friday, September 20, 2013 7:12 PM
Thanks guys!

Gene, Tamiya canned stuff is really nice - just wish we could turn down the pressure. I think I'm going to try to learn how to decant the stuff - would love to see how it shoots in my brush!

stikpusher - beautiful bird!

Todd Barker - Colorado Springs, CO

Current Projects:

  • 1/48 Beechcraft Bonanza - N51HM (Commission)
  • 1/48 B-25 Mitchell - Back Burner/Scheme TBD
  • Member since
    November 2009
  • From: Twin Cities of Minnesota
Posted by Don Stauffer on Saturday, September 21, 2013 8:22 AM

I used just plain old Testors Yellow (square bottles), and spray can of Testors Glosscoat.  I rig by drilling very small holes through wings with pinvise and very small drill (I think about #74 or 75).  Also small holes in fuselage at starting point.  By bringing thread through wing, you only need a small daub of CA. I then clip off thread coming through wing with a razor blade, apply a drop of color with a toothpick.

Don Stauffer in Minnesota

  • Member since
    April 2010
  • From: Somewhere in MN
Posted by El Taino on Sunday, September 22, 2013 7:36 AM

...........

  • Member since
    September 2013
Posted by DeafAviator on Monday, September 23, 2013 10:47 AM

Don, so are you saying you did half your rigging before putting the wings together? I can definitely see how holes would make all the difference in the world, both in ease as well as appearance. Like I said, I will be doing this aircraft again for myself, so I will most definitely try that!


Todd Barker - Colorado Springs, CO

Current Projects:

  • 1/48 Beechcraft Bonanza - N51HM (Commission)
  • 1/48 B-25 Mitchell - Back Burner/Scheme TBD
  • Member since
    September 2013
Posted by DeafAviator on Monday, September 23, 2013 10:47 AM

El Taino - speechless huh? Wink


Todd Barker - Colorado Springs, CO

Current Projects:

  • 1/48 Beechcraft Bonanza - N51HM (Commission)
  • 1/48 B-25 Mitchell - Back Burner/Scheme TBD
  • Member since
    November 2009
  • From: Twin Cities of Minnesota
Posted by Don Stauffer on Tuesday, September 24, 2013 9:16 AM

DeafAviator

Don, so are you saying you did half your rigging before putting the wings together? I can definitely see how holes would make all the difference in the world, both in ease as well as appearance. Like I said, I will be doing this aircraft again for myself, so I will most definitely try that!

I drill the holes before putting the top wing on, but actually running the thread is done after the wing is in place.  Incidently, on the staggerwing, which is fairly easy to rig compared to a WW1 plane, I used white monofilament colored silver with a silver magic marker, as those flying wires were stainless steel.

Don Stauffer in Minnesota

  • Member since
    September 2013
Posted by DeafAviator on Thursday, September 26, 2013 2:26 AM

Oh okay... I will certainly try that. I've got a 1/32 Gee Bee that needs some rigging but I am thinking about using music wire for that.

I did buy a Jenny online from someone on HyperScale and am waiting for it to arrive in the mail (along with an F-15, F-16, and an F-4). I will give your rigging suggestion a go with the Jenny when I get around to building it.


Todd Barker - Colorado Springs, CO

Current Projects:

  • 1/48 Beechcraft Bonanza - N51HM (Commission)
  • 1/48 B-25 Mitchell - Back Burner/Scheme TBD
JOIN OUR COMMUNITY!

Our community is FREE to join. To participate you must either login or register for an account.

SEARCH FORUMS
FREE NEWSLETTER
By signing up you may also receive reader surveys and occasional special offers. We do not sell, rent or trade our email lists. View our Privacy Policy.