SEARCH FINESCALE.COM

Enter keywords or a search phrase below:

Allegheny DC-9-50 conversion

2905 views
9 replies
1 rating 2 rating 3 rating 4 rating 5 rating
  • Member since
    January 2021
  • From: SW Florida
Allegheny DC-9-50 conversion
Posted by fuzznoggin on Thursday, January 21, 2021 8:28 PM

Hello All!

I refinished a DC-9-50 conversion I made over 40 years ago.  The bird was in pieces, paint yellowed, and just an overall mess.  First off, this was the product of two Aurora Hughes Airwest kits - mainly for the fuselages.  Plugs were put into the primary fuselage and wings were extended 6 scale feet at the wing root area.  Vortilons were also scratch built and applied.

Paints are all Tamiya.  4 shades of red needed to be custom mixed until they agreed with an old Allegheny ticket envelope that I have.  That part was tedious.  The base is a round piece of pine wood with 3/8" acrylic rods made into a support cradle.  Airline base logo created using Oracle vinyl via my Silhoutte Cameo vinyl cutting machine.   In fact, templates were made for the "Allegheny" and the "N-Number" and airbrushed on.  Window decals from Authentic-Airliners.

Enjoy

 IMG_8302 by Fuzznoggin, on Flickr

 IMG_8300 by Fuzznoggin, on Flickr

 IMG_8306 by Fuzznoggin, on Flickr
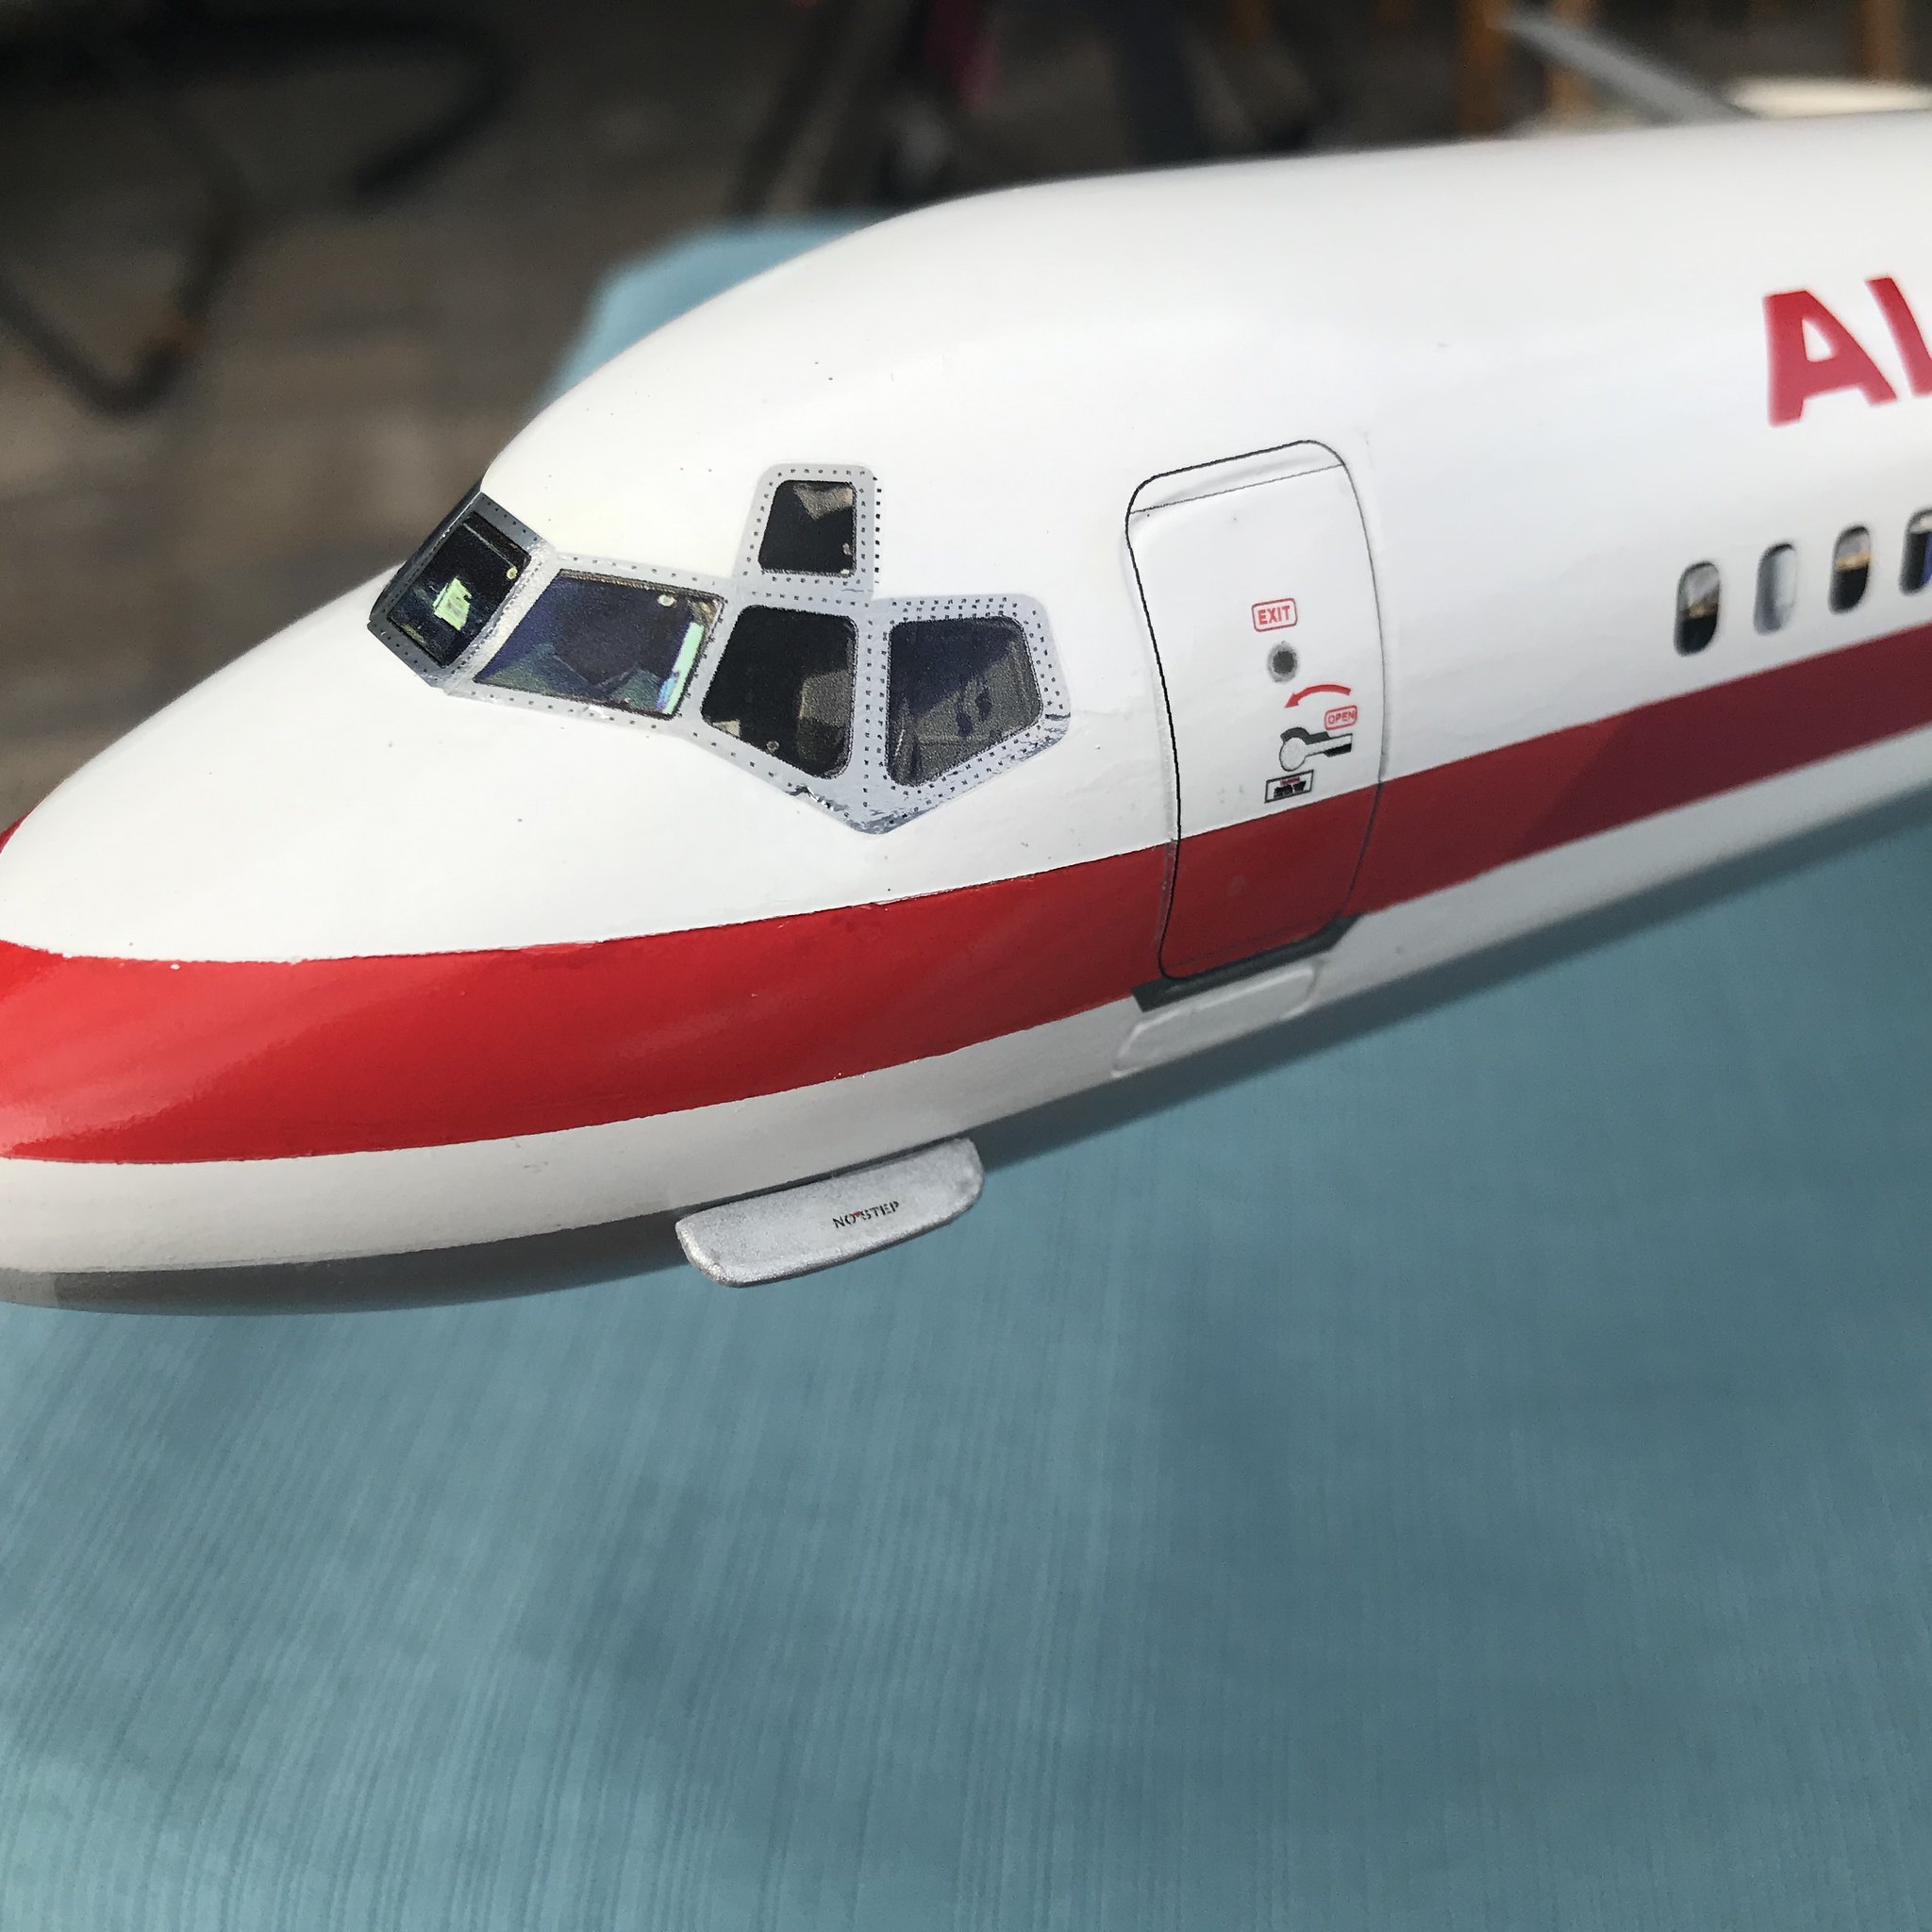
 IMG_8308 by Fuzznoggin, on Flickr

 IMG_8305 by Fuzznoggin, on Flickr

 IMG_E8488 by Fuzznoggin, on Flickr

  • Member since
    January 2021
Posted by PFJN2 on Friday, January 29, 2021 7:45 PM

Hi,

That's a nice looking conversion.  I always liked DC-9 aircraft and its variants.

Pat

  • Member since
    April 2003
  • From: USA
Posted by keavdog on Friday, January 29, 2021 8:25 PM

Fantastic. Love the cockpit detail, you'll have to share how you did that and the canopy glass. 

Thanks,

John

  • Member since
    December 2002
  • From: Northern California
Posted by jeaton01 on Friday, January 29, 2021 9:57 PM

Super!  Decals for the glass? Whose?

John

To see build logs for my models:  http://goldeneramodel.com/mymodels/mymodels.html


  • Member since
    January 2021
  • From: SW Florida
Posted by fuzznoggin on Saturday, January 30, 2021 6:42 AM

The window decals were purchased from www.authentic-airliner-decals.de  The orginal windscreen was lost over the years, so I framed it out and paneled it with styrene stock.  Then I puttied over it and smoothed it out for the decals.

  • Member since
    October 2019
  • From: New Braunfels, Texas
Posted by Tanker-Builder on Saturday, January 30, 2021 6:58 AM

Well;

 Don't that beat all! That is one beautiful Bird!

  • Member since
    December 2002
  • From: Northern California
Posted by jeaton01 on Saturday, January 30, 2021 12:48 PM

Thanks!

John

To see build logs for my models:  http://goldeneramodel.com/mymodels/mymodels.html


  • Member since
    July 2009
  • From: North Carolina
Posted by Back to the bench on Sunday, January 31, 2021 5:49 PM

That's a real beauty, love the various shades of red on the stripes.


Gil

  • Member since
    January 2021
  • From: SW Florida
Posted by fuzznoggin on Sunday, January 31, 2021 8:36 PM
Thanks Gil. Was definitely a chore mixing paints to achieve the different shades.
  • Member since
    July 2018
Posted by JustPlaneJon on Monday, February 1, 2021 1:00 PM

very nice! the mixing of the red paints paid off. looks great 

JOIN OUR COMMUNITY!

Our community is FREE to join. To participate you must either login or register for an account.

SEARCH FORUMS
FREE NEWSLETTER
By signing up you may also receive reader surveys and occasional special offers. We do not sell, rent or trade our email lists. View our Privacy Policy.