SEARCH FINESCALE.COM

Enter keywords or a search phrase below:

LARGE PHOTO UPDATE Coree Mt. Suribachi flag raising

2054 views
3 replies
1 rating 2 rating 3 rating 4 rating 5 rating
  • Member since
    January 2006
  • From: Baton Rouge, Snake Central
Coree Mt. Suribachi flag raising PT II
Posted by PatlaborUnit1 on Tuesday, November 7, 2006 5:58 AM

UPDATE!
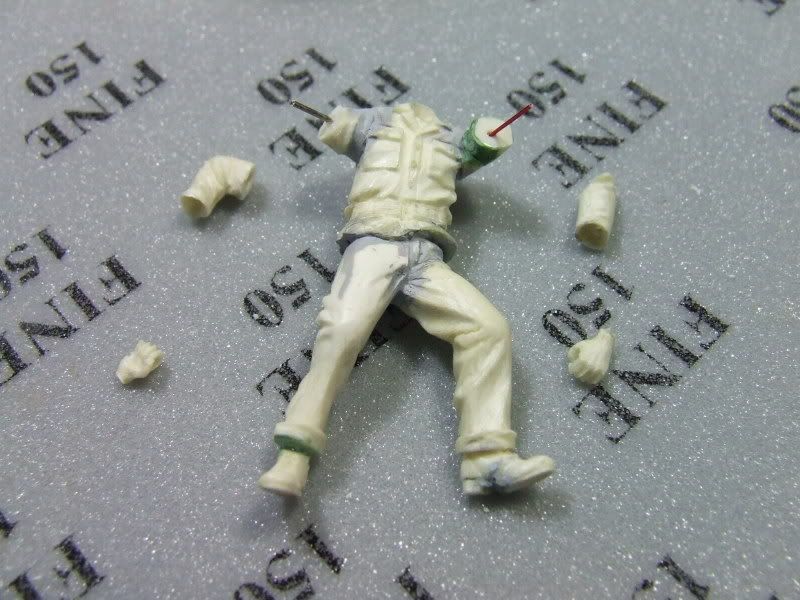
I got the majority of the figures limbs together last night, minus heads and on some figures boots and arms. This set is a complete bee-otch! The arms were built by committee and do not even come close to mounting to the torso without major sanding and puttying. I can tell Ill be using a lot of Mr. Surfacer to fill the gaps on these.  

The resin is just plain wierd.  It has a crusty white outer appearance as if it has oxydized, and drilling into the chest to pin the arms results in a dry white powder exiting the hole, simliar to baking soda.

I got the arms mixed up and trying to sort them all out was a chore,  Ihad to mount the figs to the flagpole and figure out which one had the best fit to each torso and nail it to it with with superglue/setter.  Good thing this one isnt going to competition!!!!

 Ive got really mixed feelings about this one. I like the subject and Im happy that Im building it, but it is certianly proving to be more of a challenge than neccessary. 


Ill post pics if I can ever figure out how to, since I dont seem to be able to even type a link in and have it appear later on.


David


Build to please yourself, and don't worry about what others think! TI 4019 Jolly Roger Squadron, 501st Legion
  • Member since
    January 2006
  • From: Baton Rouge, Snake Central
Posted by PatlaborUnit1 on Sunday, October 22, 2006 10:29 AM
Great info! Ill have to figure out the whole photo editing thing but the rest is very straightforward, so Ill go with that.
Thanks!!!!!!!!!!!!!!!!!

Build to please yourself, and don't worry about what others think! TI 4019 Jolly Roger Squadron, 501st Legion
  • Member since
    December 2002
  • From: Massachusetts
Posted by ajlafleche on Friday, October 20, 2006 11:38 AM

Scan or download a 48 star flag and make a mirror image in your photo editing program the combine both along the canton edge. Save this as a jpg file. Insert this into a word document as you would clip art. (Insert/Picture/From file). Resize it to the size you need. rememberm the Suribachi flag was quite large to be seen clearly form below. Now print it at the highest resolution you can on white paper. (File/Print. Choose Properties and choose the highest resoultion you can from the drop down box then back out to the Print dialogue box and click Print). Allow inks to dry and coat the printed side with MicroScale Decal Saver to seal the ink. When this is dry, using a straight edge and a new #11 blade, cut out the flag. Make a crisp fold along the edge of the canton. Apply diluted white glue to the inside and let it sit for a few seconds. Now carefuly fold the flag over. Study the picture and the cast flag and replicate the furls. You may need to keep at this while the glue begins to cure. Once cured, you have a permanent flag.Add some shading or highlights and touch up the edges of the canton and the resd stripes if needed.

According to the book, Flags of Our Fathers, the pole was a piece of pipe so the flag will have to be tied onto it.

Remember, if the women don't find you handsome, they should at least find you handy.

  • Member since
    January 2006
  • From: Baton Rouge, Snake Central
LARGE PHOTO UPDATE Coree Mt. Suribachi flag raising
Posted by PatlaborUnit1 on Friday, October 20, 2006 11:17 AM

[heavily edited by me, original poster]

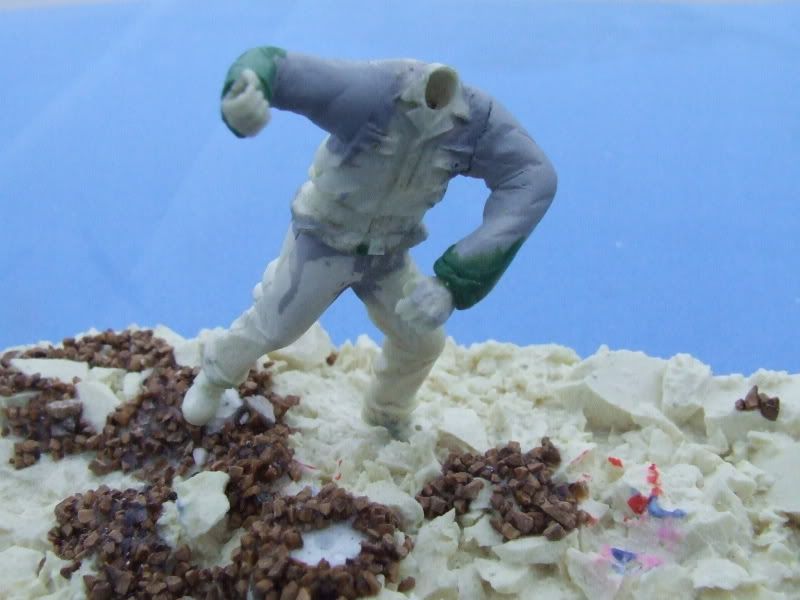
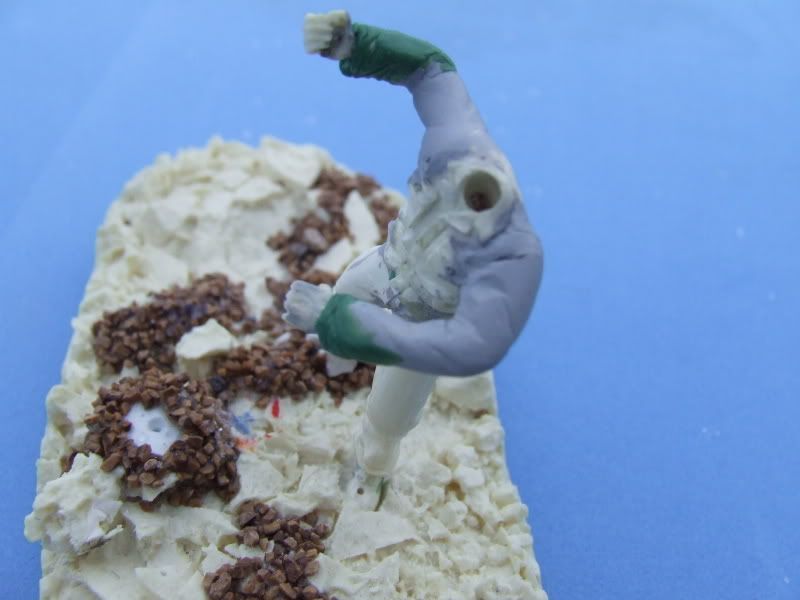
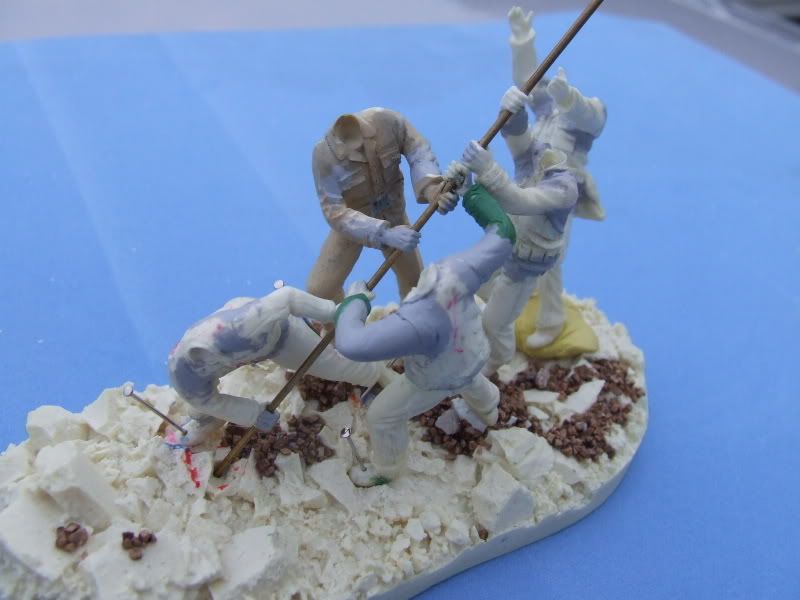
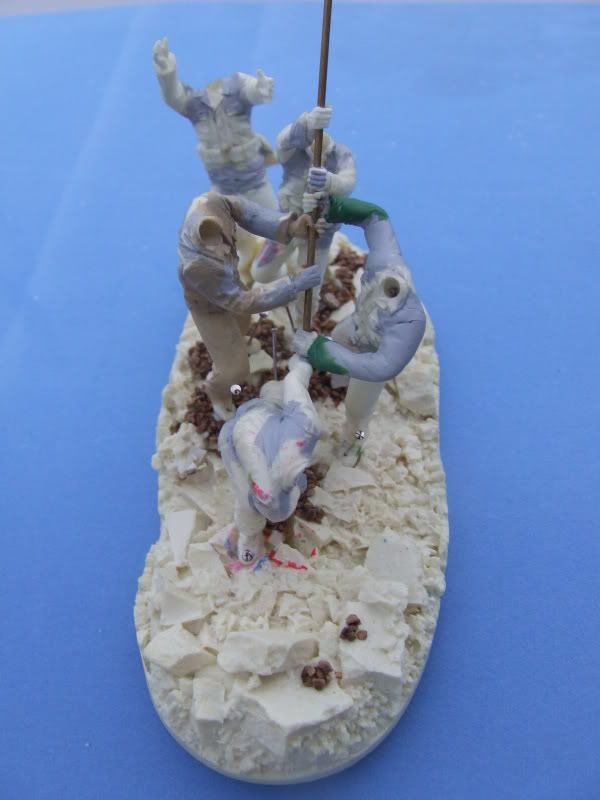
I have pushed some other projects off and got this one done to this point, and here are the photos of what I have tonight.  Quite a project so far!

This is the 1/35 scale Corree kit of Iwo Jima / Mt. Suribachi . The figures come completely unassembled, only giving you sets of arms, hands, torsos, feet, heads and legs. You must figure it all out on your own with no directions.
Each figure had to be fitted to match the pole but some never quite did, so I had to cut and modify them. The most modified was the one on the backside that we never see from the "front' view.  The figure was cut up and new arms sculpted from Magicsculp putty over a wire armature, and finished off with Games Workshop putty.
I brought the Marines to Mt. Suribachi, but had to finish bringing Mt. Surbachi to the Marines to make them fit! I used crush walnut hulls to bring up the surface, and pinned each Marine in place to lock in its' location.  

I do not claim that this kit is either properly engineered or authentic in its appearance.  The real memorial has the figures very tightly spaced, leaning on each other's bodies. Here the original sculptor had the figures distanced out from each other, which is incorrect, but I have absolutely no interest in resculpting each figure from scratch.  This is a representative piece so the mods I have done so far will be it.  The paint process will bring the figures to life!

David 


Build to please yourself, and don't worry about what others think! TI 4019 Jolly Roger Squadron, 501st Legion
JOIN OUR COMMUNITY!

Our community is FREE to join. To participate you must either login or register for an account.

SEARCH FORUMS
FREE NEWSLETTER
By signing up you may also receive reader surveys and occasional special offers. We do not sell, rent or trade our email lists. View our Privacy Policy.