SEARCH FINESCALE.COM

Enter keywords or a search phrase below:

DeAG Millennium Falcon High Detail Build

18624 views
158 replies
1 rating 2 rating 3 rating 4 rating 5 rating
  • Member since
    August 2007
  • From: back country of SO-CAL, at the birth place of Naval Aviation
Posted by DUSTER on Tuesday, October 20, 2015 6:13 PM

   Vhy Yesss Paul, I'm Vatchen' Du. Dis iss wery ehn-joyabul. Pless Keep up zee goot verk, ass I'm on pins and needles (at least until my master comes back) and it maken zee time go buy not zo sholy.

Vertizn!   

Steve

Building the perfect model---just not quite yet  Confused

  • Member since
    April 2015
Posted by LrdSatyr8 on Wednesday, October 21, 2015 2:31 PM

Hey Paul... love the extra detail work you're doing!  Can't wait to see how you tackle the details on the interior (seating, floor, bunk, walls, etc).  I've been doing all the work myself using Apoxie putty and spare styrene.  Still working out some details.  Can't wait t osee how you tackle those areas.

Things to think about... What would happen if you put a werewolf on the moon?  h is just a little chair and the human brain named itself!

  • Member since
    December 2010
  • From: Memphis TN
Posted by Heavens Eagle on Wednesday, October 21, 2015 3:21 PM

Duster (Steve) Thanks for the post!  Had me laughing for a good 5 minutes!  Much appreciated!

Thanks for looking in LrdSatyr!  Right now my build is stalled a little bit while I am working on a Trumpeter 1/32 Ju87A for a bit of a change up.  Have been working on the rear cockpit bulkhead and making a complete new one out of clear acrylic sheet.  While the idea and concept I have been working on has a good base, I am discovering that the little square buttons are going to have to be even more accurate (in size and squareness) than I originally thought.  Most likely what I am going to do is finish the square buttons on this first piece, add some of the .010 dia fiber optic, add paint, and do the other basics and test it to see what needs to change.  

I already know the square button lights are going to be more ragged than I would like, but need to test for lighting anyway.  Usuallly what happens in a case like this for me, first time looks good to most folks,  but works out the problems.  Second try is pretty much perfect and looks awesome!

There is going to be a ton of stuff redone in the hold and corrior areas.  Have made mental notes on that, but until I have all the lit cockpit panels done, everything else will be on hold.

  • Member since
    November 2009
  • From: SW Virginia
Posted by Gamera on Thursday, October 22, 2015 11:34 AM

Lol, you need a break here, I'd be burnt-out after adding even a tenth of that much detail!

"I dream in fire but work in clay." -Arthur Machen


  • Member since
    April 2015
Posted by LrdSatyr8 on Thursday, October 22, 2015 1:35 PM

I hear ya bud... I've been working with alot of Apoxie Putty lately and discovered that you can make a nice thin sheet, let it dry and cut out nice little square buttons that transmit light pretty evenly over the whole surface instead of just a pinhole.  I've just finished my replacement stickers and a matte for brass etching to match the graphic.  Nice thing about it would be that I can print and use it as a decal instead of a sticker by printing on glossy photo paper, spraying a couple of layers of gloss-cote over the top and soaking it in water.  Works wonderfully!

Things to think about... What would happen if you put a werewolf on the moon?  h is just a little chair and the human brain named itself!

  • Member since
    December 2010
  • From: Memphis TN
Posted by Heavens Eagle on Thursday, October 22, 2015 2:21 PM

I'm using thin (.007 thick) acrylic sheet that I picked up at Hobby Lobby, for the white buttons I will put a thin coat of white Vallejo on them (after removing the paint coats).  For the colored buttons, I will be using some blue or yellow sheet.  I thought I had the button sizes all set, but am going to have to do them a different way to get "nice, square, and consistant"  It will take a bit more time, but will look better.

I just need to do a little more work on the test piece and try it out.  Once that is done and tested, the second remake should go a bunch faster.  It only took about 30 minutes to get it all laid out the first time, and I have figured out a bunch of tricks to make everything go much smoother when I do the second one.

  • Member since
    April 2015
Posted by LrdSatyr8 on Thursday, October 22, 2015 3:56 PM

Have you thought about using square rod and cutting thin buttons using that instead?  They would all be consistant and I'm sure they make the clear rods for it too!

Things to think about... What would happen if you put a werewolf on the moon?  h is just a little chair and the human brain named itself!

  • Member since
    December 2010
  • From: Memphis TN
Posted by Heavens Eagle on Thursday, October 22, 2015 5:24 PM

No good rod in "exactly" the size I am doing.  Usually extruded rod isn't all that square either.  Who knows, my prototy[e might look great and won't need to be redone.  I will just have to wait and see once I do the test.  Also the paint I'm going to use might not be opaque enough.  Will just have to see.

  • Member since
    January 2003
  • From: Washington State
Posted by leemitcheltree on Sunday, October 25, 2015 12:00 PM

Absolutely outstanding work!  I'm sorry seemingly so few have posted, considering such amazing work.  I'll be watching this thread very closely.

Thanks for sharing, mate!

Cheers, LeeTree
Remember, Safety Fast!!!

  • Member since
    September 2015
Posted by TempusFugit on Monday, October 26, 2015 9:20 PM

I love how the latest part has turned out, HeavensEagle. What a difference! I can't wait to see it painted and weathered, nor can I wait to see the interior when you're finished with it. Very impressive!

I look forward to the next installment. SmileYes

  • Member since
    December 2010
  • From: Memphis TN
Posted by Heavens Eagle on Tuesday, October 27, 2015 12:22 AM

Thank you so much for the kind comments leemitcheltree and TF!  Much appreciated!

The rear cockpit bulkhead is going quite slowly.  I did do a prototype test this weekend and found many problems with the execution of my idea.  The basic idea is still fairly sound but (as I already knew)  the initial sets of square buttons were not accurate enough to work well, but showed the flaws in the test.  I have fixed that issue and have some very precise jigs made out of aluminum now to cut the square buttons out and they look GREAT!

The flaws I found are that the alclad chrome will not work on top of the bare acrylic very well.  The black primer on top of that chips off extremely easy.  Bad is it won't work, good is that I can use this on other builds to do chipped paint.  

As to the light coming through from behind, the clear plastic buttons are fairly bright once the paint is removed from the top surface, but can't get a consistent coat of white paint on it where they will be translucent.  I do have some .005 thick styrene that works quite well for this though so that should work OK.  The buttons won't be extremely bright, but will have a off white glow.  So that will work out.

The little round light idea with some .010 dia fiber optic placed in drilled holes is going to be too problematic.  It "sort of" works.  Sort of in that the lines are fairly straight, but not in that the areas between the strands don't have enough paint and what to really give the lights the separate "spots" they need to be.  This issue is what is making me rethink how the panels will have to be done.

So I have another idea. 

As an initial rethink I believe that some .003 or maybe .004 thick brass sheet with holes drilled for all the lights and larger holes drilled for the square buttons is what will be needed.  This then also breaks the panels up into smaller parts to be done.  I will still use an acrylic back piece like I have already done but the brass will be attached to it.  Then I think I can print some decals to overlay that, punch out the holes for where the buttons go and attach them with small amounts of CA.  That should take care of the marking problems, light block problems, and I can drill the tiny light holes with VERY small carbide drills.  The digital attachment on my mini mill will make that job easy.  Time intensive, but easy.  It will also be more crisp than a similar panel done as photo etch.

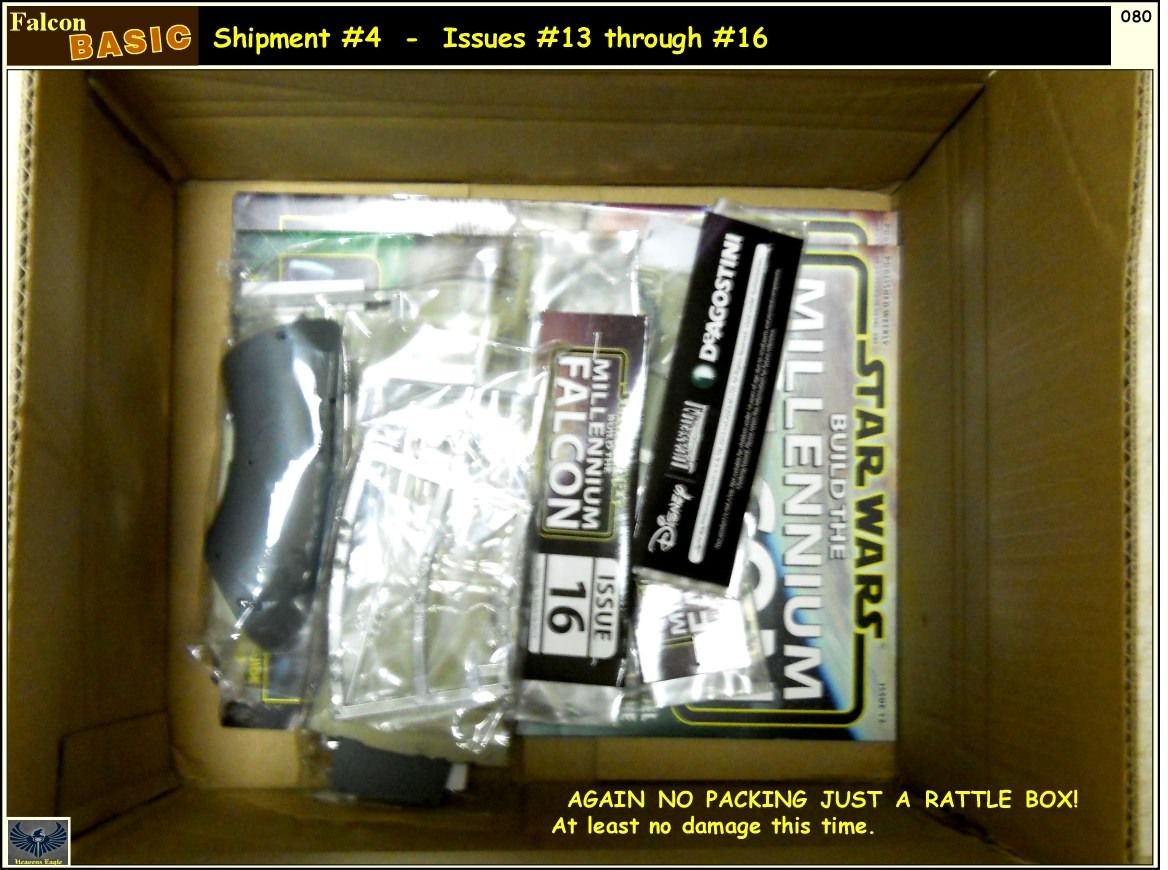
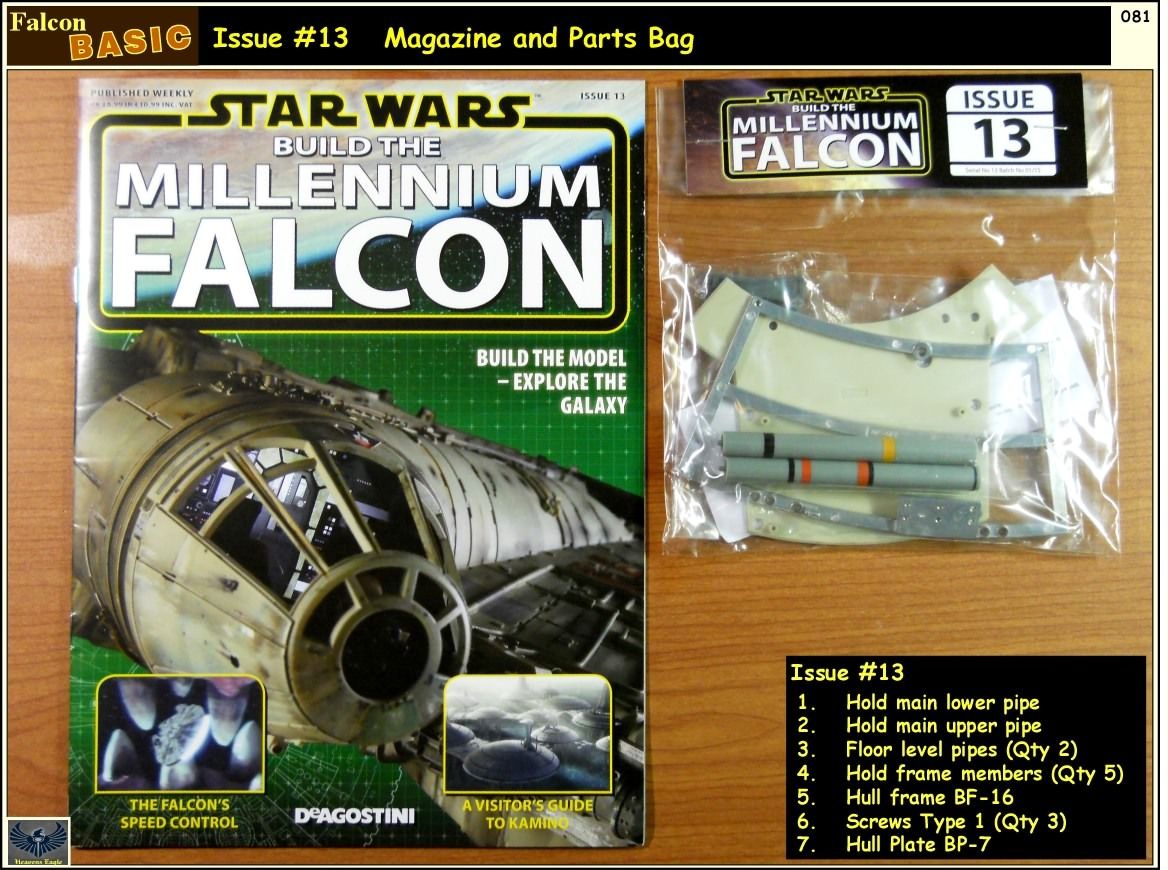
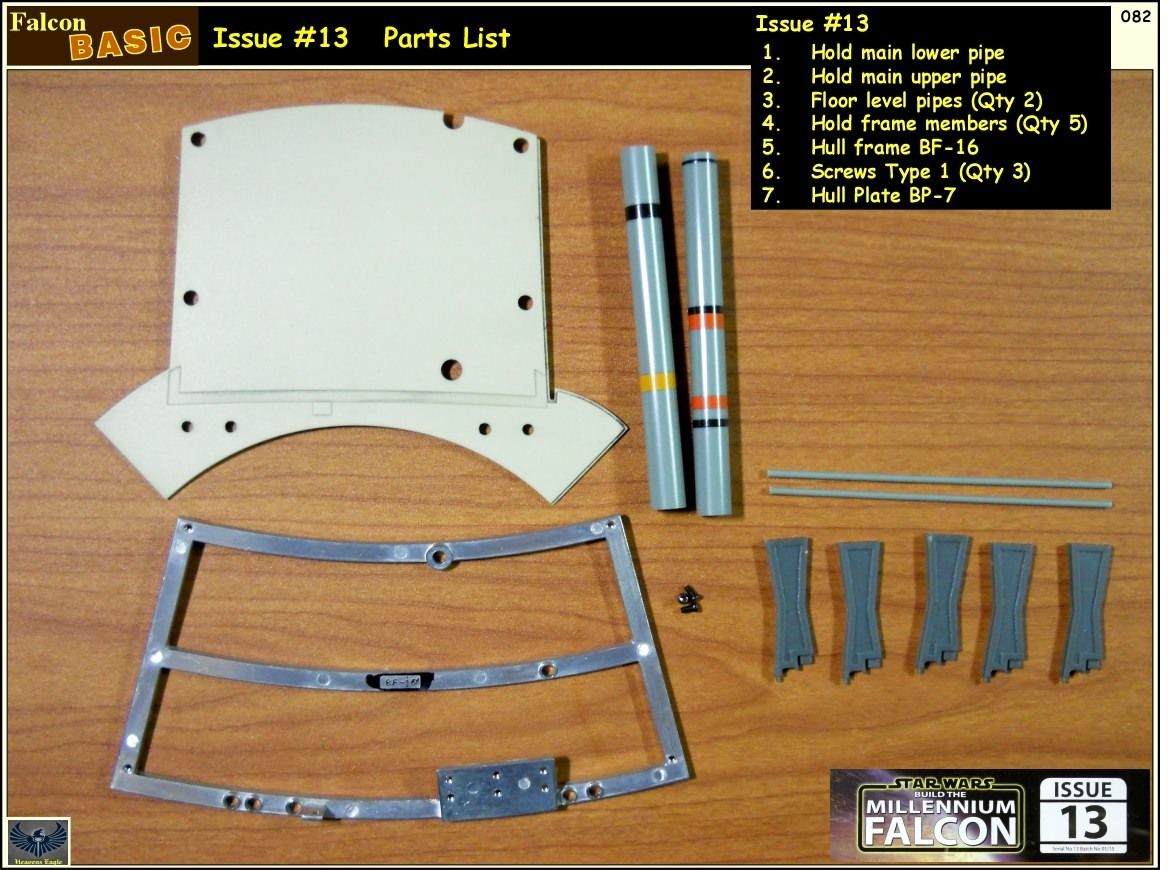
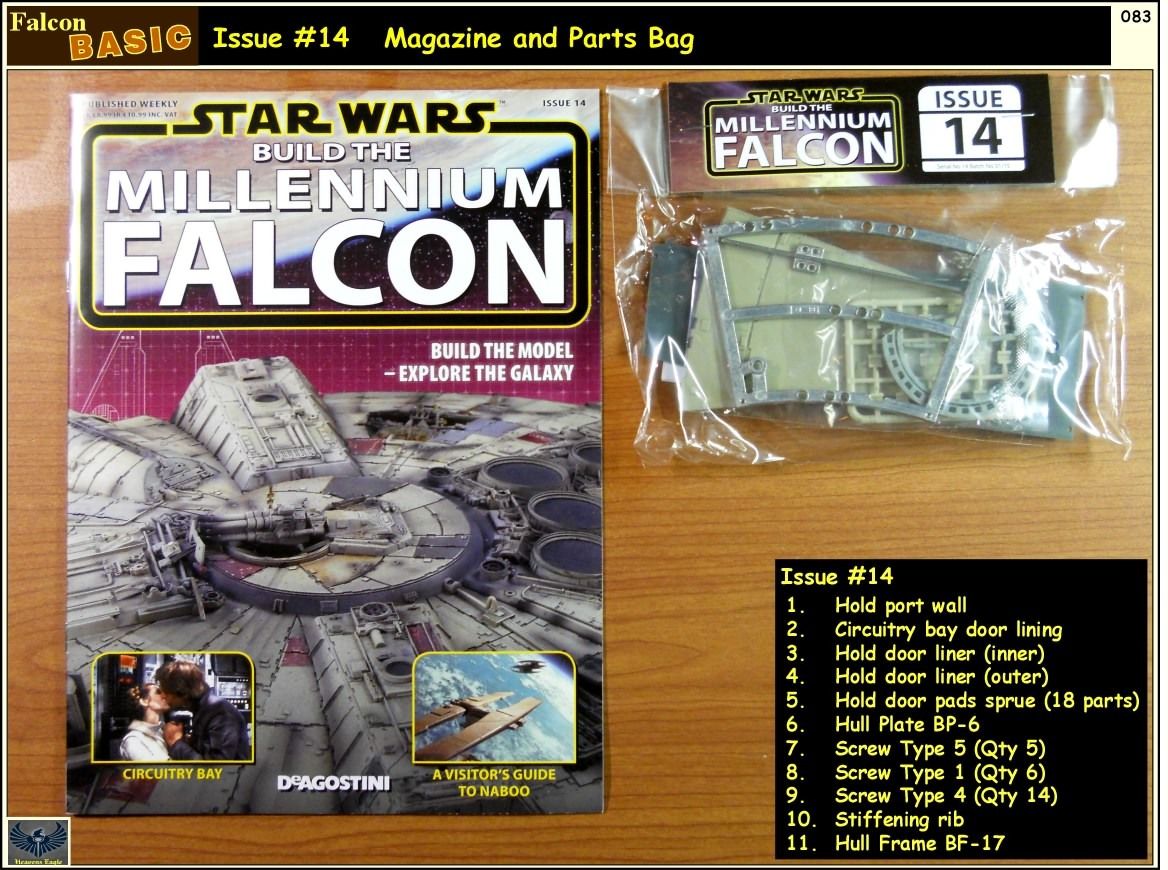
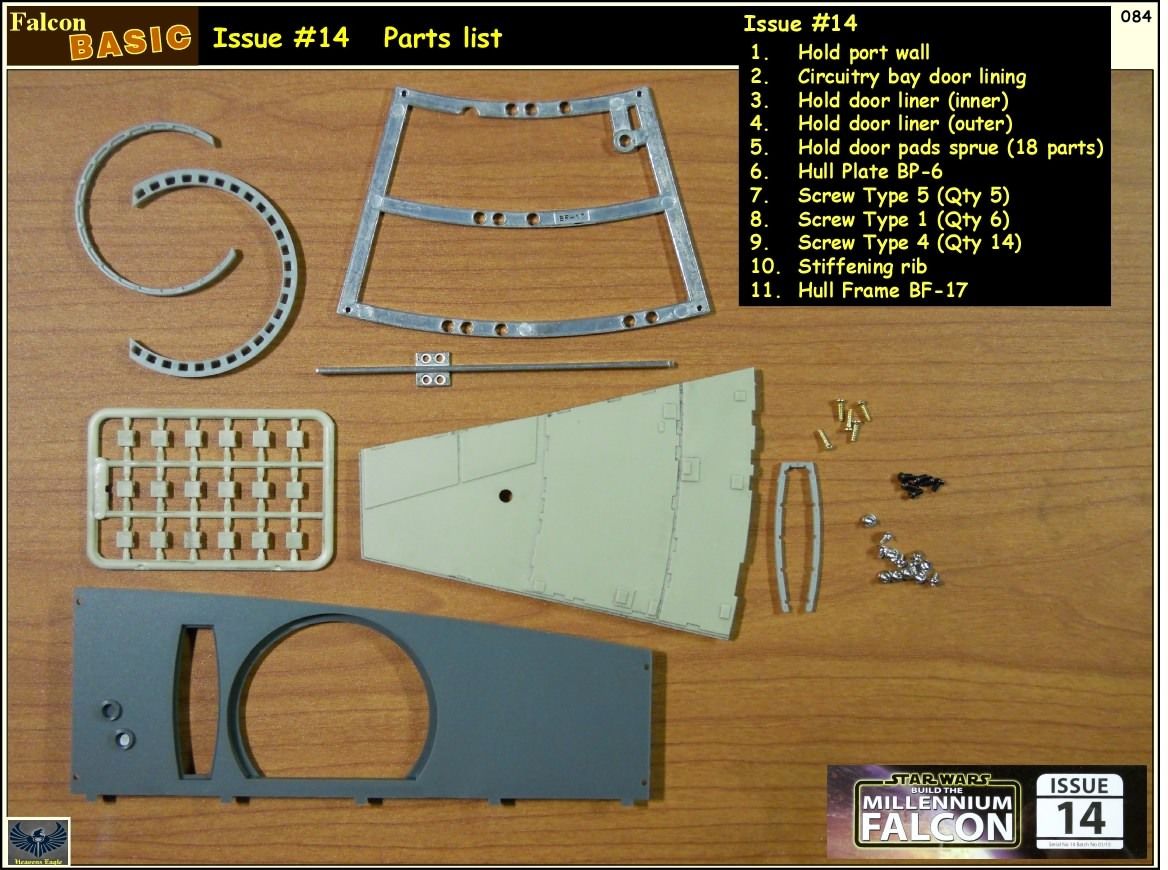
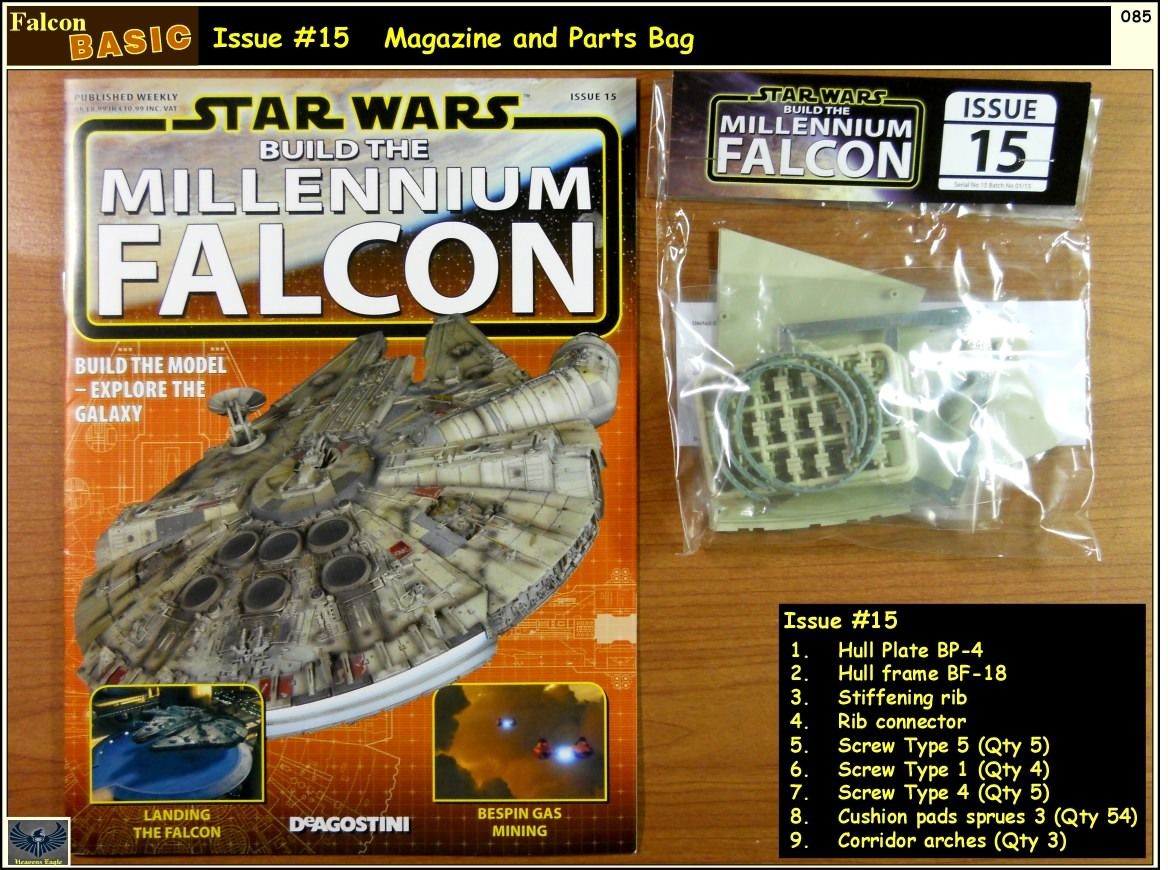
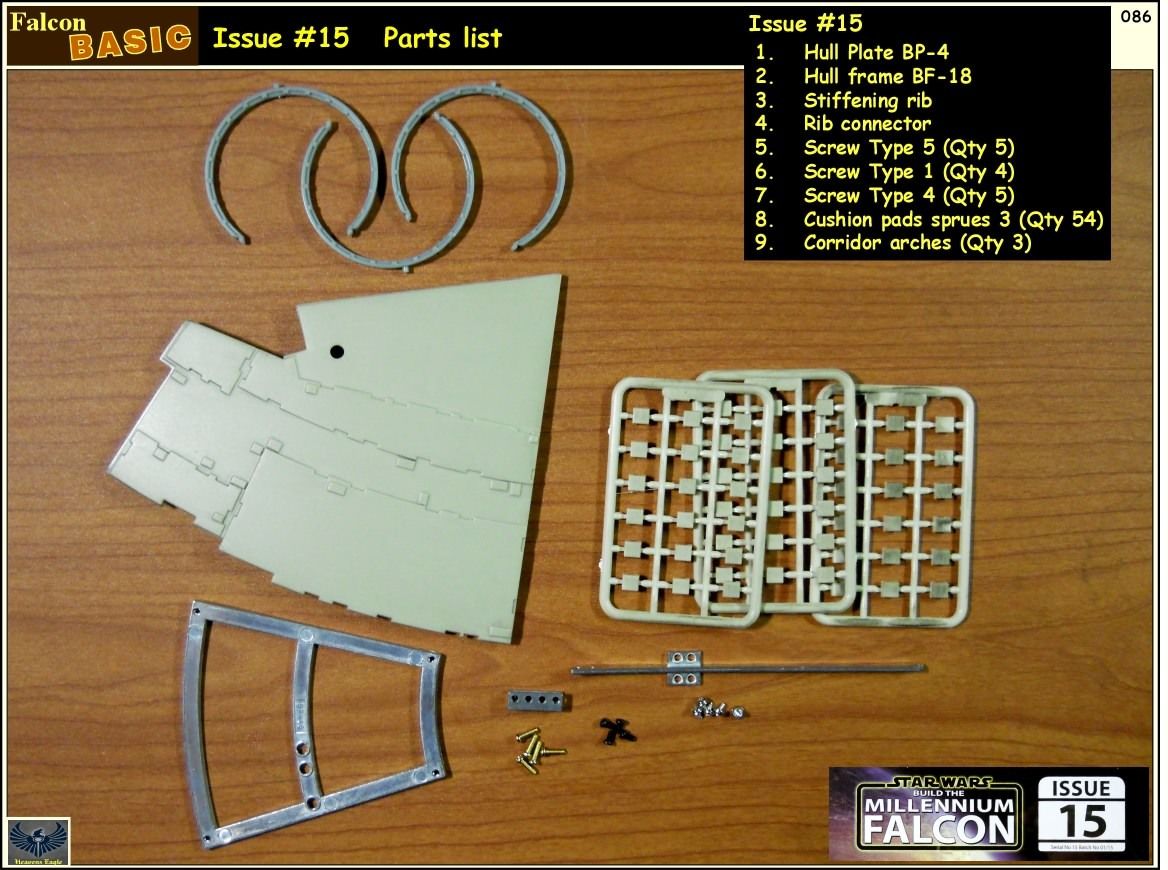
Anyway, enough on that for now.  I will have some photos on it soon.  For now I need to get some more of the basic stuff posted and get it closer to current.   Here are some more of the basics.

To be continued...

  • Member since
    December 2010
  • From: Memphis TN
Posted by Heavens Eagle on Tuesday, October 27, 2015 12:35 AM

Continued...


That is all for now folks.  There is a bit more of the basic and a short post yet for the EXtreme and I will be up where I am currently in the build.  Most of the hold changes are already planned out and shouldn't be more than cut and chop.  The cockpit is going to be my biggest hurdle, and the most challenging.  If I can do it to the level I am wanting, it should be awesome and really unique.

  • Member since
    November 2009
  • From: SW Virginia
Posted by Gamera on Thursday, October 29, 2015 12:32 AM

Still looking awesome! Thanks again for letting us tag along.

"I dream in fire but work in clay." -Arthur Machen


  • Member since
    December 2010
  • From: Memphis TN
Posted by Heavens Eagle on Thursday, October 29, 2015 11:52 AM

Gamera

Still looking awesome! Thanks again for letting us tag along.


Thanks again for your post Gamera!  Most appreciated!  I kind of keep an eye on the looky loos too to see how many folks are looking in and too bashful to actually post something.  (They might loose their status as a die hard military modeller if caught posting on a SciFi thread Stick out tongue )
 
Yeah I'm picking on those that are afraid to be a Post Toastie.  If it weren't for the view count and a few brave folks posting this thread would probably be dead Fred.
 
It isn't dead (yet) so here is the next installment of EXtreme.


That's all for now,  there will be more soon!


  • Member since
    August 2007
  • From: back country of SO-CAL, at the birth place of Naval Aviation
Posted by DUSTER on Thursday, October 29, 2015 9:36 PM

Gee, no wonder you work is so primo, you measure stuff! 

Who knew you could do that and get such good results?   Sure beats my  eyeball and knuckle  to knuckle  measurin’ system.

Seriously: Great Stuff


Steve

Building the perfect model---just not quite yet  Confused

  • Member since
    November 2009
  • From: SW Virginia
Posted by Gamera on Friday, October 30, 2015 12:15 PM

Statis as armour modelers??? What do you think I'm risking with posting nice things about a Star Wars model if my fellow Star Trek fans find out about it?!!?! Propeller

"I dream in fire but work in clay." -Arthur Machen


  • Member since
    January 2015
  • From: Tumwater, WA.
Posted by M. Brindos on Sunday, November 1, 2015 12:06 AM

We have status? Meh.

All I know is I like what I like lol. I'm a broad spectrum kind of geek.

What you are doing here is just one of those "awe" inspiring builds. I've seen this partially built on other sites but this is something extra with the lengths you are willing to go to, so it's "right".

Other than sitting here on the other side of the net in a comfy chair and saying "whoa" to myself, I have nothing to say that would contribute to making this thread any better than it already is.

I'm sure I'm not the only one with this reaction so keep watching that viewer count as it will tell you all you need to know about how much interest you have here.

When something is this awesome, there are few to little words necessary lol.

You just keep going, because we're paying attention. ;)

- Mike Brindos "Lost Boy"

  • Member since
    December 2010
  • From: Memphis TN
Posted by Heavens Eagle on Wednesday, November 4, 2015 2:21 PM

LOL!  Thanks guys, I do appreciate your posts! Getting feedback is one of the reasons that I do posts in here.  While there is a lot of stuff that I excel at, there is also a fair amount of stuff that I could use some suggestions on.  Coming up soon I will be printingout some custom decals for the first time.  Have done some looking and reading online, but until you actually do it, there is that element of "Oh Crap!" waiting to happen.

As I have shipment #6 now on it's way, I thought it is time to get the Basic posts all current.  Here is the info for the stuff in shipment #5.

To be Continued....

  • Member since
    December 2010
  • From: Memphis TN
Posted by Heavens Eagle on Wednesday, November 4, 2015 3:25 PM

Here is the rest . . .

With this installment we are now current with where things are at.  Shipment #6 will probably be in sometime this weekend.   I will post on it once I have the new post put together.

In looking ahead at some of the videos from those in the UK, I have found that the lower frame will be complete at Issue #40.  I will assemble the lower frame at that time.  Also with Issue #40 a replacement (improved?) nose cone for the cockpit. There wil also be the (garbage) clear (garbage) parts for the turret and 'pit  (garbage) windows.  If you haven't guessed yet they look like something from a 3 year olds toy.  Garbage.

The boarding ramp will be in my hands by Issue #40 as well.  I knew it was going to get a total makeover after seeing the Utube video of the prototype in operation.  It goes up and down WAY too fast and there is nothing up inside except the ridiculous frame where the opening should be.  That is going to get an EXtreme dose of rework when the time comes.

But that is down the road a ways.  For now the cockpit is being a major challenge, so be patient sports fans, more is coming on that soon!

  • Member since
    November 2009
  • From: SW Virginia
Posted by Gamera on Thursday, November 5, 2015 11:35 AM

WOW, so this only makes 1/5th of the kit so far!?! Indifferent Gee whiz!!!

Though on the downside you'd think they wouldn't cut corners. If I paid that much for a kit I'd be a little miffed too about having to scratchbuild and purchase extra detailing parts. 

"I dream in fire but work in clay." -Arthur Machen


  • Member since
    December 2010
  • From: Memphis TN
Posted by Heavens Eagle on Thursday, November 5, 2015 1:37 PM

Gamera

WOW, so this only makes 1/5th of the kit so far!?! Indifferent Gee whiz!!!

Though on the downside you'd think they wouldn't cut corners. If I paid that much for a kit I'd be a little miffed too about having to scratchbuild and purchase extra detailing parts. 


In looking around at some of the U-tube vids there are a fair number of folks that are quite happy with the OOB offering. I am very rarely content with what is in the box.  I also have the HK 1/32 B-17 G kit with all the aftermarket goodies.  The price point becomes fairly close to what this one is when you do that.

Some folks just like to put together a model and aren't too concerned about anything beyond that.  Like assembling a picture puzzle.  Others like to do all the extra stuff (like me).  There is one guy on U-tube that drves me up the wall at times. He fumbles around with things and isn'the brightest bulb on the sign,  but he is so happy with the basic kit and is informative on parts in future Issues that I watch his build.  Helps me plan ahead.

The thing I always have to keep in mind is if that person is enjoying their build.  That is the whole point of all this.  To have fun.  Any hobby if you really get into it is going to cost money.  I know folks that blow a lot at casinos or spend a huge amount on cable TV.  Both of those are a waste to me, but some folks really like that.

Whatever floats your boat I say.

  • Member since
    November 2009
  • From: SW Virginia
Posted by Gamera on Friday, November 6, 2015 7:51 AM

Guess that's just me, if I buy a middle quality or cheap kit I don't mind doing a little extra work but if I'm buying a top of the line model I expect it to be pretty close to perfect out of the box. 

I couldn't agree with you more though that if you're having fun you're doing it the right way. And since you paid for it, build it whatever way you want. Yes

"I dream in fire but work in clay." -Arthur Machen


  • Member since
    May 2008
  • From: Ypsilanti, MI
Posted by MIflyer on Friday, November 6, 2015 9:12 AM

If so few people are commenting on this thread, it's probably because, like me, they are spending most of their time scraping their jaw off the floor while looking at your work. Seriously great stuff!

Kevin Johnson    Ypsilanti, Michigan USA

On the bench: 1/72 Fujimi Ki-36 J-BAAR

  • Member since
    September 2015
Posted by TempusFugit on Friday, November 6, 2015 8:29 PM

So, Heavens Eagle, I finally get a bit of time to make another reply, lol.

I think what stands out for me the most with this build is the degree of planning you are putting in to it. Oh sure, there's obviously skill in designing and fabricating more accurate parts, but  it seems to me it's the planning that really makes all that possible. That said, this thread continues to impress! I am particularly impressed with the plotting and fabrication of the cockpit bulkhead; should be incredible when finished.

There was a time I thought it might be cool to build the DeAg Falcon, but now that I know there are so many inaccuracies I would feel compelled to "accurize" it as best I could. I think this is an excellent example of ignorance is bliss, because I don't think I could just accept it as is now, hahaha ! I'm not at all saying it is not a good kit or that I couldn't enjoy it, just that I would  enjoy it much more if I made it more accurate.

I noticed when I logged in that there were nearly 1,900 views. Perhaps some of those views are folks doing a search on this Millenium Falcon kit and are looking for a solution to a problem. Or you could be right and some are bashful. Wink At any rate, I am really enjoying this build. Good stuff!


TF

  • Member since
    August 2007
  • From: back country of SO-CAL, at the birth place of Naval Aviation
Posted by DUSTER on Friday, November 6, 2015 11:14 PM

Gamera

WOW, so this only makes 1/5th of the kit so far!?! Indifferent Gee whiz!!!

...


 Wow that is a lot of "comming in" parts in your future.

I am confident you'll know how to pound them into submission and turn their sow ears into a silk purse.Wink


Steve

Building the perfect model---just not quite yet  Confused

  • Member since
    April 2015
Posted by LrdSatyr8 on Thursday, November 12, 2015 12:34 PM

Heavens Eagle

No good rod in "exactly" the size I am doing.  Usually extruded rod isn't all that square either.  Who knows, my prototy[e might look great and won't need to be redone.  I will just have to wait and see once I do the test.  Also the paint I'm going to use might not be opaque enough.  Will just have to see.

Here's something I was thinking about for mine that might help... how about using a small press and melting the end of the fiber optic and pressing it into the square to make it squared off.  Might be worth trying, but doubtful.  I'm working on my nav chairs right now.  Almost finished with them.  Unlike you, I'm eyeballing everything instead of measuring.  Makes things go alot faster and doesn't require perfection (even though I require it and toss out alot of stuff because it didn't suit my OCD!)

Things to think about... What would happen if you put a werewolf on the moon?  h is just a little chair and the human brain named itself!

  • Member since
    December 2010
  • From: Memphis TN
Posted by Heavens Eagle on Thursday, November 12, 2015 11:24 PM

I have completely dumped the thought of using fiber optics in the cockpit for now.  It just didn't do what I wanted.  But I get ahead of myself here.  I had my rear wall laid out and was looking at putting the buttons on in straight lines.  I was going to need something to help.  So here is where I went and made a accurate little tool to help with things like this.

The whole point of this was that I really needed to do some testing.  I didn't know if my idea would work or not.  I didn't know if the paint would work, or if the little plastic squares would look right.

So in the next few days I will post my alpha test.  I learned a number of things, some good some bad.  I have come to believe that you learn more from attempts that fail than you do if everything just works.  In this case that was quite true.

One nice thing that came of it is I now have a thin alternate to the adjustable machinists square that I use all the time.

  • Member since
    December 2010
  • From: Memphis TN
Posted by Heavens Eagle on Friday, November 13, 2015 12:05 PM

I got the next update done quicker than I originally thought.  

See  Duster!  Measuring does pay off.  The trick is knowing HOW to do the measuring.  All that time spent on a drafting table has definitely paid off here.

So here is the initial results of my first test build (and fail)  along with the revised start of the Mark II panel.

Enjoy!

This section is going to be the hardest part of the whole build.  So much micro detail that can be seen and my OCD that makes me want it RIGHT.

Let me know what you think.   There will be a Basic post soon covering Issues 21 thru 24.


  • Member since
    April 2015
Posted by LrdSatyr8 on Friday, November 13, 2015 7:48 PM

That really looks good my friend... I really have to get some new bits.  Would be nice to have a press too.  I got an idea for doing all the little switches on the side panels for ya.  Use fiber optics.  Just drill your holes andglue them in and cut them to length.  That should look pretty good for them.  Whatcha think?

Things to think about... What would happen if you put a werewolf on the moon?  h is just a little chair and the human brain named itself!

  • Member since
    December 2010
  • From: Memphis TN
Posted by Heavens Eagle on Friday, November 13, 2015 9:11 PM

Hey LrdSatyr8!  Really like your build!

Actually, I have some really thin steel wire I was thinking of using for the switches.  The fiber optics will get ised for something needing lighting.

Your interior diagrams of the walls were quite interesting.  I was going to be doing something like that but yours will give me a much better starting point. 

Thinking about taking a small break from the cockpit and doing some serious cut-n-chop on the hold.  I keep seeing major things that folks are doing (or not doing) that need to be corrected there.  Need to do some "not so fiddley" type work to keep from doing the burnout thing.

JOIN OUR COMMUNITY!

Our community is FREE to join. To participate you must either login or register for an account.

SEARCH FORUMS
FREE NEWSLETTER
By signing up you may also receive reader surveys and occasional special offers. We do not sell, rent or trade our email lists. View our Privacy Policy.