SEARCH FINESCALE.COM

Enter keywords or a search phrase below:

1/32 scale Mig 31 Firefox PP1

77839 views
116 replies
1 rating 2 rating 3 rating 4 rating 5 rating
  • Member since
    November 2004
  • From: Fukuoka Japan / Brisbane AUS.
Posted by Chris_in_Japan on Saturday, May 12, 2007 7:10 PM

It certainly has been a fun build to watch..  Seeing the Soviet stars has started to give me tingles down the spine..

Chris 

On the bench:

                          1/48 RAAF 3 Sqn F/A-18B

                          1/150 /1/160 N Scale Japanese Rail diorama.

  • Member since
    November 2005
Posted by Anonymous on Sunday, May 13, 2007 3:22 AM


  what do  you believe , is this the right  or the left  wing tip? very  inderterminate from my actual point  of view.thanks William.

very   hard to  determinate in this views, a side view will be very  helpfull or a frontal view.

 but  if i can especulate  , i think this  is the right wing tip, with the chisel tip  in the more conservate  undersurface  of the relic. whitout other views,  im not sure..may be.

    thanks.

  • Member since
    September 2003
Posted by SCI-FI-REPLICATOR on Sunday, May 13, 2007 5:29 AM

You're right...It's the right wing tip, chisel tip is underside...by the way, the red star was painted, not a decal, and blends really well..

Will

  • Member since
    November 2004
  • From: Fukuoka Japan / Brisbane AUS.
Posted by Chris_in_Japan on Sunday, May 13, 2007 6:40 AM

Looking good to me!...

Chris 

On the bench:

                          1/48 RAAF 3 Sqn F/A-18B

                          1/150 /1/160 N Scale Japanese Rail diorama.

  • Member since
    September 2003
Posted by SCI-FI-REPLICATOR on Monday, May 14, 2007 11:36 PM

ok small update...

My  friend who is a mold making master helped me make boxes this evening, these things had to be exact as the mold boxes will be key to ensuring a proper fit to tools being made within them. they also have to be interchangeable. here's the latest photos of this progress taken this evening. Now it's ti9me to clay up the master pattern for the RTV pour. Enjoy the photos.

Best,

Will


  • Member since
    September 2003
Posted by SCI-FI-REPLICATOR on Friday, May 25, 2007 11:11 PM
Here's an update. I started laying up the fuselage this evening, while at the shop doing other things. I was able to get most of the left side clayed up and will build out to the box that will enclose the containment center. moving along again... Best, Will      


  • Member since
    September 2003
Posted by SCI-FI-REPLICATOR on Monday, June 4, 2007 7:53 PM

Little update,
I finally had a chance to clay up the remainder of the fuselage, now time to add registration and key system
in da mean time how bout some pics, enjoy!
Best,
Will


  • Member since
    November 2005
Posted by Anonymous on Monday, June 4, 2007 9:08 PM

I think what I love about this build is that you have shown from the start what is involved in something like this.. For me, I just take kits out and build them, and really dont take alot of time to consider how it got there.. Thanks for sharing..

Chris

  • Member since
    September 2003
Posted by SCI-FI-REPLICATOR on Tuesday, July 10, 2007 3:01 AM

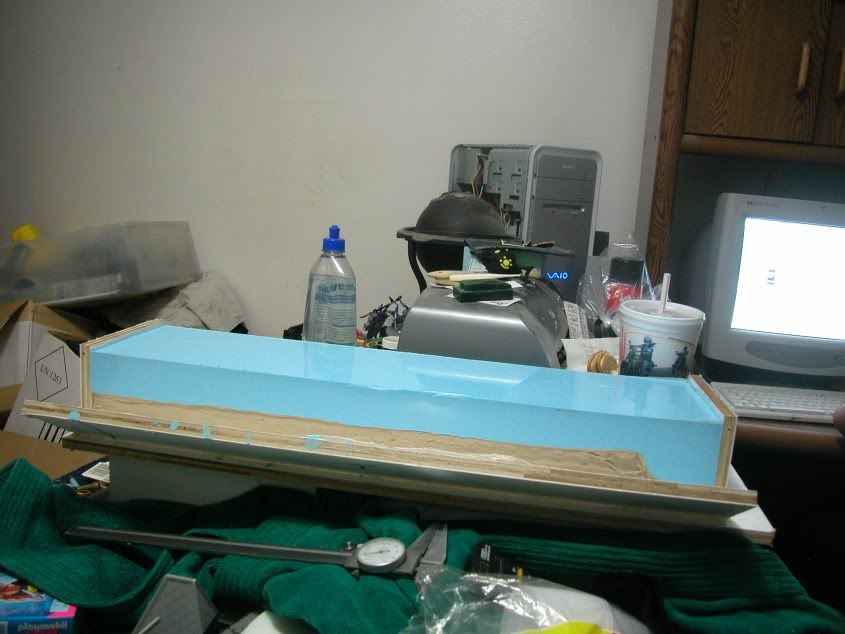
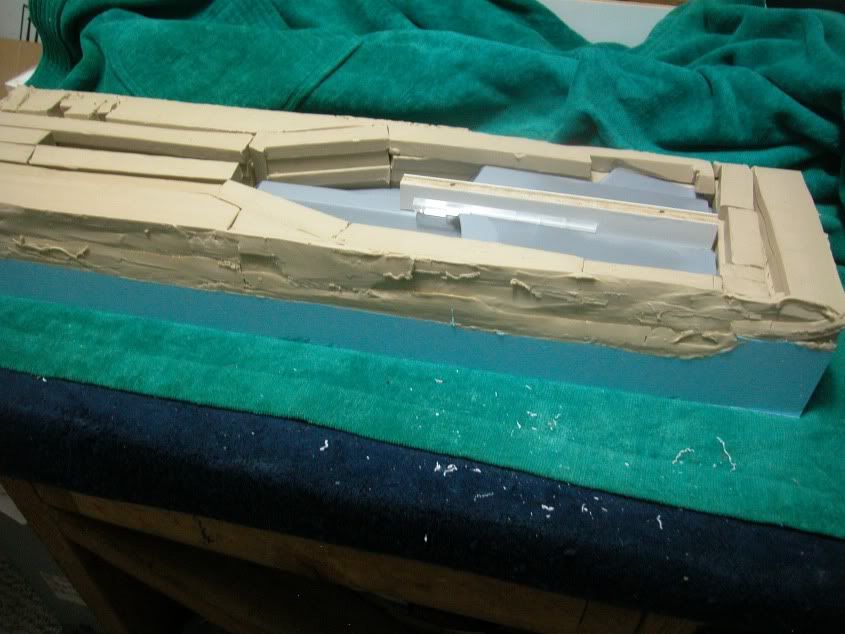
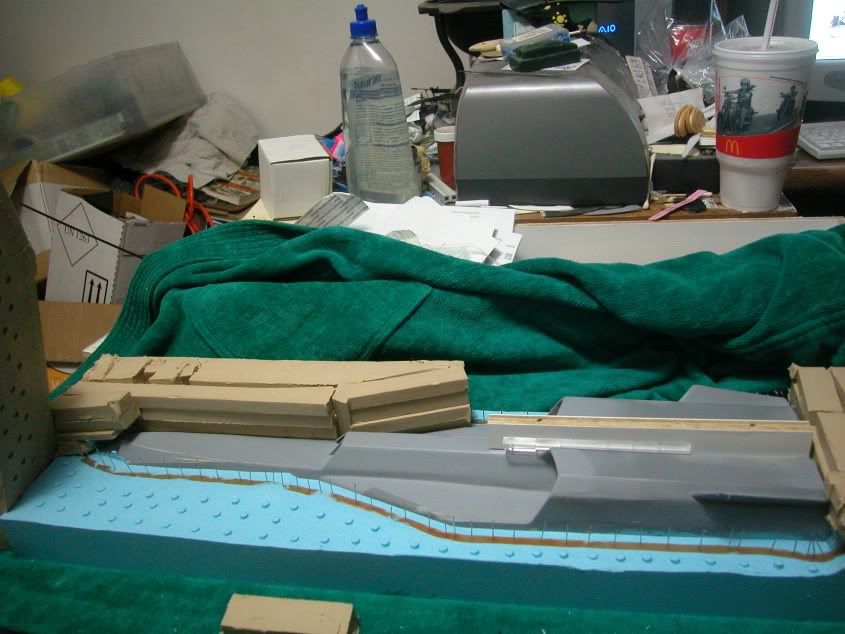
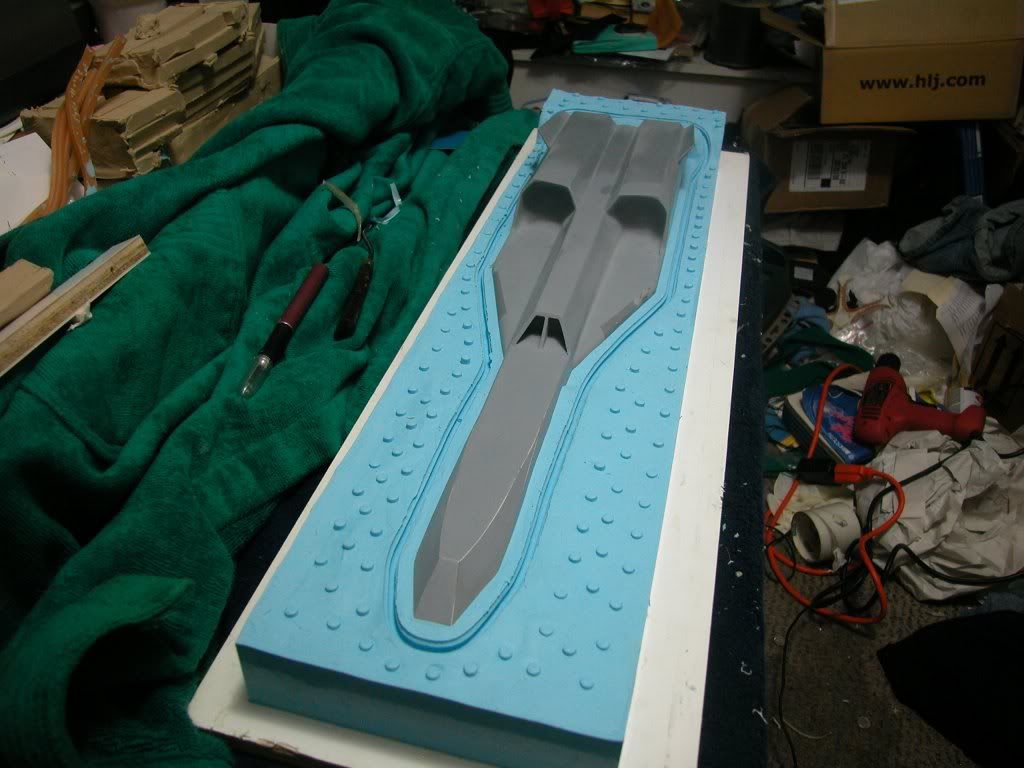
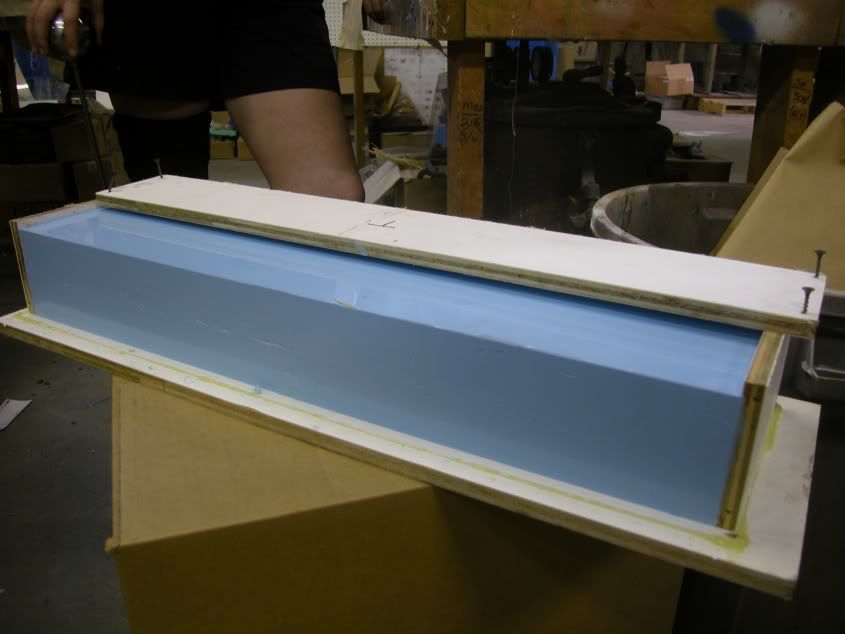
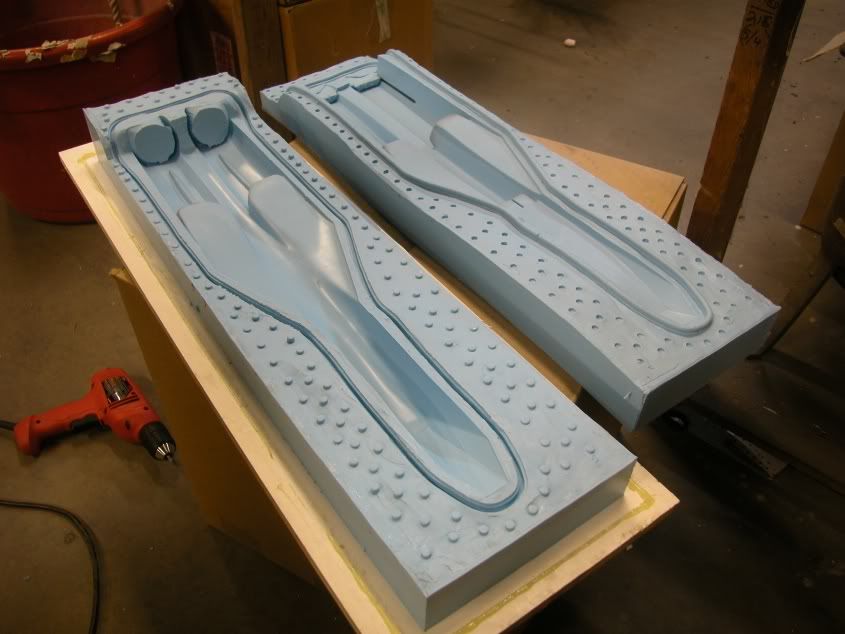
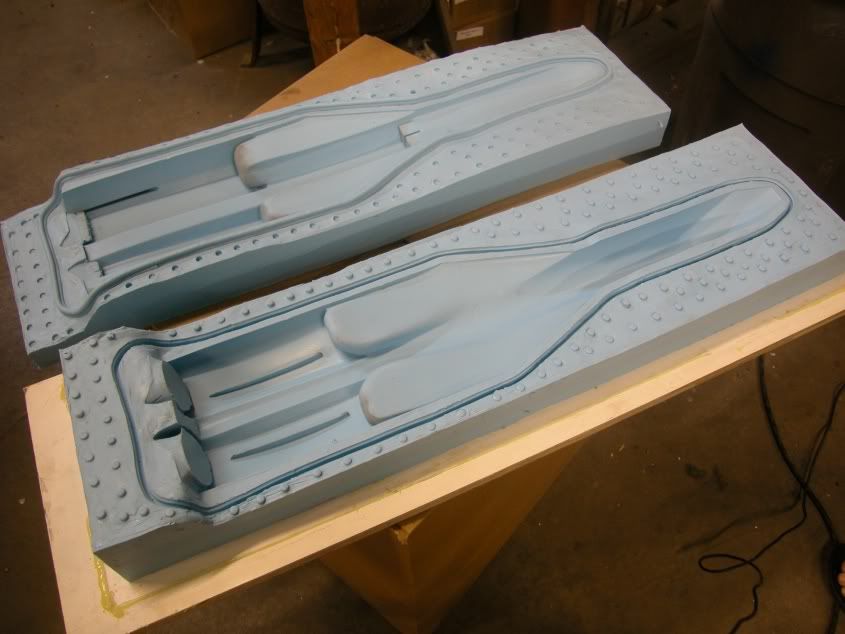
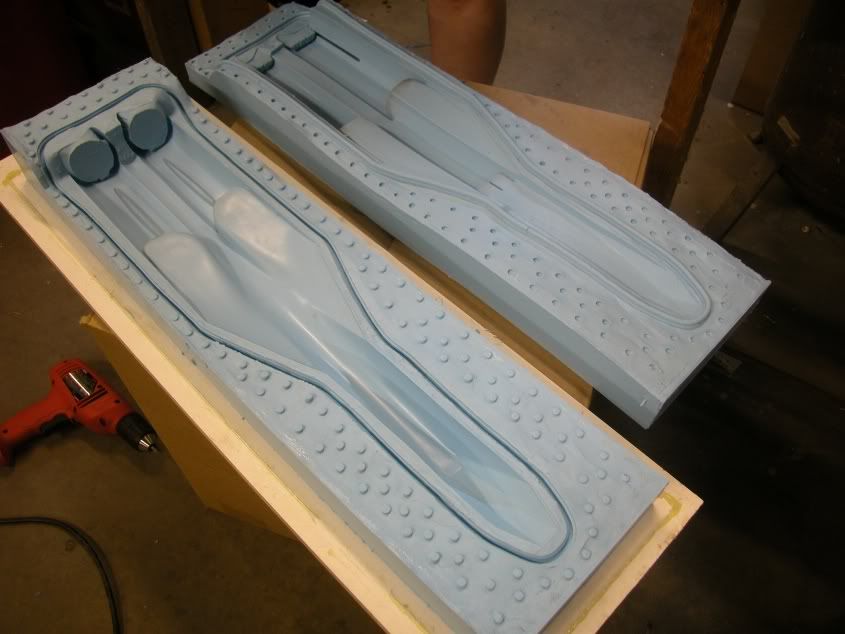
Howdy,

Big update here . I've been trying to finish off other pieces but had some time to work on the PP1 project. First, I finished claying up and adding registration keys as well as the perimeter key system. This permimeter key system took a wile to manufacture, but the result is worth it, then mold boxed the whole piece. After this was finished using mold release, I sprayed the entire project thoroughly. Finally after I was satisfied with coverage, poured the RTV.  It's a lot of RTV silicone rubber as you will see, but necessary for this two stage molding process to work. After waiting 24 hours to demold, I carefully unboxed the tool and turned her upside down to remove the clay, being extra careful to ensure that the master pattern stayed locked in the upper RTV rubber mold. Removing the clay proved to be a breeze, as the mold release did it's job extremely well. After removing all clay( it actually came aprt in a couple large sections), I removed the perimeter key system, and boxed the tool back up for final RTV pour. Again waited 24 hours which ended this past evening so i undid the mold box once more revealing a large block of RTV silicone. Carefully I pried the halves apart and what you see in the last photos is the final result. My opinion is it came out perfect, no clean up and  a major bonus in this field, the Master survived. Now comes the fun part, laying sheet wax in each half and remolding forming the resin cavity necessary to make hollow castings for the new resin hollow masters from which all final details will be added, bays recesses acess panels cockpit details, engine area details and what ever else is needed. Once this is done, I'll make the final tools . In the mean time, enjoy the photo documentation.

Sincerely,

Will
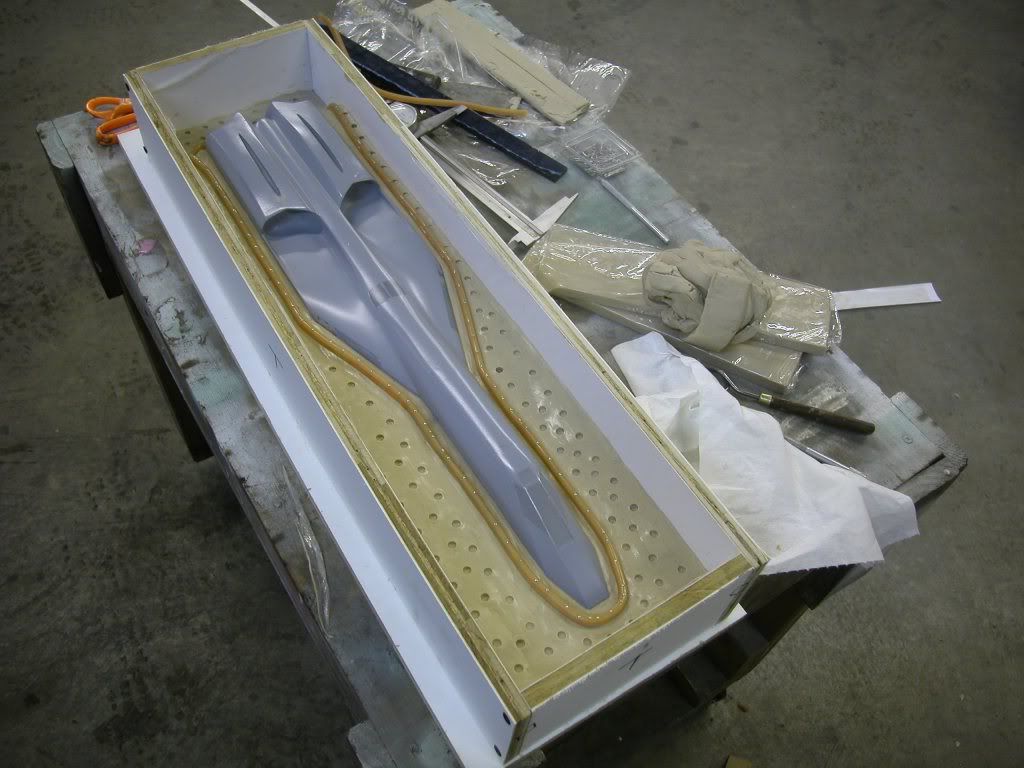
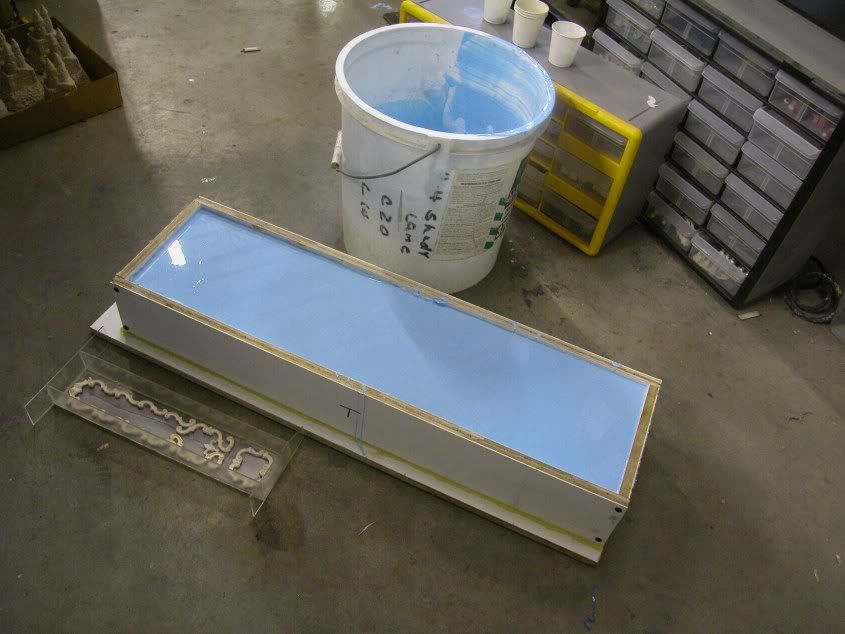


  • Member since
    September 2003
Posted by SCI-FI-REPLICATOR on Tuesday, July 24, 2007 11:00 PM

Posted: Tue Jul 24, 2007 10:48 pm    Post subject:    

--------------------------------------------------------------------------------
Howdy gang,
I just wanted to update everyone interested. I had a chance to do a little on the Firefox. I started laying the sheet wax into the bottom half of the mold. Now, perhaps the method I'm employing makes a little more sense. there are a few gaps you will note and these get smoothed over using clean clay. Also, I didnt go all the way up to the edge. Again this gets finished with clean clay to ensure the proper edge. see the pics, as always, questions welcome. Once I get the clay into the gaps and smooth everything over, pour sprue and vents applied, a liberal amount of mold release will be applied, then final rtv rubber poured. this will complete the bottom half of this stage one mold, then this process is repeated on to the top half. Enjoy the pics.
Sincerely,
Will


  • Member since
    January 2007
Posted by the doog on Wednesday, July 25, 2007 5:56 PM

I'm really excited by your model project and I can't wait to see it completed! I absolutely LOVE Clint Eastwood, and that movie was really awesome!

Impressive techniques! Just make sure you think in Russian! Smile,Wink, & Grin [swg]

  • Member since
    September 2003
Posted by SCI-FI-REPLICATOR on Wednesday, August 1, 2007 1:30 AM

ok,
I clayed up the wax in the bottom mold last night. Now I just need to add vents and pour sprue and she's ready to pour last half..as for the sheet wax, you can get quite a few different thickness(in thousandths), adhesive backed or not. note for those interested, the adhesive backed is a little more pliable, I chose .100 thickness. I think that will be thin enough, but still have strength once resin is poured in the cavity created by the sheet wax.
Sincerely,
Will  


Source: [URL]http://www.freemansupply.com/SheetWax.htm

  • Member since
    September 2003
Posted by SCI-FI-REPLICATOR on Tuesday, October 9, 2007 3:18 PM

Big Update!,

Ok, here we go..I'm quite happy with the final result of this casting so it will become the lower fuselage for the new "hollow"master pattern. The inside will be super smoothed out like an injection kit for final molding process. This series of links, in order, will hopefully give everyone an idea as to the casting and demolding process. I couldn't pour this casting under pressure and due to that fact ther are a couple airbubbles. the most prominant one is on the starboard side intake on the inside. There is also one on the front of the belly intake edge as well as the side of the belly intake, both about the diameter of a No2 pencil lead. on to the pics..enjoy

Best,

will

  • Member since
    January 2007
Posted by the doog on Tuesday, October 9, 2007 11:24 PM
I swear I'm the first one who'd buy this kit in production form!! LOOKS GREEEAAATT!!!
  • Member since
    October 2007
Posted by White_R34 on Thursday, January 17, 2008 4:19 PM
I will sec. that I'd love to have one myself. Your mold has came out grate.
Building the Impossible Is my main goal!!
  • Member since
    December 2002
  • From: Third rock from the sun.
Posted by Woody on Friday, January 18, 2008 9:02 PM

Looks like your making great head way! If your only getting a couple small voids in your casting, that's great.


" I wish to have no connection with any ship that does not sail fast; for I intend to go in harm's way." --John Paul Jones
  • Member since
    December 2004
Posted by jamesmk7 on Thursday, March 20, 2008 10:13 PM
I've been watching your build since the beginning, and Bill, that's Beautiful work! Blah, Blah, Blah about the quality of the movie's special effects, with Clint and the Firefox, it's just a great movie to watch. Blah, Blah, Blah about the "finite" details of your master. From your excellent photos of the continuing work, I believe you've nailed it. The entire idea of a 1/32 scale FireFox is incredible. Please put me second or third or whatever in line, I will be waiting for more photos and eventually your release date and price. I've already hocked the farm and everything else to get one of these. As my mentor is famous for saying "IMPRESSIVE, VERY IMPRESSIVE!" Model On, Brother, Jim.
  • Member since
    November 2009
Posted by jgabler on Friday, November 6, 2009 4:38 PM
Sorry for bumping such an old thread, but I was wondering if Will ever finished this kit and made it available to buy?
  • Member since
    March 2003
  • From: Newport News VA
Posted by Buddho on Friday, November 6, 2009 4:43 PM

I want one...I want one!!!!

Beautiful casting ....this is so cool to see in progress!

  • Member since
    July 2003
  • From: Huntington, WV
Posted by Kugai on Wednesday, November 11, 2009 9:56 PM

Whenever it's available, I gotta get one, too!

It would round out the MiG lineup I have in mind.  ( Yes, I know the Firefox is fictional, but it'd still be fun to have next to the Foxhound )

http://i712.photobucket.com/albums/ww122/randysmodels/No%20After%20Market%20Build%20Group/Group%20Badge/GBbadge2.jpghttp://i6.photobucket.com/albums/y211/razordws/GB%20Badges/WMIIIGBsmall.jpg

  • Member since
    September 2003
Posted by SCI-FI-REPLICATOR on Monday, September 20, 2010 9:57 PM

Wow, I sure let this one slip

Got to know that that w2as not my intention. I had a major tragedy in my life in Nov of 2007 that halted work on models in general for quite a while. I need to get back on this more and in fact have done a little more on it since my last post..

Will

  • Member since
    October 2010
Posted by FІЯЭFФЖ on Friday, October 8, 2010 4:51 PM
Will,
I am Brazilian and I am following with great interest your work, because I'm in love with this airplane, as seen by the nickname I use in modeling a forum in Brazil:
www.webkits.com.br
I hope to return soon, and present us with images of such a good job.
Hug
Vlamir Bueno
  • Member since
    August 2012
Posted by famvburg on Wednesday, August 8, 2012 2:19 PM

     I stumbled upon this discussion while surfing the WWW. What has become of this and / or the other 1/32 kit mentioned? How about those drawings obtained from Apogee/Industrial Light and Magic? I'd sure like to by a set myself. Thanks.

  • Member since
    August 2014
Posted by Auricom1 on Sunday, August 31, 2014 8:35 PM

Hi William,

I have just stumbled across your excellent build thread for the 1/32 Firefox. It's fantastic work! I know it has been a long while since you posted on here. But i would be VERY interested in a super scale Firefox kit if you are still producing them, or if you have one available. Further, i would also be interested in copies of the plans you used. I fly large scale radio controlled jets, and i am intending to begin work on a Firefox in 2015. It would be very helpful if i had one of your 1/32 Firefoxes and the plans for reference. If you could contact me i would be most grateful,

Kind Regards,

Mike

  • Member since
    August 2015
Posted by Nemo78 on Thursday, August 6, 2015 11:44 PM
Will, I have followed your work for years! Big fan of your huge nautilus. Any chance this has been completed and is available to buy? PM or public response is fine with me.
  • Member since
    March 2022
Posted by jasper15 on Sunday, March 27, 2022 9:04 PM

Hi William , just wondering how the build is going and if possible to buy a kit from you . I see thats it has been awhile but i recently stumbled across  you on fsm . Thanks paul

  • Member since
    April 2024
Posted by TCGFILM inc on Wednesday, April 17, 2024 12:13 PM

I would be very interested in a 1/32 scale MIG31.

We require one for a museum project.

If it were available in time we would pay well for it.


Kind regards,  Joe Parker.

JOIN OUR COMMUNITY!

Our community is FREE to join. To participate you must either login or register for an account.

SEARCH FORUMS
FREE NEWSLETTER
By signing up you may also receive reader surveys and occasional special offers. We do not sell, rent or trade our email lists. View our Privacy Policy.