SEARCH FINESCALE.COM

Enter keywords or a search phrase below:

Sovereign Replicas "fully faired" Y-Wing project.

5055 views
23 replies
1 rating 2 rating 3 rating 4 rating 5 rating
  • Member since
    March 2007
  • From: Atlanta, Ga.
Sovereign Replicas "fully faired" Y-Wing project.
Posted by MrSquid2U on Thursday, August 6, 2009 3:20 PM

Howdy gang!
When asked if I'd, "Like to build one of REL's Y-Wings?", I jumped at the chance since I don't have one for myself.
The parcel arrived and within the box were no more, and no fewer, components than I'd want to see to accomplish the subject and all with nice crisp itty bitty lil details that I quite admired! 


Thought the canopy could stand a lil thinning so went to work to do so from the inside until all framework was relatively closer to scale. 

Then turned my attention to lighting the engines by hogging out the front of each nacelle to accept a battery holder (for 3 lil "buttoncell batteries) cut away from 'TeaLights' along with drilling a wire path end to end. 


To control the electronics I chose microswitches that would hide behind the 'rear body face plate', then come up through that with aluminum tube and styrene caps which mimic the 'stepped' details originally cast in place. Hogged out a pocket and the whole thing will just "snug" into place to allow servicing if needing. Again, holes were drilled for wiring through the body and then out to where the nacelles will mount.


So far, so good.


  • Member since
    March 2007
  • From: Atlanta, Ga.
Posted by MrSquid2U on Friday, August 7, 2009 11:01 AM

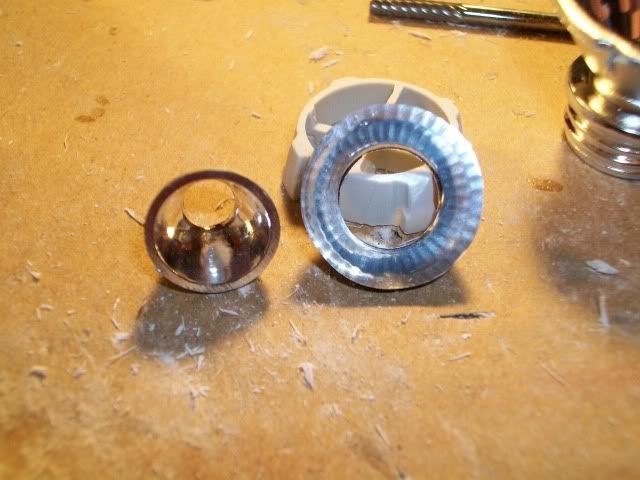
To light up the engines I thought about boring out the "nacelles" and sinking the LED waaaay back down in there (compare where the engine is to the vectoring vanes on an FM 'exposed' Y-wing) and while I still might for now I've taken the easy way out and will sink a refelctor just to house the LED and disperse the light.

Here's that reflector cone (pirated from a keychain flashlight) sunk in place:


Since my only goal was to light the engines, the components are now in place along with wiring paths so next is assembly and actual wiring.


  • Member since
    June 2004
  • From: The House of Blues Clues
Posted by Griffworks on Friday, August 7, 2009 2:46 PM
Lookin' good!

The greatest measure of a man is his children and what kind of people they are.


  • Member since
    July 2009
Posted by Marcus-Sirilicus on Friday, August 7, 2009 4:01 PM

I'm a big starwars fan, your doing ILM justice!!  George would be proud, keep up the good work!!

  • Member since
    March 2007
  • From: Atlanta, Ga.
Posted by MrSquid2U on Monday, August 10, 2009 9:22 AM

Griff,

 Thanks buddy.

'Marcus',

 Um, wow, that's TOO kind, but thanks very much.


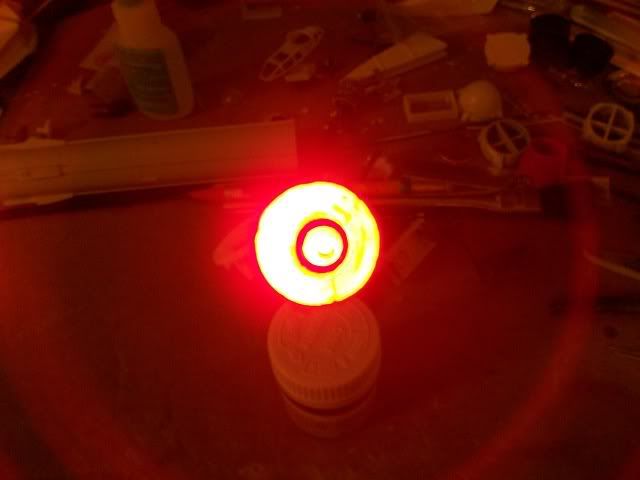
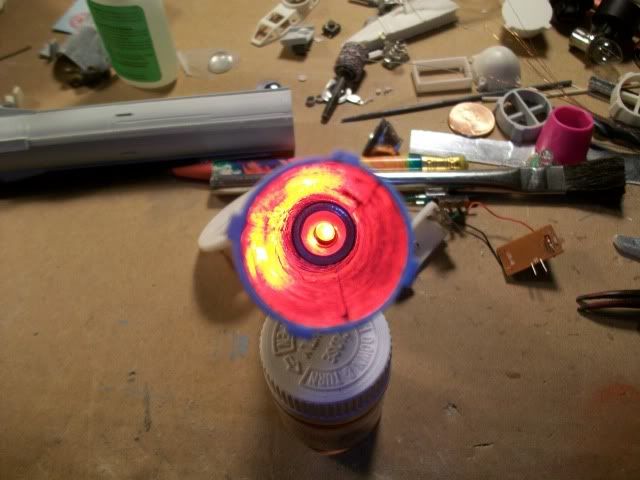
Having bored the nacelles entirely through I now saw a need for a reflector 'cone' that would span the entire inside diameter and lacking one I took a larger one meant for a "bulb", cut down to overal diameter and then placed atop my original one that accomodates an LED. Lines the inside of the nacellewith self adhesive detail foil and condcuted a light test.
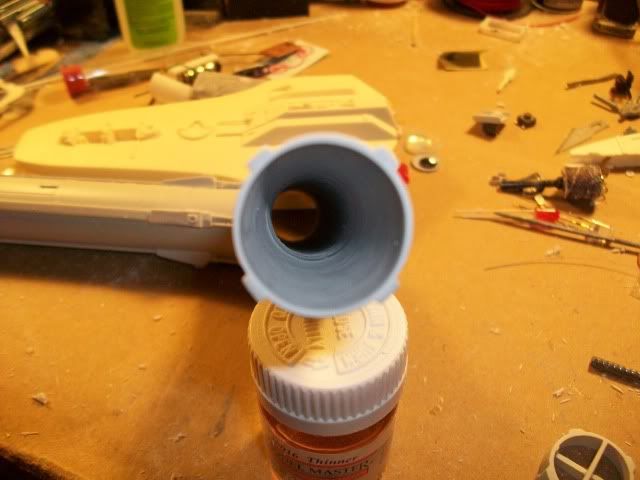
There'll be two modes for lights- constant full intensity OR a 'flickering' effect, just for variety. Oh, of course, there's also OFF.Wink [;)]


  • Member since
    February 2009
Posted by Sian on Monday, August 10, 2009 3:56 PM

Is this the same scale as Fine Molds 1:72 Ywing? I've been wanting to build a piece with the same Y-wing, showroom-new and later hotrodded by the rebel alliance, and this seems like it would be a lot easier than fairing in the Fine Molds model. ^.^


*edit* I see that it is. how much does one of these run?

  • Member since
    March 2007
  • From: Atlanta, Ga.
Posted by MrSquid2U on Monday, August 10, 2009 6:10 PM
 Sian wrote:

Is this the same scale as Fine Molds 1:72 Ywing? I've been wanting to build a piece with the same Y-wing, showroom-new and later hotrodded by the rebel alliance, and this seems like it would be a lot easier than fairing in the Fine Molds model. ^.^


*edit* I see that it is. how much does one of these run?


You can contact the kitmaker at http://www.sovereignreplicas.com/


  • Member since
    March 2007
  • From: Atlanta, Ga.
Posted by MrSquid2U on Tuesday, August 11, 2009 10:28 AM

Thinking that the engines can't be "all there is to light" I started to look at the AstroMech:


After the LED was turned down to fit within the hollowed out Droid I have some holes drilled while a couple of those are waiting for brass sleaves to represent their "lens housings" too:

And then the body will be prepped to receive the components and some form of activation switch again.


  • Member since
    August 2009
  • From: Johnson Creek, WI
Posted by Model Kit Builder on Tuesday, August 11, 2009 11:30 AM

Lookin' good so far.

I will follow your build.....

Thanks and take care,

-Jason The Model Kit Builder

"Helping Keep YOUR Hobby Alive"

  • Member since
    February 2003
  • From: Sandusky Ohio, USA
Posted by Swanny on Tuesday, August 11, 2009 2:10 PM
Inspirational work, looking forward to your next update.
  • Member since
    June 2004
  • From: The House of Blues Clues
Posted by Griffworks on Tuesday, August 11, 2009 7:14 PM

 MrSquid2U wrote:
You can contact the kitmaker at http://www.sovereignreplicas.com/  

I thought he was selling them thru Skidmarks Diecast ( http://www.skidmarksdiecast.com/catalog/ )?  Strangely enough, tho, I don't see them on that site...?

Regardless, like what you're doing for the lighting.


The greatest measure of a man is his children and what kind of people they are.


  • Member since
    March 2007
  • From: Atlanta, Ga.
Posted by MrSquid2U on Tuesday, August 11, 2009 8:30 PM
 Griffworks wrote:

 MrSquid2U wrote:
You can contact the kitmaker at http://www.sovereignreplicas.com/  

I thought he was selling them thru Skidmarks Diecast ( http://www.skidmarksdiecast.com/catalog/ )?  Strangely enough, tho, I don't see them on that site...?

Regardless, like what you're doing for the lighting.


Griff,

 If I understand it correctly REL (Sovereign Replicas) is releasing his new Tie Defender through Skidmarks while this 'Clone Wars Y-Wing' is something that he isn't actively marketing now. When I wrote to him that current interest was being expressed he replied you can contact him directly since he is 'able' to pour fresh ones if the need arises.

 I believe he'll at least be pouring another one or two for myself so I can explore some alternate paint schemes after I complete this one the way it has been requested.Dinner [dinner]

 A fair question that could use clarifying though and I also thank you for the kind words.Cool [8D]


  • Member since
    March 2007
  • From: Atlanta, Ga.
Posted by MrSquid2U on Tuesday, August 11, 2009 9:10 PM

"MKB", Swanny: Gents- thank you too for the kind words and I hope you'll find my further intentions for this project just as interesting.Wink [;)]


  • Member since
    June 2004
  • From: The House of Blues Clues
Posted by Griffworks on Wednesday, August 12, 2009 12:27 PM
 MrSquid2U wrote:
 Griffworks wrote:

 MrSquid2U wrote:
You can contact the kitmaker at http://www.sovereignreplicas.com/  

I thought he was selling them thru Skidmarks Diecast ( http://www.skidmarksdiecast.com/catalog/ )?  Strangely enough, tho, I don't see them on that site...?

Regardless, like what you're doing for the lighting.   

Griff,

 If I understand it correctly REL (Sovereign Replicas) is releasing his new Tie Defender through Skidmarks while this 'Clone Wars Y-Wing' is something that he isn't actively marketing now. When I wrote to him that current interest was being expressed he replied you can contact him directly since he is 'able' to pour fresh ones if the need arises.

 I believe he'll at least be pouring another one or two for myself so I can explore some alternate paint schemes after I complete this one the way it has been requested.Dinner [dinner]

 A fair question that could use clarifying though and I also thank you for the kind words.Cool [8D]

There was a thread at Resin Illuminati, in one of the Vendor's Section forums where Skidmarks was talking about selling the kit. I'm fairly certain that it was also mentioned by REL himself in a thread at R.I., maybe where he was building the master? Anyhow, I think Skidmarks had it marked up something like $10 over what REl was selling it. Seems something changed about that.  If you do a user search for Skidmarks Diecast, checking the threads he's started you should find it easily enough.

The greatest measure of a man is his children and what kind of people they are.


REL
  • Member since
    April 2006
Posted by REL on Wednesday, August 12, 2009 10:36 PM

What a fantastic build up, this is going to look great.

Skidmarks doesn't sell my products anymore, not for any bad reason though. The Y Wing is basically out of production, but I may release it again in the future. 


The TIE Defender is up in the air at the moment, I'm actually thinking of just selling the master, I don't know. 

  • Member since
    June 2004
  • From: The House of Blues Clues
Posted by Griffworks on Wednesday, August 12, 2009 10:55 PM

Gaaah!   Dang it!  I was hoping that he was just OOS on the Y-Wings at Skidmarks and that they'd be BIS when I had the funds again. Sad [:(]


The greatest measure of a man is his children and what kind of people they are.


  • Member since
    March 2007
  • From: Atlanta, Ga.
Posted by MrSquid2U on Thursday, August 13, 2009 2:55 PM
 Griffworks wrote:

Gaaah!   Dang it!  I was hoping that he was just OOS on the Y-Wings at Skidmarks and that they'd be BIS when I had the funds again. Sad [:(]


Aaaack!


And now it looks like I should have ordered the Tie Defender before it was officially available, which was before it became on possible hold?

Wait, how would that have worked?Confused [%-)]


  • Member since
    March 2007
  • From: Atlanta, Ga.
Posted by MrSquid2U on Friday, August 14, 2009 12:59 AM

Decided to go ahead and excersise the Dremel some more by hogging out a cavity within the body to allow a cockpit plus additional room to the sides to route wiring and fiberoptics. Here's the roughcut-


  • Member since
    March 2007
  • From: Atlanta, Ga.
Posted by MrSquid2U on Saturday, August 15, 2009 11:36 AM

Wound up with the canopy just the size of the opening so that it will eventually rest upon the 'cockpit walls' when they're built wihich will aid the making and mounting of hinges.


Also changed a side body detail from raised to sunken to evetually match a reference shot, after some inner details are added.


  • Member since
    June 2004
  • From: The House of Blues Clues
Posted by Griffworks on Sunday, August 16, 2009 9:54 PM

Awesome!  I'm reallin' diggin' yer accurizing, too.


The greatest measure of a man is his children and what kind of people they are.


  • Member since
    March 2007
  • From: Atlanta, Ga.
Posted by MrSquid2U on Monday, August 17, 2009 10:28 AM

^^^

Thanks Griff. I'm having fun putting the lil touches to it as well!


The kit came with a nicely cast clear resin 'turret ball' but I've been searching for a 'hollow' version? Looked at the usual suspects like Craft Store "rollie eyes" and anything else I could scrounge but with no luck?
Until I glanced over at a pill dispenser pack! One of those bubble packs with foil backing that you push the pill through.

Here's one, with a lil brass tubing trim ring at the base just for garnishment. Overall height is still to be determined but now I do have something to mount the guns through and allow the gunner up into.;)


  • Member since
    June 2004
  • From: The House of Blues Clues
Posted by Griffworks on Monday, August 17, 2009 10:55 AM

Nice!  Very resourceful.


The greatest measure of a man is his children and what kind of people they are.


  • Member since
    March 2007
  • From: Atlanta, Ga.
Posted by MrSquid2U on Tuesday, August 18, 2009 5:54 PM

^^^^

Thank you Griff. I appreciate your participation and kind words!


Somewhere along the way, I lost my 'voice of reason and limitations"??

Took a look at the underbody armament "tunnels" and I've always like replacing that kind of molded in detail with actual tubing. But if I was going to replace that anyways I decided to go ahead and add lighting effects to that weaponry too. So, I hogged out more of what is quickly becoming just a resin shell of a body and fashioned up aluminum tubing which is shown roughed in place. The backend of those tubes now have room for circuitry and LEDs as well.


You might notice the "nose" of the craft is now cut off- for the same reason.


  • Member since
    March 2007
  • From: Atlanta, Ga.
Posted by MrSquid2U on Thursday, August 20, 2009 5:20 AM

Realizing that adding the electronic components to operate the additional armament planned would need more space, I set about to make it. Picked a spot on the bottom that leant itself to an opening and then framed it in so the acess panel would sit nicely and also hogged out the rest of the interior that I could now reach better.

I think I've now made enough room for what eventually turned into an effort to light up "just about everything"?Propeller [8-]


JOIN OUR COMMUNITY!

Our community is FREE to join. To participate you must either login or register for an account.

SEARCH FORUMS
FREE NEWSLETTER
By signing up you may also receive reader surveys and occasional special offers. We do not sell, rent or trade our email lists. View our Privacy Policy.