SEARCH FINESCALE.COM

Enter keywords or a search phrase below:

Zaku fz hguc work n progress - new finished pictures

22098 views
71 replies
1 rating 2 rating 3 rating 4 rating 5 rating
  • Member since
    October 2008
  • From: italy
Zaku fz hguc work n progress - new finished pictures
Posted by bsyamato on Saturday, February 19, 2011 6:35 PM

I was in doubt to do a wip of this kit, because i'll put few modding of it.

This kit is one of the best new hguc that bandai lately published .. for me..

Movements and pcb pieces covering are very good, so the kit looks good even as oob


[View:/themes/fsm/utility/Photobucket:550:0]

[View:/themes/fsm/utility/Photobucket:550:0]

[View:/themes/fsm/utility/Photobucket:550:0]

After dismembered the mounted zaku glued all main parts together, and,

after sanded seams (very few putty was needed) i engraved some more

realistic panel lines with cutter and back blade of it:

[View:/themes/fsm/utility/Photobucket:550:0]

[View:/themes/fsm/utility/Photobucket:550:0]


In the legs the first mod, putted on a piece of plasticard to cover the power hoses holes..

i prefere to use some scratched piece to simulate it:

[View:/themes/fsm/utility/Photobucket:550:0]

[View:/themes/fsm/utility/Photobucket:550:0]

[View:/themes/fsm/utility/Photobucket:550:0]


i sanded all surfaces, it work better for a matt finis:

[View:/themes/fsm/utility/Photobucket:550:0]


All nozzles was drilled.

Starting paint medium grey parts, used humbrol 147:

[View:/themes/fsm/utility/Photobucket:550:0]

Light green parts; i choice humbrol 78 that use normally for aircraft cockpit. Have a good grip without primer and have good mat finish for drybrush

[View:/themes/fsm/utility/Photobucket:550:0]

[View:/themes/fsm/utility/Photobucket:550:0]

two layer of color was applied, till now not chosen the dark green to use.

now working on foot , chest and head, that need of a good monoeye !!

Soon some other pict, actually working on it to finish sooooon (i hope)


  • Member since
    April 2008
  • From: Philadelphia PA
Posted by smeagol the vile on Saturday, February 19, 2011 9:44 PM

Yay for a gunpla build.  I cant wait to see what you do with it.


I FINALLY got my airbrush parts so hopefully I should have a gunpla WIP up on here soon too.


  • Member since
    October 2008
  • From: italy
Posted by bsyamato on Sunday, February 20, 2011 9:16 AM

smeagol the vile

Yay for a gunpla build.  I cant wait to see what you do with it.


I FINALLY got my airbrush parts so hopefully I should have a gunpla WIP up on here soon too.


Hi friend Beer

I'm using again 50 cents brushes to paint Cool and some good brush for retouch and drybrush.

As i write above don't mod too much this kit. Naturally as ever i'll use homemade decals ,Lots of them again on sheets.. Hope you post soon your gunpla wip.

Advice me when you post because mainly posting on aircraft section of the forum.

then... some update of this morning:

Tried thi modelmaster enamel for the dark green but not convinced to me, i'll try with humrol 116 for next piece and compare to it.

[View:/themes/fsm/utility/Photobucket:550:0]


heres grey pieces ready for weathering, holes was maded even on the axe:

[View:/themes/fsm/utility/Photobucket:550:0]

After blackened the visible inner of chest

[View:/themes/fsm/utility/Photobucket:550:0]

Drybrushed with gunmetal 53

[View:/themes/fsm/utility/Photobucket:550:0]

last layer of light green and black, and pieces was ready for drybrush:

[View:/themes/fsm/utility/Photobucket:550:0]

[View:/themes/fsm/utility/Photobucket:550:0]

that's all for now, waiting glued chest to dry i'll work on it


  • Member since
    April 2008
  • From: Philadelphia PA
Posted by smeagol the vile on Sunday, February 20, 2011 8:10 PM

So your hand brushing it eh'?  I havent hand brushed a gundam in a while, I never seem to get a smooth enough finish.

What are you going to do to weather and detail it?  I have started using oils for that and it works great.


  • Member since
    October 2008
  • From: italy
Posted by bsyamato on Monday, February 21, 2011 4:35 AM

Simply drybrushing and panel lining with high thinned black Big Smile 

only use enamels for all, will try to show all steps with this kit when i'll do it.

Never used oils


  • Member since
    April 2008
  • From: Philadelphia PA
Posted by smeagol the vile on Monday, February 21, 2011 12:52 PM

Oh you should give the oils a try mate, you would love them.

They blend and mix very well, also they use nothing close to the thinner for other paints so you can do washes over anything.


My last project was a 1/76th Airfix World War 1 female tank.  I base coated it with green, then I mixed some Green oils untill they were the same color as the base.  I then put it out on a bunch of different pallets and mixed each one with just a drop of blue, or red, or yellow, or white, or whatever I had.  then I lightly brushed it and colored and blended them, one of each blend onto the seperate pannels of the armor on the tank.   It wasnt overly noticable but it came out looking beautiful, check it out.


  • Member since
    October 2008
  • From: italy
Posted by bsyamato on Monday, February 21, 2011 6:03 PM

smeagol the vile

Oh you should give the oils a try mate, you would love them.

They blend and mix very well, also they use nothing close to the thinner for other paints so you can do washes over anything.


My last project was a 1/76th Airfix World War 1 female tank.  I base coated it with green, then I mixed some Green oils untill they were the same color as the base.  I then put it out on a bunch of different pallets and mixed each one with just a drop of blue, or red, or yellow, or white, or whatever I had.  then I lightly brushed it and colored and blended them, one of each blend onto the seperate pannels of the armor on the tank.   It wasnt overly noticable but it came out looking beautiful, check it out.

http://i734.photobucket.com/albums/ww347/smeagolthevile/003-2.jpg?t=1298251203


wow good progress .. last of your work i see, was think the guntank on bakuc!! Yes only the rear part seems less weathered that the rest (keep in mind in the WWI the combat was mainly in trenches with lots of mud).

Good to see some new from you Cool

Not in mind to try oils for now, relatively satisfied of actual finish.


now some zaku's updates:

--------------------

... ok i maded some mods on skirts:


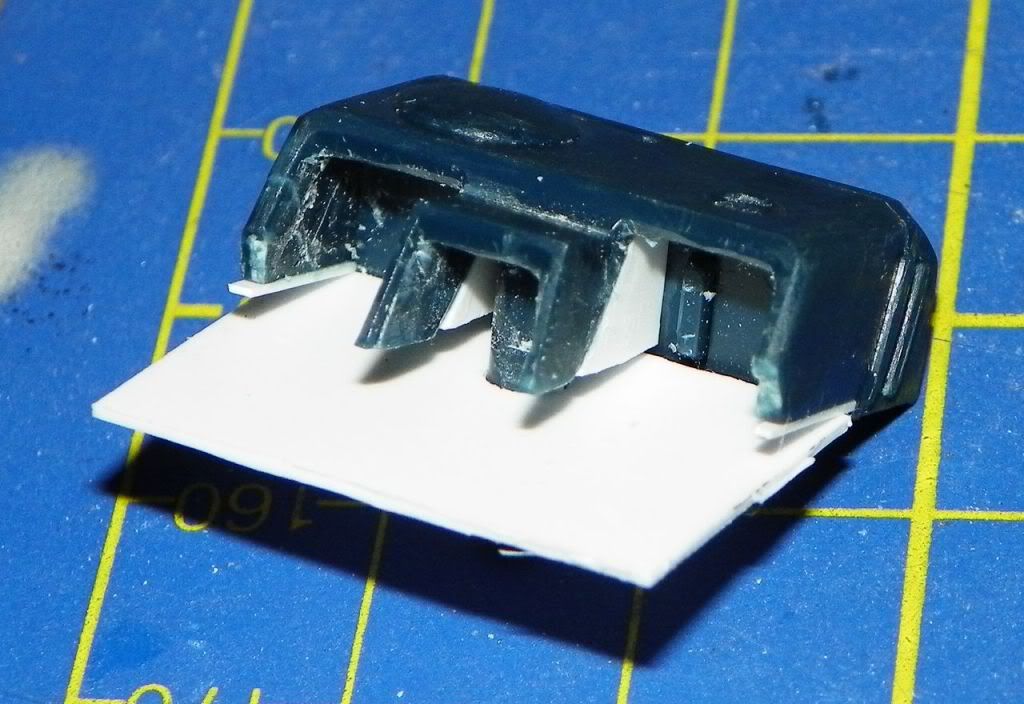
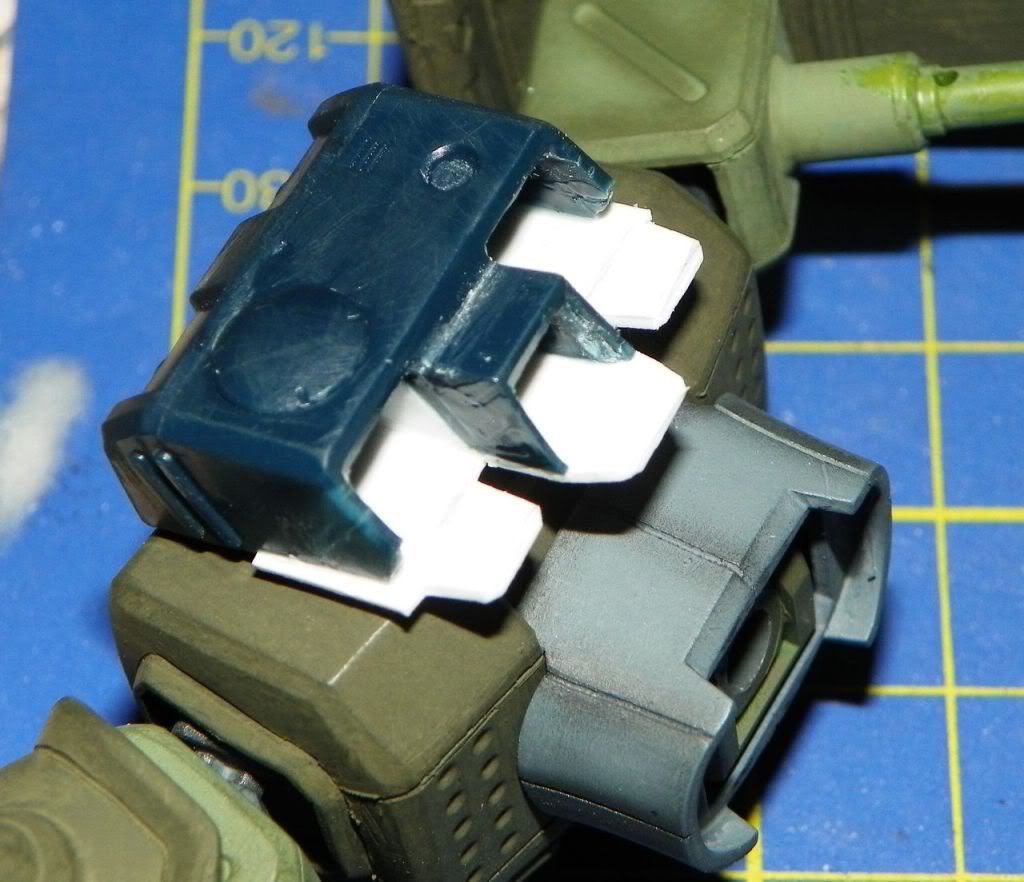
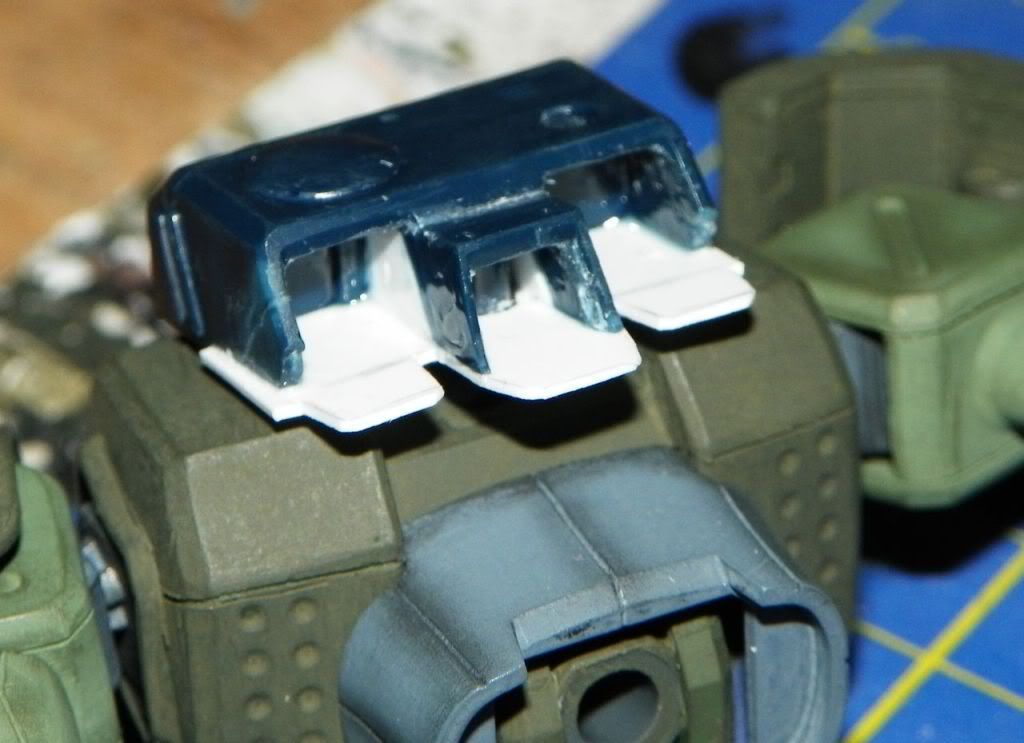
shaped some piece of plastic to fit rear of skirt parts

[View:/themes/fsm/utility/Photobucket:550:0]

[View:/themes/fsm/utility/Photobucket:550:0]

so on; (strange not find on web pictures of the real, so i must invent something... Hmm )

[View:/themes/fsm/utility/Photobucket:550:0]

[View:/themes/fsm/utility/Photobucket:550:0]

[View:/themes/fsm/utility/Photobucket:550:0]

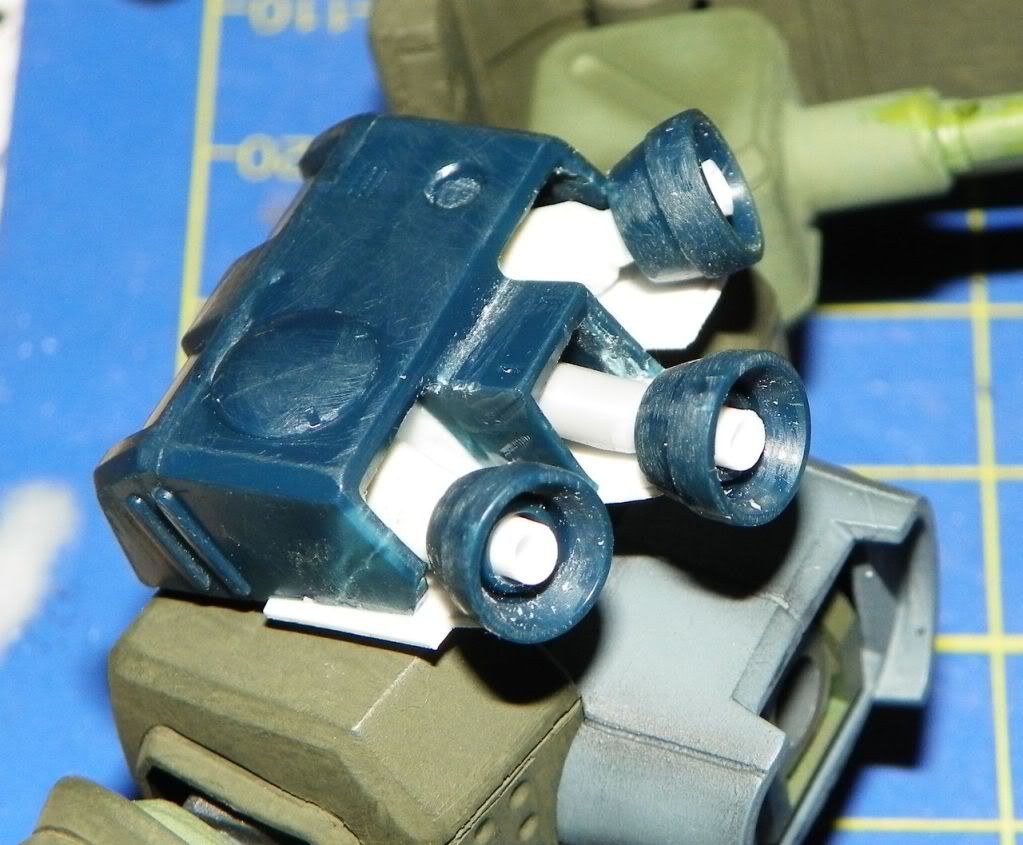
on the opposite side of rounded white pieces have thrusters, after i'll put some tube for more realistic look

The chest glued with engraved panels and some hole done:

[View:/themes/fsm/utility/Photobucket:550:0]

[View:/themes/fsm/utility/Photobucket:550:0]

[View:/themes/fsm/utility/Photobucket:550:0]

some hole for inguinal thruster

[View:/themes/fsm/utility/Photobucket:550:0]

-------

painting time!

.... choiced the good color for dark green (humbrol 116) i removed the previous MM green with thinner (after two days the MM green not totally dry .. No ) and done first layer of it:

[View:/themes/fsm/utility/Photobucket:550:0]

[View:/themes/fsm/utility/Photobucket:550:0]

[View:/themes/fsm/utility/Photobucket:550:0]

Fit testing to see if colour work good together:

[View:/themes/fsm/utility/Photobucket:550:0]

[View:/themes/fsm/utility/Photobucket:550:0]

Some gray part have lready a shot of black drybrush

.... low legs first pass of drybrush, used the same humbrol 116 on the light 78 .. seems that work:

[View:/themes/fsm/utility/Photobucket:550:0]

Cool i like this mech

At the next for more updates !!!!


  • Member since
    October 2008
  • From: italy
Posted by bsyamato on Sunday, February 27, 2011 12:40 PM

some other steps ;

other pieces painted

[View:/themes/fsm/utility/Photobucket:550:0]

All the light green pieces shaded with first pass of drybrush

[View:/themes/fsm/utility/Photobucket:550:0]

Head ready for monoeye modding

[View:/themes/fsm/utility/Photobucket:550:0]

others modding on skirts

[View:/themes/fsm/utility/Photobucket:550:0]

and another fit testing (this is the official excuse to look at final work Geeked )

[View:/themes/fsm/utility/Photobucket:550:0]

[View:/themes/fsm/utility/Photobucket:550:0]

that's all for today !! Hmm


  • Member since
    April 2008
  • From: Philadelphia PA
Posted by smeagol the vile on Sunday, February 27, 2011 12:48 PM

Hey, I only fear that your shading on the legs and arms seems a bit to dark.  are you going to give them another coat?


  • Member since
    January 2006
  • From: California
Posted by SprueOne on Sunday, February 27, 2011 8:55 PM

significant progress on this MS Yes 

I completed a similar kit about 5 years ago and these are fun to do 


Tags: gundam

Anyone with a good car don't need to be justified - Hazel Motes


Iron Rails 2015 by Wayne Cassell Weekend Madness sprueone

  • Member since
    April 2008
  • From: Philadelphia PA
Posted by smeagol the vile on Sunday, February 27, 2011 9:05 PM

5 years is AGES in bandai time.  You would not believe the quality difference between 5 years ago and this year's releases.


  • Member since
    October 2008
  • From: italy
Posted by bsyamato on Monday, February 28, 2011 4:18 PM

umh .. i think that pictures accentuate the dark colour, at the real not seems so much, but the steps to do are these:

- another shading of lighten green 

- gloss clear cote

- black panel lining and decals (printed by me Big Smile

- mat clear cote

- another round of dry brush (some touch of black to exagerate on movable parts and some touch of brown on feets to simulate mud and others)

that's for painting overall.

SpueOne good progress but again lots to do. Monoeye mod again not decided the way to do, and after.. the 95% comlpete pain have to come Cool

Not sure but thinking to do a little diorama for stand

  • Member since
    April 2008
  • From: Philadelphia PA
Posted by smeagol the vile on Monday, February 28, 2011 6:59 PM

Yea, thats how photos work sometimes, they show things you would never see in real life.


  • Member since
    January 2006
  • From: California
Posted by SprueOne on Monday, February 28, 2011 8:09 PM

smeagol the vile

5 years is AGES in bandai time.  You would not believe the quality difference between 5 years ago and this year's releases.


true that 

and I completed it about 5 years ago, the kit release was a year or two before that, (ms-07B3) 


Anyone with a good car don't need to be justified - Hazel Motes


Iron Rails 2015 by Wayne Cassell Weekend Madness sprueone

  • Member since
    January 2006
  • From: California
Posted by SprueOne on Monday, February 28, 2011 8:16 PM

bsyamato

SpueOne good progress but again lots to do. Monoeye mod again not decided the way to do, and after.. the 95% comlpete pain have to come Cool

Not sure but thinking to do a little diorama for stand


yeah, the monoeye  

I inserted an LED and wired it through the head, neck, body, and down one leg into the foot and base of a small diorama to a battery  

The battery I used was too much and didn't have a resistor in line so it has since burnt out and not replaced 

if you don't want to do all that, you can paint it bright silver and dot on some clear red 


Anyone with a good car don't need to be justified - Hazel Motes


Iron Rails 2015 by Wayne Cassell Weekend Madness sprueone

  • Member since
    April 2008
  • From: Philadelphia PA
Posted by smeagol the vile on Monday, February 28, 2011 8:59 PM

What you should do is this.

Take the backpack of the kit and remove it, on the inside build the battery pack, and wire through it to the mono eye.  The packs can come off and on fairly easily and don't need to have seams fixed on their attachment points.


  • Member since
    October 2008
  • From: italy
Posted by bsyamato on Tuesday, March 1, 2011 4:32 AM

SprueOne


yeah, the monoeye  

I inserted an LED and wired it through the head, neck, body, and down one leg into the foot and base of a small diorama to a battery  

The battery I used was too much and didn't have a resistor in line so it has since burnt out and not replaced 

if you don't want to do all that, you can paint it bright silver and dot on some clear red 

Thanx for tips. It's too late to put led, led modify takes lot of space and need to planning before build.

I use another way for monoeye, i shape often a little piece of cleare plastic, or heat with fire a clear sprue

and press down in a sort of mold, then i drill the inside to make the "lens" less thick. and glue on a base of plastic .. painted of silver, and finally put the clear red or other clear color on top.

here some example:

Photobucket

Photobucket

For MG scale i used another way (actually finished only one MG)

old PC cd player damaged have the optical lens that can be used perfect as monoeye.

Here is my Char's Zaku monoeye:

Photobucket

Can be i'll try monoeye with led in future with one of MG that i have in my stock , or even in the MG custom gouf that i started but again at the start of building SnailSnail

Thanx to follow this post


Tags: zaku fz
  • Member since
    January 2006
  • From: California
Posted by SprueOne on Tuesday, March 1, 2011 8:43 PM

Cool thanks for your tech on that subject. Those look pretty good without electrical power behind it 


Tags: mecha

Anyone with a good car don't need to be justified - Hazel Motes


Iron Rails 2015 by Wayne Cassell Weekend Madness sprueone

  • Member since
    October 2008
  • From: italy
Posted by bsyamato on Wednesday, March 2, 2011 6:14 PM

SprueOne

Cool thanks for your tech on that subject. Those look pretty good without electrical power behind it 


Thanx SprueOne Beer that's the first gundam worknprogress for me on this forum, maded to show how i try to buid mechs using my scale kits knowledge. i posted others works on this section but all finished subject.

sooome update:

I post wrong picture on previous post at the skirt mods, this is the correct:

Photobucket

then after first paint

Photobucket

again miss tubes to connect thrusters to the top, i need to search some old guitar string.

Power cables and dry gunmetal on hip, i'll do some shot of brass after

Photobucket

under foots paint for details

Photobucket

testings for monoeye mod:

Photobucket

Photobucket

founded the right eight i put a piece of styrene tube after some adjust

Photobucket

adding a larger strip of plastic following the head shape and le space for the eye ,the two little  srtipes of plastic , one on top and one at bottom for eye rails:

Photobucket

and some cut to start even the last piece not touched, the backpack. Opened the holes to do some realism for the thrusters bays.

that's all for this night Sleep


  • Member since
    October 2008
  • From: italy
Posted by bsyamato on Saturday, March 5, 2011 7:46 AM

some little update, actually focused on fairey gannet for (A)SW GB2.

The axe!! not in all zaku's kit thi is included

did some hole

Photobucket

skirt armorm adding tubes:

Photobucket

not found at house broken guitar strings i use various electric wires to add littlest tubes:

Photobucket

the overall chaos on workbench

Photobucket

so i wrap a thin wire on another larger

Photobucket

final result on front skirt

Photobucket

testing the remaining space for others mods

Photobucket

Photobucket

and final paint it black of head parts

Photobucket

as showed the picture i did some cut on piece to simulate monoeye rails

it blow up when i do grey or white drybrush

even all inner parts of head that came after the glass window was painted in black.

that's all for now, return on gannet.

Hope to give to all the desire to built some mech with more realism intent Cool

thanx for visit the post


  • Member since
    October 2008
  • From: italy
Posted by bsyamato on Tuesday, March 8, 2011 4:34 PM

some update

starting backpack and thrusters modding:

hip under thrusters made by two plasticard tubes pieces

Photobucket

on backpack removed the few dept covers where thrusters originally placed

Photobucket

Photobucket

and thrusters, remoed original pins and added internal tube and simulting the rest with normal sprues shaped as a sort of rocket engine:

Photobucket

Photobucket

Photobucket

at next update Headphones

  • Member since
    January 2006
  • From: California
Posted by SprueOne on Tuesday, March 8, 2011 8:20 PM

awesome detail progress on this MS. I like that wire wrap. Disposable lighters can also provide detail parts


Tags: mecha

Anyone with a good car don't need to be justified - Hazel Motes


Iron Rails 2015 by Wayne Cassell Weekend Madness sprueone

  • Member since
    April 2008
  • From: Philadelphia PA
Posted by smeagol the vile on Tuesday, March 8, 2011 9:57 PM

Yea its looking good, I love scratch built details.  I cant wait to see it finished.


I really want to like... send the better armor builders on here, like doog and chuckw the bandai hardgraph kits and see what they do with them, because its rare to get people like you mate, that do both scifi and armor.  Its mostly one or the other


  • Member since
    October 2008
  • From: italy
Posted by bsyamato on Wednesday, March 9, 2011 6:59 PM

uote user="SprueOne"]

awesome detail progress on this MS. I like that wire wrap. Disposable lighters can also provide detail parts

[/quote]

Big Smile thanxx SprueOne

Disposable lighters are a good unfortunately i forgot this and throw in the trash Hmm....

Used parts of lighterand, pc cd player and  lots of thing (without spending money Super Angry) in my mg char's zaku II (i'll put an after work'n'progress of it when have more time), that's my actual masterpiece between mechs,

here some other picture of it:

Photobucket

Photobucket

Photobucket

Crying it's the only MG i've done (three remaining to built)

smeagol the vile

I really want to like... send the better armor builders on here, like doog and chuckw the bandai hardgraph kits and see what they do with them, because its rare to get people like you mate, that do both scifi and armor.  Its mostly one or the other


Confused not sure i totally standing what do you mean (specially about armor.. Hmm doog and chuckw did some mech?) ,remember i'm not good in english Bow Down but many thanxx to follow this other attempt to do something like real veichle in gundam world,

at the base of anime the intention was this, mechs used in war as normal war machines Toast

------------------------ Camera

... so... this day after maded some little work on the gannet for (anti) submarine warfare, i did something on the (little) green monoeyed giant.

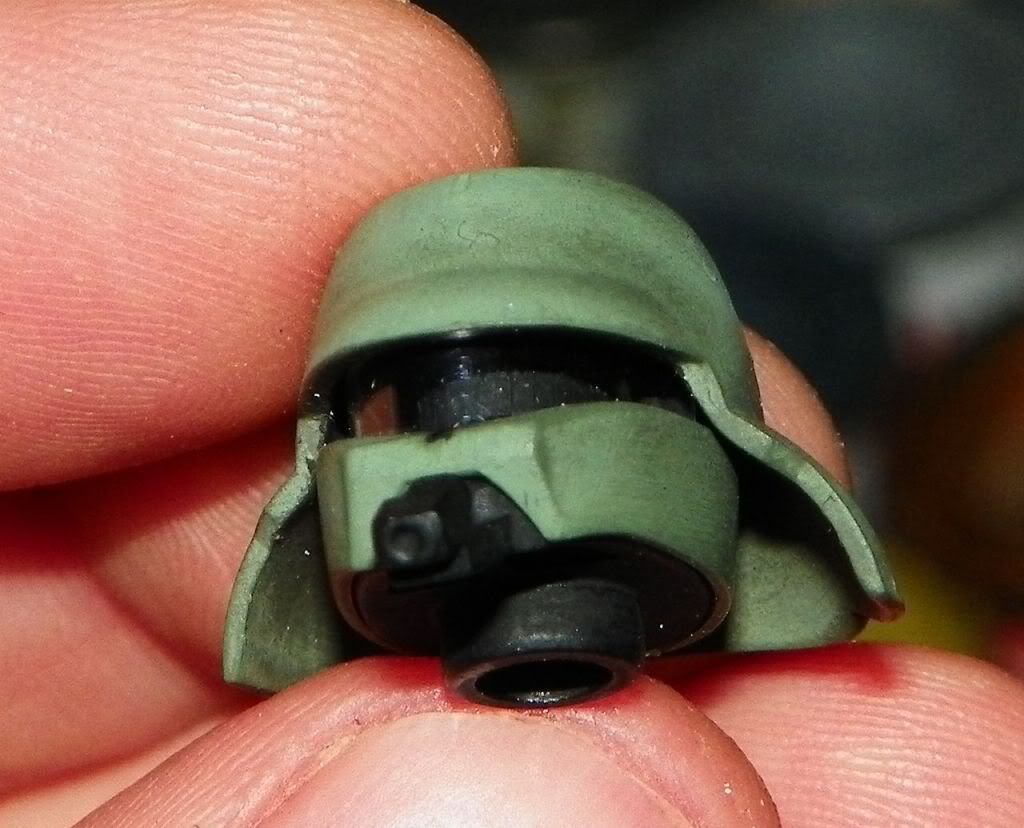
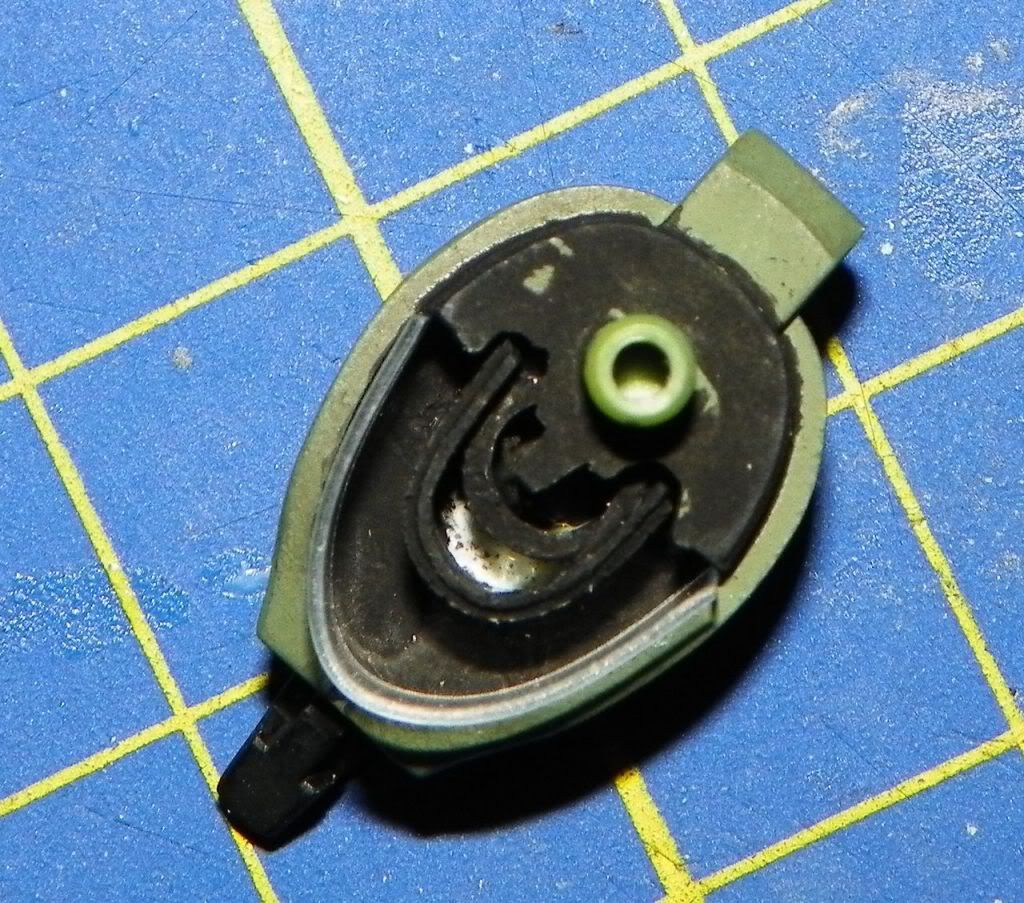
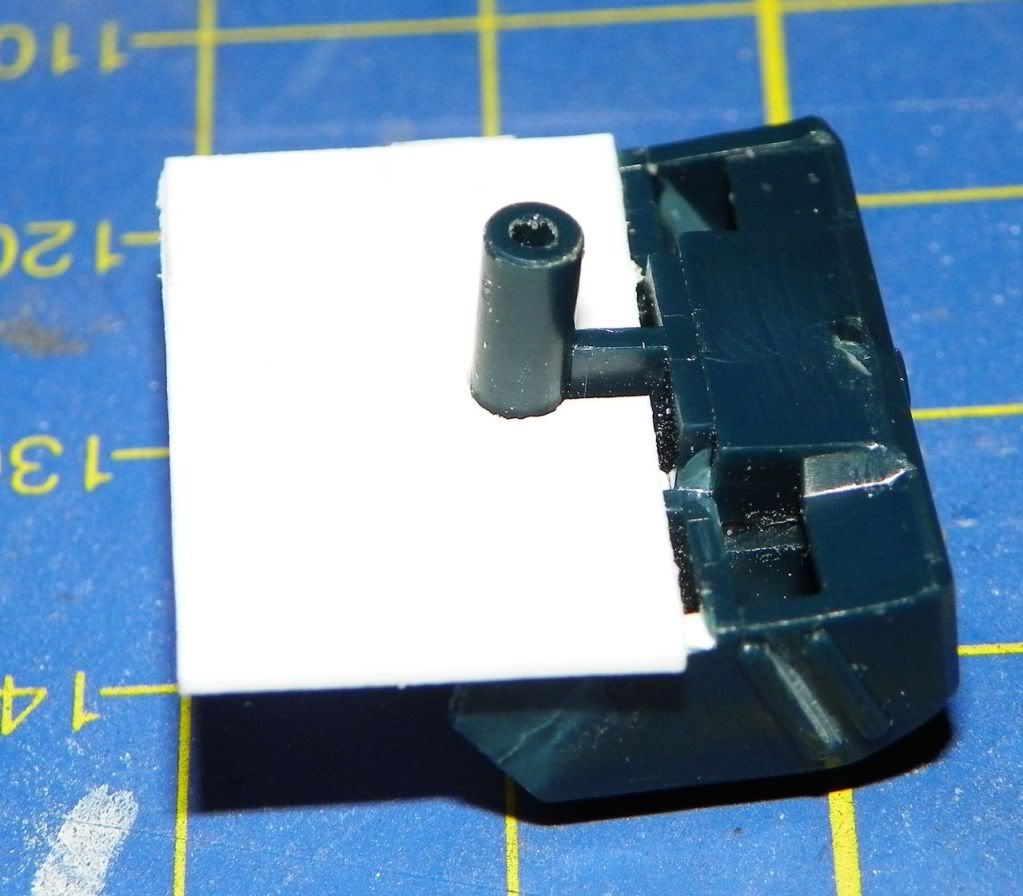
Backpack shaping with plastic sheets come out, but in mind others mods (Bang Head started with the idea to made few mods):

closing the rear with a raw plastic piece
Photobucket

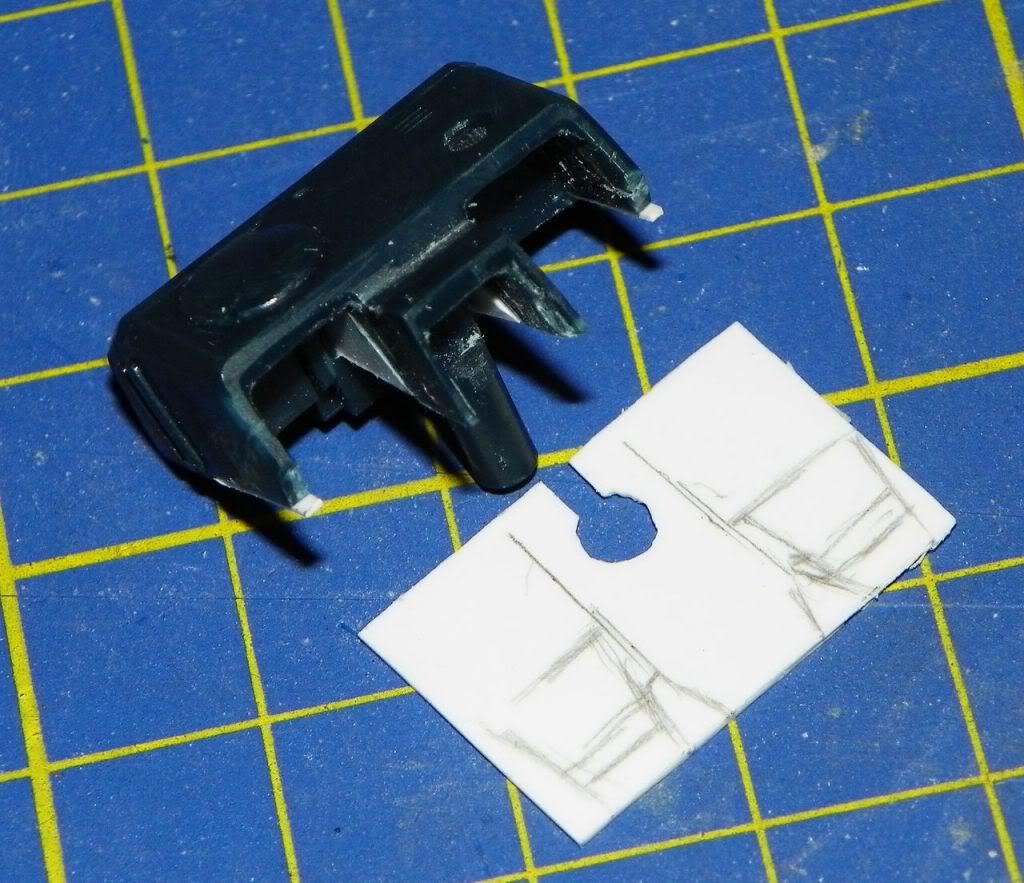
Photobucket

drawing some line with backpack as dime
Photobucket

and shaped and gled piece

Photobucket

Photobucket

rocket fittings ... need  some cut Hmm

Photobucket

.....

return on monoeye and resolving glass question

My cousin architect brought to me two sheet of clear plastic used in architecture modelling, more thick than blister clear plastic
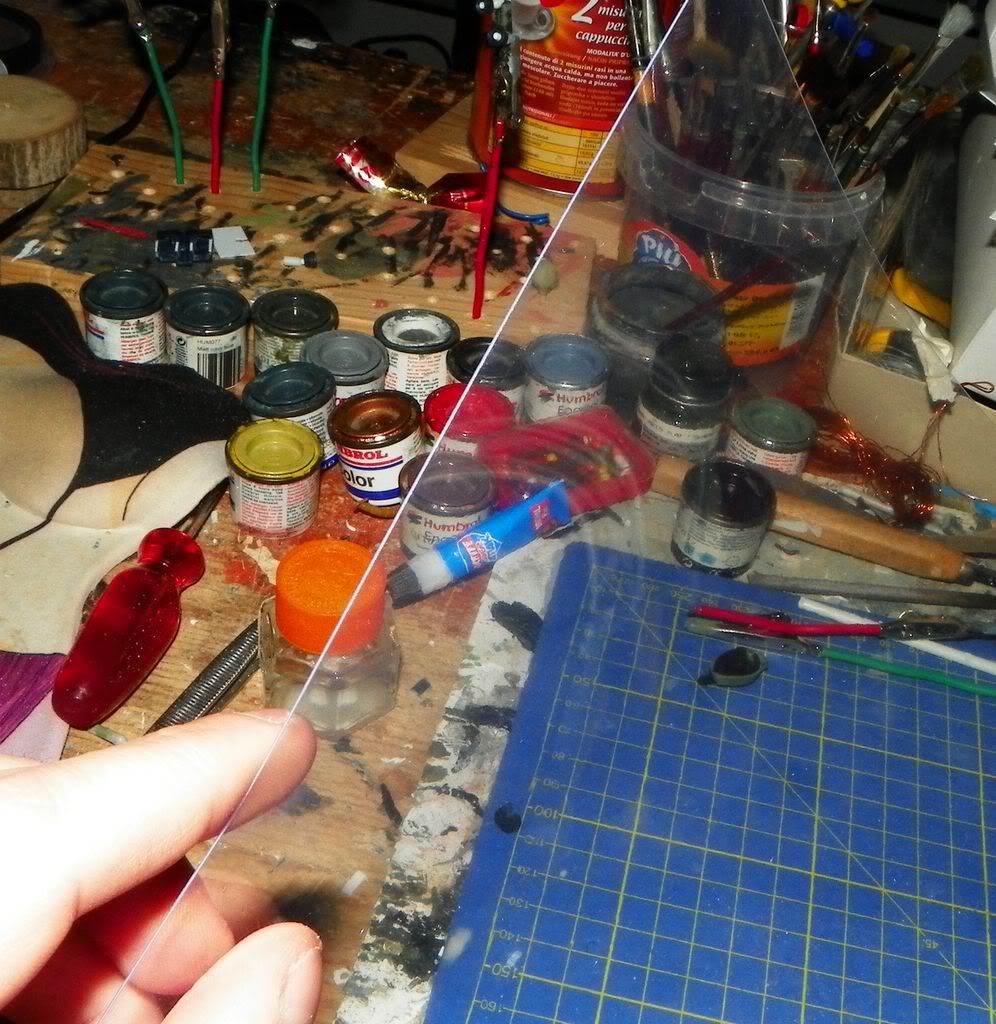
Photobucket

let'go try it

first attempt: cutting a stripe and put down in the head
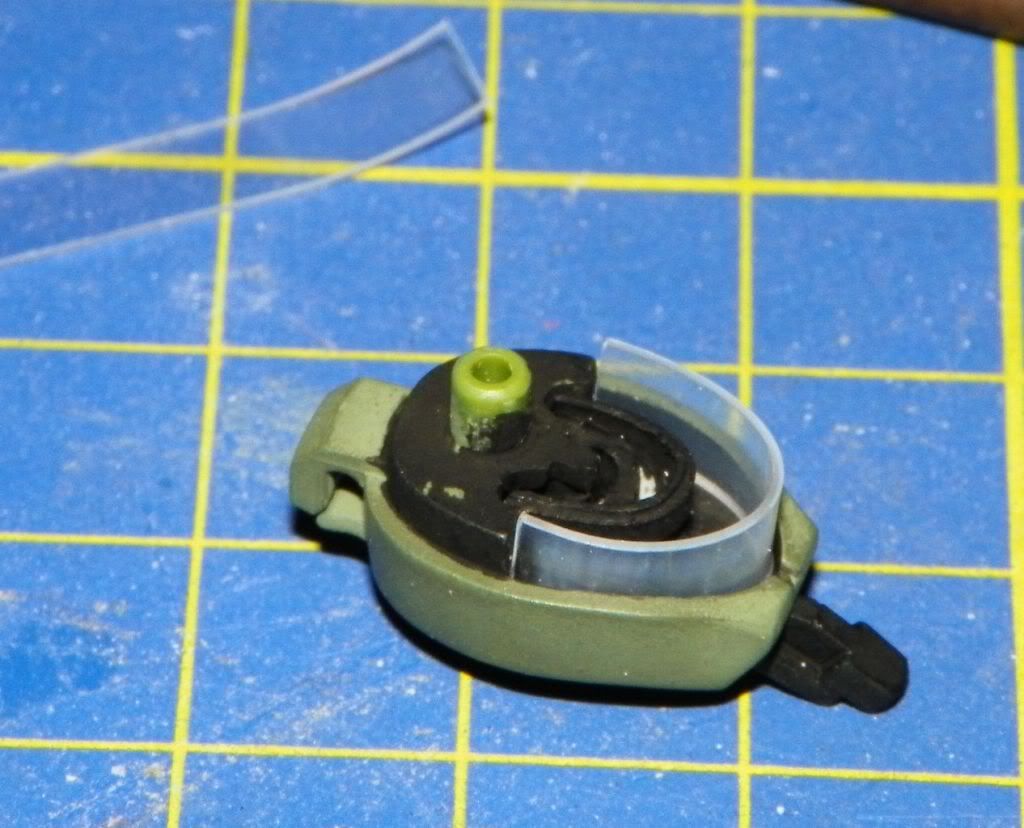
Photobucket

mmmm bending it become a sort of whiteness.... not good

can be that in flame heting way (as others glass mods i've maded) he work good..

but ... this time i use again blister plastic of unknow origins, and
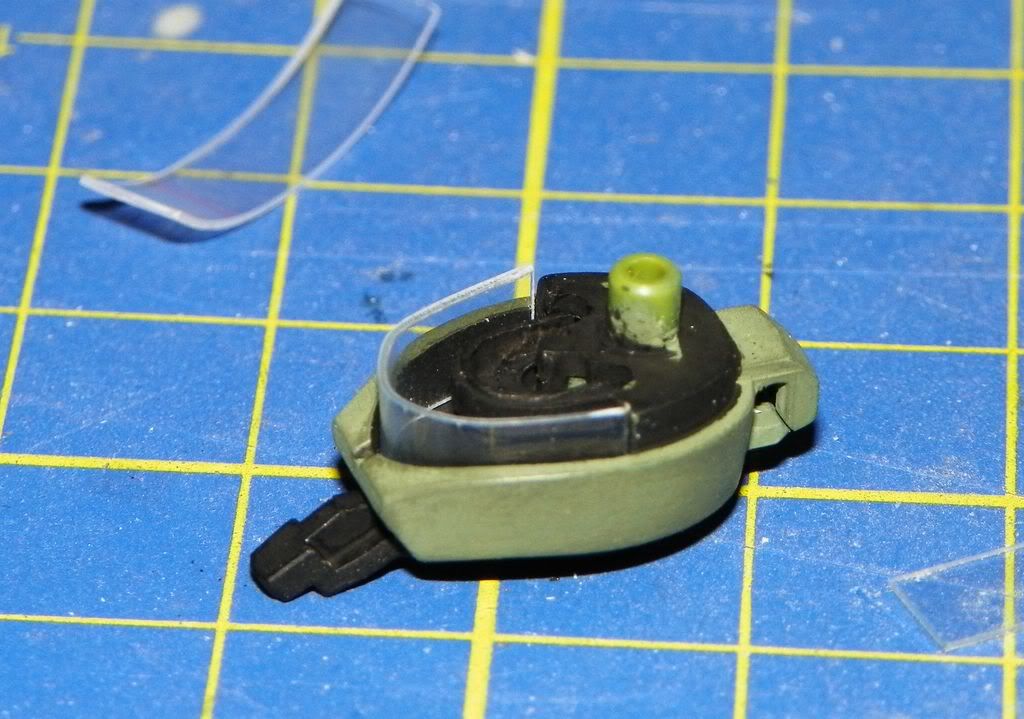
Photobucket

....surely work better Yes...

Photobucket

... whitout whiteness and very clear

the space for monoeye it's very little respect others mech Tongue Tied

Photobucket

so i melt a little piece of clear sprues on a sort of istant mold
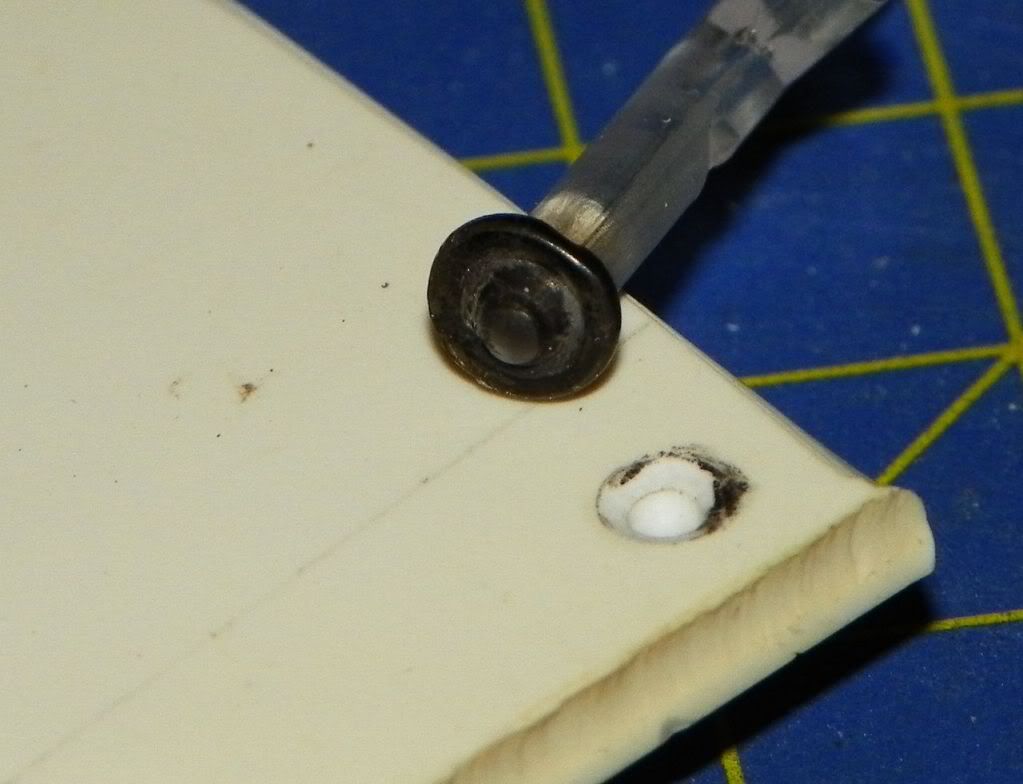
Photobucket

sanding to clear burned part and rear silver paint on itPhotobucket
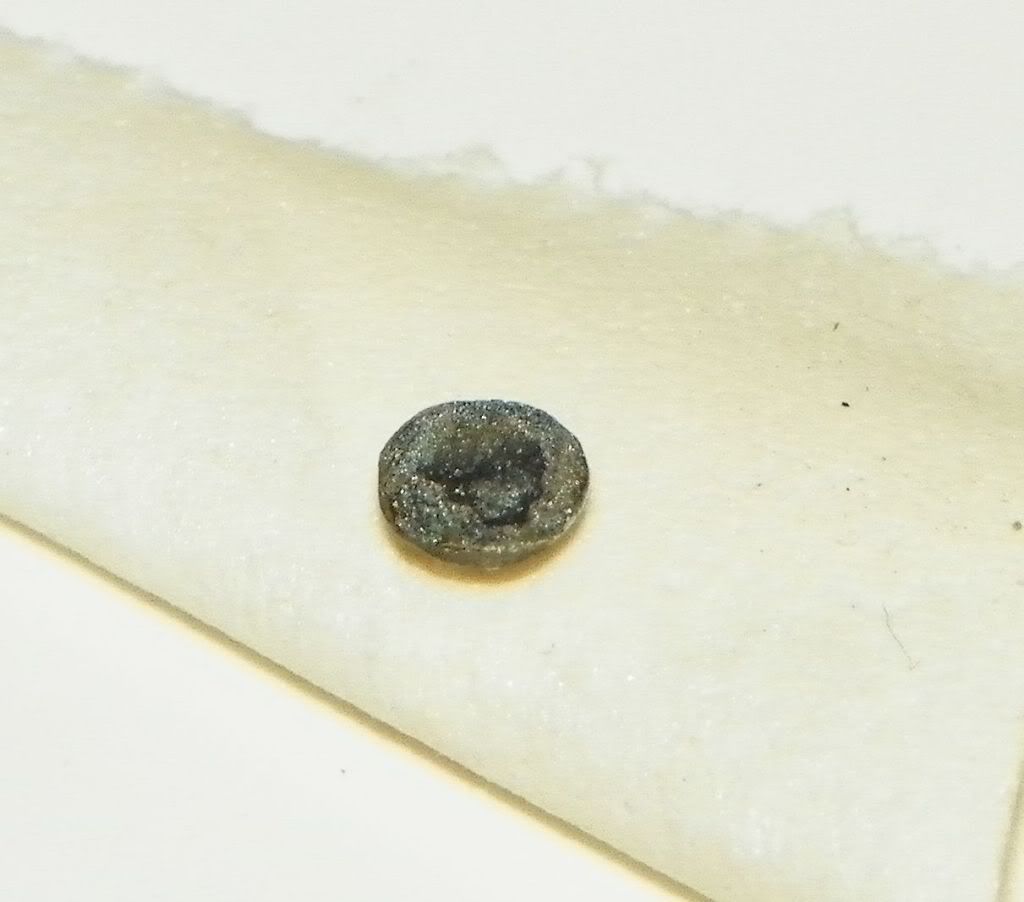
i'm sure it's silver!!

end of updates and two AM of clock .....Sleep

at the next


  • Member since
    January 2006
  • From: California
Posted by SprueOne on Wednesday, March 9, 2011 8:40 PM

yes, lots of electronics and other disposable products, true 

great idea and handling of that clear material for the 'eye shield' in the head Idea Yes 


Tags: mecha

Anyone with a good car don't need to be justified - Hazel Motes


Iron Rails 2015 by Wayne Cassell Weekend Madness sprueone

  • Member since
    April 2008
  • From: Philadelphia PA
Posted by smeagol the vile on Thursday, March 10, 2011 12:36 AM

Ahhh, sorry if I confused you.  The Doog is a primary armor guy who is amazing and has been on the cover of the magazine many times.  ChuckW does alot of aircraft some armor and does the most amazing scratch building you have ever seen and his finish product is outstanding.


What I was saying is that its rare to see people like you, who build armor and helicopters and planes and such, do gundam kits and such.  You can see in your work that you do as well, becuase your approach is completely different and it looks wonderful


  • Member since
    October 2008
  • From: italy
Posted by bsyamato on Sunday, March 13, 2011 11:36 AM

smeagol the vile

What I was saying is that its rare to see people like you, who build armor and helicopters and planes and such, do gundam kits and such.  You can see in your work that you do as well, becuase your approach is completely different and it looks wonderful

I try to do my best in all kits that i build Yes

I'm worried about japan situatio smeagol.

Talked long with alkaiser, fortunately he not in tokyo in these days and no friends died.

between the big tragedy even  the giant gundam 1/1 in tokyo is down

.....

Sad

soon for updates


  • Member since
    April 2008
  • From: Philadelphia PA
Posted by smeagol the vile on Sunday, March 13, 2011 1:32 PM

Yea, the situation in Japan is really tragic and has me worried.


  • Member since
    October 2008
  • From: italy
Posted by bsyamato on Sunday, March 13, 2011 5:41 PM

after others research seems that the pictures is not referred to the hearthquake.

at least this is not a thrue reality..

ok,

went to the zaku's updates:

backpack

Photobucket

Photobucket

Photobucket

monoeye mod:

white drybrush on inner head and monoeye painted

Photobucket

Photobucket

Photobucket

Photobucket

Photobucket

--

last pieces with dark green

Photobucket

started to paint the light green pieces and power cables with gloss clear, ready for home made decals:

Photobucket

Photobucket

Photobucket

and start to painting orange-red for trhusters

Photobucket

before this, last fitting test

Photobucket

Photobucket


that's all for now

i'll hope for a next update with more happiness


  • Member since
    April 2008
  • From: Philadelphia PA
Posted by smeagol the vile on Sunday, March 13, 2011 10:25 PM

Looks great but the body color green looks odd being on the shoudler, or something on the shoulder looks like its the color of the arms and legs.


Also, have you ever tried the HGMC Head sets?  They sold aftermarket heads for MG kits that had lighting kits in them.


JOIN OUR COMMUNITY!

Our community is FREE to join. To participate you must either login or register for an account.

SEARCH FORUMS
FREE NEWSLETTER
By signing up you may also receive reader surveys and occasional special offers. We do not sell, rent or trade our email lists. View our Privacy Policy.