SEARCH FINESCALE.COM

Enter keywords or a search phrase below:

Klingon Bird of Prey WIP

3320 views
9 replies
1 rating 2 rating 3 rating 4 rating 5 rating
  • Member since
    January 2010
Posted by Klik on Wednesday, April 3, 2013 6:42 PM

I too, had a malformed piece on this kit (although mine was on the underside of the rear edge of the wing), so kudos on fixing it--should be barely noticable.

My suggestion for the weathering--do an internet search. I don't have the pic available right now, but I found a beautiful picture of the original shooting model (made for "Khan") taken at the auction a few years ago.

I will be following this closely--might even start a thread so I can post mine side-by-side with yoursWink.

Keep up the Great work!

Klik

oneyearwar1

The hardest part of flying isn't flying...it's landing.

  • Member since
    July 2003
  • From: Huntington, WV
Posted by Kugai on Thursday, March 21, 2013 11:43 PM

Thanks for the comments, guys.

Havoc, the base color is Testors FS Pale Green.  Plating was done with Fulcrum Gray Green and Zinc Chromate green, also from Testors, after deciding against the Russian Interior Blue-Green and Willow Green ( tested in the upper photo of the topside ).  The red plating is a 2:1 mix of Tamiya's red and orange.

MrSquid, no, I'm not lighting this one.  My goal here is to get familiar with the kit to make planning lighting a spare someday easier, and have something "out of the box" to display at the LHS so that people know what they can do without the extras to maybe nudge someone's interest in starting the hobby ( which, if successful, would help the LHS stay in business longer ).  The closest to lighting is I'm using a thin coat of neon colors on the inside of the engine with red behind it to allow a "fake lighting" effect if there's a blacklight handy.

And now the bad news.  While I had set the kit aside for a little bit, something happened to it that broke one of the domes loose Bang Head.  I'm not junking the kit, but I got another one ( all my old spares are made for the old stand, and I'd like to use the stand Round 2 provided for this project ) and am rebuilding the fuselage.  The new fuselage will go with the wings I started, and the broken one will be reused for a custom project I have in mind.  I'll have more on that later when I post more pics here soon.

http://i712.photobucket.com/albums/ww122/randysmodels/No%20After%20Market%20Build%20Group/Group%20Badge/GBbadge2.jpghttp://i6.photobucket.com/albums/y211/razordws/GB%20Badges/WMIIIGBsmall.jpg

  • Member since
    October 2010
  • From: Hoodsport, WA
Posted by Dogfish_7 on Thursday, March 21, 2013 9:24 AM

Looking great!

Bruce

  • Member since
    March 2007
  • From: Atlanta, Ga.
Posted by MrSquid2U on Thursday, March 21, 2013 12:14 AM

Are you gonna light it up?


  • Member since
    December 2002
Posted by havoc on Tuesday, March 19, 2013 10:14 PM

Lookin' good, Kugai!

What paint and color did you use for the green base color?

Are you going to build 'er with the new-releases' landing gear deployed? I have the old one, sans gear, and look forward to seeing what the additions look like.

Keep up the good work!

With Regards and Aloha,

Johnny B

"I love the smell of resin in the morning!!"

  • Member since
    March 2004
  • From: Kincheloe Michigan
Posted by Mikeym_us on Sunday, March 17, 2013 9:43 AM

I actually have both of the earlier releases of this kit from AMT in the Generations boxing and these kits actually scale close to the Polar Lights Enterprise Refit.

On the workbench: Dragon 1/350 scale Ticonderoga class USS BunkerHill 1/720 scale Italeri USS Harry S. Truman 1/72 scale Encore Yak-6

The 71st Tactical Fighter Squadron the only Squadron to get an Air to Air kill and an Air to Ground kill in the same week with only a F-15   http://photobucket.com/albums/v332/Mikeym_us/

  • Member since
    March 2006
Posted by TD4438 on Sunday, March 10, 2013 7:34 PM

You are off to a good start.Gotta keep an eye on this one.

  • Member since
    July 2003
  • From: Huntington, WV
Posted by Kugai on Sunday, March 10, 2013 3:36 PM

I started with Russian Marker Red for the underside plumage pattern...

 photo IMG_0310_zps7e706814.jpg

...but decided it was a little off for the look I wanted.  I ended up making a mix with Tamita red and orange acrylics, and after a few layers had the contrast I wanted.  Yeah, it may look a bit bright, but there's still the weathering phase coming up to take care of that.

 photo IMG_0315_zps786852c7.jpg

Then there was the topside of the wings.  This is where I also started figuring out what colors I wanted to use for the plating detail.  The odd, more bright green section is one of the colors I tested and rejected, covering up with the final colors.

 photo IMG_0314_zps342f265a.jpg

 photo IMG_0321_zps5513bcd0.jpg

http://i712.photobucket.com/albums/ww122/randysmodels/No%20After%20Market%20Build%20Group/Group%20Badge/GBbadge2.jpghttp://i6.photobucket.com/albums/y211/razordws/GB%20Badges/WMIIIGBsmall.jpg

  • Member since
    October 2008
  • From: SE Pennsylvania
Posted by padakr on Sunday, March 10, 2013 3:34 PM

Kugai,

That's looking like it will be very sharp.  I've never done a "modern" ST kit, only the old AMT ones.  I might have to get one of those.

Paul

  • Member since
    July 2003
  • From: Huntington, WV
Klingon Bird of Prey WIP
Posted by Kugai on Sunday, March 10, 2013 3:22 PM

The LHS finally got some of these in, and I've been eager to try one out and see what Round 2 had done to improve the kit.  This one's going to be for display at the LHS with the intent of being practice and getting familiar with it for more detailed builds later, as well as a kind of "advertising" for the store ( letting potential buying customers see what comes with the kit ), so I'm restraining myself from adding what I'd otherwise like to for extra detail.

Right from the start, there was a problem.  The upper part for the nose was flawed, with a missing area.
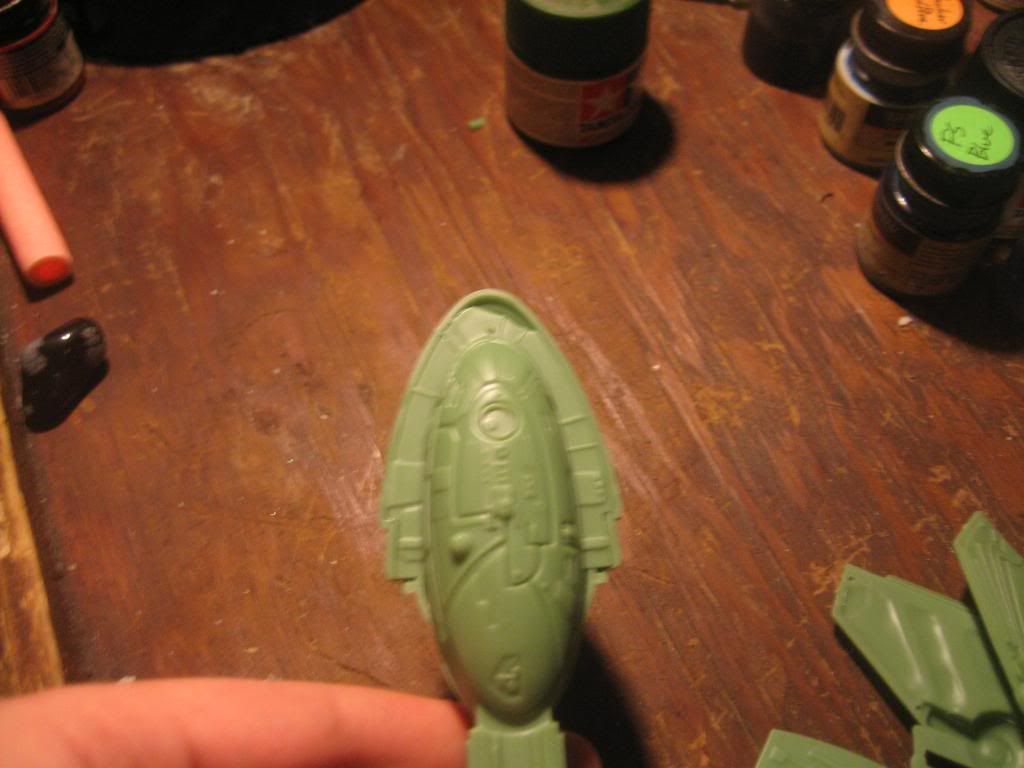
 photo IMG_0299_zps0ae35363.jpg

 photo IMG_0304_zps01e27913.jpg

But, that's just setting up the difference between "assembler" and "modeler, right?  I filled most of the gap with Tamiya 2-part epoxy putty, with the tube type to finish up.  
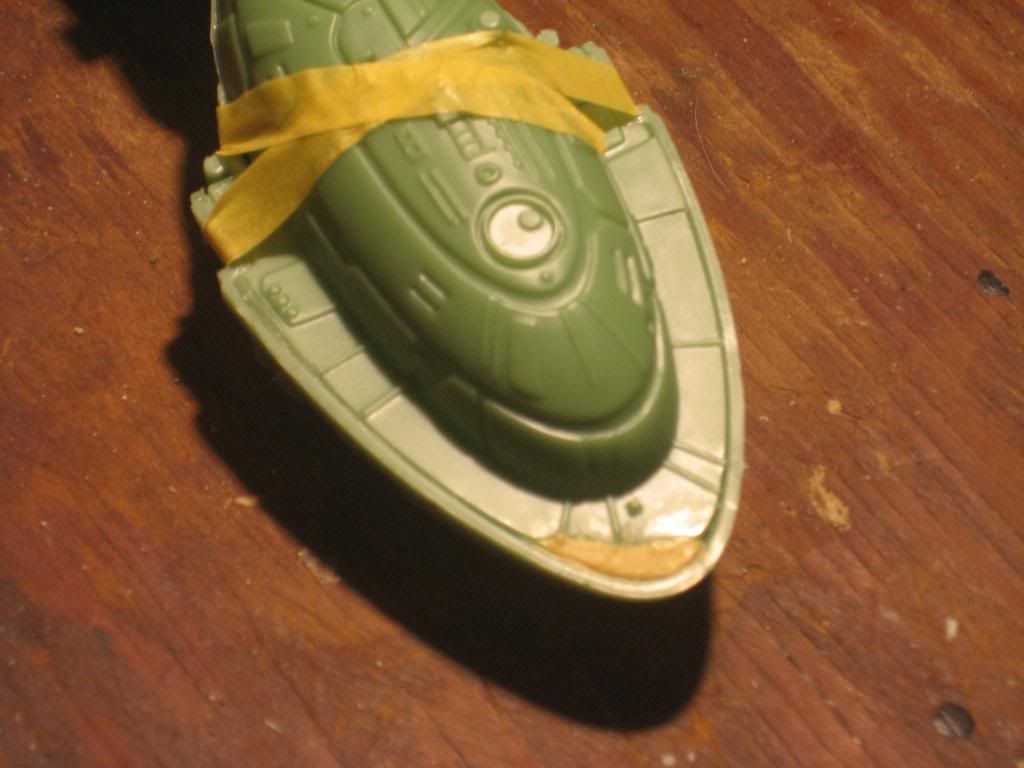
 photo IMG_0308_zps28b06203.jpg

While that was drying, I started work on the wings.  After test-fitting, I used the darkest green I had for the areas where the interior plastic would be visible, a simple ( and, again, out-of-the-box with no customizing needed ) solution to the problem of bare plastic interior showing through.
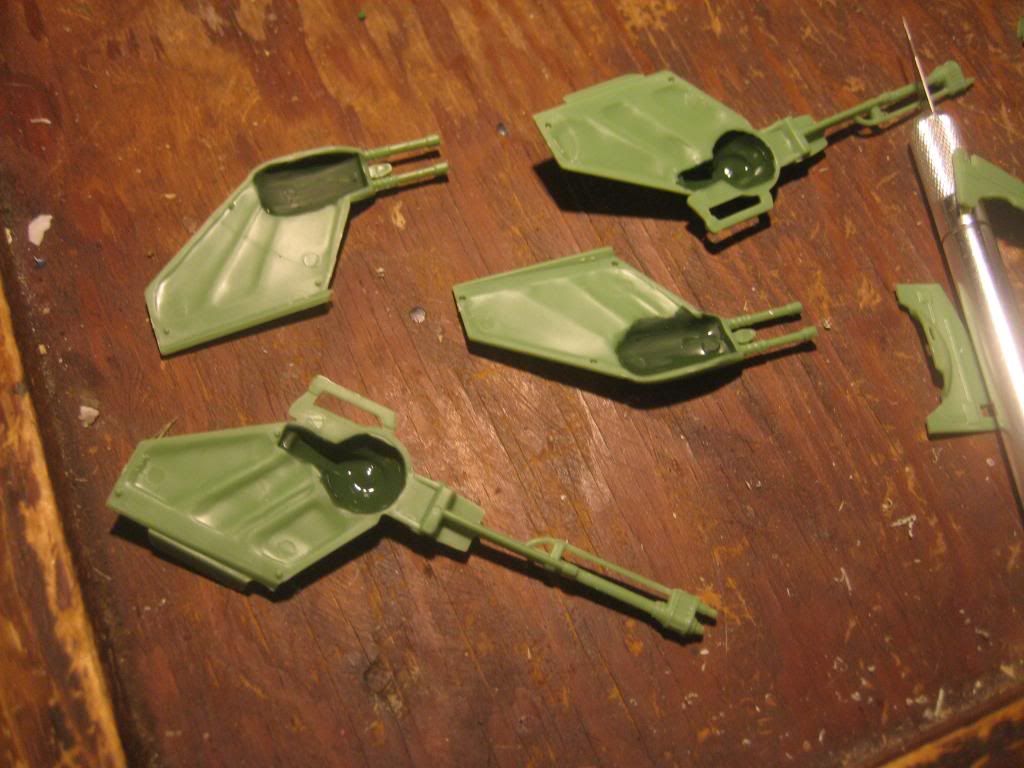
 photo IMG_0306_zps7c8812b1.jpg

Then the put together, primed, and added base color to the wing sub-assemblies.
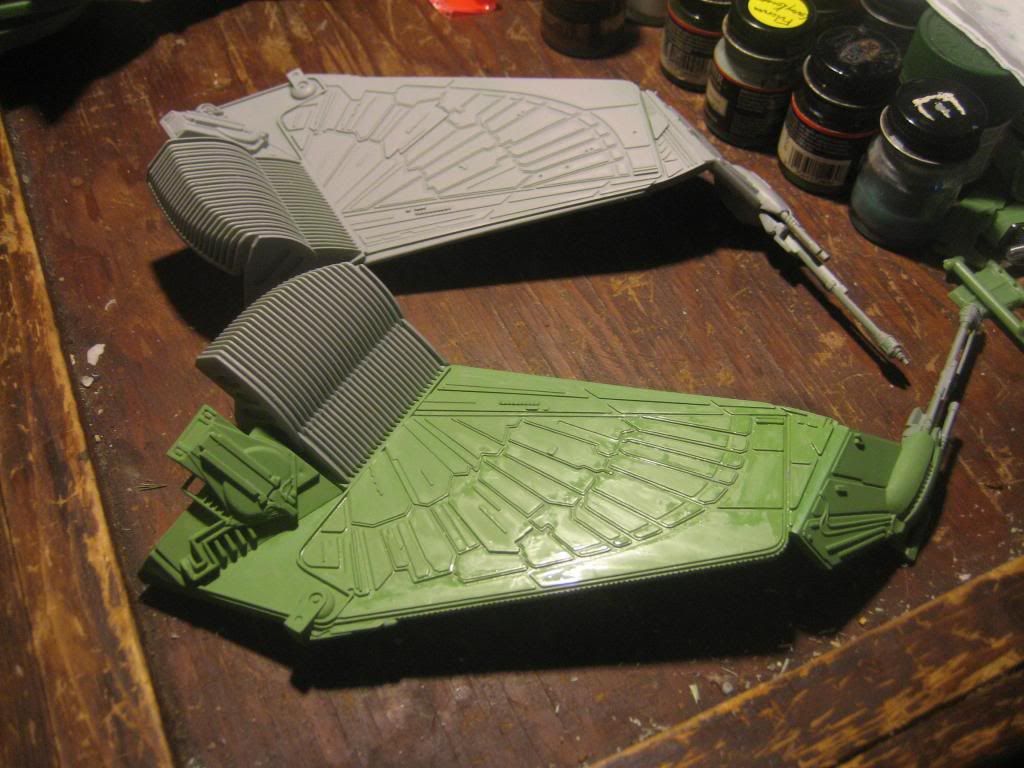
 photo IMG_0309_zps8844d3b3.jpg

http://i712.photobucket.com/albums/ww122/randysmodels/No%20After%20Market%20Build%20Group/Group%20Badge/GBbadge2.jpghttp://i6.photobucket.com/albums/y211/razordws/GB%20Badges/WMIIIGBsmall.jpg

JOIN OUR COMMUNITY!

Our community is FREE to join. To participate you must either login or register for an account.

SEARCH FORUMS
FREE NEWSLETTER
By signing up you may also receive reader surveys and occasional special offers. We do not sell, rent or trade our email lists. View our Privacy Policy.