SEARCH FINESCALE.COM

Enter keywords or a search phrase below:

Plight of the Rebellion

2431 views
11 replies
1 rating 2 rating 3 rating 4 rating 5 rating
  • Member since
    March 2015
  • From: Streetsboro, Ohio
Posted by Toshi on Sunday, December 4, 2016 10:55 AM

LOL!  LOL!  That took some creative ability to come up with that.  Just amazing my friend!

Toshi

On The Bench: Revell 1/48 B-25 Mitchell


Married to the most caring, loving, understanding, and beautiful wife in the world.  Mrs. Toshi


  • Member since
    June 2010
  • From: Rochester, New York USA
Posted by rocker286 on Thursday, November 24, 2016 5:12 PM

Three words: THIS  IS AWESOME. Great job! My girlfriend and I were just talking about this episode last night. So creative !  

4badges

  • Member since
    April 2006
Posted by Irish3335 on Thursday, November 24, 2016 12:29 AM

Fantastic build, super creative


  • Member since
    July 2004
  • From: Sonora Desert
Posted by stikpusher on Wednesday, November 23, 2016 4:35 PM

The ingenuity and creativity of some folks here never ceases to amaze me! Great job here!


F is for FIRE, That burns down the whole town!

U is for URANIUM... BOMBS!

N is for NO SURVIVORS...

       - Plankton

LSM


  • Member since
    December 2002
  • From: Fort Knox
Posted by Rob Gronovius on Wednesday, November 23, 2016 11:02 AM
Awesome, well done
  • Member since
    January 2007
Posted by Gigatron on Monday, November 21, 2016 9:33 AM

I finally dug out my old photo booth and lighting equipment. So, I was able to get a much better picture. Last one - I promise Big Smile


Fred

  • Member since
    January 2007
Posted by Gigatron on Sunday, November 20, 2016 6:33 AM

Thanks, guys - glad you enjoyed. It was a fun build.  Nice thing about custom builds - you don't have to follow any instructions, so you can never get it wrong Wink, lol.

I finally found the diffuser for the pop-up flash on my camera, so here's another picture, closer to the angle of the cartoon, for comparison.

Fred

  • Member since
    December 2002
  • From: Bury St Edmunds, Suffolk, England
Posted by Bish on Sunday, November 20, 2016 1:20 AM

I like that, some very differant. Thanks for shareing.

I am a Norfolk man and i glory in being so


On the bench: Airfix 1/72nd Harrier GR.3/Fujimi 1/72nd Ju 87D-3

  • Member since
    November 2009
  • From: SW Virginia
Posted by Gamera on Saturday, November 19, 2016 6:55 PM

LOL, very cool! Yes

"I dream in fire but work in clay." -Arthur Machen


  • Member since
    May 2009
  • From: Poland
Posted by Pawel on Saturday, November 19, 2016 3:57 PM

Yeah, lookin' good - thanks for sharing and have a nice day

Paweł

All comments and critique welcomed. Thanks for your honest opinions!

www.vietnam.net.pl

  • Member since
    April 2013
Posted by KnightTemplar5150 on Saturday, November 19, 2016 10:52 AM

Couldn't help but smile and laugh outloud to myself upon first seeing this! Nice work, Gigatron - very creative!

  • Member since
    January 2007
Plight of the Rebellion
Posted by Gigatron on Saturday, November 19, 2016 10:06 AM

Hey guys, been gone a while, but I'm finally back.  I've been out of the game for about 4 years, so I tried to make my return as interesting as possible ;-).  

What we have here, is the Family Truckster, from "Blue Harvest" - the Family Guy parody of Star Wars.  Though it was only on screen for 10 seconds, I fell in love with the design, being a huge fan of both movies being parodied.
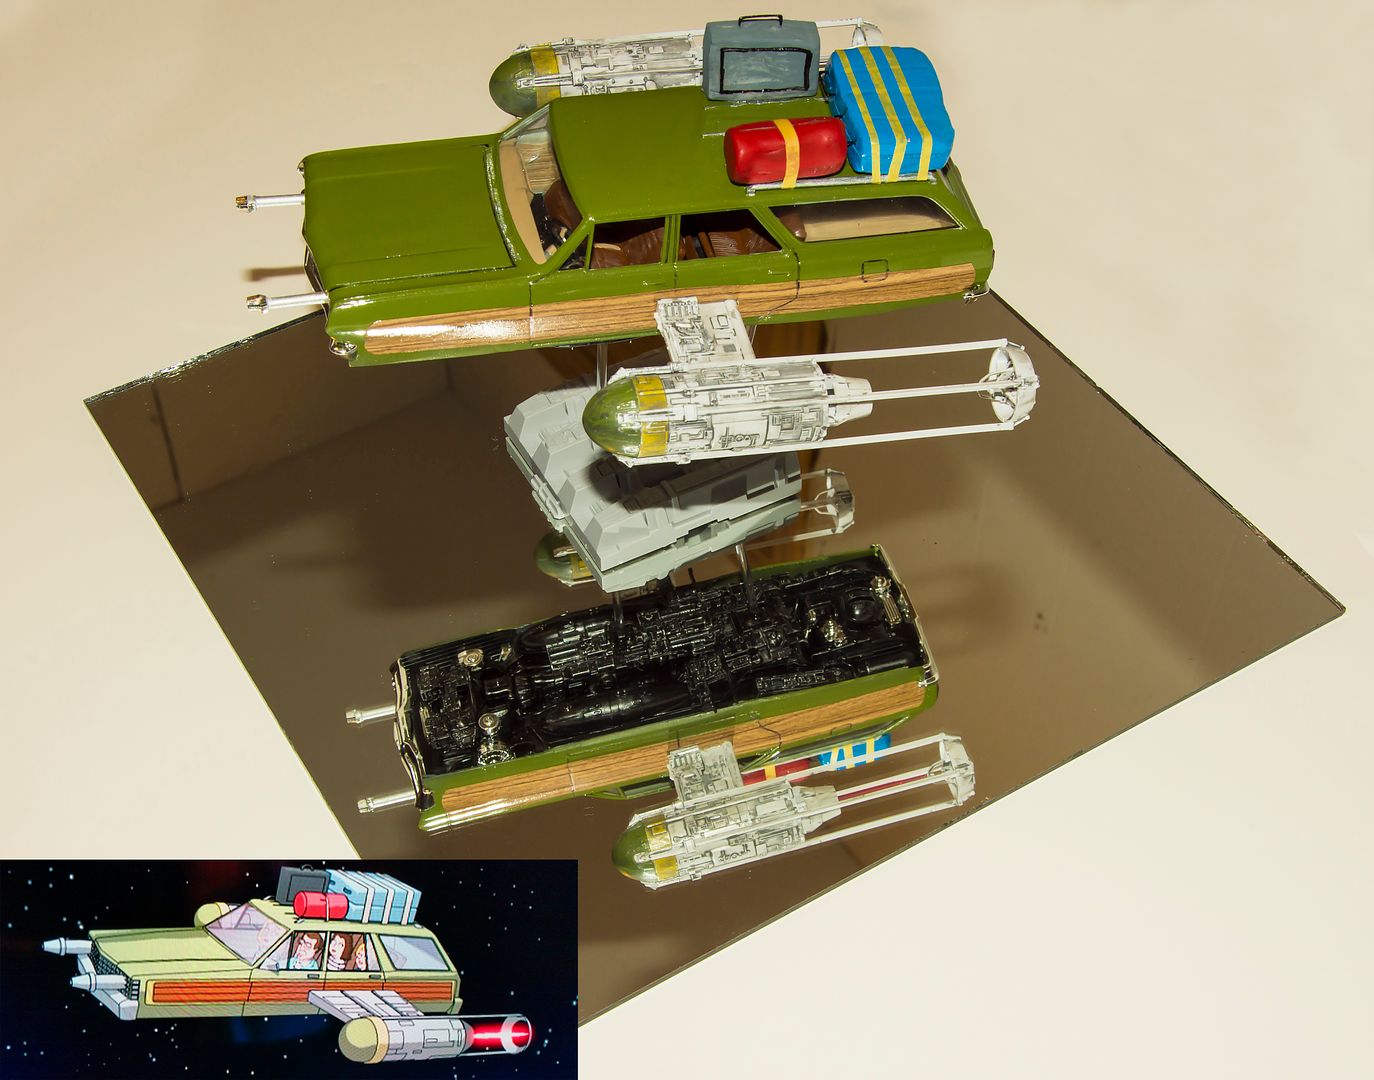
 .

It's a kitbash using an AMT 1:25 '65 Chevelle station Wagon, and a 1:72 Bandai Y-Wing.  The undercarriage is custom, as it's never seen on screen. Built up using bits of styrene, parts from the Y-Wing, and parts from the Chevelle. Plus a few miscellaneous spare aircraft parts from old builds. The roofrack is built from styrene, the luggage is sculpted from clay, and the wood panelling is  contact paper.  

The hardest parts were deleting the wheel wells, and engineering the wing mounts.  The Y-Wing mounting point is oddly shaped, so I had to cut corresponding holes in the side of the vehicle.  Then use a brass rod to connect both sides to each other, for further stability.

Hopefully the pictures work, as this new (to me) system is a bit wonky yet.

Enjoy

JOIN OUR COMMUNITY!

Our community is FREE to join. To participate you must either login or register for an account.

SEARCH FORUMS
FREE NEWSLETTER
By signing up you may also receive reader surveys and occasional special offers. We do not sell, rent or trade our email lists. View our Privacy Policy.