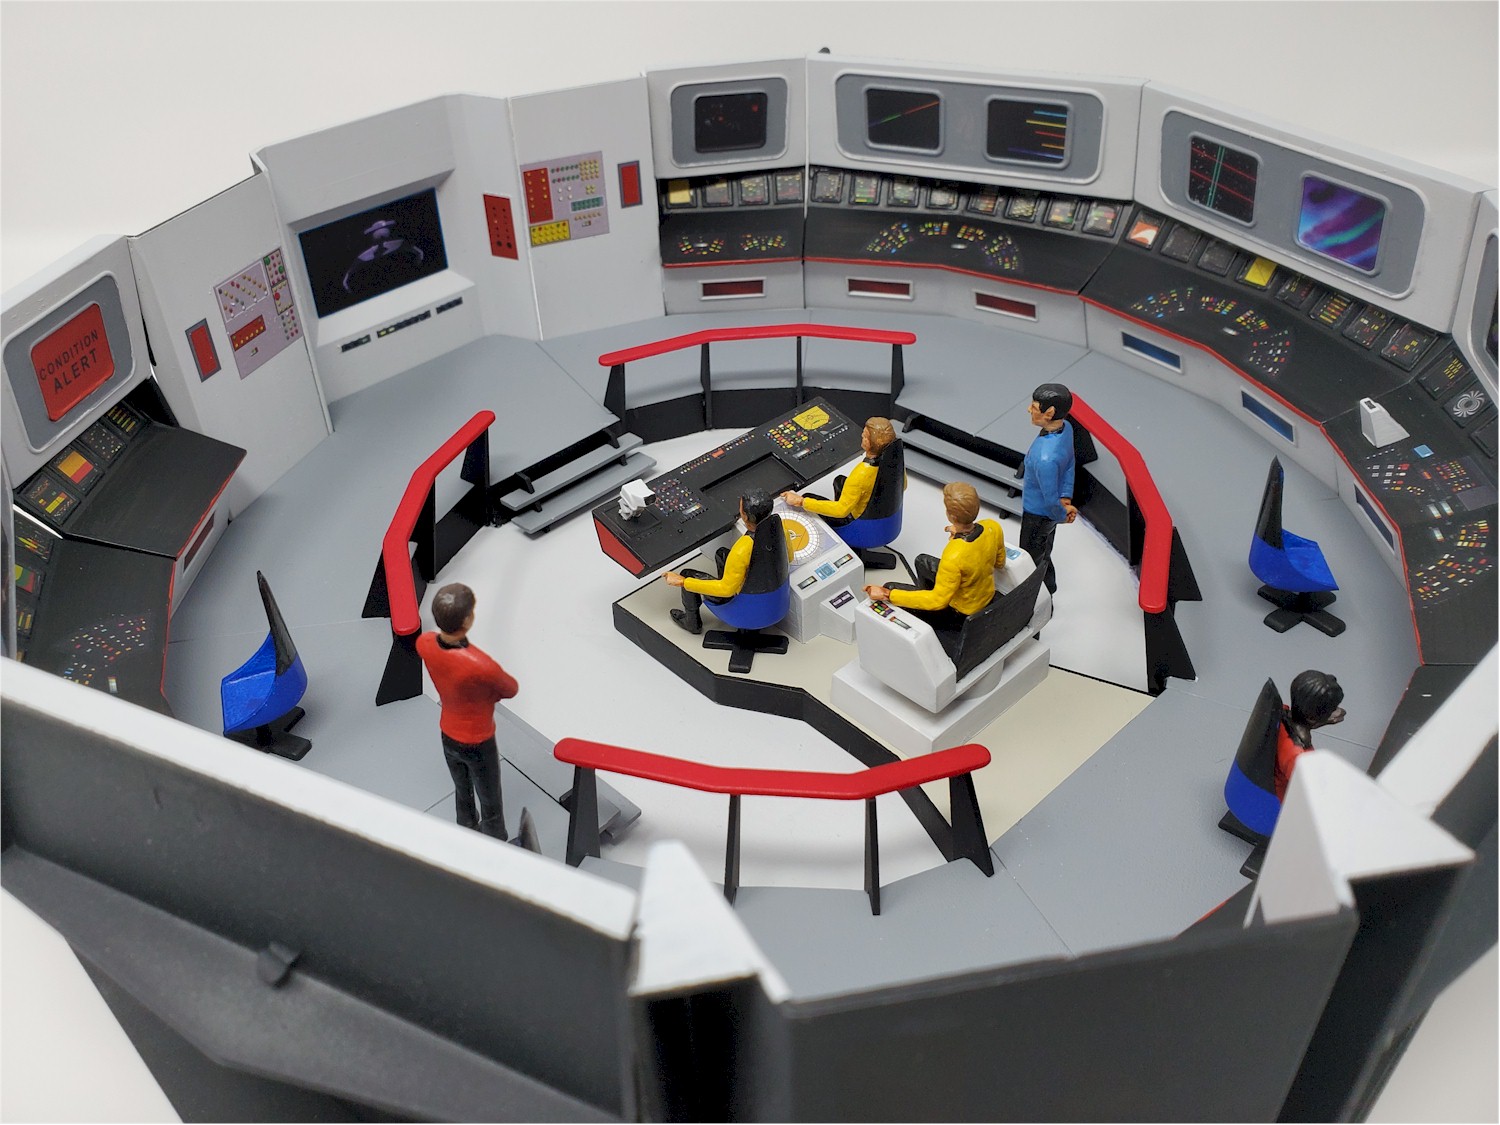
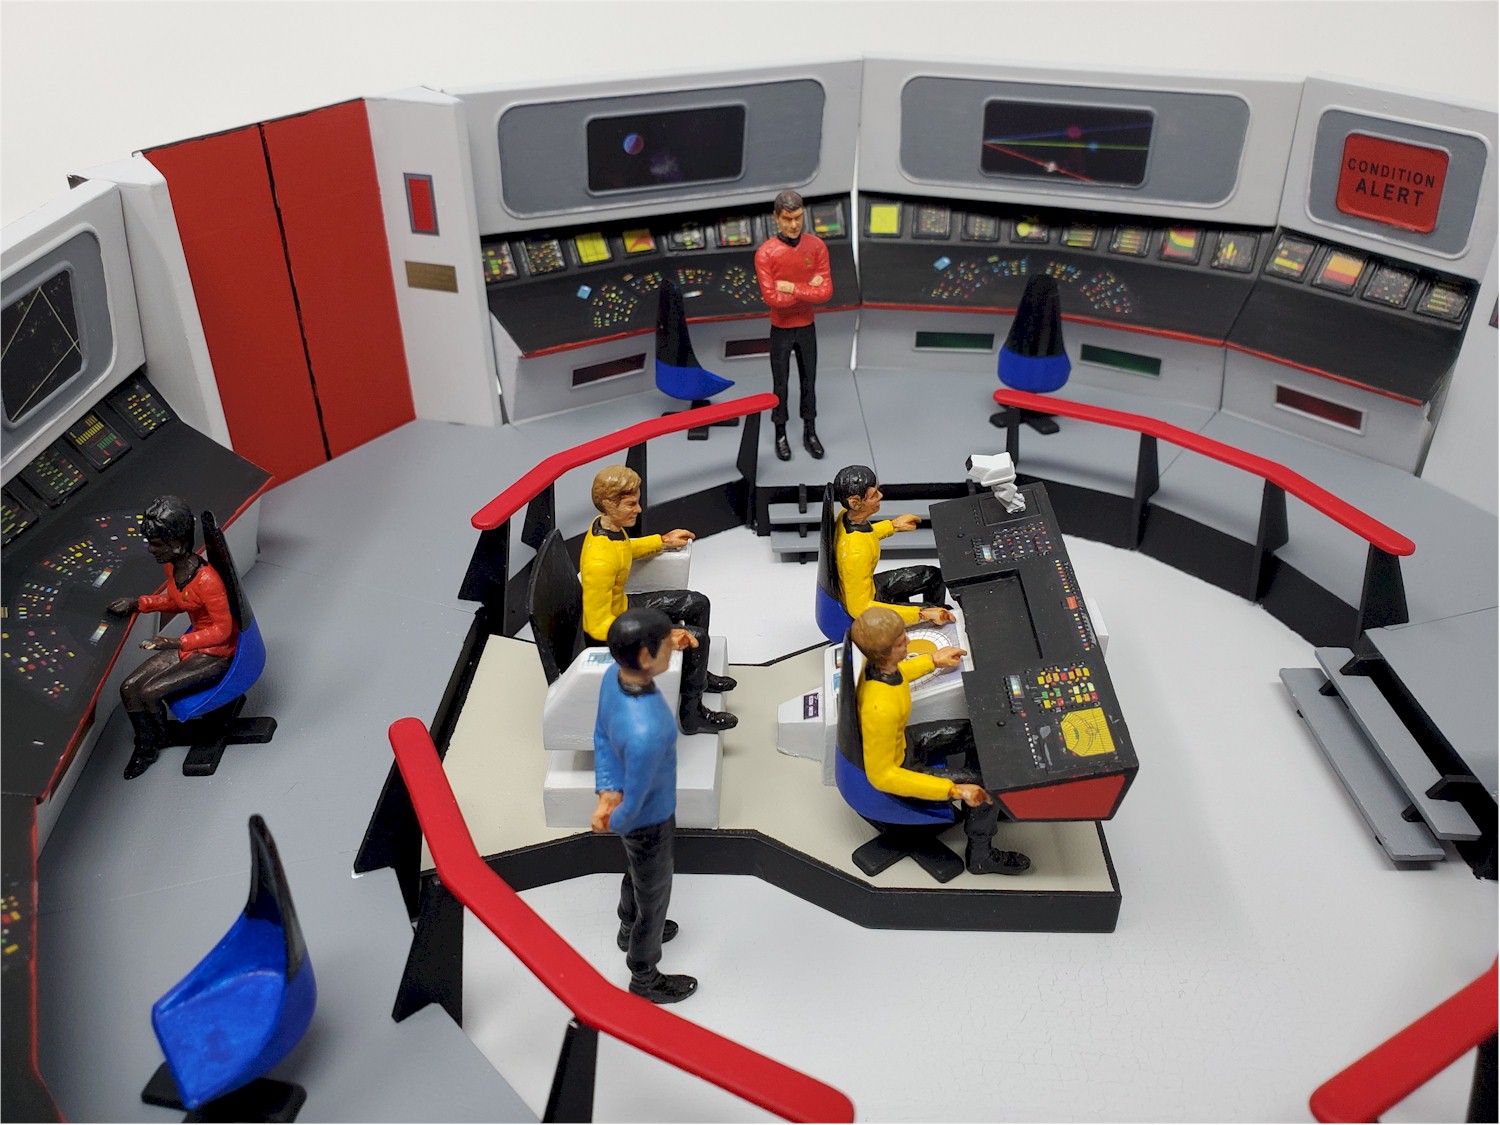
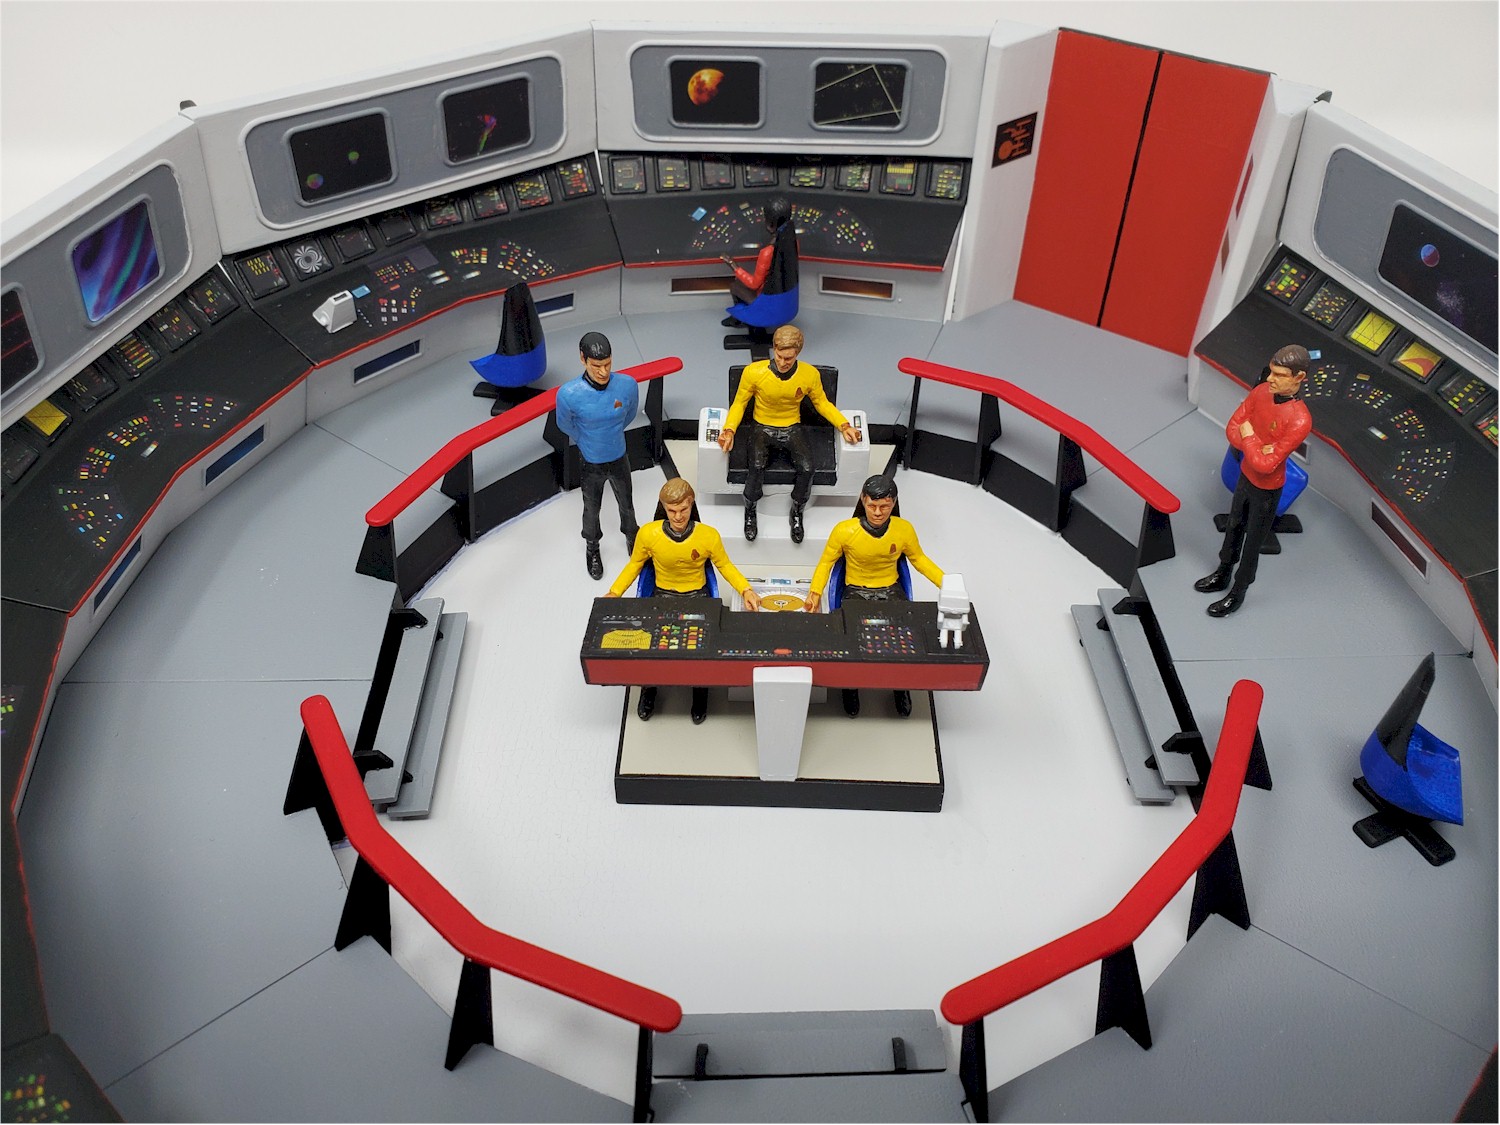
Hi All,
Recently built the Round 2 re-release of the classic AMT USS Enterprise Bridge. The original kit was updated with new, more accurate heads, and new panel sections to complete the entire circle of the bridge. If I recall correctly, the original had a large section missing so you could look in from the side.
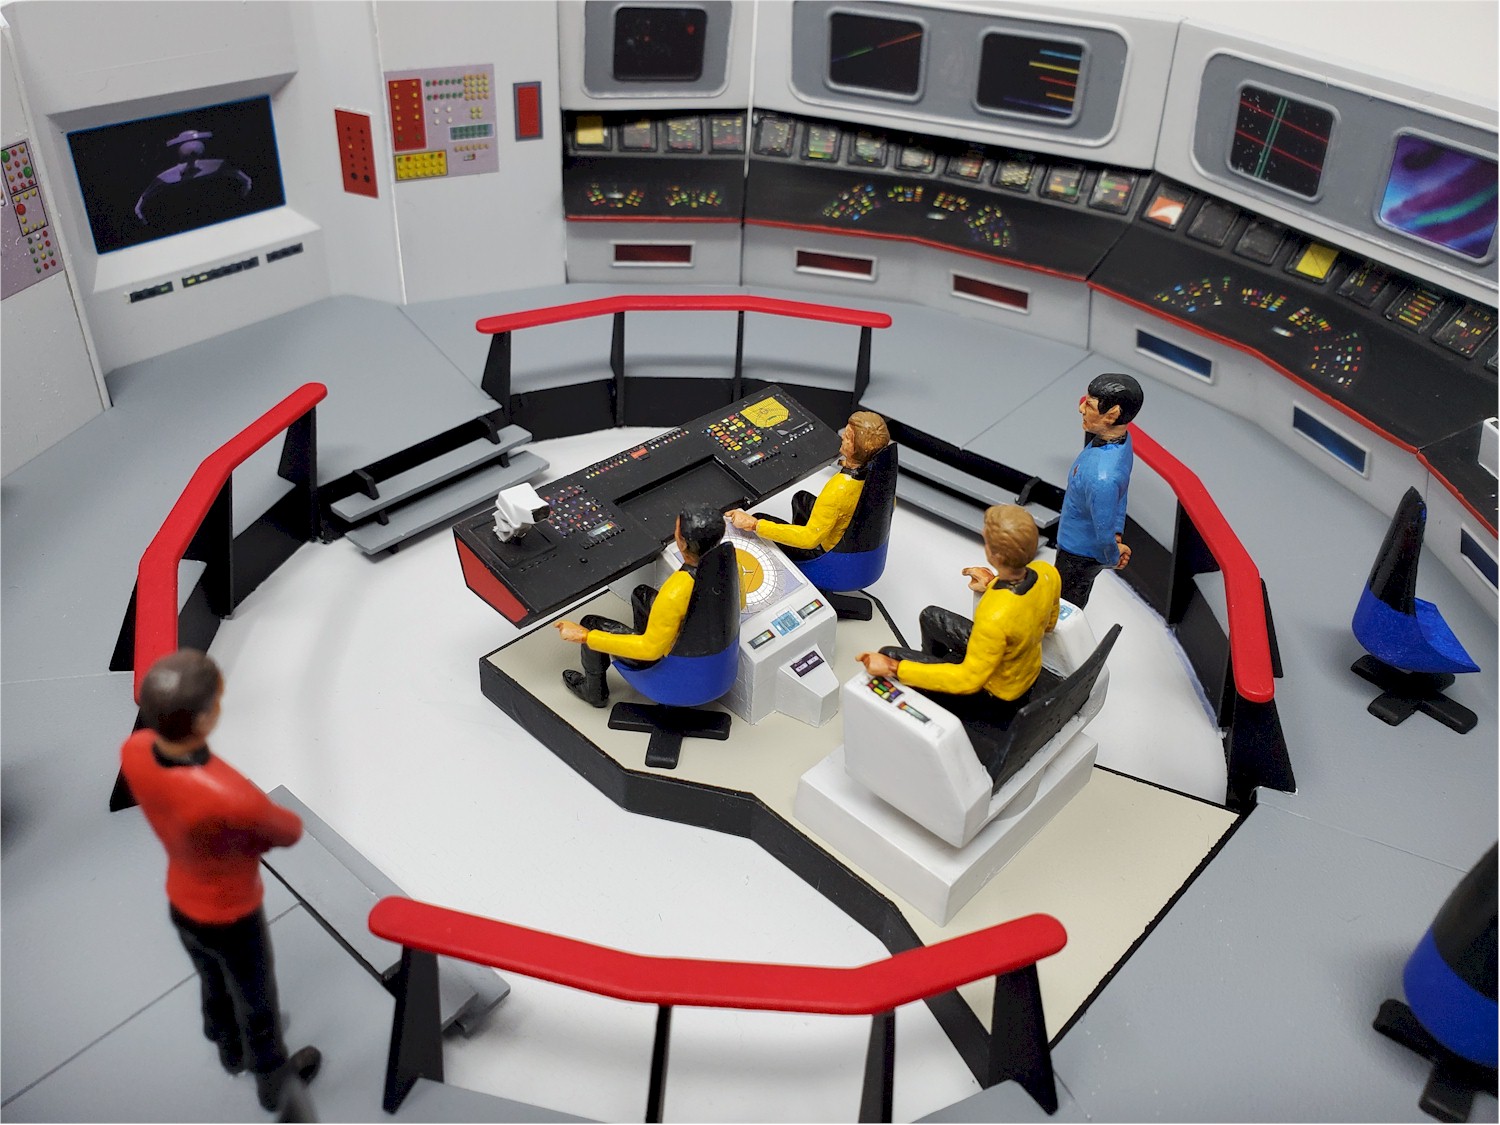
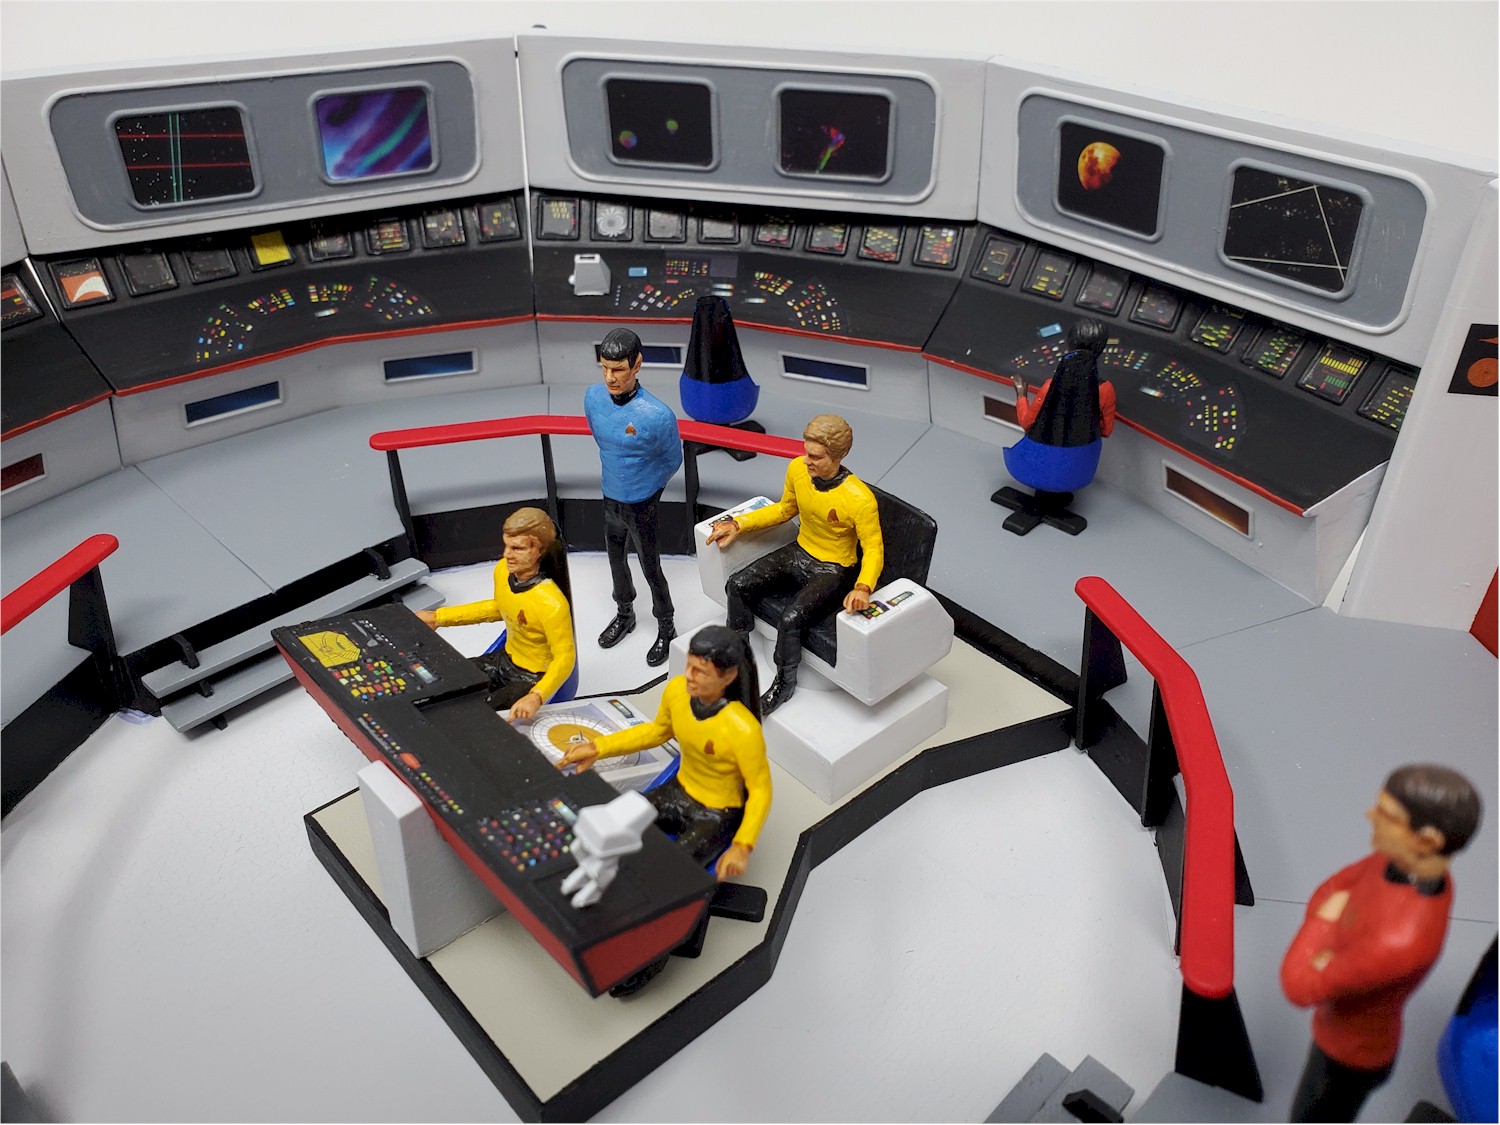
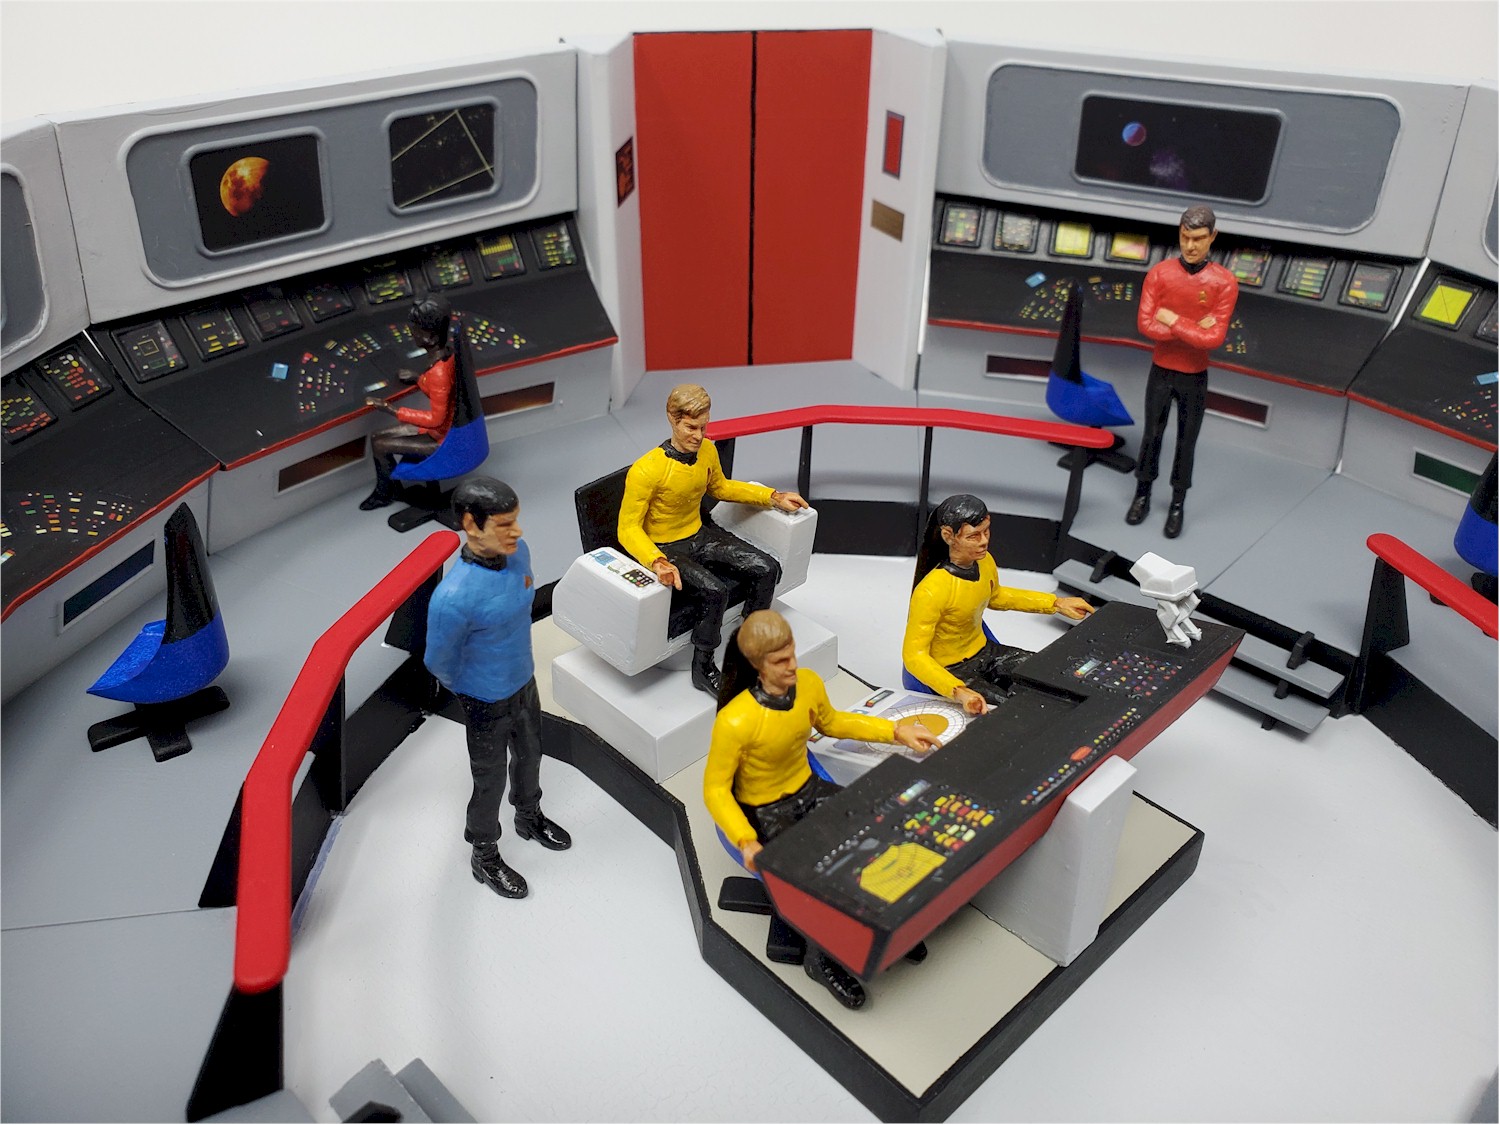
First, the kit itself. You've got parts for 6 bodies (four sitting and two standing), and a choice of different 10 heads. There are 6 of the retro 60's chairs, three sets of steps, four guard rails with supports, the main control panel and captain's chair, and then LOTS of wall panels and floor sections.
The kit does not include the lowest level floor in the round central bridge area, so I mounted some sheet styrene on a square base, and then painted the middle circle the off-beige color and the rest black so it would blend with the outside of the walls.
This kit suffered one of the same issues I've found to be very common from this era, a slight "lip" at the end of the straight sections. Sanding was required for every floor section and wall panel to remove that, as it was noticeable. The character heads are very detailed and quite good. The decal sheet is absolutely gorgeous, with nice color and design. Decals applied smoothly and generally fit the area they were designed for very nicely. One exception to that were the tiny multiple monitors right above the control panels on the walls. They are just a little bit too big, and I used a ton of micro-sol to get them to settle in and remove bubbles at the edges.
The instruction sheet mislabels three of the panels in the assembly instructions - the new ones. Where those parts are labeled 1, 2, and 3, the instructions show 36, 37, and 38. It's necessary to go between several different diagrams to connect the part numbers with placement on the bridge, and the decals that go on them. Those two things taken together made final assembly of the walls a bit like the "clue" game where you eliminate all the options one by one till you are left with the right part.
Painting the crew and the navigation console was the most fun for me. There are black edges on the corners of the console which were fun to mask off. The wall panels did seem to become a bit tedious with the repetitive painting and decaling, but not bad. However, they don't fit quite like they should. Even if you align all the wall sections perfectly (which I did not), there just isn't enough room for all the sections. I ended up dremeling about 1/4 inch off of each of the view screen side walls to get them to fit. The panels also don't mate exactly correctly no matter what you do. There are still cracks visible between some of the sections, and I just didn't have the energy to try and fill all those. My airbrush was absolutely giving me fits during this build, so almost all parts were hand painted. That too had some impact on the result that I wasn't quite happy with.
All in all, I enjoyed building this, even though the result wasn't quite what I'd hoped for. This was my first time with this kit. I'd done every one of the classic Trek kits when they first came out in the 70s except this one. It's nice to check that box.
Thanks for looking!