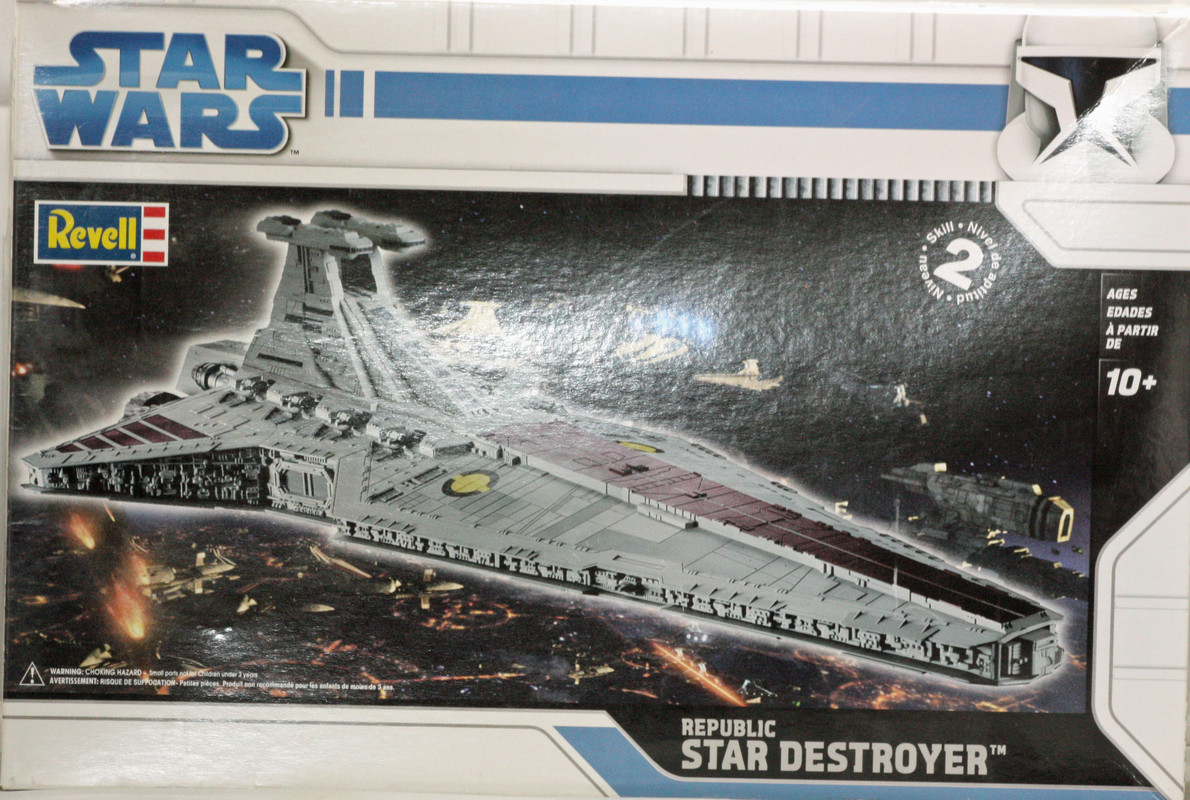
I'm here to present my most recent build, from Star Wars, Episode III - Revenge of the Sith - the Republic Star Destroyer.
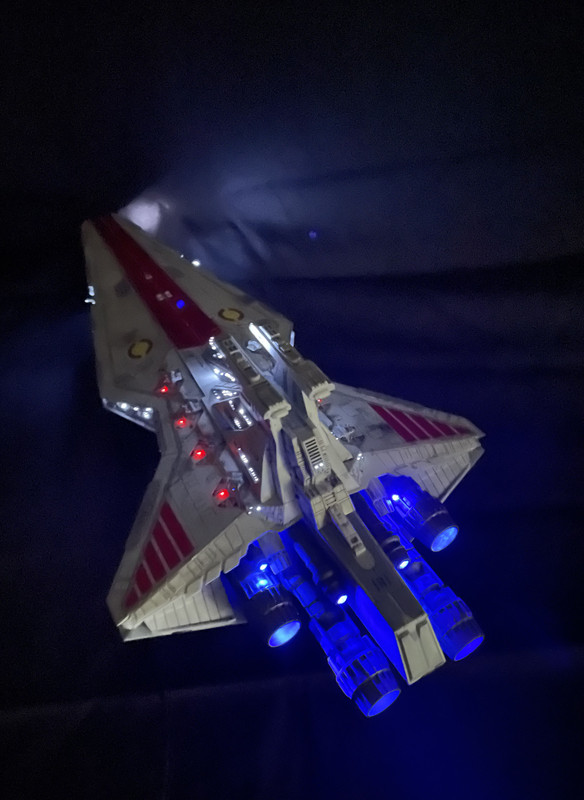
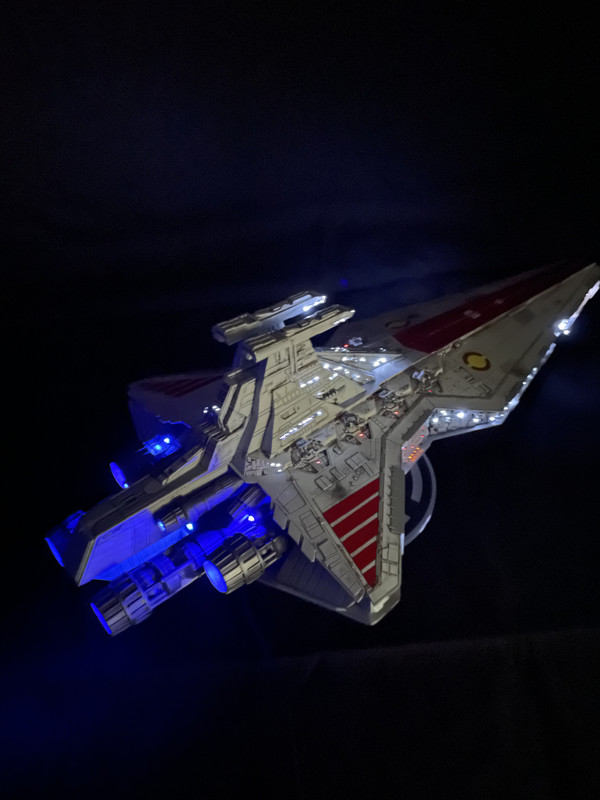
I kept this thing in my stash for years, with the idea that when I finally built it, I would light it up. When I finally decided to build it, back toward the beginning of this year, I opted to purchase a lighting kit intended for this kit. I reasoned that I had only done one kit with lights previously - an Iron Man kit where I did all the wiring and soldering, built a base with a switch and a battery holder - but this one was far more complicated, so the idea of spending ~$70 on a lighting kit didn't really bother me. I bought the kit made by MadMan Lighting.
As it turned out, I would have been better off not buying the lighting kit. The instructions for that lighting kit were awful, but after a thread I posted here earlier this year and with help from EagleCash and Pawel and a few others, I managed to get the lighting kit to work. And that is where the real trouble started. My bench time on this build was fairly sporadic given the heat we've had here. It seemed as if every time I would return my attention to the lighting kit, the damn thing would not work. Then I'd get it to work, life would be great ... time would pass, then I couldn't get it to work again without more fiddling.
At that point, I decided to ditch the lighting kit, well, the little board that was the guts of that kit. I did use all of the LEDs and fiber optics that also came with the kit. I bought a bunch of resistors and several more LEDs, dug out the solder and iron, and got to work. Oh, that was only after weeks and weeks of drilling out all the tiny holes through which the fibers would be run.
This new approach was far cheaper. I also noticed that I was starting to make progress toward completing this thing. At first I ran a bunch of the fibers, but found that to be rather difficult to get them all into heat-shrink at the same time. I'm sure the sweat that was dripping off my fingers and forehead didn't help my frame of mind while doing all this very tedious work. I eventually got to where I would place a light with the heat-shrink, then run fibers one-by-one into it. Even more tedious, but it worked.
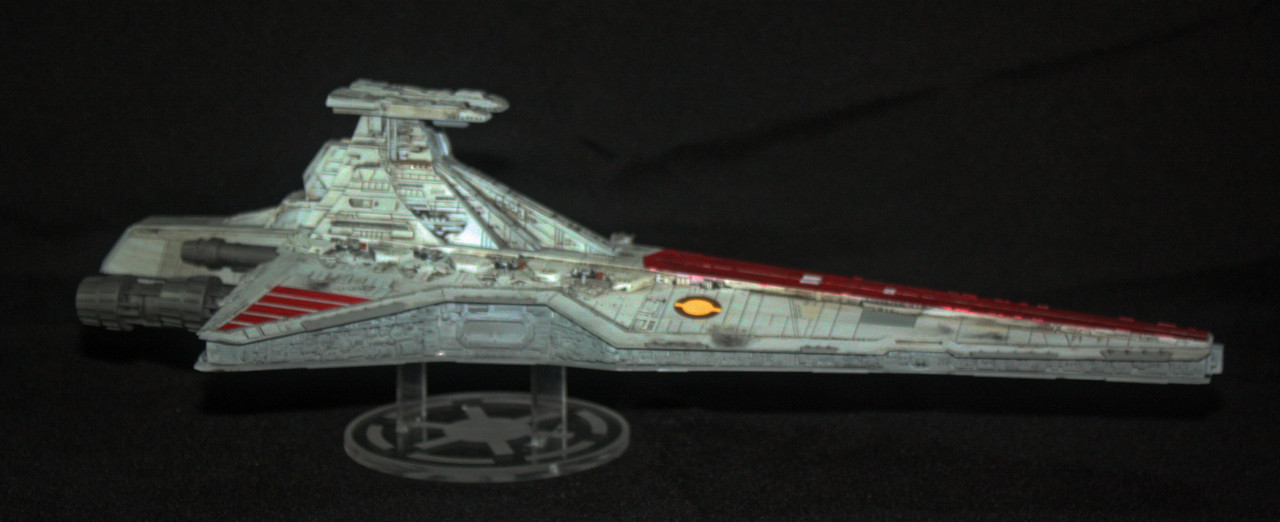
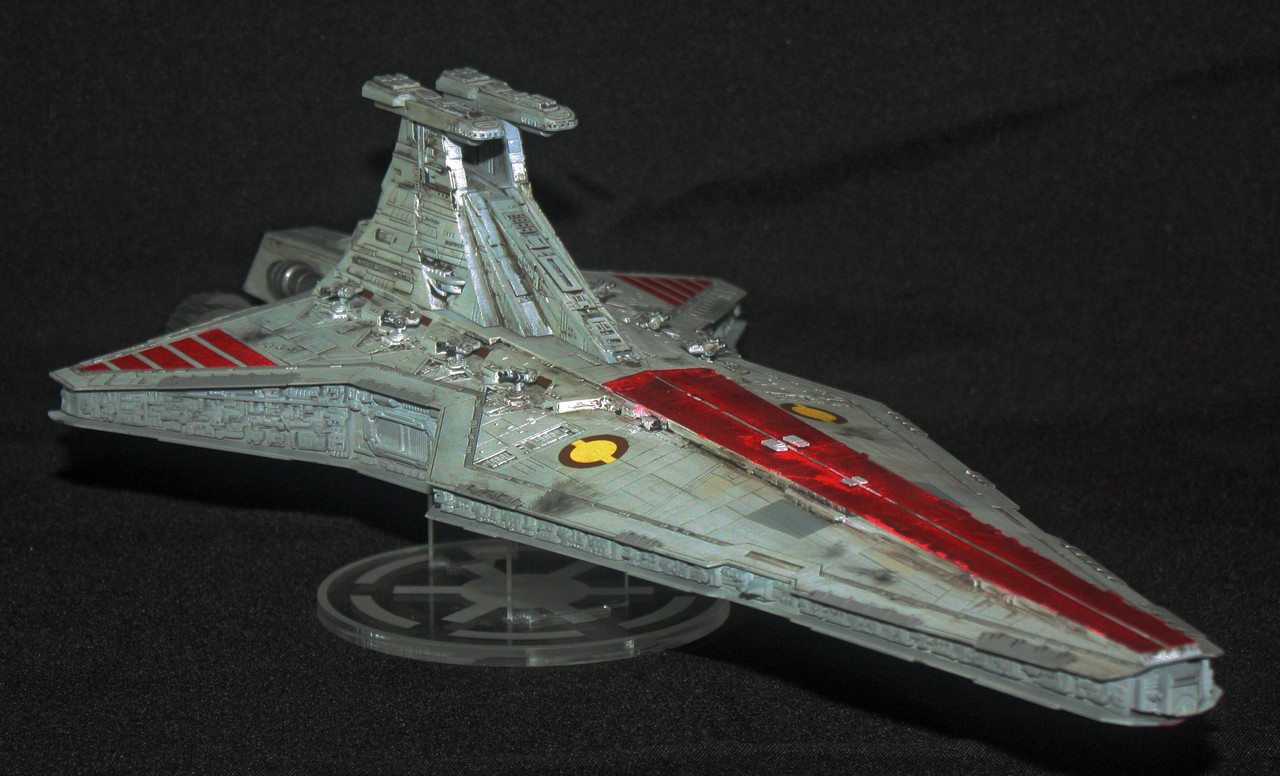
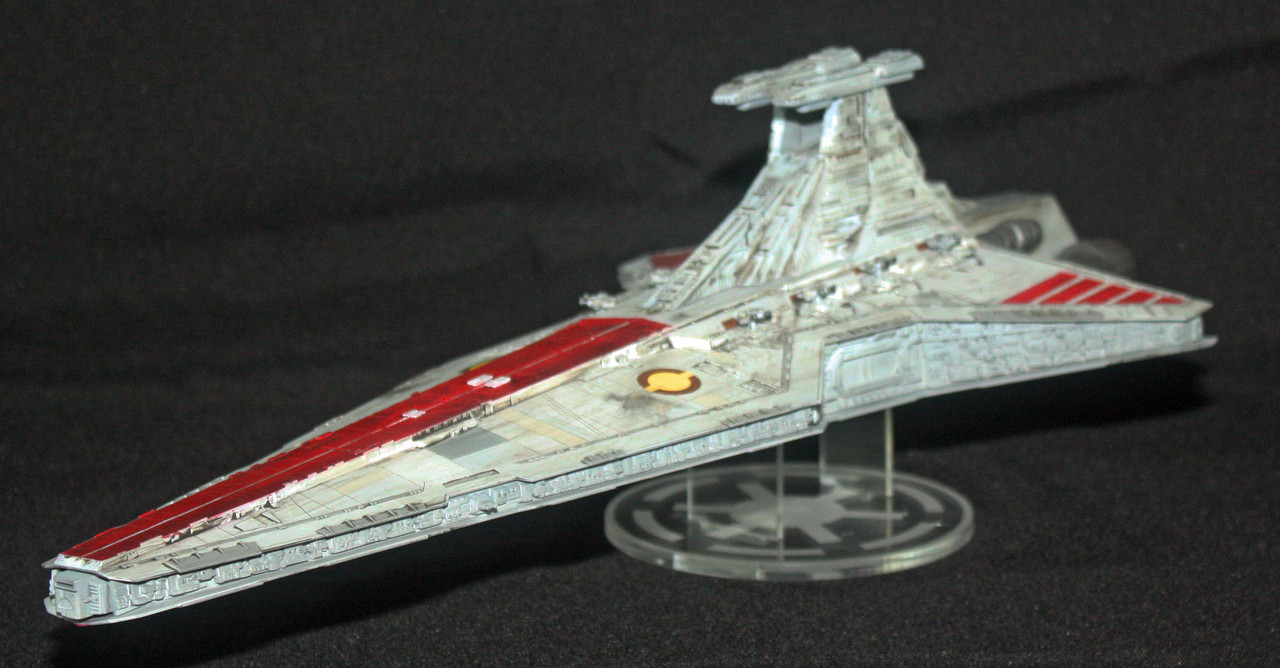
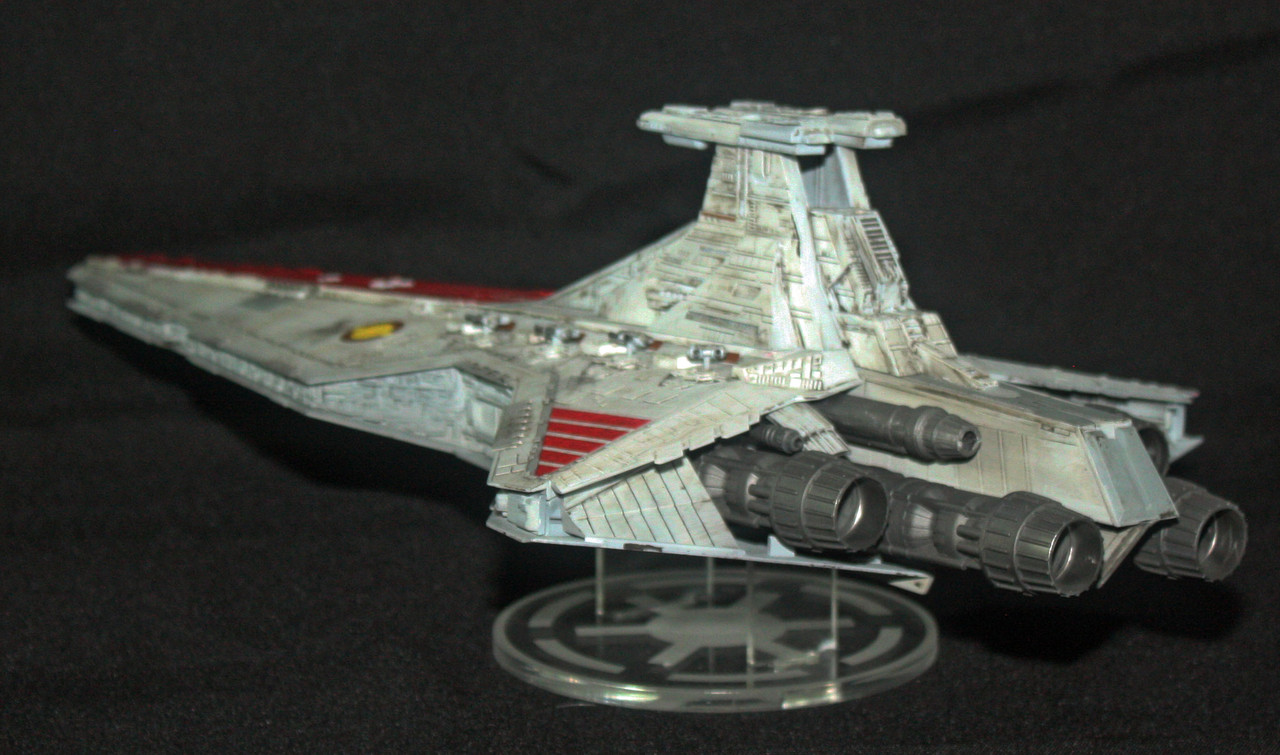
As a life-long Star Wars nut, I have a number of books that cover the special effects and miniatures in those movies, but curiously, there was no miniature built of this particular Star Destroyer. It was all CGI. So there weren't a whole lot of reference photos that I could find. I do, however, own the movie, so I ended up taking photographs from freeze-frame shots in the opening portion of the movie when we first see this Star Destroyer.
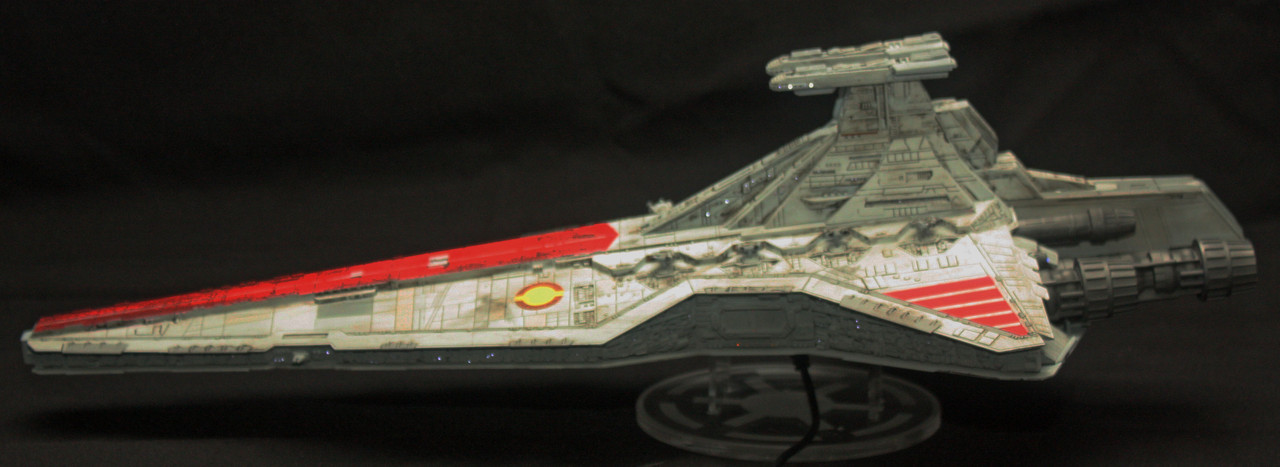
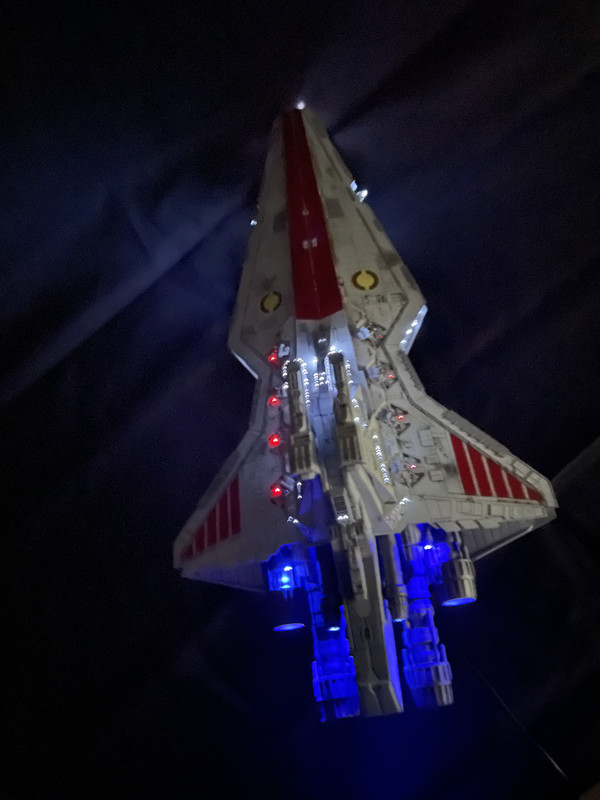
I used various shades of gray for the exterior hull - light gray, barley gray, medium gray, dark gull gray. The only other color is flat red. There is a wash of Flory dark dirt, and I used Tamiya weathering compounds to get the look of exploded laser blasts or star fighters that can be seen on the upper hull in a few spots. The engines are a metallic gray.
The kit did not come with a stand. I found a guy on eBay that makes stands for particular kits, and he had one for this Star Destroyer. It's a nice stand with the Imperial logo. http:/www.displaystandsdirect.com
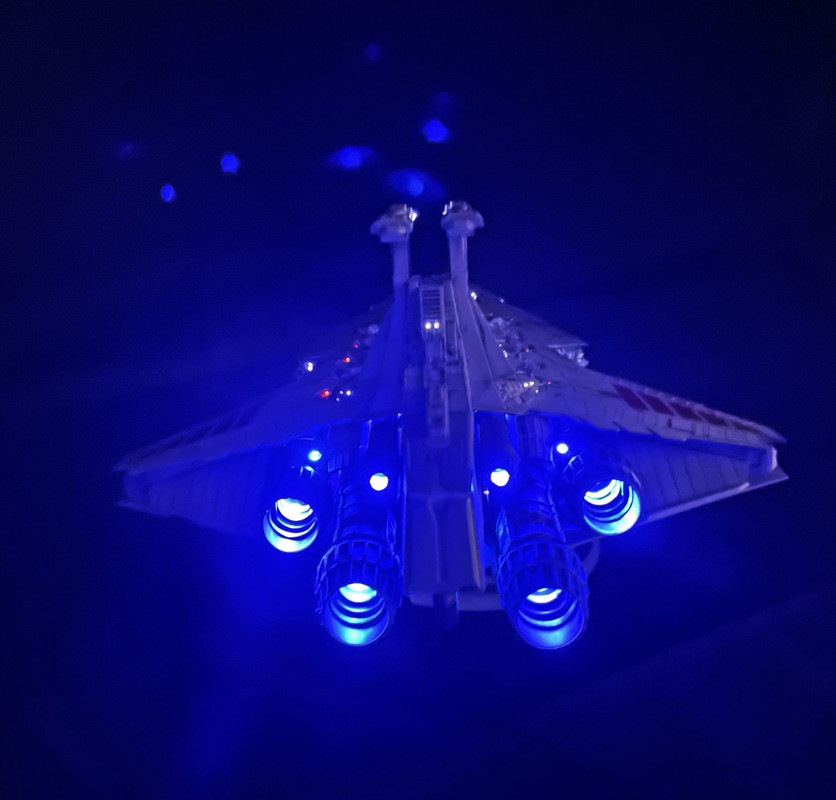
This next photo shows the lights, but not really. This one and the 4 previous were taken with my usual camera setup - a Canon DLSR with an external flash unit and the standard lens. I pointed the flash away from the subject, but still got all this light. Without any flash, all I got was black.
So I switched to my iPhone for the lighting photos.

This build was a tale of different worlds. The build itself was ridiculously simple. There are very few parts in this kit. It goes together great. I actually did not glue the top hull to the lower hull; I simply snapped it together (and no, it is not a snap kit like a Bandai kit). The hull parts fit very snugly. I reasoned this to allow for any potential repair work to the lights. When one adds the lights, the build becomes quite a bit more difficult (caveat, in that should apply to lighting novices such as myself). I started work on this build in May, and did not finish until the first of September. For me, that is a lifetime (I can typically put out a similarly-sized WWII warbird in a month or less).
I'm not sure when I'll get back to my bench - probably some time after it has started to cool off a bit, maybe by October. My next subject is going to be Revell's old 1/32 Ju87B Stuka.