SEARCH FINESCALE.COM

Enter keywords or a search phrase below:

Monolith Apollo Astronaut WIP Revell 1/8 scale model kit

3935 views
29 replies
1 rating 2 rating 3 rating 4 rating 5 rating
  • Member since
    October 2021
Posted by PhoenixG on Monday, March 18, 2024 10:39 PM

Wow, the groundwork on that turned out great!  I think you did an amazing job of capturing the look and feel of the moonscape.

As for the gap.  You can attribute it to thermal expansion due to being out in the sun.  ;)

On the Bench:

Bandai 1/72 Defender Destroid

  • Member since
    November 2009
  • From: SW Virginia
Posted by Gamera on Monday, March 18, 2024 10:10 PM

Oh that looks fantastic! The grey looks perfect for a moonscape. Though the first photos where it's unpainted and still red I was thinking would be perfect for a Mars base. 

"I dream in fire but work in clay." -Arthur Machen


  • Member since
    February 2021
Posted by JimC2020 on Monday, March 18, 2024 8:53 PM

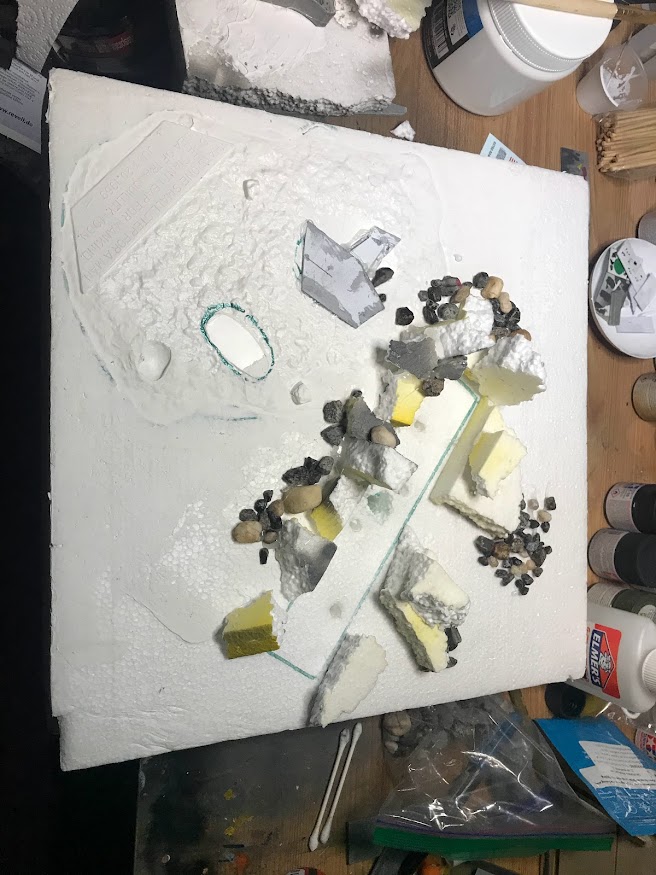
Work done on the base,


added more texture, experimented with "moondust" (roughly equal mix of fine semolina flour and baking powder)


After primer coat and a clear coat just to help keep everything in place (no idea what I'm doing here, kind of going on instinct).


First round of paint


layered on a couple of gray shades


Layered on a little silver


And seeing how it looks


Of course what I didn't realize was how the opeining for the Monolith had I guess wided or warped, and now doesn't fit well? Oh well not going to sweat it.


Close to being finished...


  • Member since
    November 2009
  • From: SW Virginia
Posted by Gamera on Monday, February 26, 2024 10:06 PM

Yeah fantastic work there on the astronaut's face and suit! 

"I dream in fire but work in clay." -Arthur Machen


  • Member since
    October 2021
Posted by PhoenixG on Friday, February 23, 2024 1:36 AM

Love the work on the astronaut.  The attention to detail on his suit brings the piece to life.  And the lit up monolith is such a cool effect.  One could understand why the astronaut is so mesmerized by it.  :)

On the Bench:

Bandai 1/72 Defender Destroid

  • Member since
    February 2021
Posted by JimC2020 on Tuesday, February 13, 2024 10:09 PM

Couple more updates. Most of the weathering done, and pieces glues on


Added custom rim to helmet glass


Last thing to do if figure out how to conenct all the hoses to the PLSS backpack

  • Member since
    November 2009
  • From: SW Virginia
Posted by Gamera on Sunday, February 11, 2024 5:26 PM

You're making great progress! Everything looks good but I esp love the watch! 

"I dream in fire but work in clay." -Arthur Machen


  • Member since
    February 2021
Posted by JimC2020 on Sunday, February 11, 2024 2:34 PM

A little more progress


Backpack is pretty much done


Watch is complete, with a custom decal I made, first time doing this! Seemed to turn out ok.

Front power pack thingy, forgot the technical name for this

GAF
  • Member since
    June 2012
  • From: Anniston, AL
Posted by GAF on Monday, February 5, 2024 5:47 PM

Well, about the positioning of the hoses... it's science fiction anyway so all is good!

Nicely done!

Gary

  • Member since
    April 2020
Posted by Eaglecash867 on Monday, February 5, 2024 5:12 PM

"My God...its full of stars!"

Nice work so far!


"You can have my illegal fireworks when you pry them from my cold, dead fingers...which are...over there somewhere."

  • Member since
    November 2009
  • From: SW Virginia
Posted by Gamera on Sunday, February 4, 2024 8:55 PM

Aw krap, somehow I missed your post! 

Great job on the astronaut, he looks really good! Yes

Sorry to hear about the masking tape, I hate it when it pulls up paint and I have to repaint stuff. 

"I dream in fire but work in clay." -Arthur Machen


  • Member since
    February 2021
Posted by JimC2020 on Tuesday, January 30, 2024 9:17 PM

I am aware that the connector positions are pretty far off, part of the problem is that the one hose that Revell gives you with the model is positioned way too far off to the side, so to keep things symetrical, and to reuse the hole, I put the others off to the side. Also the weird rectangular cover/pocket/doohicky that Revell molded right in the abdominal region isn't even in the real suit! And it means you can't really position anything there. I guess if I had planned ahead more I could have sanded some of that away? Not sure if the plastic is thick enough for that? I suppose you could always put something on the other side to support it? Oh well, next time! 

  • Member since
    February 2021
Posted by JimC2020 on Tuesday, January 30, 2024 9:12 PM

Painted the boots and gloves


Started putting in the hose connectors


test fitting with hoses (some of the paint came off when I pulled off the masking tape :( )


  • Member since
    February 2021
Posted by JimC2020 on Monday, January 29, 2024 9:26 PM

Then realized the astronaut was wearing a watch! So obviously we need one too!


Primed


Painting in progress


Made a custom decal for it


Made my first decal today, but it didn't go so hot, used Tamiya cleay acrylic to cover the printed decal paper. I'm guessing I need to try something else. And don't use Tamiya mark fit solution, that seemed to mess things up.


  • Member since
    February 2021
Posted by JimC2020 on Monday, January 29, 2024 9:19 PM

Next got the lighting for the Monolith wired up


Powered on, arduino controlled, but will work out the flicker pattern later on.


  • Member since
    February 2021
Posted by JimC2020 on Monday, January 29, 2024 9:07 PM

Finally some more progress, kind of got bummed during the holidays, and lost interest.


So I realized that there's a lot of detail that the Revell kit misses out on, decided to add the right number of hoses/cables, because, why not?

I scratch built the little piece with bits of left over or sprues that I sanded down. 


Here's where they all go


Testing the fit


Various "hoses" made from cut up gloves


Primed all the parts


Painting

A layer of Model Master aluminum, then tamiya clear Red and Blue.


  • Member since
    November 2009
  • From: SW Virginia
Posted by Gamera on Tuesday, November 7, 2023 7:41 PM

Great job! The face looks fantastic! 

"I dream in fire but work in clay." -Arthur Machen


  • Member since
    February 2021
Posted by JimC2020 on Wednesday, November 1, 2023 9:48 PM

A little more progress on the astronaut


first time painting a face at this scale, damn it's tricky! 

  • Member since
    October 2021
Posted by PhoenixG on Wednesday, November 1, 2023 8:31 PM

JimC2020
I really don't know what the hell I'm doing here, completely winging it.

That pretty much sums up my thoughts at the start of every build, and yet I still finish each with a smile on my face.  Big Smile

On the Bench:

Bandai 1/72 Defender Destroid

  • Member since
    November 2009
  • From: SW Virginia
Posted by Gamera on Monday, October 30, 2023 8:18 PM

Yeah looks neat to me! 

I remember one of the issues with the monolith in the movie is they had to keep cleaning the darn thing so you couldn't see any fingerprints during the close-up filming. 

"I dream in fire but work in clay." -Arthur Machen


  • Member since
    July 2014
  • From: Franklin Wi
Posted by Bakster on Sunday, October 29, 2023 8:33 AM

Cool idea...

  • Member since
    February 2021
Posted by JimC2020 on Saturday, October 28, 2023 5:31 PM

Thank you! I really don't know what the hell I'm doing here, completely winging it. 

GAF
  • Member since
    June 2012
  • From: Anniston, AL
Posted by GAF on Saturday, October 28, 2023 11:05 AM

Styrofoam is difficult to work with.  You've done a superb job!  Can't wait to see it finished.

Gary

  • Member since
    February 2021
Posted by JimC2020 on Saturday, October 28, 2023 9:56 AM

GAF
That's great!  What did you use for the monolith?

I built up the monolith by using some leftover styrofoam (which next time I do this I'm getting the purple foam core stuff, the white stuff is a mess to work with), measured out the correct dimensions on plastic styrene sheets and then glued it over the styrene. The plastic sheets I had couldn't cover the complete height, so I had to glue two together, which did result in some uneven bowing on one side :(

Turns out making a box, and making it nice and smooth and even is pretty tricky! LOL.


I made sure I could take out the foam core, and that's what will hold my LED lights. I attached some sprue scraps to form attachment support so it would mount to the bottom section.


Now I'm trying to add some detail with bits of stone and foam and then modeling paste.


Not sure how this is going to turn out, this is my first time doing something like this. The modeling paste goes quick! And it's $17 a jar! 

  • Member since
    April 2003
  • From: USA
Posted by keavdog on Tuesday, October 24, 2023 7:56 PM

Very cool!

Thanks,

John

  • Member since
    October 2021
Posted by PhoenixG on Tuesday, October 24, 2023 6:05 PM

JimC2020
adjusting one of the hands (my apologies for the hand amputation, I did glue it back, sorry for the lack of anesthesia...)

Lol, that's great!
Excellent concept from an iconic see.  Keeping my eye on this one to watch it develop.

On the Bench:

Bandai 1/72 Defender Destroid

  • Member since
    November 2009
  • From: SW Virginia
Posted by Gamera on Sunday, October 22, 2023 9:04 PM

Yeah that's so cool!!!!! 

Someone made a garage kit twenty or so years ago of the monolith with an astronaut in a 2001 EV suit touching one side and a man-ape touching the other. Always thought it was amazing but at the time money was a bit tight so I didn't buy one.  

"I dream in fire but work in clay." -Arthur Machen


GAF
  • Member since
    June 2012
  • From: Anniston, AL
Posted by GAF on Sunday, October 22, 2023 7:19 PM

That's great!  What did you use for the monolith?

Gary

  • Member since
    December 2002
  • From: Fort Knox
Posted by Rob Gronovius on Sunday, October 22, 2023 6:33 PM

Very nice, such an iconic scene.

JOIN OUR COMMUNITY!

Our community is FREE to join. To participate you must either login or register for an account.

SEARCH FORUMS
FREE NEWSLETTER
By signing up you may also receive reader surveys and occasional special offers. We do not sell, rent or trade our email lists. View our Privacy Policy.