SEARCH FINESCALE.COM

Enter keywords or a search phrase below:

Chih Who? WIP.....The Finer Details....9/18

17695 views
72 replies
1 rating 2 rating 3 rating 4 rating 5 rating
  • Member since
    December 2006
  • From: N. Georgia
Posted by Jester75 on Tuesday, September 27, 2011 6:58 AM

Thank you very very much for that information capn. According to the instructions the pedastal for the compass is to be brown (wood?) with the top compass part brass. I remember an episode of Swords where one of the ships compasses went way off and was throwing the autopilot off. They talked about adjusting it using magnets placed around the outside of it to get it back in order.

Eric


  • Member since
    November 2005
  • From: Formerly Bryan, now Arlington, Texas
Posted by CapnMac82 on Monday, September 26, 2011 1:45 PM

Jester75
Only thing left to add is the compast post on the bridge and the navigation lights/brackets on each side of it.

The spheres on either side of the compass (the assembly is a "binnacle" compass is just one part of it) are cast iron, and not lights.  They are used to counter-act the effects of the iron and steel in the vessel on the magnetic compass.  The rest of the binnacle is brass or bronze to be more magnetically-neutral.

Adjusting the compass is a giant pain, from the fussiness of how much and which way to more the spheres.

Now, being iron, the spheres are liable to rust.  They are also very visible to everyone on the ship.  Regardless of Nation or Service, NCO's the world around apply paint and polish in direct proportion to the highest-ranking office likely to see same.  So, those iron spheres are painted red and green (port and starboard) and neatly, too.

The compass rose is lit from within the binnacle, and usually with some ability to adjust that illumination for the helmsman (shutters over candle flame; oil valves for gas lamp or mantel; rheostat for electric lamps).


Still, amazing work on that ship.

  • Member since
    December 2006
  • From: N. Georgia
Posted by Jester75 on Sunday, September 25, 2011 8:51 PM

Another small update on the Chih. Got most of the stuff done on the forward deck. Only thing left to add is the compast post on the bridge and the navigation lights/brackets on each side of it. Still need to paint the rope/cables on the mast, but its not secured yet. Will probably be on of the last things that gets glued down to keep from breaking the durn thing.


Tags: Chih Yuen

Eric


  • Member since
    December 2006
  • From: N. Georgia
Posted by Jester75 on Thursday, September 22, 2011 8:23 PM

Thanks for chiming in Vance and Manny! The barrels have some graphite on them but I may apply more as I agree, they need more of a gunmetal appearance.


Eric


  • Member since
    February 2003
  • From: Rothesay, NB Canada
Posted by VanceCrozier on Thursday, September 22, 2011 12:05 PM

Jester75

http://i9.photobucket.com/albums/a86/Jester75/Chih%20Yuen/20110921_2.jpg

Very nice work Jester. I love this pic, showing the "turret" from behind. These early ships were really still a work in progress, it's like a field artillery piece strapped to the top of the decking! I love it! Yes

On the bench: Airfix 1/72 Wildcat; Airfix 1/72 Vampire T11; Airfix 1/72 Fouga Magister

  • Member since
    November 2005
Posted by Anonymous on Thursday, September 22, 2011 10:18 AM

Jester75

Thanks Manny!

Well, here goes an update to my Chih Yuen. Its not a big one, but with my limited build time, all I can give are small updates, lol. Got some painting done on the photoetch that came with the kit. Everything in the photos is just sitting in place, no glue yet as I have a few odds and ends to do to it before it gets glued.

http://i9.photobucket.com/albums/a86/Jester75/Chih%20Yuen/20110921_1.jpg

http://i9.photobucket.com/albums/a86/Jester75/Chih%20Yuen/20110921_2.jpg

http://i9.photobucket.com/albums/a86/Jester75/Chih%20Yuen/20110921_5.jpg


Looks fabulous---bridge structure is awesome...I'm likeing the looks of your colors...maybe get those black barrels a bit more "blued"?---graphite dust might work...

Maybe Fermis or some other MOJO will now start building...and maybe Bondo will quit crying and actually cut some sprue...

  • Member since
    December 2006
  • From: N. Georgia
Posted by Jester75 on Wednesday, September 21, 2011 8:29 PM

Thanks Manny!

Well, here goes an update to my Chih Yuen. Its not a big one, but with my limited build time, all I can give are small updates, lol. Got some painting done on the photoetch that came with the kit. Everything in the photos is just sitting in place, no glue yet as I have a few odds and ends to do to it before it gets glued.


Eric


  • Member since
    November 2005
Posted by Anonymous on Sunday, September 18, 2011 11:59 PM

Jester75

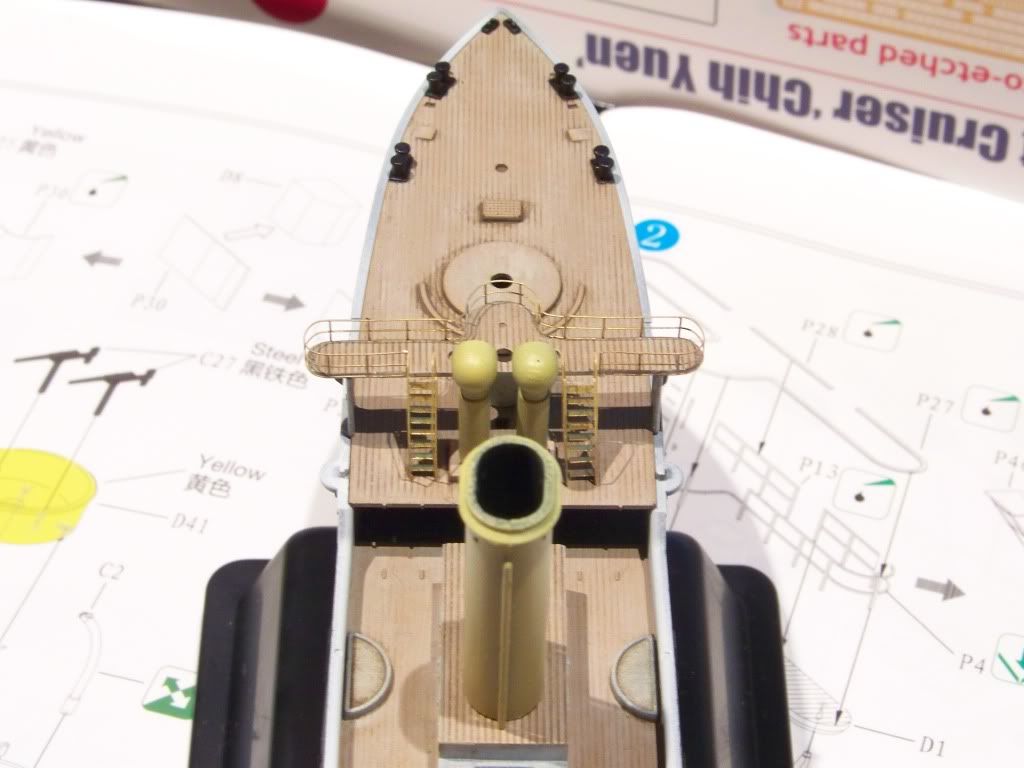
Yes they are Manny. Slowly making progress on the pe and fitting for the forward deck. got the railings installed on the bridge and the ladders that lead up to it. They really are beautiful pieces once bent into shape. One word of advice though for the railings with these intricate bends in them, ANNEAL ANNEAL ANNEAL. Ok, that was actual three words, but man, I really fought this piece of railing to get it on.
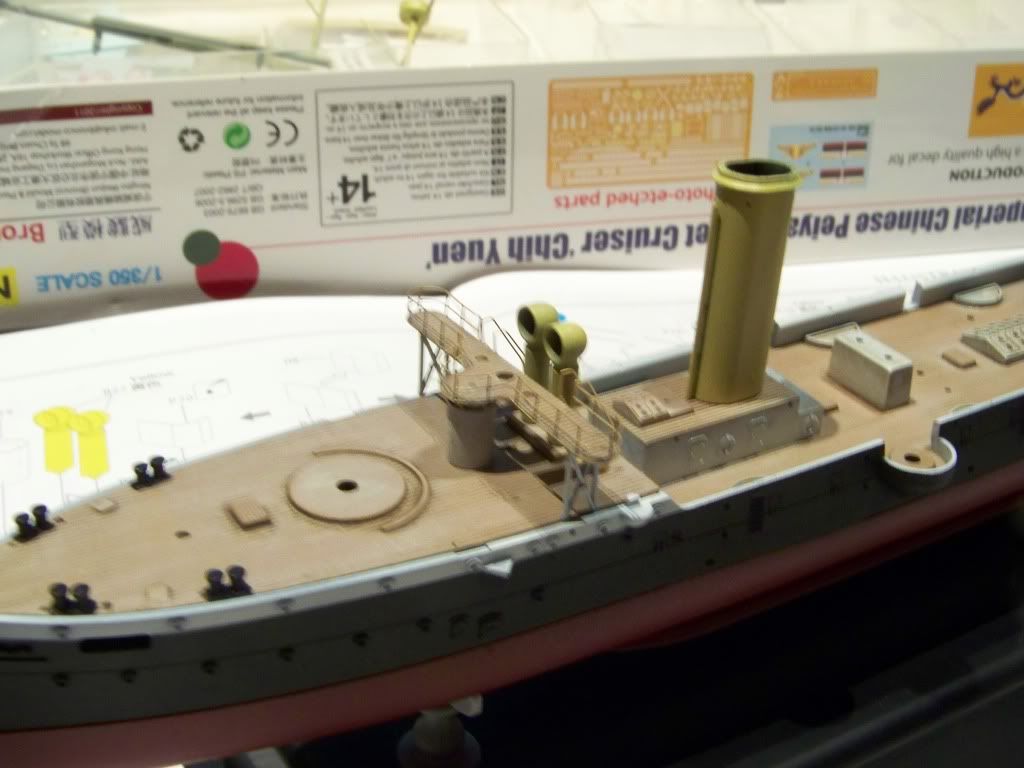
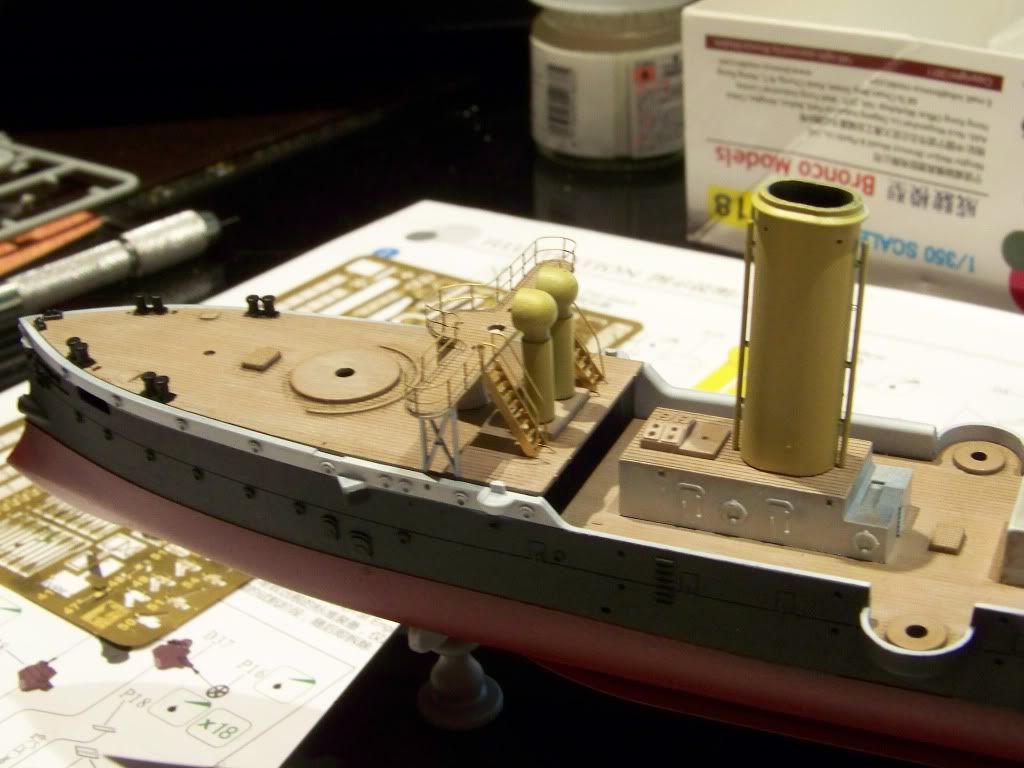
http://i9.photobucket.com/albums/a86/Jester75/Chih%20Yuen/20110918_1.jpg

http://i9.photobucket.com/albums/a86/Jester75/Chih%20Yuen/20110918_2.jpg

http://i9.photobucket.com/albums/a86/Jester75/Chih%20Yuen/20110918_3.jpg

Sorry for the fuzzy first pic...

Okay, that looks freakin' great...the bridge structure really looks cool...I'm also liking the shade of yellow you picked for the funnels and fittings...Yes

  • Member since
    December 2006
  • From: N. Georgia
Posted by Jester75 on Sunday, September 18, 2011 10:58 PM

Yes they are Manny. Slowly making progress on the pe and fitting for the forward deck. got the railings installed on the bridge and the ladders that lead up to it. They really are beautiful pieces once bent into shape. One word of advice though for the railings with these intricate bends in them, ANNEAL ANNEAL ANNEAL. Ok, that was actual three words, but man, I really fought this piece of railing to get it on.
Sorry for the fuzzy first pic...

Tags: Chih Yuen

Eric


  • Member since
    November 2005
Posted by Anonymous on Saturday, September 3, 2011 7:58 AM

Nice...these kits are one word: cherry...

  • Member since
    December 2006
  • From: N. Georgia
Posted by Jester75 on Thursday, September 1, 2011 7:26 PM

Wow, hopefully you guys will get your kits soon. I haven't ordered the battle cruiser yet but after working on this one, I'm sure I will pick one up. When and if they are released again....

Just a few photos of some of the fine photo etch that comes with the kit. Glueing the ammo hatches on was pretty tedious as they are very small but it looks pretty good when finished. I plan on leaving the back four lockers open just for display as half of them actually have shells molded in them. The pulleys are for the ammunition loading and they will be mounted on the gun platform. Sorry for the horrible pics but this stuff is ultra small!!


Eric


  • Member since
    April 2006
  • From: Denver, Colorado
Posted by waynec on Thursday, September 1, 2011 6:47 PM

my ting yuen has been "on order" through my LHS for the past 4 months. it's also listed as preorder at freetime hobbies and not listed at all at sprue brothers (which means it isn't out)

Никто не Забыт    (No one is Forgotten)
Ничто не Забыто  (Nothing is Forgotten)


  • Member since
    November 2005
Posted by Anonymous on Thursday, September 1, 2011 12:49 PM

That's what I thought...reason I asked is that what Jester is building (Crusier) is still available at several places in-stock.  Battlecrusier is a totally different story.  I think I literally snagged the last one for sale retail in the Northern Hemisphere at Great Models....

  • Member since
    March 2007
  • From: Carmel, CA
Posted by bondoman on Thursday, September 1, 2011 11:54 AM

Just dropped Brandon an email. We'll see wotappens.

  • Member since
    March 2007
  • From: Carmel, CA
Posted by bondoman on Thursday, September 1, 2011 11:41 AM

I ordered the battleship, plus a KA deck for it, from Freetime Hobbies. I just haven't had a chance to chase them abt it. It was on sale for $ 40 or so marked down from $ 60ish. Still got charged $ 90 or so total etc. THEN I get an email saying my status is changed from "shipped" to "backordered". I waste so much time blathering on line, I guess I'll go dig out the email now and see what I can do. Woulda been nice to have this weekend.

  • Member since
    November 2005
Posted by Anonymous on Thursday, September 1, 2011 10:46 AM

bondoman

I am, for my kit. By the time it comes everyone else will be finished and have moved on to the next subject. Oh, well, live and learn. I shoulda not ordered the kit and the deck together.

Bondo, did you order the Crusier or the "Battleship"?

  • Member since
    April 2006
  • From: Denver, Colorado
Posted by waynec on Thursday, September 1, 2011 10:22 AM

I use a Xuron with the blue handle. i also grab my safety goggles. i usually work on models without my glasses because they are too strong for close up work. sometimes i wear my computer glasses when working on models. but I ALWAYS put on my wrap around safety glasses when cutting PE.

i have 2 of these plus the sister ship and one of the "battleships". i bet i can take longer to build mine than you can (at least until i get comfortable with air brushing). can't wait to get started but i have a bunch i want to finish up by the end of the year (12 or so)

Никто не Забыт    (No one is Forgotten)
Ничто не Забыто  (Nothing is Forgotten)


  • Member since
    March 2007
  • From: Carmel, CA
Posted by bondoman on Wednesday, August 31, 2011 11:11 PM

I usually use a single edge razor blade against glass.

I have a set of Xurons with the blue handles (somewhere)


  • Member since
    December 2006
  • From: N. Georgia
Posted by Jester75 on Wednesday, August 31, 2011 9:37 PM

Don't sweat it bondo, I'm sure it will arrive before you know it. I have begun cutting and forming the PE for the kit but I am finding the attachment points to be much thicker and tougher to cut away than other PE. I normally use a chisel blade or a #11 blade and cut into a steel ruler but some of the PE is so delicate that its actually bending before it cuts. What do you guys use to cut the PE from the sprue when its really fine ( such as railings and the likes) but hard to cut from the fret??

Eric


  • Member since
    March 2007
  • From: Carmel, CA
Posted by bondoman on Wednesday, August 31, 2011 9:57 AM

I am, for my kit. By the time it comes everyone else will be finished and have moved on to the next subject. Oh, well, live and learn. I shoulda not ordered the kit and the deck together.

  • Member since
    November 2005
Posted by Anonymous on Wednesday, August 31, 2011 6:17 AM

I'm not holding my breath....

  • Member since
    December 2006
  • From: N. Georgia
Posted by Jester75 on Tuesday, August 30, 2011 9:39 PM

Thank ya gentlement!! Hopefully some more progress soon.....

Eric


  • Member since
    November 2005
Posted by Anonymous on Tuesday, August 30, 2011 8:45 PM

Ditto

  • Member since
    December 2003
  • From: 37deg 40.13' N 95deg 29.10'W
Posted by scottrc on Tuesday, August 30, 2011 4:25 PM

No kidding about the detail on those boats, wow! 

Good job on toning down the deck color and some washes on the hull, it was looking too bright and clean, more like an ocean liner and not a warship.

  • Member since
    May 2008
  • From: UK
Posted by Billyboy on Tuesday, August 30, 2011 7:48 AM

Those boats look like just about the best plastic ships boat in 1/350 that I've ever seen. Impressive kit!


Will

  • Member since
    November 2005
Posted by Anonymous on Monday, August 29, 2011 10:23 PM

Nicely done...yep, washes always darken what they are applied to---still looks good Yes

  • Member since
    December 2006
  • From: N. Georgia
Posted by Jester75 on Monday, August 29, 2011 9:57 PM

Thanks Manny, I thinkHmm Isn't that the same record that DITCY Part 2 holds over in dioramas????Wink

Added a oil wash to the deck to make the planks pop using a color slightly darker than that deck color. Pretty pleased with how it turned out although it did darken the deck more than I had hoped. Next time I will probably go much lighter on the initial deck color and let the wash bring right down into place.


Also got the lifeboats finished with the exception of the PE oars. There is alot of detail in these little lifeboats and they almost became like little kits of their own. Put a wash in the bottoms to make the details pop a bit and then drybrushed over it with some white artist oil.


Thanks for taking a gander, more to come soon hopefully.....

Eric


  • Member since
    November 2005
Posted by Anonymous on Monday, August 22, 2011 2:46 PM

About time you worked on this MOJO...you trying to break the record on longest ship build (which your Tirpitz now holds)?

Deck is MUCH better in shade, IMO...you nailed it...looks almost like an AM real wood deck...

Looking forward to seeing more fixtures added---front casemate looks cool...

  • Member since
    December 2006
  • From: N. Georgia
Posted by Jester75 on Monday, August 22, 2011 2:19 PM

Man, time really does fly. Sorry for the long delay, lots of stuff going on and no time for modeling unfortunatelySad I started weathering the deck again and tried to get some different shading for the planks. I am really happy with how it looks right now and I think this is how it will stay. I have yet to put a darker wash in the panel lines for the individual planks, but that should really make it pop. Working on the smaller stuff for the forward deck now, hopefullly more pics soon....

Tags: Chih Yuen

Eric


JOIN OUR COMMUNITY!

Our community is FREE to join. To participate you must either login or register for an account.

SEARCH FORUMS
FREE NEWSLETTER
By signing up you may also receive reader surveys and occasional special offers. We do not sell, rent or trade our email lists. View our Privacy Policy.