SEARCH FINESCALE.COM

Enter keywords or a search phrase below:

Building a American Civil War "Maury" Gun/Torpedo Boat

5659 views
10 replies
1 rating 2 rating 3 rating 4 rating 5 rating
  • Member since
    September 2012
  • From: Edmond, Oklahoma
Building a American Civil War "Maury" Gun/Torpedo Boat
Posted by Tom Cervo on Sunday, January 6, 2013 9:54 PM

Hello all, 

I'm starting this little build because I enjoy anything American Civil War.  It's just after the Christmas rush, and I have a little time on my hands, so here's a neat build of a Confederate "Maury" Gun Boat.  I'll be using one of the kits I manufacture, so I'll make no comments to fit, accuracy or quality, since that should be left to others.  Moreover, I need a box art shot for the kit, so you are folks who I hope may benefit from this as much as I.

Known as "Maury" Gunboats, the Hampton Class of which 100 were planned, were the brain child of Commander Matthew Fontaine Maury, CSN.  These gunboats were a manifestation of a recurrent theory of "overwhelm by numbers" by naval strategists over the years that Maury subscribed to.  One advantage to this theory was that wars could be fought economically with small gunboat "mosquito" fleets proposed by Maury.  Unfortunately, such mass production of "standard ships" was not accomplished until 1918.

CSS Hampton along with Nansemond were the beginning of the  wooden gunboat fleet, but before construction could begin in earnest, Norfolk, Portsmouth, and others were burned on the stocks before completed at Norfolk Navy Yard when operations were moved up the James River.   Maury, in command of the Hampton, participated in several river actions including the battle at Dutch Gap, operations against Fort Harrison, and the actions at Chaffin's Bluff.  Hampton was burned by the Confederates as they evacuated Richmond,

Painting the deck was first on the list after construction of the rudder and prop.  I shot a coat of hull red that mixed using a 50/50 mix of Model Master Insignia Red and Rust.  It is know that Confederate vessels were painted either red or black as an anti fowling coating below the waterline.  Since there isn't any documentation to definitively call out the color, I decided on red to give a little color to the boat.

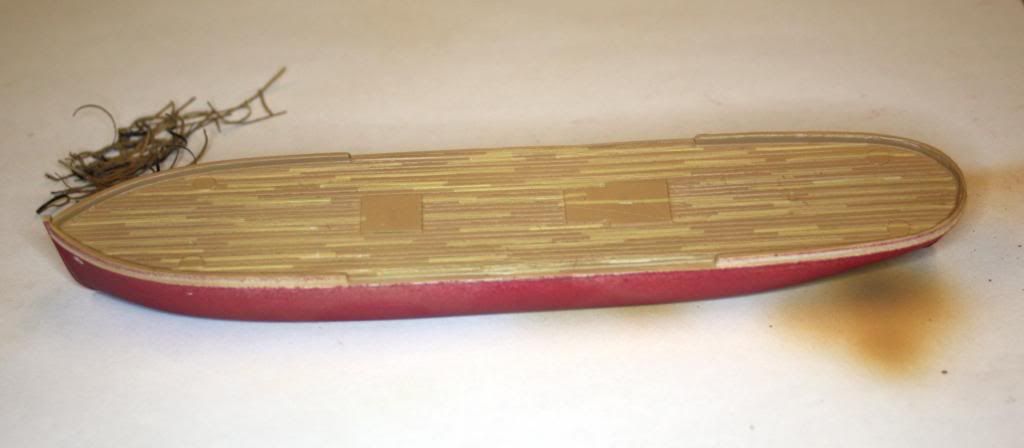
The deck was painted using a light teak brown to begin with mixed together from MM Brown, Yellow, Camouflage Gray, and just a touch of red.  I sprayed a thin coat of the dark color first and let dry for 24 hours.  It was then time to apply the second color to make the planks stand out. 

Using the same color as a beginning point, I mixed a slightly lighter shade for color number 2.  I then cut a bunch of THIN Chartpak Crepe tape in different lengths to represent the planking and stuck them to deck in a uneven fashion.
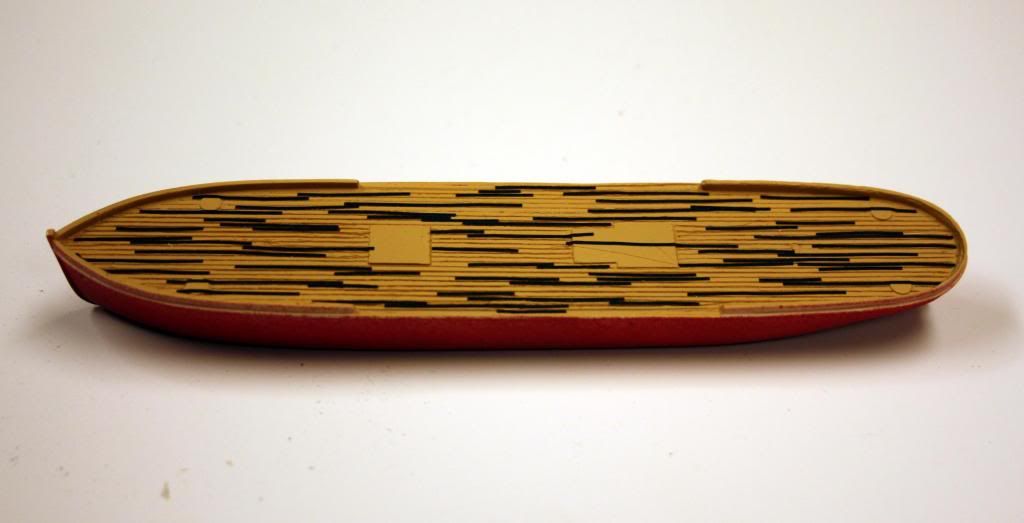
Now all I had to do was spray on a THIN coat of number two, and let dry fro an hour or so.  Removing the tape was easy.  Just use an Xacto knfe with a number 11 blade to pry the end of the tape up and a small set of tweezers will easily remove the tape.  The result is a little too stark, but I had allowed for that.
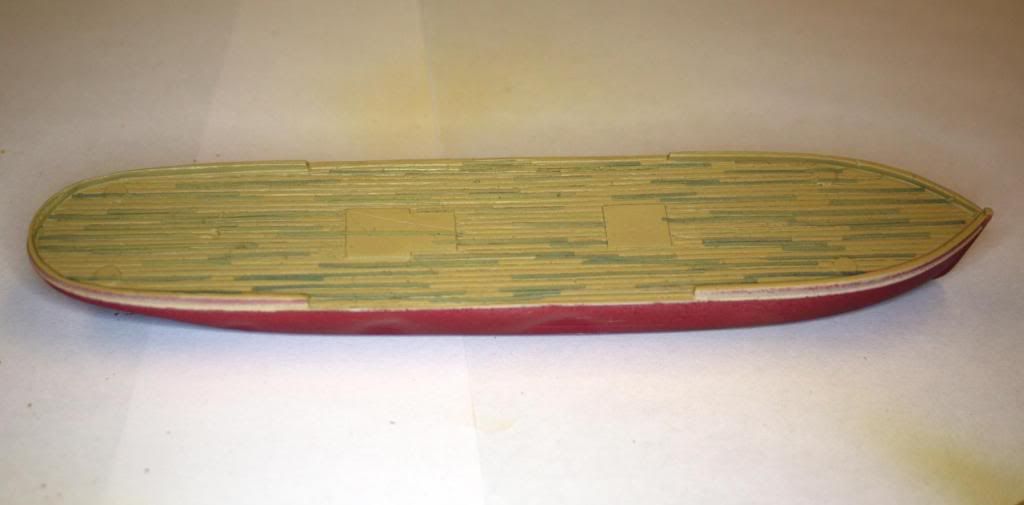
You have choice here.  On a smooth surface like injected molded plastic, a light dusting of color number 2 would blend everything nicely, but I have s surface with molded in planks on resin, so I decided on a chocolate brown wash to make all the planks pop out a bit more and tone down the lighter planks at the same time.

Before adding the wash, I sprayed the deck with a clear gloss coat to help the wash run smoothly into the plank seams and only slightly tint the deck planking colors.
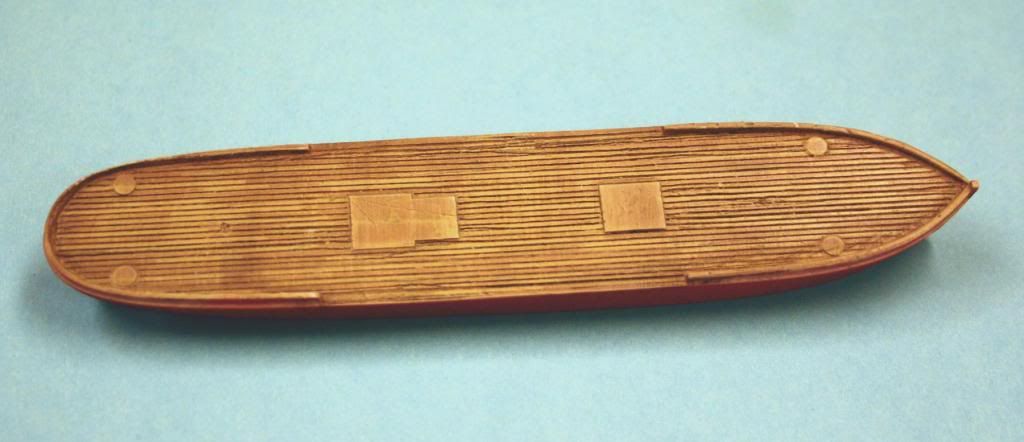
Here's the finished deck.  We are all ready to begin adding parts and finish painting the hull.  I know it looks like a lot of wood here, but it will be broken up quite a bit by the addition of the two guns, stack, rigging and other deck equipment.

"A man cannot say he has fully lived until he has built a model ship"

Ronald Reagan

  • Member since
    March 2004
  • From: Spartanburg, SC
Posted by subfixer on Monday, January 7, 2013 8:54 AM

As a resident of Hampton Roads and as a retired shipyarder at the Norfolk Navy Yard, I really appreciate your excellent Civil War subjects. Superb work on this one, too.

I'm from the government and I'm here to help.

  • Member since
    July 2010
  • From: Tempe AZ
Posted by docidle on Tuesday, January 8, 2013 12:00 AM

Beautiful work on the deck Tom, I really like it.

Steve


  • Member since
    September 2012
  • From: Edmond, Oklahoma
Posted by Tom Cervo on Tuesday, January 8, 2013 6:22 PM

Next is the smoke stack.  The Hampton had a slightly different stack than most other Confederate ships in that it has a slight slant to the stern which needs to be depicted in the finished piece.  The kit comes with a 5/16" plastic tube which served as a starting point.  There is to be a photo etched whistle on the stack as well, but I will add that just before I mount the stack to the model.  I cut the 5/16" tube to the proper length which in this case was 1" using a K&E tube cutter.  If you don't have one of these neat little tools, GET ONE.  They come in so handy for so many projects.  I then thinned out the tube to better represent a sheet metal stack.  At this point, I scribed in some rudimentary seams to represent sheet metal.  If I was REALLY industrious, I would add some resin cast rivets to the stack, but since this is to be basically an OOB build for the box art, I chose to skip that detail.

I made the stack Coaming next using the next size up plastic tube.  In this case, 1/4".  It was an easy thing to do.  I just sanded down the end of the tube at a 45 degree angle, then cut it away using an Xacto saw and mitre box.  Coaming is an important addition to any ship model because it serves in real life as a weather striping of sorts, sealing the stack and deck from rain and dust.  Below is a simple drawing to show how to make a typical smoke stack for ships.

"A man cannot say he has fully lived until he has built a model ship"

Ronald Reagan

  • Member since
    September 2012
  • From: Edmond, Oklahoma
Posted by Tom Cervo on Friday, January 11, 2013 1:25 AM

Here's the finished smoke stack with the scribing and photo etched whistle ready to mount to the model.

I added the photo etched grills to the deck after painting the mounting points black.  Since the grills were gray, the black back ground added depth.  I always use a tool I thought up one day to apply small drops of super glue to the model.  I call it a "nub".  It's simple to make.  It's really just a chunk of stretched sprue.  The thinner the end, the smaller amount of glue it will apply.  When the glue builds up on the tip, just cut it away and continue working.

It's now time to mount the model to the base before any more fiddly bits are added that could be bent or broken from too much handling.  Before I began (I guess I should have mentioned this earlier), I drilled a hole in the bottom of the hull to accept a drywall screw.  I had an extra pedestal, so I used that to mount the model to a inexpensive base I purchased a while back.  It was supposed to be for an auto model, but it just filled the bill for the little Hampton even at 1/192 scale.  The only problem I had with the base was that it was plastic, which didn't work well since it was flimsy and wouldn't support the model very well.  I filled the base with resin and that shored it up just fine and allowed a hole to be drilled and support the model on a sturdy surface.

Before I mounted the model though I finished painting the hull and added a little weathering here and there for realism.

The Hampton is turning pretty cool looking so far.  Now for the cool stuff.  The Hampton was primarily a Gun Boat, so she sported a pretty stout Dahlgren 19 pounder on the bow.  The gun on the stern was almost a joke as it was only an 8 pounder which lacked firepower and range. 

"A man cannot say he has fully lived until he has built a model ship"

Ronald Reagan

  • Member since
    September 2012
  • From: Edmond, Oklahoma
Posted by Tom Cervo on Sunday, January 13, 2013 5:03 PM

Here's the guns, ship's wheel and lifeboats so far.  On the guns, take note of the four attachment rings (two on each side) and the tiny elevation screw at the end.  I hollowed out the end of the muzzles of both guns and cleaned up their carriages.  They look rough in this shot, but understand that the life boat is less than one inch long and you can see the end of my pointed tipped tweezers for scale, so when viewing, the model the guns look pretty sweet.  The steering wheel with support was made from four photo etched parts.  The circular part with the handles was sandwiched between the inner and outer rings.  The steering ropes and pulley are at the back.  Once painted the wheel looks like a solid piece.

More photo etched parts to add to the guns.

"A man cannot say he has fully lived until he has built a model ship"

Ronald Reagan

  • Member since
    September 2012
  • From: Edmond, Oklahoma
Posted by Tom Cervo on Saturday, January 19, 2013 9:24 PM

I have the model mostly completed at this point.  There is still a lot of shiny spots due to super glue, but I'll fix that before I finish up as a last step.  I decided to add a little interest to the Hampton by painting her hull bumper white.  This was a common practice among Captains and it made the model look better.  

The 19 pound Dahlgren and 8 pound Brooke cannons were next.   The primary weapon was the big Dahlgren and includes 12 parts to really detail it well while the little Brooke included 10 photo etched parts.   I painted the gun carriages both green to add just a bit of color where I can.  Carriages were also painted either black, or gray, so you have some choice here.  The recoil ropes were added using thin copper wire.  The bow is as on all ships a pretty busy place.  Two anchors, and anchor davit, windlass, flag pole, bitts, gun rigging, blocks, and cat heads (the parts that stick out with the anchor chain on them) really add up so it's important to keep everything "ship shape" and in thier proper place.

The stern was a pretty busy place too when the ship went into action with it's 8 pound Brooke cannon, bitts, rigging lines flagpole, Captain, compass and tiller.  Slight weathering can be seen in this extreme close up.

I'm sure everyone has pretty much figured this out by now, but here's a shot of midships to show how I mount life boats to my models.  I can't imagine standing there and holding those +*$%^ boats in place while the glue dries.  I glued the davits first (duh!) then cut some slivers of wood that would put the boats at about the right height.  After about a half hour I carefully slid the wood out.  Also note in this photo, the support lines to the smoke stack.  I made those from stainless steel wire and add super glue for the small blocks. 

The last thing to do today was making the flag.  I can't stand "flat" looking flags on a 3D model so I use some foil from a Cherry Cordial and sandwiched it in between the decals and allowed to dry over night.  Next we will fold the flag to look realisticly hanging from the staff.

"A man cannot say he has fully lived until he has built a model ship"

Ronald Reagan

  • Member since
    December 2012
Posted by rwiederrich on Saturday, January 19, 2013 9:33 PM

I loved Ronald Reagan.....your model is awesome.

  • Member since
    September 2012
  • From: Edmond, Oklahoma
Posted by Tom Cervo on Saturday, January 19, 2013 9:47 PM

Thank you for the kind words.  The Hampton is really a pretty small boat for 1/192 scale.  It may be 6" long, but the scale is big enough to allow for some nice detailing.  This is a box art build, so I had to be careful not to add anything that didn't come in the kit.  After I shoot some photos for the box art, I plan to add a figure for scale.

"A man cannot say he has fully lived until he has built a model ship"

Ronald Reagan

  • Member since
    September 2012
  • From: Edmond, Oklahoma
Posted by Tom Cervo on Sunday, January 20, 2013 1:54 PM

The foil from the Cherry Cordial is extremely thin so it makes perfect flags.  The only drawback is it doesn't hold a fold as well as thicker foils; something to consider when making your flag.  I used a tooth pick to fold the flag and some red paint to touch up the shiny foil edges.

I added the optional torpedos to add interest and followed that up with a coat of clear flat over the entrie model to remove any shiny spots of super glue.

I have always been a fan of the Maury Gun Boats.  They were an interesting concept that was ahead of thier time, and now I have one to add to my collection.


"A man cannot say he has fully lived until he has built a model ship"

Ronald Reagan

  • Member since
    September 2012
  • From: Edmond, Oklahoma
Posted by Tom Cervo on Sunday, January 20, 2013 1:55 PM

"A man cannot say he has fully lived until he has built a model ship"

Ronald Reagan

JOIN OUR COMMUNITY!

Our community is FREE to join. To participate you must either login or register for an account.

SEARCH FORUMS
FREE NEWSLETTER
By signing up you may also receive reader surveys and occasional special offers. We do not sell, rent or trade our email lists. View our Privacy Policy.