SEARCH FINESCALE.COM

Enter keywords or a search phrase below:

By the deep 17 ...

9311 views
105 replies
1 rating 2 rating 3 rating 4 rating 5 rating
  • Member since
    April 2016
  • From: Ludwigsburg Germany
By the deep 17 ...
Posted by dafi on Wednesday, April 20, 2016 8:12 AM
As my main build HMS Victory by Heller still takes a long way to go over the stages of the lower deck, I made a small side project just to fullfill my curiosity, about some of the things still to come.
 
It all started as I had a piece of formed resin from a test cast from the Heller hull ...
 
800_Victory-guss_3030.jpg
 
... and it was saying "Hy" to me all the time :-)


First the standards: out the scaler and eliminating the "wood"-grains ...
 
Deep17-130222_6494.jpg
 
.... thinning the backsides ...
 
Deep17-130222_6499.jpg
 
... redoing the port sills (to be seen in the middle) ...
 
Deep17-130222_6500.jpg
 
... and here the fake to be seen from the back.
 
Deep17-130223_6501.jpg
 
Cheers, Daniel
  • Member since
    May 2003
  • From: Greenville, NC
Posted by jtilley on Wednesday, April 20, 2016 9:34 AM

I guess I don't understand what I'm looking at here. The gunports in the lower of the two rows seem to be plugged, as though there are going to be "dummy" stub barrels plugging the little round holes. Every example of that kit I've seen has fully opened gunports, with complete, multi-part guns and carriages. What happened?

Youth, talent, hard work, and enthusiasm are no match for old age and treachery.

  • Member since
    January 2015
Posted by rdiaz on Wednesday, April 20, 2016 9:39 AM

Looks like it's not part of the kit's original hull, but a resin cast. I think the holes are there to help re-cut the ports later. Daniel, what's the purpose of this experiment? Does the inside of the gun deck walls actually look like that in the real ship?

  • Member since
    May 2003
  • From: Greenville, NC
Posted by jtilley on Wednesday, April 20, 2016 10:13 AM

Now that I've taken a more careful look, I'm sure rdiaz is right. The upper gunports are plugged in the first picture and opened in the others.

Maybe I'm just dim-witted, but I don't understand the purpose of the experiment either. But it certainly looks like the modeler knows what he's doing.

Youth, talent, hard work, and enthusiasm are no match for old age and treachery.

  • Member since
    April 2016
  • From: Ludwigsburg Germany
Posted by dafi on Wednesday, April 20, 2016 10:14 AM

Sorry I did not want to confuse you too much, but yes, it is a small cutout from the hull area of the fore chains.

Fixed it on the display by a screw ...
 
Deep17-130223_6503.jpg
 
... etch parts and new rails fitted ...
 
Deep17-130223_6506.jpg
 
... and Victory´s old style timberheads being carved ...
 
Deep17-130223_6518.jpg
 
... filling the badly drilled dead eyes ...
 
Deep17-130225_6519.jpg
 
... making the chainplates ...
 
Deep17-130226_6521.jpg
 
... the channels - at least one - ...
 
Deep17-130228_6523.jpg
 
... new profiles and the hull got new planks of better dimensions than on the Heller ...
 
Deep17-130229_6526.jpg
 
... and a tad of color to see what I am doing.
 
All the best, Daniel
  • Member since
    December 2012
Posted by rwiederrich on Wednesday, April 20, 2016 11:26 AM

I'm assuming the original side is NOT a 1/4" thick as is the test casting..the aim(It appears), is to sand off the plug backings, then add port trim so you can actually add guns in their carriages.....instead of the plug gun tips.Wink


Rob

  • Member since
    September 2012
Posted by GMorrison on Wednesday, April 20, 2016 2:09 PM

But it's really confusing because the Heller kit does not have filled gun ports.

Daniel, I think you are maybe making a diorama using the Heller side as a model for a smaller section? And you drilled those holes to remove the over casting.

Appears not to be meant to be seen from the inside.

 Neeto little belt sander! Don't breath the dust!

Interesting...

 Modeling is an excuse to buy books.


  • Member since
    April 2016
  • From: Ludwigsburg Germany
Posted by dafi on Wednesday, April 20, 2016 2:18 PM
Sorry not to be able to answer your questions faster, as they have to be (still?) approuved by the mods.
 
Yes it is a cast from the heller hull and the backside is just thinned to get rid of the overcast. The display started as a mere test piece that suddenly got a life of its own, leading to several twists and turns, just for the sake of enjoying the trying out new technics :-)
 
 
After the first coat of primer I left the can on the cold balcony, stupid idea, as the color got to cold ...
 
Deep17-130229_6530.jpg
 
... which I was made aware by an apart giraffe pattern on the model :-(
 
So back to zero and take down the paint with the help of a scaler. 
 
Deep17-130229_6532.jpg
 
... reworked the splitlines ...
 
Deep17-130230_6533.jpg
 
... and saw (PUN!) the results of this unexpected action. The scratching down the color left some rattling marks.
 
One needs to be able to see and realise, but these rattle marks look very much like the marks of handsawn wood, also seen on older ships.
 
As I was already looking for a long time how to differenciate a painted steel hull from a painted wooden hull, I got aware taht with the slightly uneven levels of the different planks, the different dimensions of the gaps in between the planks and the rattle marks, I am coming quite close to the look I was looking for :-)
 
XXXDAn
  • Member since
    April 2016
  • From: Ludwigsburg Germany
Posted by dafi on Wednesday, April 20, 2016 2:20 PM

And Roberto, I will stoll add some pictures how a ship looked inside on another place here, just gimme time :-)


Cheers, Daniel

  • Member since
    July 2010
  • From: Tempe AZ
Posted by docidle on Wednesday, April 20, 2016 7:49 PM

Dan,

It is great to see you here and welcome to FSM. As usual, I love and I am amazed with your techniques. I'm pulling up a chair because I always learn some great techniques from you.

I have known Daniel for a number of years through various other modeling sites such as the German site Wettringermodelbauforum.com and Modelshipworld.com. Personally, I think everyone should check out his Heller 1/100 HMS Victory thread on Modelshipworld. It is absolutely amazing how he worked and reworked this model to fit his vision. Here is the link:

http://modelshipworld.com/index.php/topic/76-hms-victory-by-dafi-heller-plastic-to-victory-and-beyond/

Also, anyone interested in REALLY going the extra 100 miles on their Victory model, like it isn't a project in itself, Daniel created a number of photoetched sets for his Victory and is now selling the sets here at his site and you owe it to yourself to check out these beauties.

http://www.dafinismus.de/index_en.html

No, I do not work for Daniel but as I have said, I have admired his work for years and would like to consider him a friend. And as always Dan, your English is so much better than my German! 

Lookng forward to to your next installment,

Steve


  • Member since
    April 2016
  • From: Ludwigsburg Germany
Posted by dafi on Thursday, April 21, 2016 3:16 AM

Thank you for all the comments, very welcome!

And Steve, thank you tons for those accolades, I hope I can stand up to the expectations with my tinkering :-)

For me model making never is a straight forward process, in the german forums I was one of the first to break the iron rule: It is glued - it stays!

And so we come to the typical dafinistic approach in model making: Destruction!!!

Deep17-130230_6536.jpg

 
... that is always the bit that small boys love the most ...
 
... and yes, let´s snail around a bit ...
 
Deep17-130230_6538.jpg
 
... rebuild the rails to slightly different dimensions ...
 
Deep17-130230_6539.jpg
 
... and redoing the splitlines with the help of Dymo tape.
 
Deep17-130230_6542.jpg
 

And this led to the next step: duplication of my duplicate :-)


Deep17-130331_6546.jpg


This left me with two slidely different versions of the same area of the ship, the source of the next tests to come.


Cheers and all the best, Daniel

  • Member since
    June 2014
  • From: New Braunfels , Texas
Posted by Tanker - Builder on Thursday, April 21, 2016 8:02 AM

Hello Dan !

Welcome here , and don't worry , Your English is okay .At least you won't have to cringe listening to my German .I like your idea and have done such stuff in the past as gifts for folks who don't have room for the whole ship ! Keep us in the loop , okay ?   Tanker - Builder

  • Member since
    April 2016
  • From: Ludwigsburg Germany
Posted by dafi on Thursday, April 21, 2016 9:30 AM

Thank you tank builder!

XXXDAn


PS: And Hourrrrrray, I am allowed to post straight and therefor reply faster and I can edit some of my writing mistakes :-) :-) :-)


  • Member since
    April 2016
  • From: Ludwigsburg Germany
Posted by dafi on Friday, April 22, 2016 3:20 AM
Those new parts gave me the comfortable position to try out some aging and weathering technics on a comparable base.
 
I used casein based paint, as it is quite resistant against touching but still reworkable in a dryed state.
 
 
So I applied 4 different shades to all 3 pieces, and I had a nice variaty of results.
 
The base was a classical Revell ocher and the application was Pelikan Plaka that was applied generously and then once dried was whiped off with a slightly wet cloth.
 
Depp17_6552b.jpg
 
... looking spectacular, but mostely far too fooked up :-)
 
The good thing on the casein paint is, take a wet cloth and just wipe everything off and redo :-)
 
It prooved that the most spectacular job for me was: waaaaaaaaaaaaiiiiiiiiitiiiiing until the paint gets dry enough ...
 
more trials with the casein paint ...
 
Deep17_6560c.jpg
 
Deep17_6560b.jpg
 
...  and for comparisson another medium: oil paint diluted with original Zippo lighter fuel.
 
Deep17_6560a.jpg
 
And it looks much more realistic now.
 
Cheers, Daniel
  • Member since
    April 2016
  • From: Ludwigsburg Germany
Posted by dafi on Friday, April 22, 2016 3:25 AM
Slowly things are starting to get the intended way ;-) 
 
I chose my 2 favourite samples and was coming from both extrems of application - carefull and loads.
 
deep17-hull_6566.jpg
 
But still this was too fooked, even though already twice reduced. The casein paint is easily to be gradually removed by wet brush, or if far too much by a wet cloth. Here the collection of paints, large brush and an inlay of a sweets box for mixing ...
 
deep17-hull_6570.jpg
 
... here taking off the paint with brush, pipe cleaner and Q-Tipp, afterwards more paint in different shades, allow extremely weeeeeeeeeell drying and taking the exceed of if necessary.
 
deep17-hull_6571.jpg
 
Funnily both samples are coming closer together. Time to start the marks of water running down the sides, easily incorporated with some fresh paint or even only a wet brush.
 
deep17-hull_6572.jpg
 
Made the marks of the scuppers, the black not only being dirt but also the often seen black rot of the surface and gaps if wood is continuously confronted with wet dirt.
 
deep17-hull_6576.jpg
 
And both trials in comparission.
 
deep17-hull_6577.jpg
 
And finally the hinges added and integrated with some shades.
 
Deep17_hull_6593.jpg
 
All the best, Daniel
  • Member since
    July 2013
Posted by steve5 on Friday, April 22, 2016 5:09 AM

daniel , your modeling ability far out strips most of us in this forum , but gee I'm glad your here , I've followed your victory build for at least 2 and a half year's , and I never want it to end , welcome aboard

steve5


  • Member since
    January 2015
Posted by rdiaz on Friday, April 22, 2016 5:15 AM

That is very, very nice. Never heard of those casein based paints. Being Pelikan I don't think they will be hard to find around here. Oil takes ages to dry!


However, since a lot of touching up with wet brushes is required, I'm not sure this will work if acrylics are used as a base. Did you use enamel as your base color?


  • Member since
    April 2016
  • From: Ludwigsburg Germany
Posted by dafi on Friday, April 22, 2016 8:24 AM

Hello Roberto,

yes this was the enamel, but I think the aquacolor would do the job too as they are NOT water solulable once dry.


The Pelikan paint is this one https://www.amazon.com/s/ref=nb_sb_ss_i_2_13?url=search-alias%3Daps&field-keywords=pelikan+plaka+paint&sprefix=pelikan+plaka+paint%2Caps%2C272

Cheers, Daniel


  • Member since
    December 2010
  • From: Salem, Oregon
Posted by 1943Mike on Friday, April 22, 2016 12:38 PM

Daniel,

I just want to let you know how impressed I am with the Victory you're building on Model Ship World. Your stamina, determination, and skill are truly remarkable.

I've only been within about 45 miles of where you live - back in 2007, but I was taken with how beautiful many of the places in Germany are.

Mike


Mike

"Le temps est un grand maître, mais malheureusement, il tue tous ses élèves."

Hector Berlioz

  • Member since
    April 2016
  • From: Ludwigsburg Germany
Posted by dafi on Friday, April 22, 2016 2:54 PM

Thank you Mike for the kind words,

just for clarification: Was the trap the house or the eyes ? ;-)

XXXDAn

  • Member since
    December 2010
  • From: Salem, Oregon
Posted by 1943Mike on Friday, April 22, 2016 5:38 PM

Daniel,

The eyes, the hair, the smile, etc., etc. Whistling

Mike

April 25th: Looks like Photobucket unlinked my pictures from my previous post so I'll let that go. I've edited it and deleted references to and the pictures of Heidelberg, The Black Forest tourist trap, and the pretty sales girl. Mike

Mike

"Le temps est un grand maître, mais malheureusement, il tue tous ses élèves."

Hector Berlioz

  • Member since
    April 2016
  • From: Ludwigsburg Germany
Posted by dafi on Saturday, April 23, 2016 4:52 AM
(Small flashback)
 
This led me to a new sidekick, as I had 2 samples of the 1805 appearence of the Vic and 2 samples of the 1780 look. So I found a nice idea to compare those two ones to see the development and continue my weathering tests on a parallel road.
 
New timberheads were produced fitting the different versions ...
 
 
Deep17-130408_6562.jpg
 
... and applied.
 
Deep17-130408_6565.jpg
 
Nice to see the differences in the position of the channels, the anchor protections and the timberheads.
 
 (Back to track)
 
deep17_6961.jpg
 
... and also worked on the wasp-twins. So painted, redrawn the grooves, guide is the plastic stripe from a labeling machine ...
 
deep17_6927.jpg
 
... and treated the bottom cast with a diluted blach ink to enhance structures. The top is the usual clean version, seen on most models.
 
deep17_6953.jpg
 
Casted new iron brackets ...
 
deep17_6955.jpg
 
... and applied more mess.
 
deep17_6956.jpg
 
Then added some rust, some scupper delicacies, some rust from all the iron work and some chipped color as nicely to be seen even on todays Vic.
 
deep17_6960.jpg
 
A bit rough at the first moment, but if one consider the ships being out for months on blockade duty, I believe this was not the worst ...
 
And it still looks better than the Surprise in San Diego ...
 
Cheers, Daniel
  • Member since
    June 2014
  • From: New Braunfels , Texas
Posted by Tanker - Builder on Saturday, April 23, 2016 7:30 AM

Hello Daniel :

   You did know of course ,many of us used the very product you mention , as , our first thinner and brush cleaner . Zippo lighter fluid is good old Naptha .Used it for years .Still do on occasion . It worked great in Testors paints  and still does !

     The H.M.S. Surprise in San Diego shows what I've said for years  .Salt Air , Water and wave action washes out any color and does so with a vengeance ! Ship-modelers need to take this to heart when weathering the model .  Tanker - Builder         P.S. So there's no confusion - I Specialize in Oil , Gas , LNG and other tank ship models Plus I was employed as Captain for some years on the type . , Hence the handle or nick-name

  • Member since
    December 2003
  • From: 37deg 40.13' N 95deg 29.10'W
Posted by scottrc on Saturday, April 23, 2016 7:57 AM

Hi Daniel and welcome to FSM,

I also have been watching your progress and techniques over at MSW.

Scott

  • Member since
    April 2016
  • From: Ludwigsburg Germany
Posted by dafi on Monday, April 25, 2016 7:49 AM
 
At this point I wondered that nobody did moan, as I did not bolt the channel onto the gunwale but on the normal planking atop instead ?!?
 
...
 
...
 
... so dafi does what dafi knows best ...
 
... DESTRUCTION!!! ...
 
deep17_6971.jpg
 
Positively seen, this gave a nice test, if the painting technic is dafiproof - If I mange to cover up the damages caused by this little action, I am on the right way :-)
 
So fixed the channels on the right hight ...
 
deep17_6975.jpg
 
... coverd the holes with the basic color, first layers with three different shades of brown ...
 
deep17_6977.jpg
 
... and drying-washing of-adding more-and-so-on and it goes the right direction :-)
 
deep17_6979.jpg
 
Close enough to the original version, so I am quite happy ;-)
 
Then went on to the more famous version, the Vic in bee-ing (PUN!)
 
 
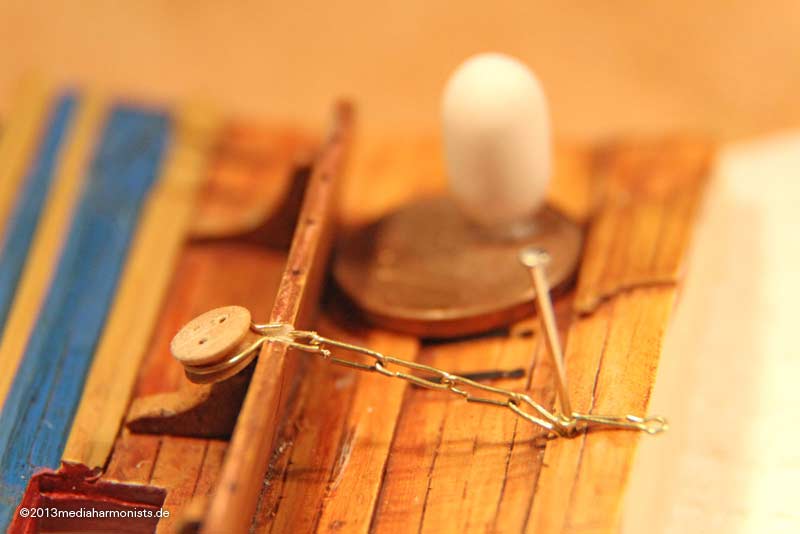
Then folded, soldered and fitted the deadeyes irons ...
 
deep17_130501_6980.jpg
 
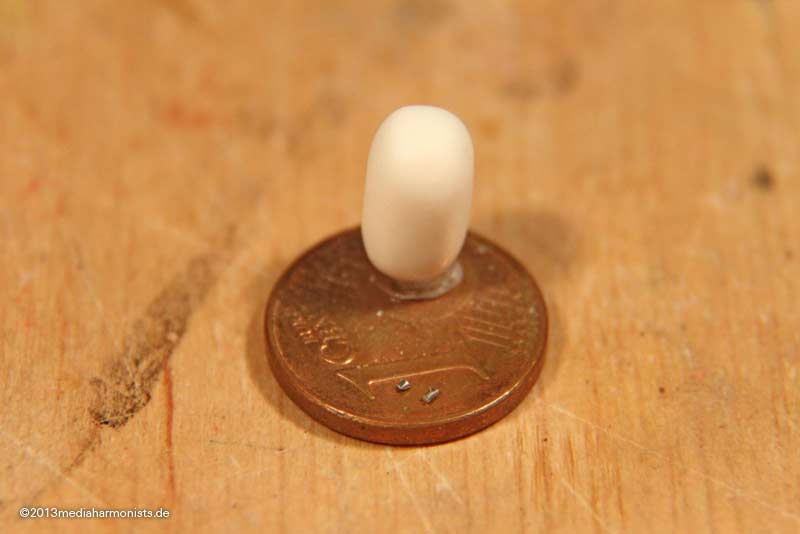
... used the revolutionairy Double-Twin-Super-Drive-Technology for grinding the needle heads for the bolts ...
 
deep17_130501_6985.jpg
 
... put on the batten ...
 
deep17_130501_6989.jpg
 
... and it looks even neater than the ones in P.  :-)
 
deep17_130501_6991.jpg
 
Also added some paint, dirt and rust ...
 
deep17_130501_6998.jpg
 
deep17_130501_7004.jpg
 
deep17_130501_7006.jpg
 
deep17_130501_7009.jpg
 
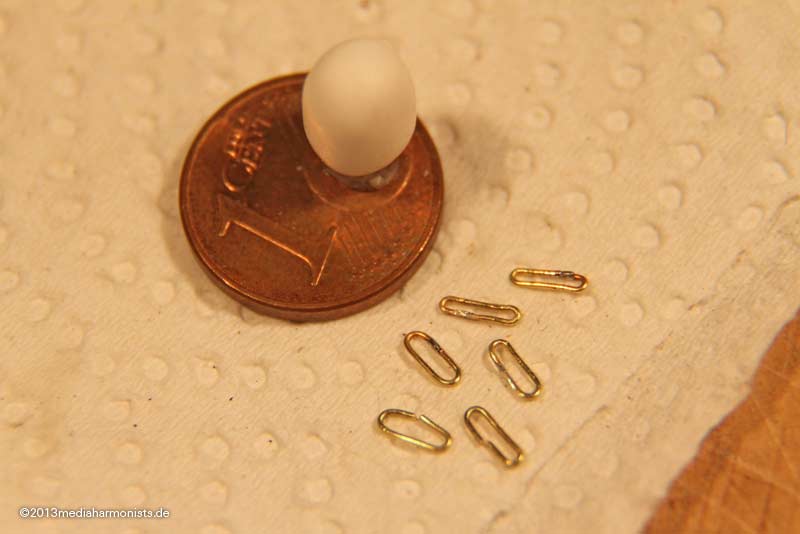
And more tempting as the 1803 chain irons are the 1765 ones: same length but two pieces more!

Testing the lengths, carefully remembering that the outer ones are longer.

Deep17-130511_7067.jpg

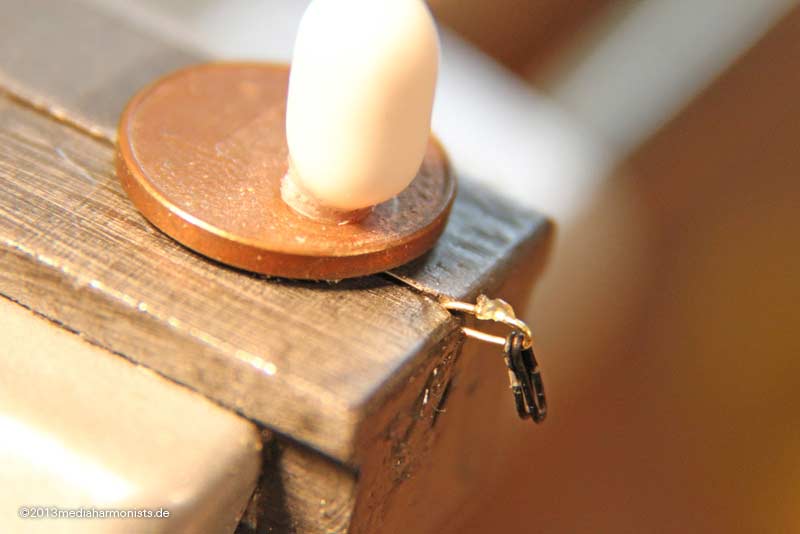
... homeopathic doses of solder ...

Deep17-130511_7075.jpg

... degreased the wire, first soldering the single rings, then joining them on the central part, the flux with the solder embedded, small touch with the hot iron ...

Deep17-130511_7071.jpg

... and the same game with the dead eye and the triple pack ...

Deep17-130511_7090.jpg

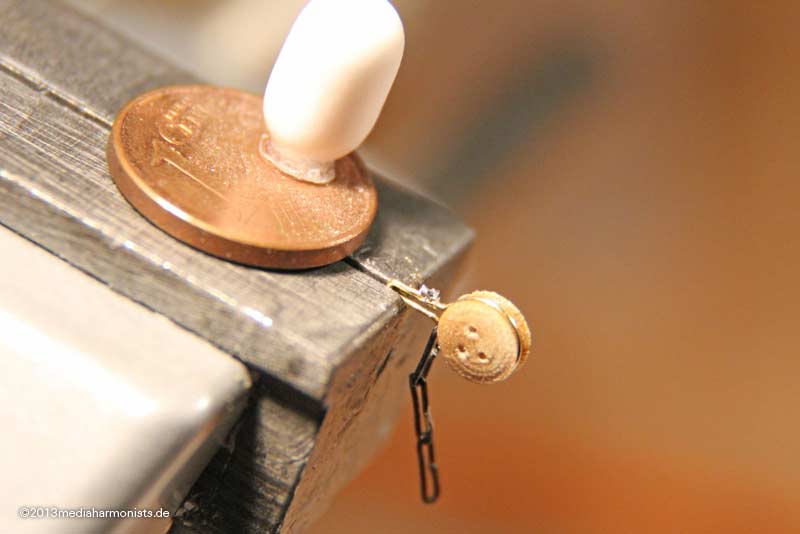
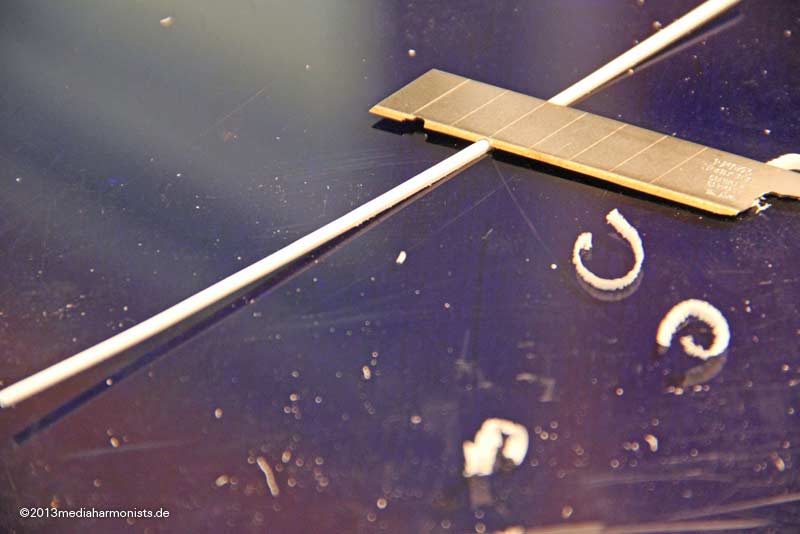
... adjusting over the edge of a blade ...

Deep17-130511_7076.jpg

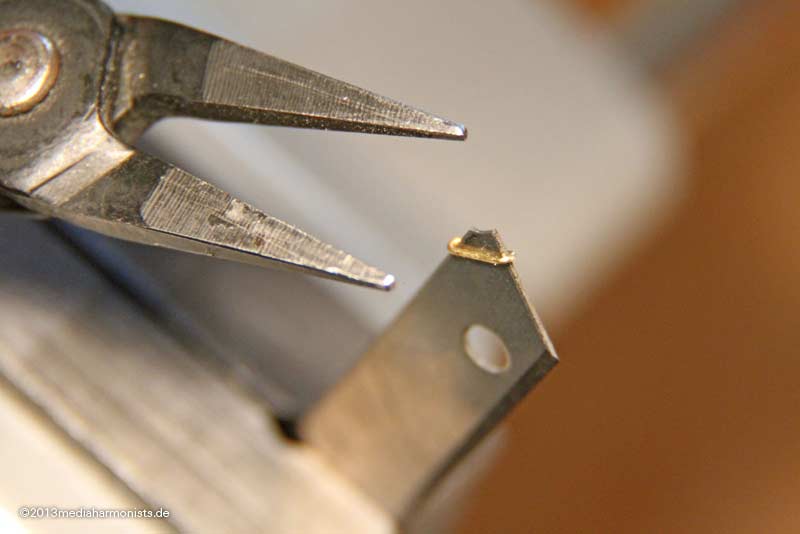
... and comparison: bottom as cut, then solderd and on top adjusted. Inside length 4 mm :-)

Deep17-130511_7083.jpg

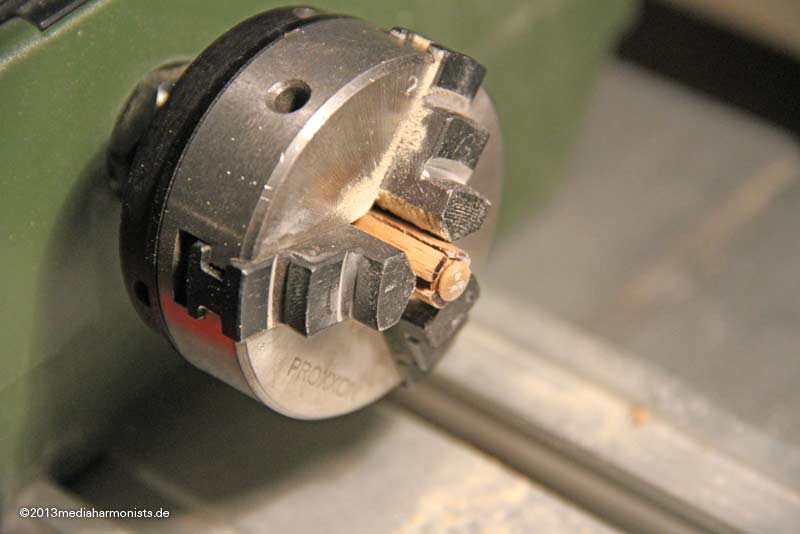
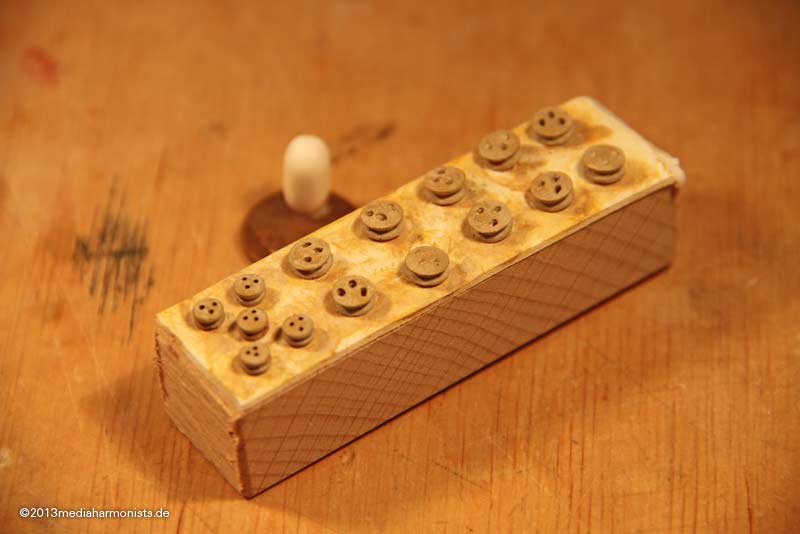
A small jack done for thinning the deadeyes ...

deep17_130518_7179.jpg

... and painting them with casein paint to give a better to scale wood appearance than the original wood ...

deep17_130518_7182.jpg

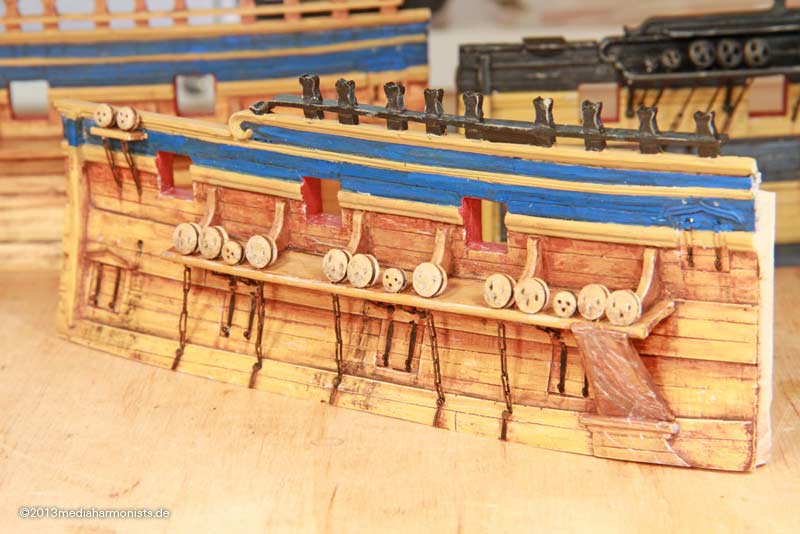
... put on place ...

deep17_130518_7185.jpg

... made the batten to cover the channels ...

deep17_130518_7186.jpg

... and painted and rusted.

deep17_130518_7202.jpg

deep17_130518_7199.jpg

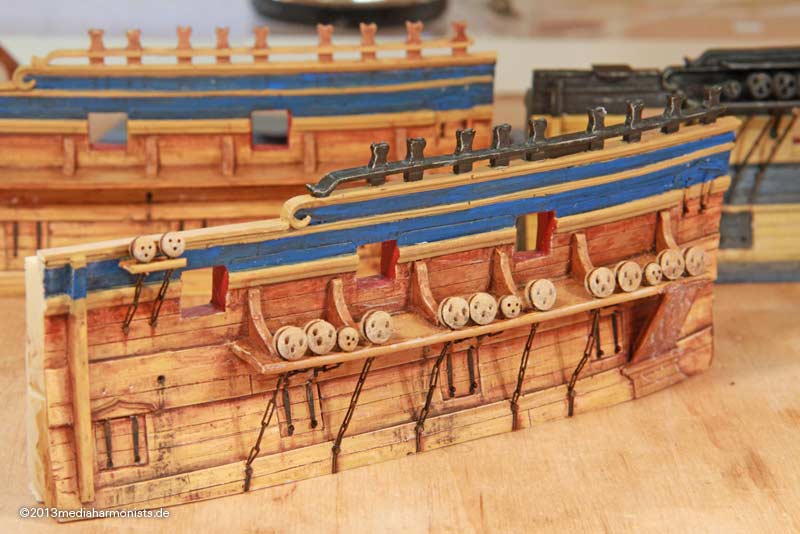
And here the comparison both versions side by side, same ship, only 40 years of difference in between ...
:-)

deep17_130518_7190.jpg
 
... fascinating, as a good friend of mine would say ;-)


Cheers, Daniel
  • Member since
    January 2015
Posted by rdiaz on Monday, April 25, 2016 8:41 AM

Awesome weathering Daniel. I'm assuming you used washes for the yellow parts and dry brushing for the black on the bee line version?

  • Member since
    December 2012
Posted by rwiederrich on Monday, April 25, 2016 9:30 AM

Daniel..fantastic weathering.  I always prefer a vessel weathered to represent the actual vessels appearance...NOT out of the box look.  The sea is a brutal element to wood and iron...and it too must be represented in the final analysis...if true accuracy is to be closely achieved.  You've done well.

Rob

  • Member since
    April 2016
  • From: Ludwigsburg Germany
Posted by dafi on Monday, April 25, 2016 4:31 PM

Thank you both Robs :-)

I think there are plenty of technics combined. Faint wash, different shadings, chipping and  marks are done by brush.

And I think something like a "new" ship never really existed. As the building took months or even years, the ships were already waethered when going out for the first time. I saw this in a small shipyard in Brittany, one was able to always see, where work was done. Fresh marks of light brown wooden chips in silver aged enviroment :-)

XXXDAn

  • Member since
    April 2016
  • From: Ludwigsburg Germany
Posted by dafi on Wednesday, April 27, 2016 7:03 AM
That was the moment that I started to concentrate onto the black´n´yellow version.
 
Got the stub gun carriages fixed on the background messed with paint and gave a brownish oil coat to the barrels as some of the ingredients of the applied coat - rust and tar - suggest ...
 
Deep17_7014.jpg
 
... and the tompions just plain wood without color, sticking out of the barrel a bit as the artifacts in NMM and museums suggest, and not todays fancy colored and crowned gadgets. 
 
Just for fun fitted both versions over the guns :-)
 
Deep17_7010.jpg
 
Deep17_7012.jpg
 
The shoe for the anchor was fixed in the appropriate place means one iron more in the back than heller suggest :-)
 
Deep17_7013.jpg
 
And on it went, some quantum leaps -  means very small and little :-)
 
Fitted the last lid ...
 
deep17_130506_7024.jpg
 
... and fitted with lanyards.
 
deep17_130506_7026.jpg
 
The holes in the brass fittings were deepened into the plastic by means of a hot needle ...
 
deep17_130506_7025.jpg
 
... so the brass is not damaged like with a drill and the deep is automatically fixed by the cones of the needle tip and the size of the hole in the fitting ...
 
deep17_130506_7036b.jpg
 
... and it looks like this.
 
deep17_130506_7033.jpg
 
Grüßle, Daniel
  • Member since
    August 2007
  • From: back country of SO-CAL, at the birth place of Naval Aviation
Posted by DUSTER on Saturday, April 30, 2016 2:06 PM

           words are superfluous at this time


Steve

Building the perfect model---just not quite yet  Confused

JOIN OUR COMMUNITY!

Our community is FREE to join. To participate you must either login or register for an account.

SEARCH FORUMS
FREE NEWSLETTER
By signing up you may also receive reader surveys and occasional special offers. We do not sell, rent or trade our email lists. View our Privacy Policy.