SEARCH FINESCALE.COM

Enter keywords or a search phrase below:

Revell USS America WiP

2841 views
12 replies
1 rating 2 rating 3 rating 4 rating 5 rating
  • Member since
    October 2004
  • From: Northern Virginia
Posted by ygmodeler4 on Saturday, May 13, 2017 5:29 PM
Thanks! I thought about doing that, I believe that's what you said you did on yours. I think I need to burnish it down harder as it didn't quite look right when I practiced on the rudder. I was going to wait til the weather warms up this week to airbrush above the waterline, but I said to heck with that and brush painted it, just like it would've been in the 19th century I reckon!

-Josiah

  • Member since
    September 2012
Posted by GMorrison on Saturday, May 13, 2017 4:56 PM

That's looking really nice, Josiah. See though, the nails molded into the part are telegraphing through. You might just burnish down your tape and let them show through.

 Modeling is an excuse to buy books.


  • Member since
    October 2004
  • From: Northern Virginia
Posted by ygmodeler4 on Saturday, May 13, 2017 12:24 PM

Not much progress to show, mostly just been soaking everything in. Started working on the coppering, as soon as I saw a model that wasn't painted but "taped" I knew I couldn't paint it. The finish looks a zillion times better than when painted. I think I've found a "system" that works for me, just have to refine it. Not sure if the "rivet" pattern I'm putting on the tape is accurate but I think it looks good, and better than the scattered pattern that was on the hull before.

 Untitled by Josiah, on Flickr

I will paint the black above the hull before proceeding anymore, I just wanted to get a start on putting what I've read in terms of the copper tape to practice.

-Josiah

  • Member since
    October 2004
  • From: Northern Virginia
Posted by ygmodeler4 on Thursday, May 11, 2017 10:36 AM
Not yet, getting married in September so hopefully that's a few years down the road.

-Josiah

  • Member since
    June 2014
  • From: New Braunfels , Texas
Posted by Tanker - Builder on Thursday, May 11, 2017 8:01 AM

Do You Have Children ?

 If you do , then borrow some of their LEGOS or MEGA BLOCKS .They make nice working cradles .   T.B.

  • Member since
    October 2004
  • From: Northern Virginia
Posted by ygmodeler4 on Monday, May 1, 2017 10:09 AM
Thanks for the advice everybody!

-Josiah

  • Member since
    September 2012
Posted by GMorrison on Sunday, April 30, 2017 1:42 PM

I think another perfectly reasonable approach would be to attach the keel directly to the base board at the rudder, and have only one stanchion forward. That would give a little room for adjustment to get her level without a lot of math.

you'll probably need a stanchion with a slot on it for the keel. It could be anything from a short section of stained dowel or square stock, to a short piece of clear acrylic, to a nice brass turning.

Blue Jacket sells them. Call them and it might not be too late to get it (them) added to your package.

 Modeling is an excuse to buy books.


  • Member since
    May 2008
  • From: Wyoming Michigan
Posted by ejhammer on Sunday, April 30, 2017 9:36 AM

I like to use lamp shade risers as I think they look "classy". They are available at hardware stores or places that sell lighting products. Available in 1" tall and 1 1/2" tall, brass, have a male threaded portion that will accept a 1/4 - 28 threaded nut, and a threaded female portion for a 1/4-28 bolt. They can be stacked for more clearance if your model has a centerboard or other keel projection.

I usually drill the hull, place a riser through the hole and run a nut on the threaded part, block the nut in place with pieces of styrene. Then drill the holes in the base and counterbore them from the bottom, insert the bolts and gently snug them up. This aligns everything up. Then epoxy the nuts in place, avoiding getting any glue on the threads. Sometimes I coat the threads with a release agent just in case. After it all sets up you can remove the risers and fit a temporary "working" base to the nuts so you don't get paint/glue etc on the beautiful base.


Completed - 1/525 Round Two Lindberg repop of T2A tanker done as USS MATTAPONI, USS ESSEX 1/700 Hasegawa Dec 1942, USS Yorktown 1/700 Trumpeter 1943. In The Yards - USS ESSEX 1/700 Hasegawa 1945, USS ESSEX 1/700 Dragon 1944, USS ESSEX 1/700 Trumpeter 1945, USS ESSEX 1/540 Revell (vintage) 1962, USS ESSEX 1/350 Trumpeter 1942, USS ESSEX LHD-2 as commissioned, converted from USS Wasp kit Gallery Models. Plus 35 other plastic and wood ship kits.

  • Member since
    November 2005
  • From: Formerly Bryan, now Arlington, Texas
Posted by CapnMac82 on Saturday, April 29, 2017 10:40 PM

ygmodeler4
thought the keel would be thicker so I'm not sure how to put screws in something this small to hold

Drill from above.  Start with a small drill bit, and work up to the size desired.

Any damage to the keel will be hidden by the pedestals.

But, before you drill, cobble up some "V" blocks and adjust them so that the waterline, and not the keel is level.  This kit, as did the ship it represents, has a great deal of "drag" on the keel.  Which means the rudder end is significant;y loer than the forefoot of the bow.  You want the drilled holes forthe mounting screws to be perpendicular to the waterline.

Now, you do not need a hefty screw to hold the kit on it's base.  You can actually get by with 1/8" bolts, you just need a good fit to the pedestals.  (Note, the rather enormous holes in typical ship pedestals are menat to pass the threads of wood screws for wooden kits.)
My preference is to take simple machine screws or he head bolts and epoy them to the inside of the hull.  But, you can equally epoxy he nuts into the hull, aligning them using the bolts/screws passed through the keel (use vaseline or oil on the threads to prevent inadvertent gluing--don't ask me how I know).

That, at least, is my 2¢

  • Member since
    October 2004
  • From: Northern Virginia
Posted by ygmodeler4 on Thursday, April 27, 2017 8:34 PM

I've started putting plastic together at last, got the two halves of the hull together, the instructions have the rudder halves going on before the hull, but I test fitted and you can do it afterwards so I will wait on that. I know I want to pedestal mount this, but I also thought the keel would be thicker so I'm not sure how to put screws in something this small to hold on a "working" base while it's being built. I'm waiting for the Bluejacket book/plans to come before I do anything else substantial, hopefully they're on the way.

 Revell USS America by Josiah, on Flicker

 Revell USS America by Josiah, on Flickr

 Revell USS America by Josiah, on Flickr

-Josiah

  • Member since
    October 2004
  • From: Northern Virginia
Posted by ygmodeler4 on Saturday, April 22, 2017 9:37 PM

Thanks for checking in GM, I wanted to get this thread started to get the creative juices flowing and what not. Your America is very nice, it'd be nice to see the work continue on it!

Thanks for the book reference, it's ordered (gotta love Amazon Prime), it should make for good motivational reading during the dull parts of the building of this ship to keep pressing on. I took a look at that Bluejacket drawings. I'm not familiar with how they do their scaling...would the plan and book set for this 1/4" scale model be the one you're referring to (link below)? They also have an 1/8" scale.

http://www.bluejacketinc.com/kits/america.htm

I wasn't going to make any improvements but after looking through the plastic at the sprues (if I cut it open I know I'll start prematurely), I can understand why you replaced the aft-most cabin structure (the one that is in a museum).**EDIT: I see the skylight you put in your post, that is what I was talking about** This kit is full of possibilities, I just need to nail down how I'm going to attack it.

-Josiah

  • Member since
    September 2012
Posted by GMorrison on Saturday, April 22, 2017 9:07 PM

Swell sprue shot! Makes me want to finish the model.

If you are interested in the history, the book I'd recommend is "The Low Black Schooner: Yacht America 1851- 1945".

Blue Jacket Shipcrafters sells a great set of drawings on 1/48 scale, and the instruction book for their kit. Three sheets including all of the rigging details. Those in the Revell drawings are pretty useless. The book has all the info you'd ever need if you want to improve any parts of the kit. Or just read for enjoyment. 

Josiah you have made a great choice, picking a large scale schooner. So many modelers jump in with the big Revell Constitution or another three mast fully rigged ship and burn out from the tedium of all the repeat assemblies. I really like schooners as a subject, and the America is a classic.

Her stint as a USN ship was fairly brief, after her racing career. If you choose to model her as the racer, just skip the cannons.

Her fate was ignominious. But her beautiful skylight remains, on display in the Mariners Museum in Newport News, VA.

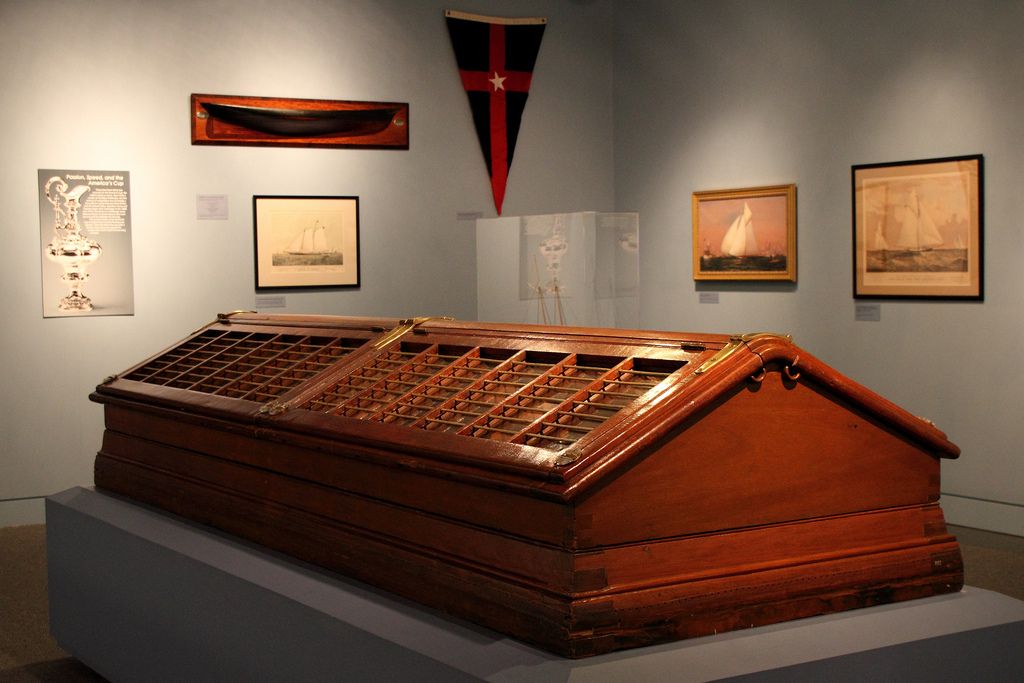
 Dr. John Tilley, member of this forum, worked on the restoration of that furniture.


 Modeling is an excuse to buy books.


  • Member since
    October 2004
  • From: Northern Virginia
Revell USS America WiP
Posted by ygmodeler4 on Saturday, April 22, 2017 7:12 PM

After sifting through many posts I squeezed the trigger on the Revell Germany offering of this for my first sailing model. My fiancé has been wanting me to build a sailing ship for quite some time so I figure nows a good as time as any. I'm still trying to decide on some things, and waiting on the "Neophyte Shipmodeller's Jackstay" to come in the mail. I believe I'm going to pedestal mount this and am aware of the issue on making sure I mount to the waterline and not the keel. While I'm anxious to jump right in I'm still trying to gain a little more knowledge on the subject (vocabulary especially) and different options/techniques to doing things. So as of now here's where I'm at:


-Josiah

JOIN OUR COMMUNITY!

Our community is FREE to join. To participate you must either login or register for an account.

SEARCH FORUMS
FREE NEWSLETTER
By signing up you may also receive reader surveys and occasional special offers. We do not sell, rent or trade our email lists. View our Privacy Policy.