SEARCH FINESCALE.COM

Enter keywords or a search phrase below:

Chinese Steamer 'Taiping' (Meng 1/150) - Build Log

6689 views
21 replies
1 rating 2 rating 3 rating 4 rating 5 rating
  • Member since
    August 2018
Chinese Steamer 'Taiping' (Meng 1/150) - Build Log
Posted by JurS on Tuesday, September 18, 2018 3:18 PM

Having completed my little Heller Tartane, I have started on my next project. This is again a ship in 1/150 scale, but of a rather different subject:


This is Meng Models ship model of the 'Taiping', a ship that featured in a Chinese film released a few years ago, 'The Crossing'. This kit is a movie tie-in and a rather sumptuous production. Someone else posted an in-box review of the kit on the forums here a couple of years ago, but I haven't seen a build log yet.


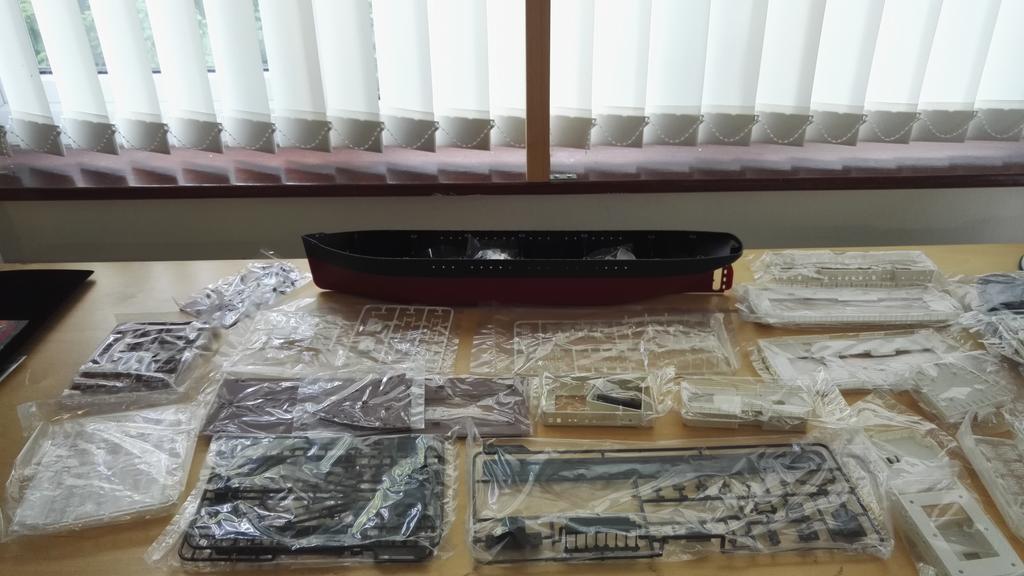
This is quite an expensive kit but I managed to find one with a hefty discount. It comes in a huge box, lined with felt and the instruction manual is a hardcover booklet! There are lots of parts on a number of sprues, pre-coloured in various colours and transparencies. The parts look well detailed and are totally flash-free. In the blurb it says that the kit can be completed as snap-together without cement. The hull comes in one part, pre-coloured, and is 21"/53 cm long. A USB LED strip is included to provide interior lighting, a bit of a gimmick perhaps but we'll see.

Although the colours of the parts look reasonably sensible, I have decided to give everything a coat of paint to get rid of the plasticky sheen, and to bring out some more detail, of which there is plenty. For the rest this will be pretty much an out-of-the-box build, with just some minor additions such as rigging. Apparently there was an aftermarket wooden deck set available but I couldn't find it for sale, and anyway I think I may be able to do something with the plastic as it stands.

A few pictures of what is in the box:

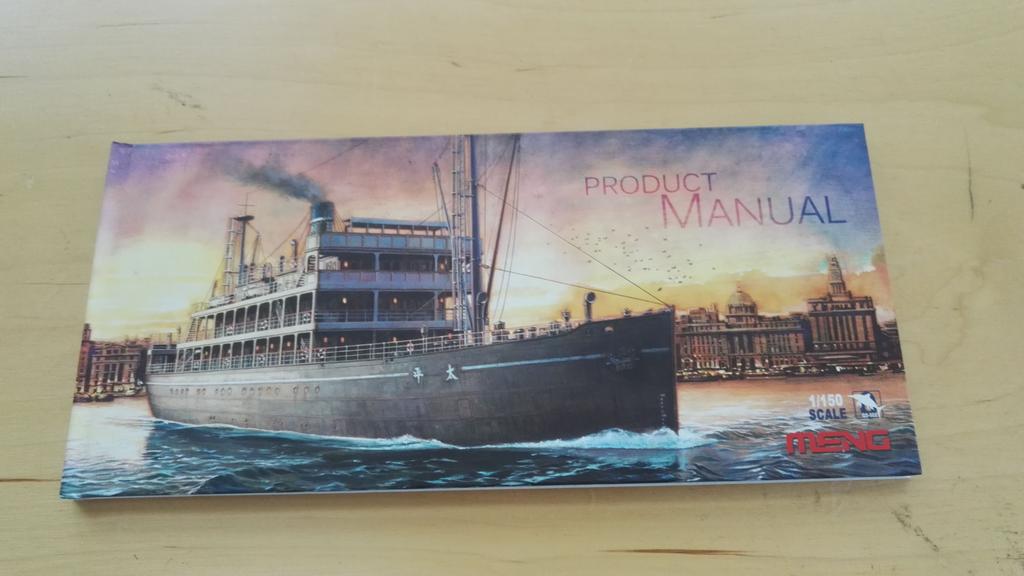
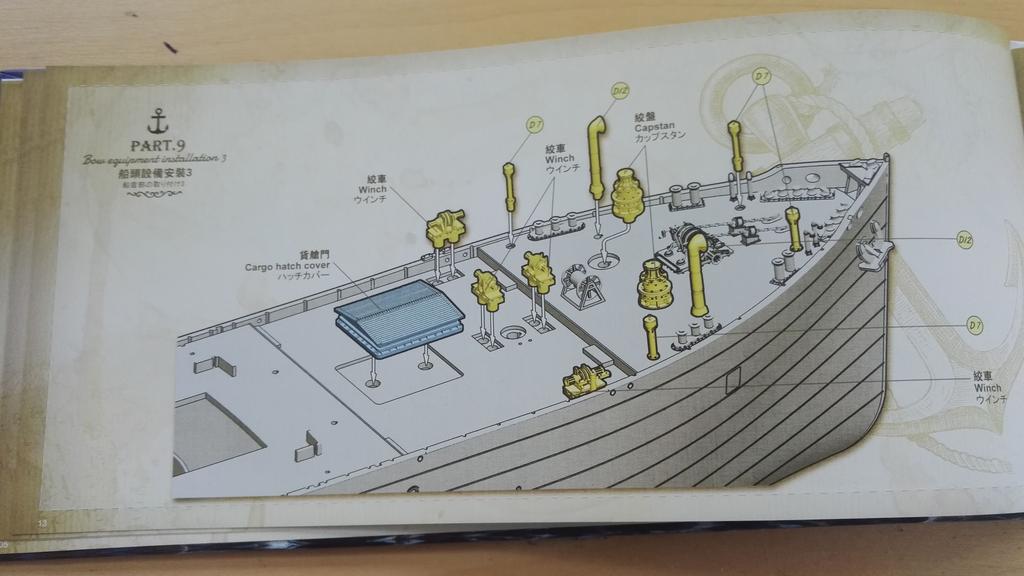
And the instruction book, which is almost entirely in Chinese but has very clear diagrams referring to numbered parts.


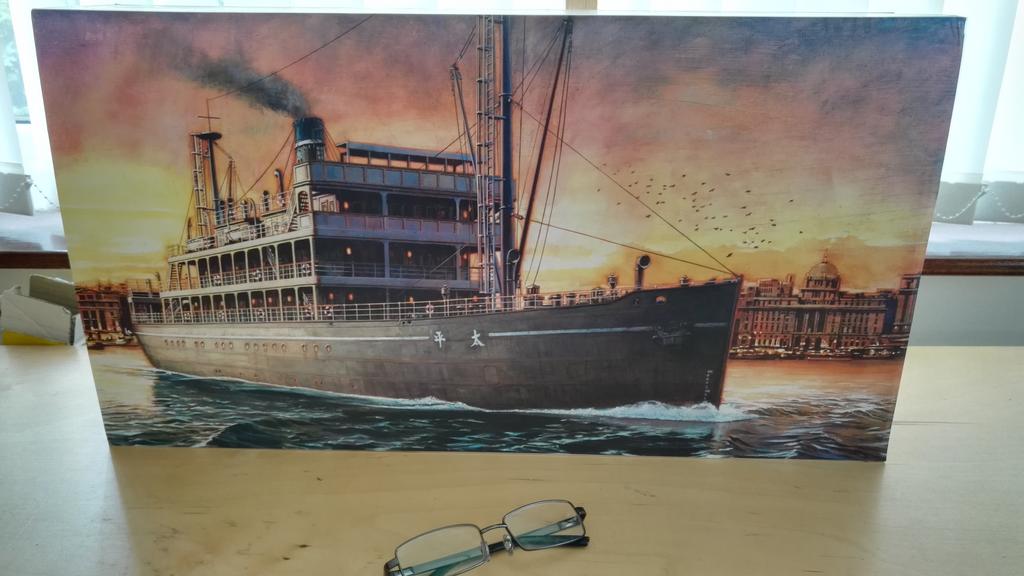
According to the info on the Meng website, "the steamer Taiping is a type of Great Lakes passenger-freight ship made in the American Manitowoc shipyard. It was launched in 1920 with the load of 2050 tons. During WWII, it was used as the short supply ship for U.S forces. On July 14th 1948, it was changed (sic) into a passenger ship by Shanghai Zhonglian Company with the carrying capacity of 508 passengers, travelling between Shanghai and Keelung." This was a major calamity and the ship went down with the loss of 1500 lives.

I have tried to find more info on this ship but so far I've drawn a blank. A website about the Manitowoc shipyard lists many vessels constructed there over the years, but no mention of this one. I can't therefore definitely say if this is a model of a historic protoype or merely a representation of what was used in the film, but in any case I think it looks good and worth building.

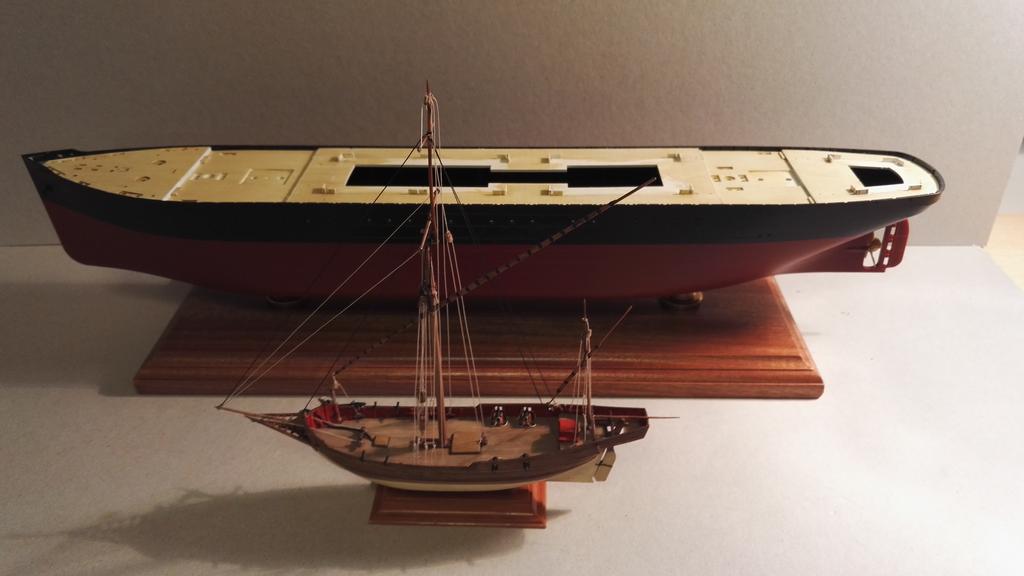
To compare it with my little Tartane, at the same scale of 1/150:


  • Member since
    August 2018
Posted by JurS on Tuesday, September 18, 2018 3:23 PM

I thought that this model wood look good on a wooden base rather than on the plastic stand provided, so I did some measurements and ordered a nice looking base plus some brass lamp fittings. I drilled two holes in the bottom of the hull and glued nuts in place with CA glue and araldite. I won't mount the model just yet to avoid any possible mishaps with the base.

The rectangular hole in the hull is for the USB connector on the LED strip. I blanked the holes for the original stand to stop the light from leaking out.

  • Member since
    August 2018
Posted by JurS on Tuesday, September 18, 2018 3:36 PM

I don't have an airbrush so I resorted to rattle cans for the basic colours: Tamiya NATO Black for the upper hull and deck fittings (a very dark grey shade that looks better than pure black imo), Tamiya Dull Red for the lower hull, and a DIY chain Satin White rattle can for the superstructure, railings and ladders, life boats and other small details. I want to spray the masts, booms and air shafts deep yellow and have ordered a can of Tamiya Chrome Yellow for this.

The decks have recessed imitation planking, there are paper stickers provided with a kind of wood colour but these look rather bland. Instead I rattle-can sprayed the decks with a Cream colour and after drying went over them with a mix of cream, light and dark brown oil paint, wiping most it off almost immediately after applying. This brings out the planking and gives a more lively representation of a wooden deck.

When all this was dry I inserted the hull glazing (all portholes are glazed) and the LED strip.


Then I glued the main deck which comes in three parts.


This is as far as I got. Because the kit is meant to snap together the tolerances are very tight. I dry fitted the first bits of the superstructure and struggled to get them off again! The fit is so tight that I am worried about breaking something, or not being able to push everything home, so today I filed out all the location slots to provide a bit more play.

I also detail painted some of the railing tops. There is a detailed painting guide in the booklet. Next step then is to start mounting the superstructure and deck fittings.

  • Member since
    September 2012
Posted by GMorrison on Tuesday, September 18, 2018 3:37 PM

It's good to see one of these built. I was interested in it, but like you say, it was a little too expensive for me.

I also tried to track down the actual history, and like you could not come up with anything.


Interested to watch this.

 Modeling is an excuse to buy books.


  • Member since
    August 2018
Posted by JurS on Tuesday, September 18, 2018 3:48 PM

I just noticed that the thread title has mangled the quotation marks. Sorry for that! I'm afraid I don't know how to fix this!


(Edit: Thanks to the moderator for fixing this!)

  • Member since
    August 2018
Posted by JurS on Friday, September 21, 2018 9:57 AM

A little bit more progress, the first level of the superstructure is installed, and I'm working on the deck fittings.

I have now come to a (literally) small problem. Right on the prow of the ship are some bitts. I managed to get one on, the round one you can just make out right at the front in the following picture:

Next are two very small items, I think they are cable guides of some sort. These are utterly tiny:

(The ruler divisions are mm's).

Installation should be like this:

This has me stumped. The problem I'm having is that I'm struggling to pick up these pieces and insert them into their slots (the small elliptical slots immediately behind and just to the side of the round item, you can just make out the starboard one in the picture). Fingers are obviously out. I tried tweezers, of various types, but the moment you try to squeeze it in, the part pops out and flies off. I was lucky to find them on the floor - twice...

So, that doesn't work either. I also have a self-closing type of tweezers that at least grips them reasonably well, but not quite tight enough so that I can exert any pressure to drive them home. Anybody have any ideas on how to pick them up and drive them home? What would be the best tool for this?

For now I will leave them off, until I have a solid idea on how to proceed. Faffing about just risks losing them forever to the carpet monster.

The situation is not helped by the extremely tight fit of most of the parts (because the kit is supposed to be snap-together). When assembling and placing the other bitts I have opened up all location slots with broaches and needle files, otherwise I have to put so much pressure on the parts that I fear something will snap. It makes for slow going but then, there is no hurry.


  • Member since
    August 2012
  • From: Parker City, IN.
Posted by Rambo on Friday, September 21, 2018 10:23 AM
Try a toothpick with a bit of bluetac on the end. If you don't have that maybe a small piece of chewing gum lol.

Clint

  • Member since
    August 2018
Posted by JurS on Friday, September 21, 2018 10:30 AM

Thanks, I might try that. I could cut off the locating pip so I don't have to force it in, pick it up the way you describe and glue it with a tiny drop of CA.

  • Member since
    June 2014
  • From: New Braunfels , Texas
Posted by Tanker - Builder on Friday, September 21, 2018 2:39 PM

Hi ;

 On those I would definitely enlarge the mounting holes !

  • Member since
    July 2013
Posted by steve5 on Friday, September 21, 2018 3:56 PM

these are a handy tool for that kind of thing jurs . you can look them up on u-tube .

www.umpretail.com/products/ultimate-photo-etch-placer


  • Member since
    August 2018
Posted by JurS on Saturday, September 22, 2018 10:16 AM

Thanks for all the tips, guys. Those photo-etch placers certainly look worth having.

In the meantime I did manage to get the little b*****s on. I held them down on the cutting mat with my nail, then trimmed the tab a little, picked them up ever so carefully between my nails and pushed them home, with a touch of CA.

Also fitted some more deck furniture. The anchor winch is quite detailed, made up from 13 separate parts. Unfortunately I can't install it just yet because one of two the ultra fine anchor chains is missing, so you won't see it for a while. I've emailed Meng and hope they can send me a replacement.

  • Member since
    December 2010
  • From: Salem, Oregon
Posted by 1943Mike on Saturday, September 22, 2018 11:10 AM

JurS,

Nice work so far.

As to the small bits you were having a little difficulty placing in their "slots", you ended up solving the problem in a way that worked for you. Next time, for less sturn und drang, just do what TB suggested ... much, much easier.

Mike

"Le temps est un grand maître, mais malheureusement, il tue tous ses élèves."

Hector Berlioz

  • Member since
    August 2018
Posted by JurS on Wednesday, September 26, 2018 8:11 AM

Made some more progress on this ship. First came the main deck railings, they come in a number of smaller segments and fit into slots to the side of the deck:


Then the decks. I was a bit apprehensive about these, the 30-odd supports need to be slotted in at the same time as lowering the deck into its location holes.

I need not have worried, it all came together very nicely. I had filed down all of the locating tabs a little before fitting, without them becoming too lose. Everything lined up and fell in place beautifully.

Unfortunately two of the fragile railing segments came loose, but they can be fitted with a bit of glue later.

The second deck likewise fitted quite easily.

She is beginning to look like a real steamer.

I also got an email back from Meng customer service and they will mail me the missing anchor chain.


  • Member since
    September 2013
  • From: San Antonio, Texas
Posted by Marcus McBean on Wednesday, September 26, 2018 3:31 PM

I was doing some research on another ship built at the Manitowoc shipyard when this kit came out and I could not find any record of that ship being built by them.  I could have missed it but I check the years before and after when they said she was built and I was not able to find any ship her size built or name.  Didn't spend much time with it because I was more focused on my original seach and moved on.

Marcus

  • Member since
    August 2018
Posted by JurS on Thursday, September 27, 2018 1:34 AM

The name of the ship is Taiping (although the box only says 'The Crossing'). Wikipedia has a very short entry on a ship of this name, stating that it was built in 1926 in Hong Kong for the Australia Oriental Line, used by the Royal Navy between 1941 and 1947, and broken up in 1961.

This is completely different from the story presented by Meng relating to the Taiping shipping disaster, so you would think this article has nothing to do with the kit. Until you look at the photograph:

Clearly this ship is of a similar type as the one in the kit, although there are many detail differences too.

My speculation is now that they were going to make a movie about the disaster, tried to find details of the ship involved but drew a blank, and then fell back on this other Taiping to base their movie ship on. They altered some details (as they do in movies), and Meng produced the kit as a tie-in.

It doesn't bother me, I like the model even if it is not strictly according to a real prototype.

  • Member since
    June 2014
  • From: New Braunfels , Texas
Posted by Tanker - Builder on Thursday, September 27, 2018 6:01 AM

Hi ;

 As you can see in the photo , on many of these the stack was larger than the model's stack .This would be the only thing I would change if I could afford her ! Very high price indeed ( for me anyway ) Tanker- Builder      P.S. For some reason she looks almost too stubby , Hmmmm ? ? 

  • Member since
    December 2002
  • From: Derry, New Hampshire, USA
Posted by rcboater on Friday, September 28, 2018 8:23 PM

Tanker - Builder

    P.S. For some reason she looks almost too stubby , Hmmmm ? ? 

TB, that was my reaction, too. When I saw the hull photo, I was surprised at how beamy it was for the length. I immediately thought it has potential for an RC conversion...

What is the length and beam of the hull, I wonder?

-Bill

Webmaster, Marine Modelers Club of New England

www.marinemodelers.org


  • Member since
    June 2014
  • From: New Braunfels , Texas
Posted by Tanker - Builder on Sunday, September 30, 2018 7:28 AM

R.C.Boater ;

 Tried my source yesterday . Didn't have one in stock  . Last one sold Friday . Will try again . If you find out another way let me know , Please ? She looks like she may be about 18" long LOA and Maybe 5" wide by 4" tall from the main deck to keel .

  • Member since
    August 2018
Posted by JurS on Sunday, September 30, 2018 1:20 PM

Finished most of the plastic parts this weekend with the exception of the anchor winch (waiting on Meng to send me the missing chain). Still to do are the rigging of the davits, masts and cargo booms (I'm not too sure of those, actually), and give her a name. Since this is most likely a free-lance ship I am not wedded to the Chinese name in the kit and will go for something a bit more personal to me. I need to experiment with making my own decals for this.

She does look a bit stubby but that is mainly because the height of the superstructure I think. Her length is 21", width is 3 1/2 " and main deck to keel height is 2 1/2".


  • Member since
    December 2010
  • From: Salem, Oregon
Posted by 1943Mike on Sunday, September 30, 2018 10:32 PM

Looking great! Very clean, tidy work.

Are you planning to weather it?

That stack really does look minuscule for the size of the ship .. but I, for one, would not change it if I were building her. To me it would represent just one interesting facet of that vessel - if, of course, it was a real vessel.

Mike

"Le temps est un grand maître, mais malheureusement, il tue tous ses élèves."

Hector Berlioz

  • Member since
    June 2014
  • From: New Braunfels , Texas
Posted by Tanker - Builder on Monday, October 1, 2018 10:44 AM

Hmmm;

 Based on these photos You could lengthen the bow by a full one inch ahead of the deckhouse and the stern behind the deckhouse two full inches to have a Bremen Built style Tramp .

 This ship is open to many design possibilities . I would Definitely enlarge that stack though . Even being more modern the engines of the time had much bigger uptakes for proper exhaust and fuel burn than that would allow .

 By adding one more lifeboat on each side you would have a small  "Panama Steamer " of the time . The only other comment .- On the full side Photo she still looks top heavy in the deckhouse to hull proportions . .

  • Member since
    June 2006
Posted by Paul5910 on Saturday, October 6, 2018 8:24 AM

Nice work JurS.  Thanks for sharing your work here.

JOIN OUR COMMUNITY!

Our community is FREE to join. To participate you must either login or register for an account.

SEARCH FORUMS
FREE NEWSLETTER
By signing up you may also receive reader surveys and occasional special offers. We do not sell, rent or trade our email lists. View our Privacy Policy.