SEARCH FINESCALE.COM

Enter keywords or a search phrase below:

I-400 IJN Aircraft Carrier Submarine Tamiya 1/350

2077 views
10 replies
1 rating 2 rating 3 rating 4 rating 5 rating
  • Member since
    December 2022
  • From: Canada
I-400 IJN Aircraft Carrier Submarine Tamiya 1/350
Posted by Tcoat on Friday, December 16, 2022 7:09 AM
Last year I had been on a bit of seaplane/flying boat kick and while researching I came across the Japanese Seiran aircraft. As I fell further down the rabbit hole I learned about the Japanese I-400 series of aircraft carrying subs.  The history on these subs and aircraft is amazing and anybody that doesn't know it  should give a quick read. https://en.wikipedia.org/wiki/I-400-class_submarine 
Sort of formulated a plan to do the Tamiya I-400 in 1/350 scale and then do a 1/48 Seiran  all folded up with the front of the hanger and start of the catapult scratch built as a base. 
Off I went online shopping and the prices sort of scrapped that idea.


Then one day I was near one of the only places in town that still sells models and popped in for some paint.  There on the shelf was the I-400 kit! Since I happened to have a 25% off coupon I had been holding for a while it is then mine at a cost that made me feel better about what the 1/48 Seiran kit was going to cost me.


So down to business


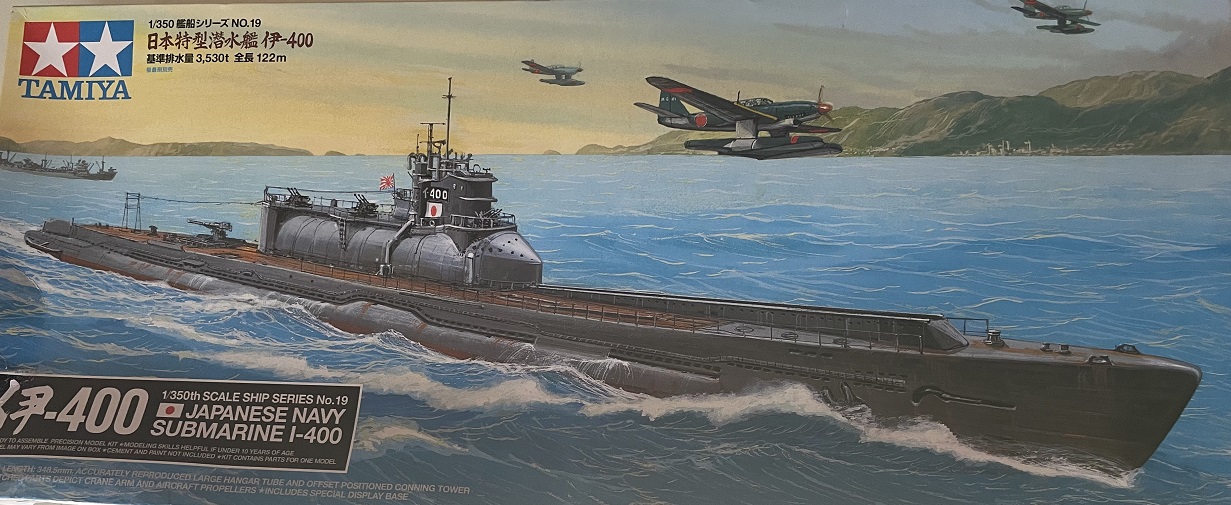
Normal Tamiya box. Even in 1/350 this is a large sub!


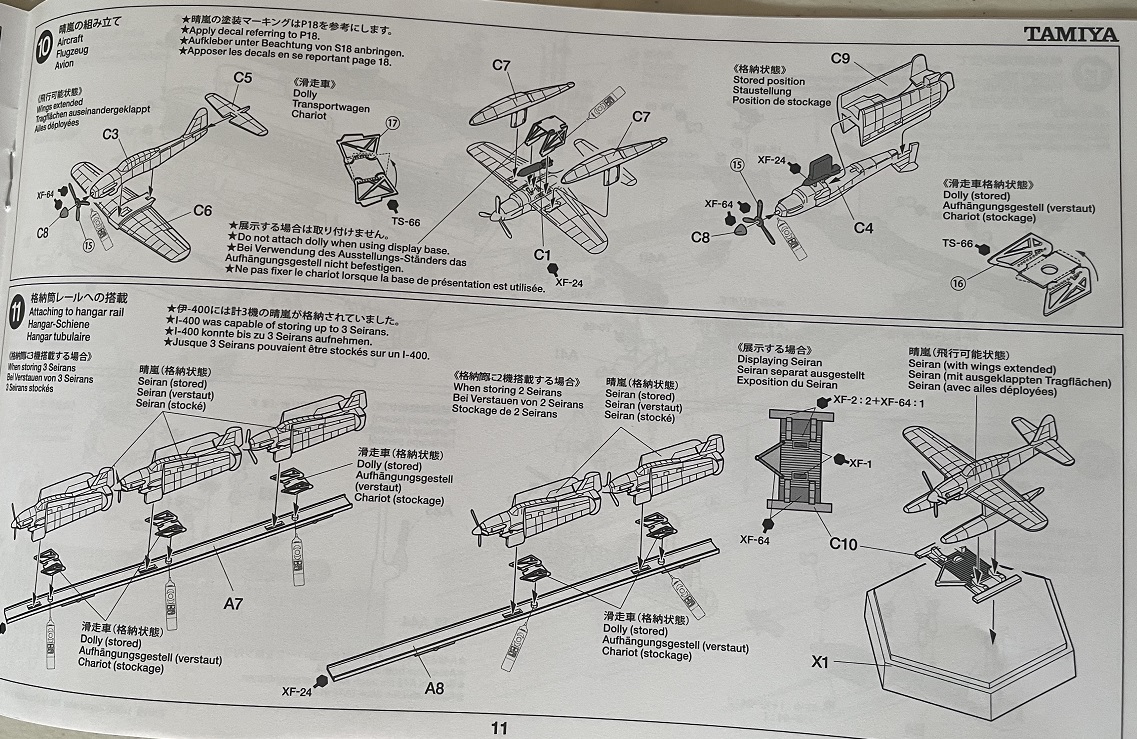
Pretty much your standard new(ish) instructions and paint guide


There is a rather nice stand with hardware to secure it and very well done name plates. There is also a stand to show one of the Seirans separate.


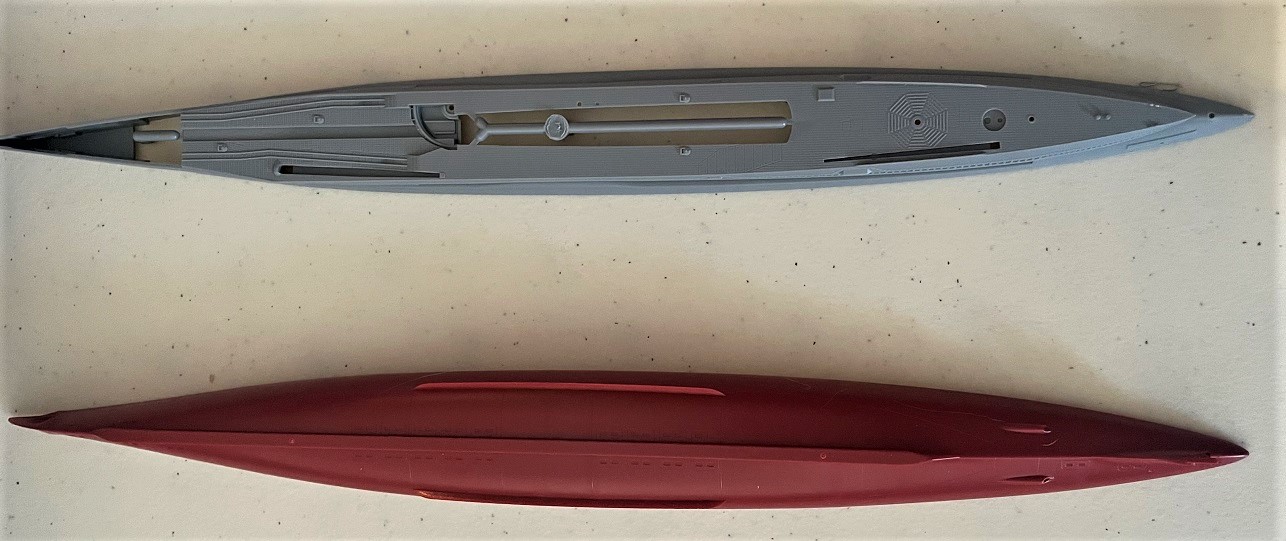
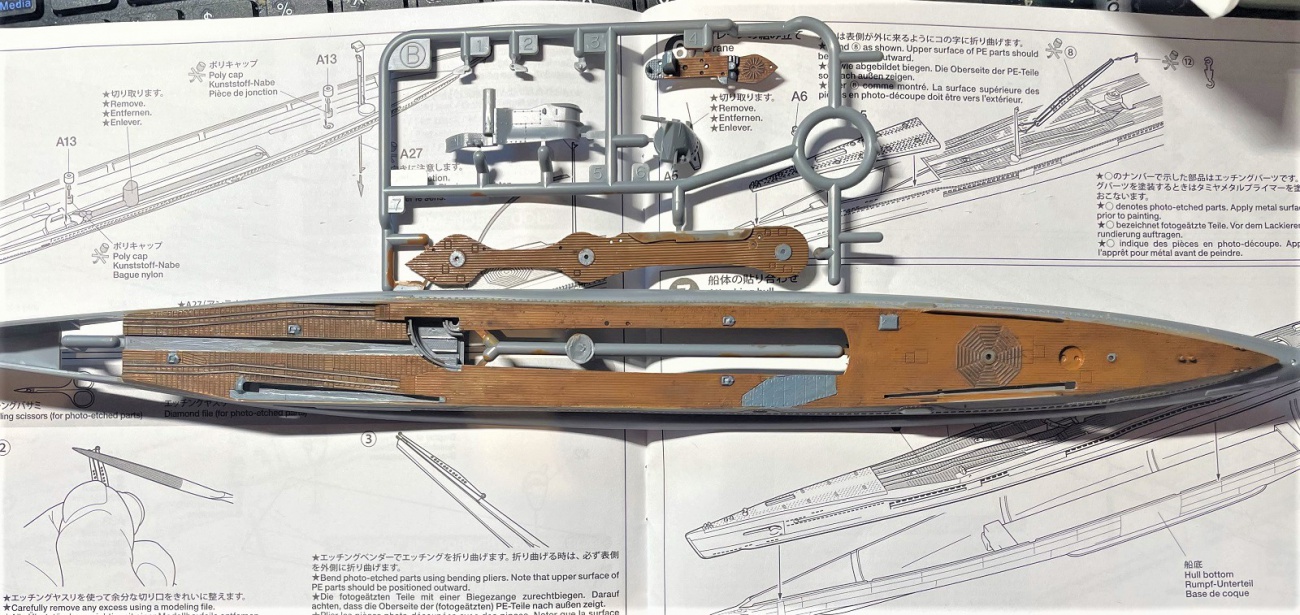
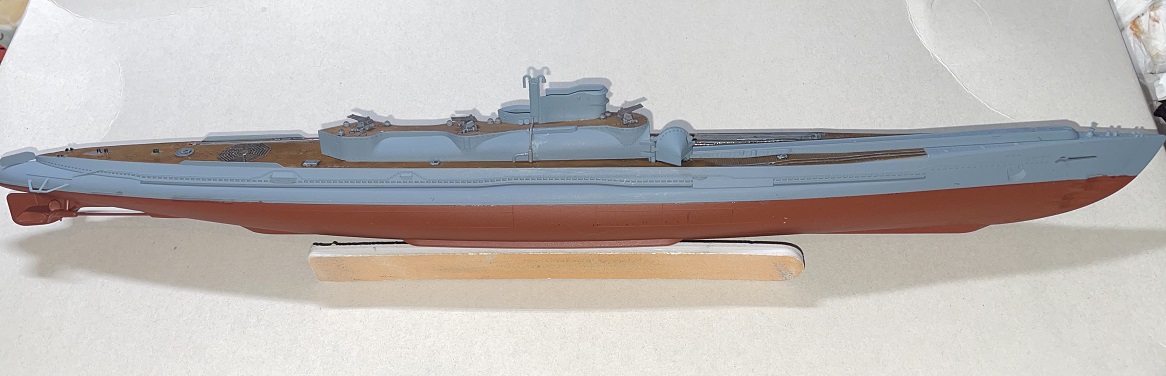
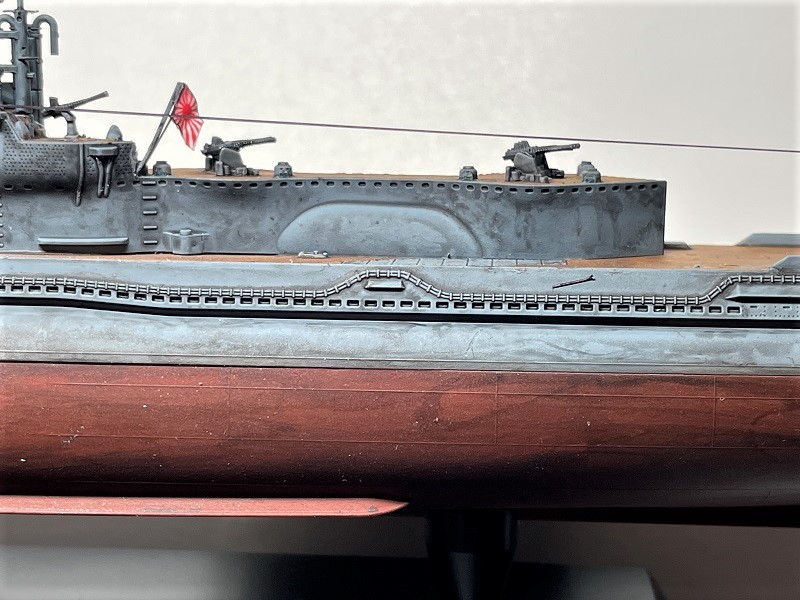
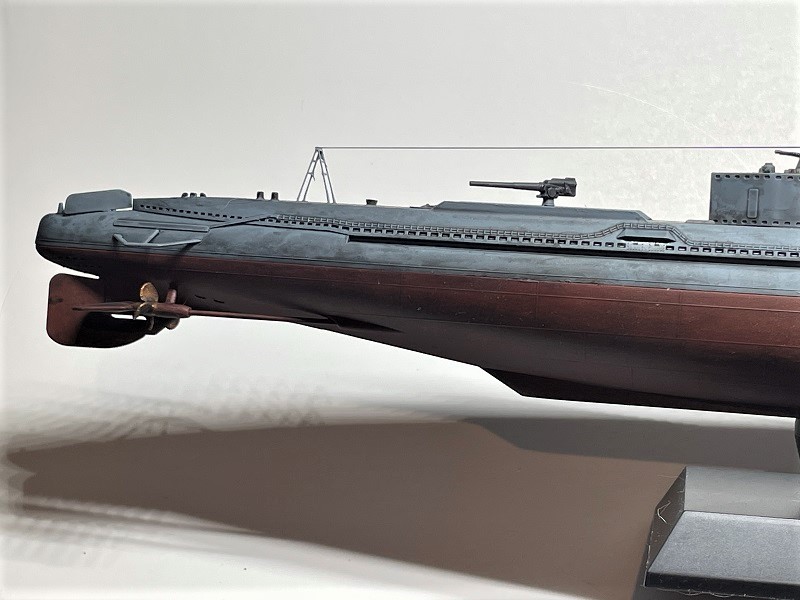
Hull demarcation line will be easy since two pieces. The deck has nice detail. The space between the planks is a bit large for the scale but paint and weathering should fix that up


Not a lot of parts but there never is with subs. What there is are really nicely molded.


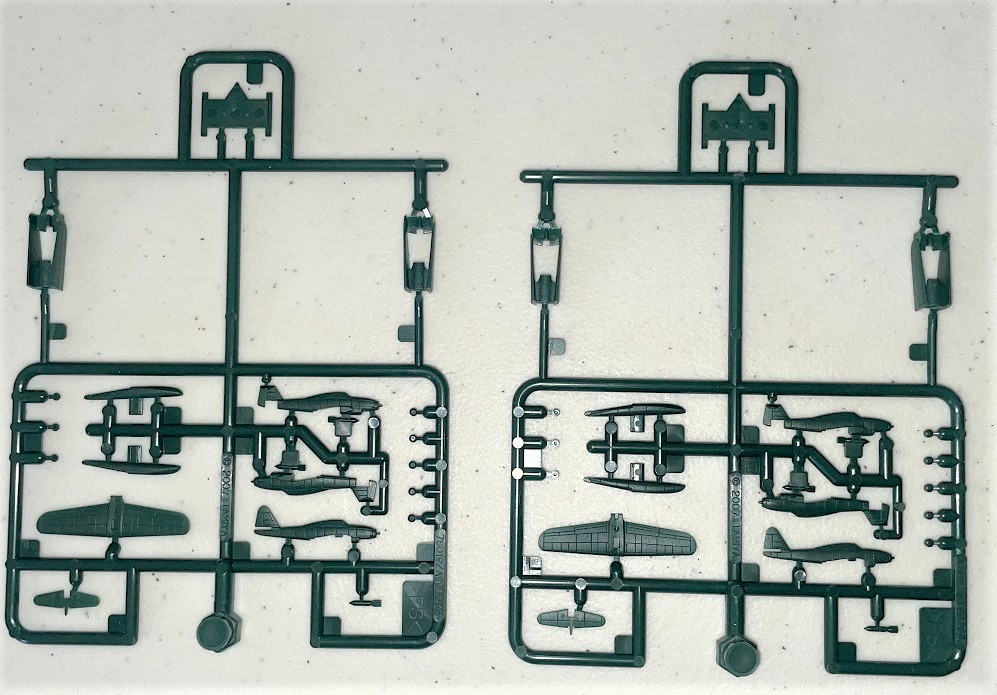
Enough parts for two Seirans all assembled, wings out, ready to fly and four folded up for the hanger. Only need three of them so have a couple of spares for something. They are very well molded. The panel lines are a bit heavy but again paint will help.


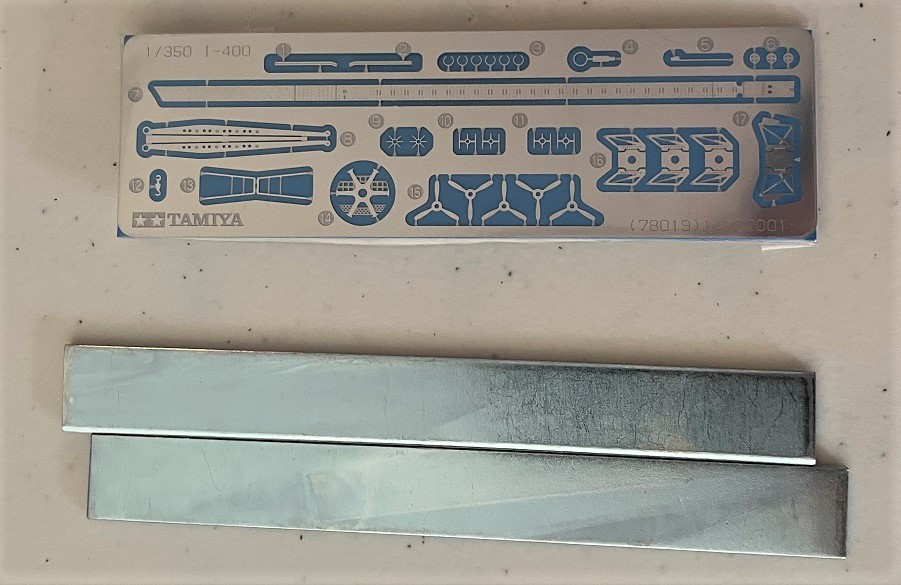
Nice little photoetch mostly for the aircraft and radars. Also two big "ballast" bars. Like their 1/48 armour line I guess they think small kits need weight?


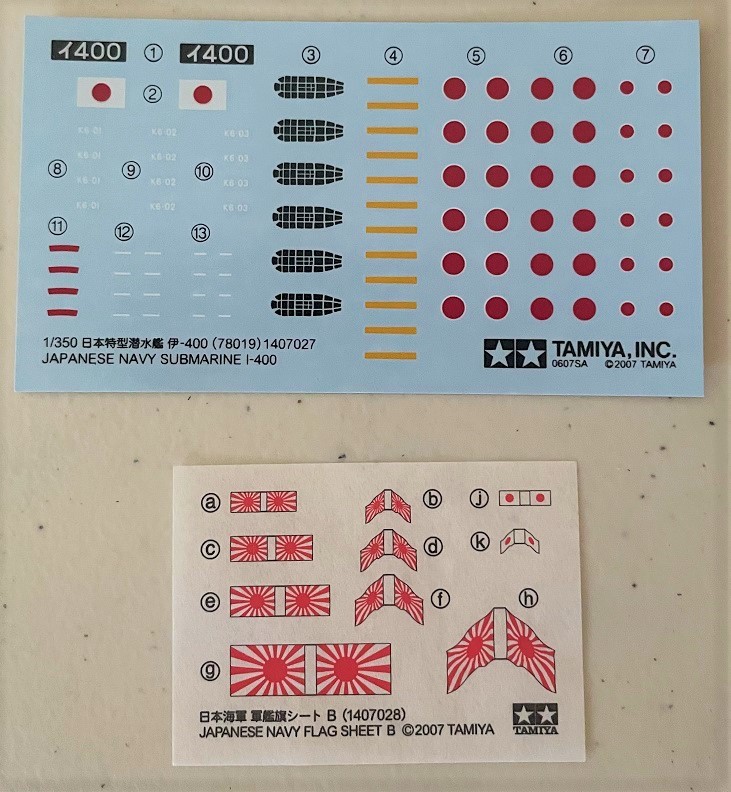
Beautiful decals. Not sure why they went with black glass and white frames for the canopies though. I will try painting one as well and see which is better. The flags are on a very very thin sort of parchment paper and are a complete work of art


Some sub assembly's done but boring so no pictures. 

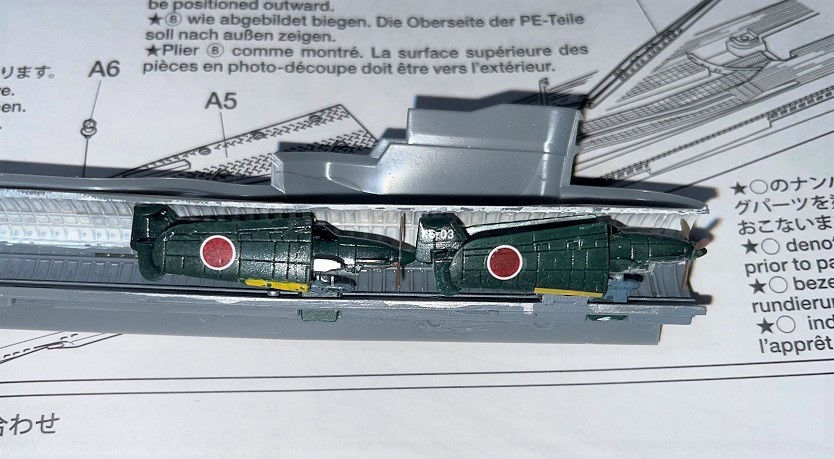
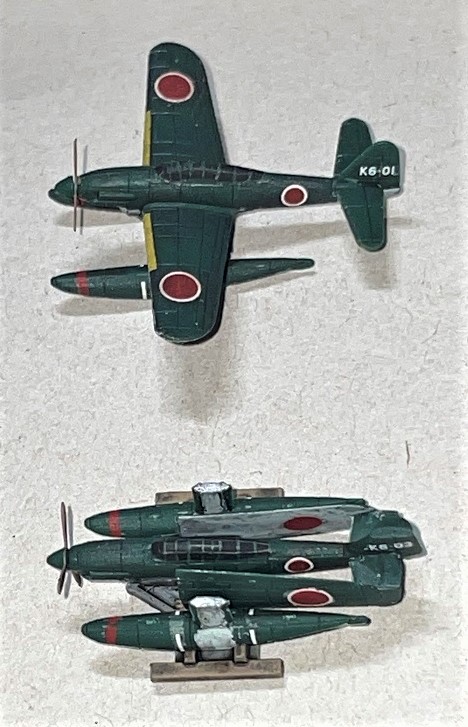
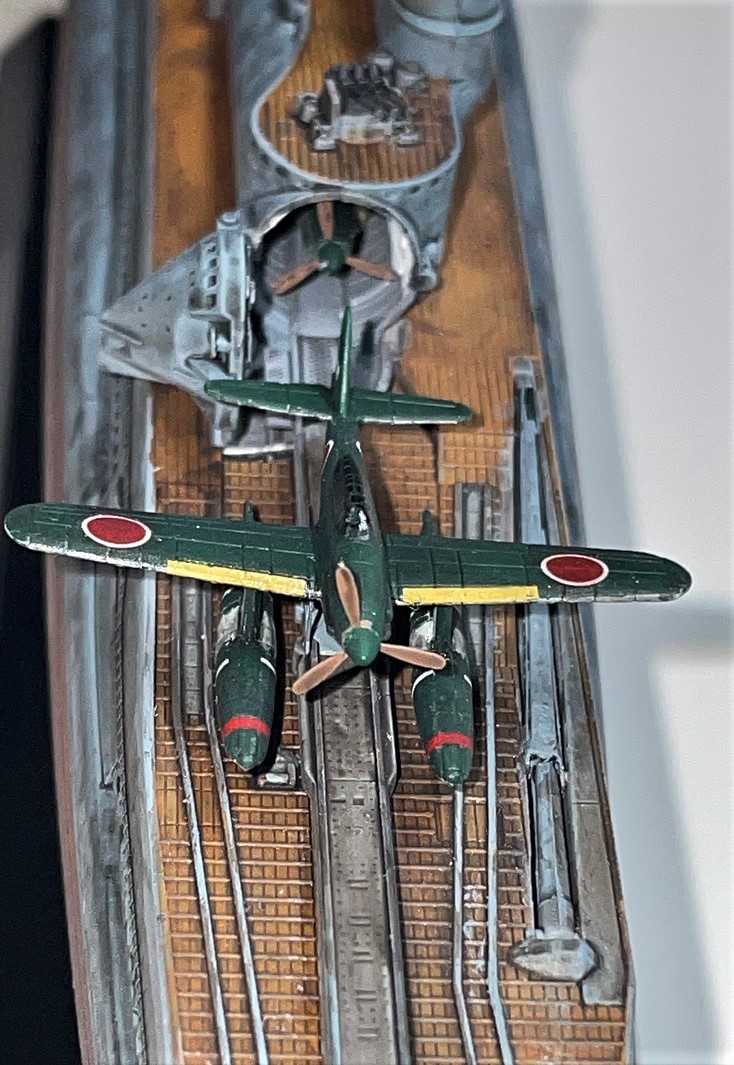
Aircraft all done but still in their high gloss coat of tinted Future. A coat of dull coat will subdue the weathering. 


Rear one has a rough painted yellow band since you can't see one little part of it anyway and those bands were a fight to get on


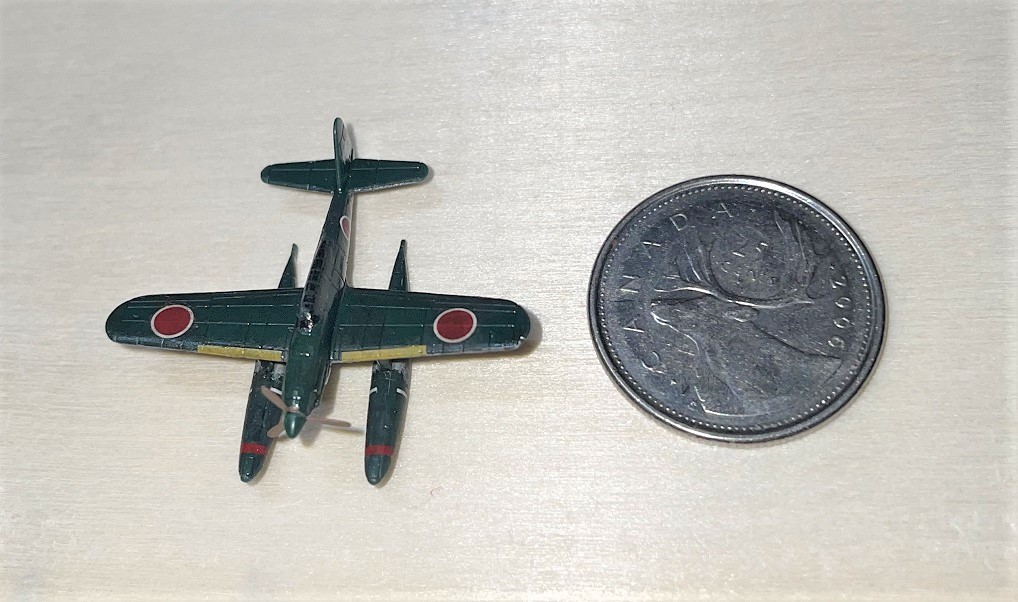
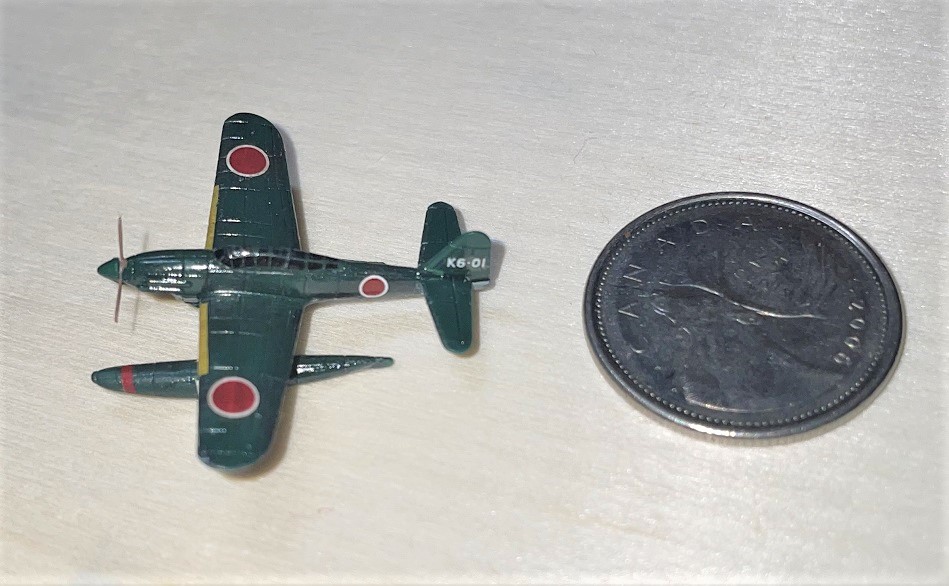
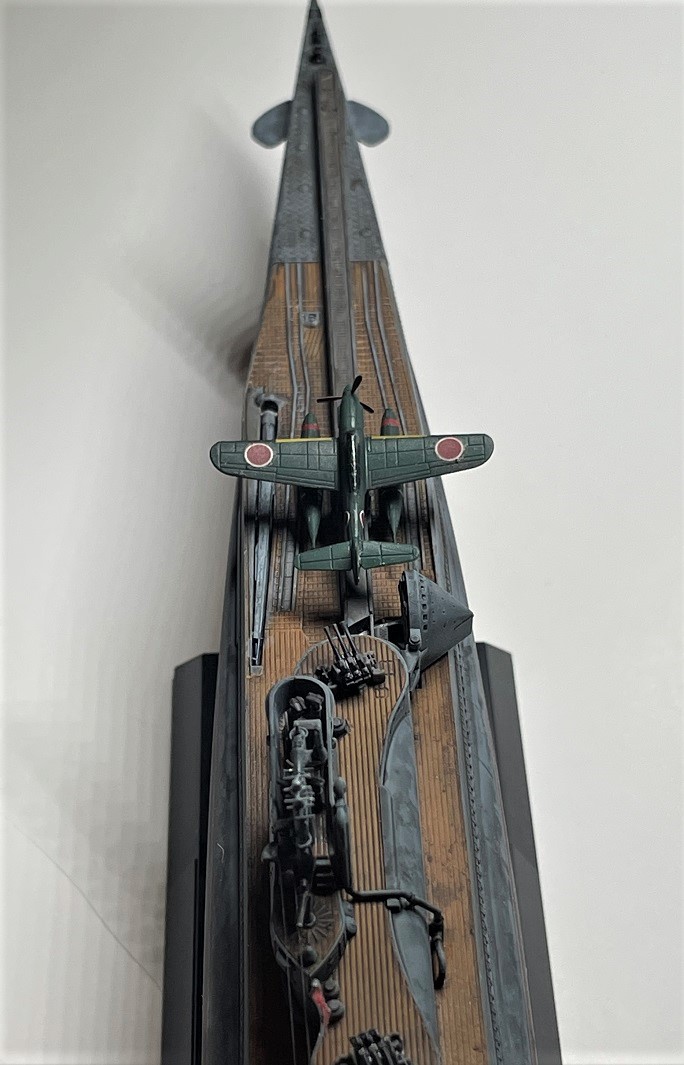
Will be on the cat. They are tiny little kits!


Since you can't see them inside the hanger and I considered cutting it open so you could but it is still not going to show much so I displayed one on the trolley. There is a small base that it can go on and at least you can see what they look like all folded up.


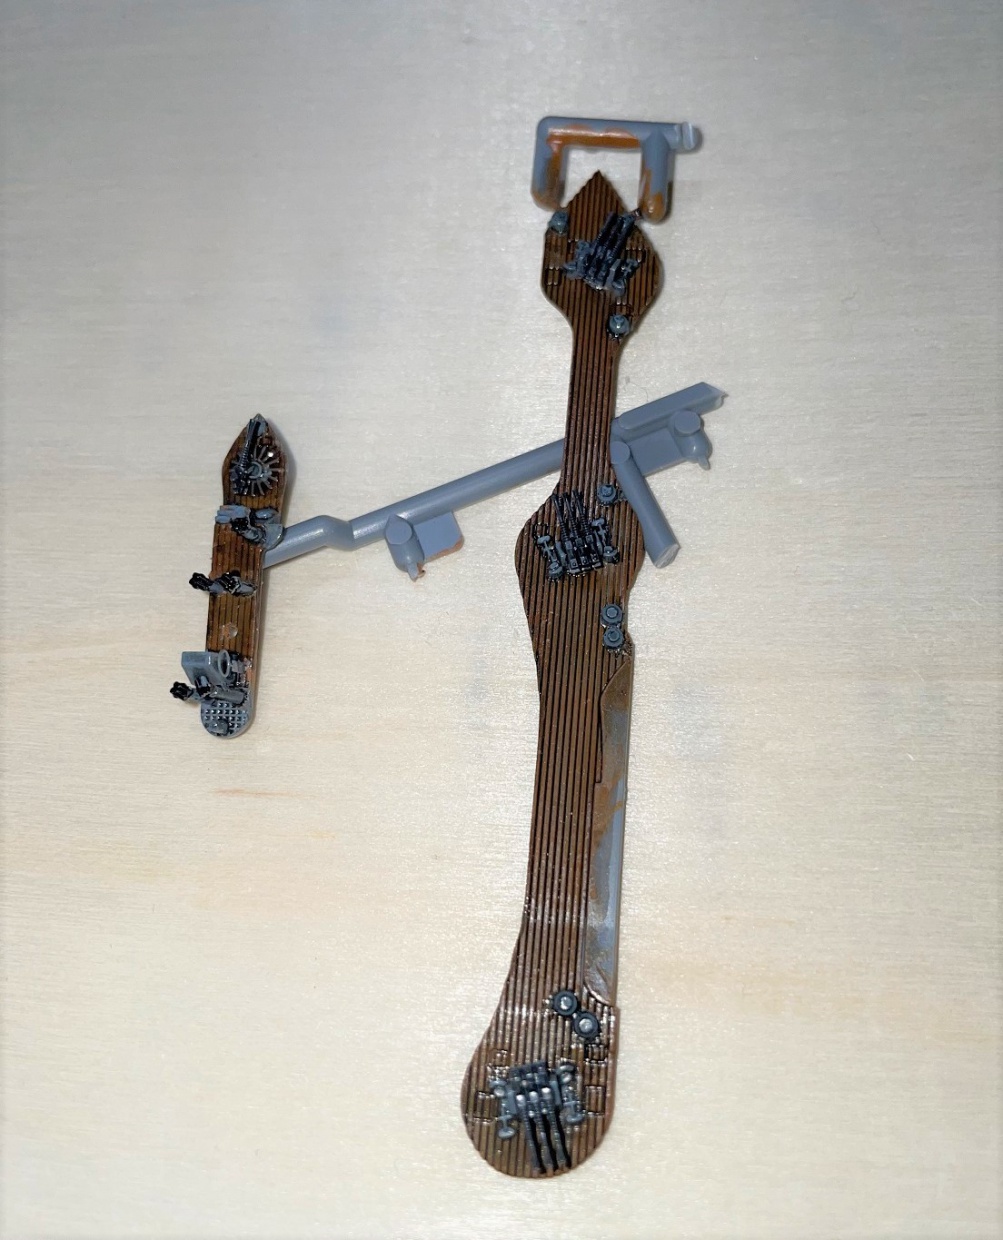
The progress on the decks was fast. 

Base coat way off colour because that will change. The few real pictures of show it was pretty beat up even though it was never used as intended so I will be weathering it fairly heavy. Brush painted for a deliberate blotchy look.


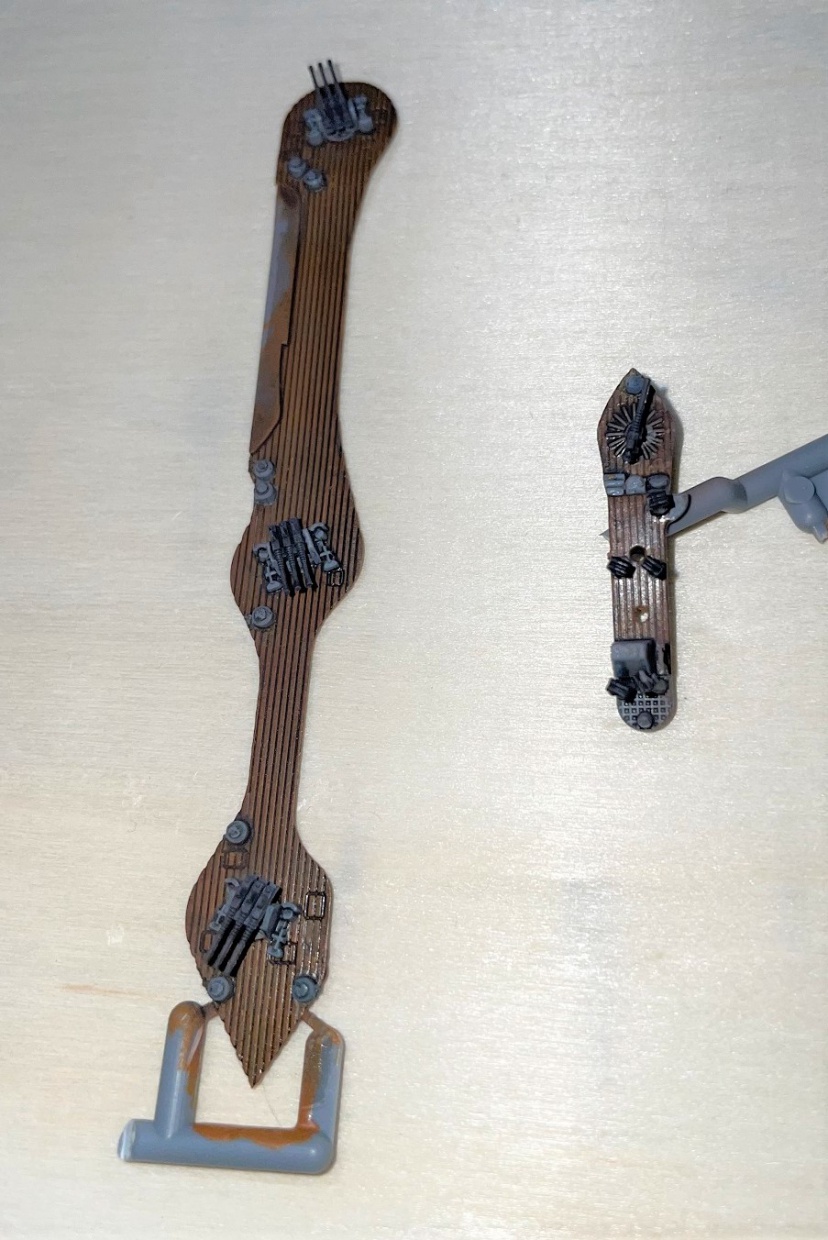
A darkening wash of Citadel "Agrax Earthshade". More blotches and uneven tones especially on main deck. Some detail painting done.


Coat of tinted Future (I use this ALOT) to highlight details, create fake shadows and add depth. Once dull coated this will be very close to the colour mix recommended in the instructions but not just a monotone brown


Decks finished.


With tinted Future. Detail hidden by gloss.


With first coat of dull coat. Details pop.


Whole thing base coated 


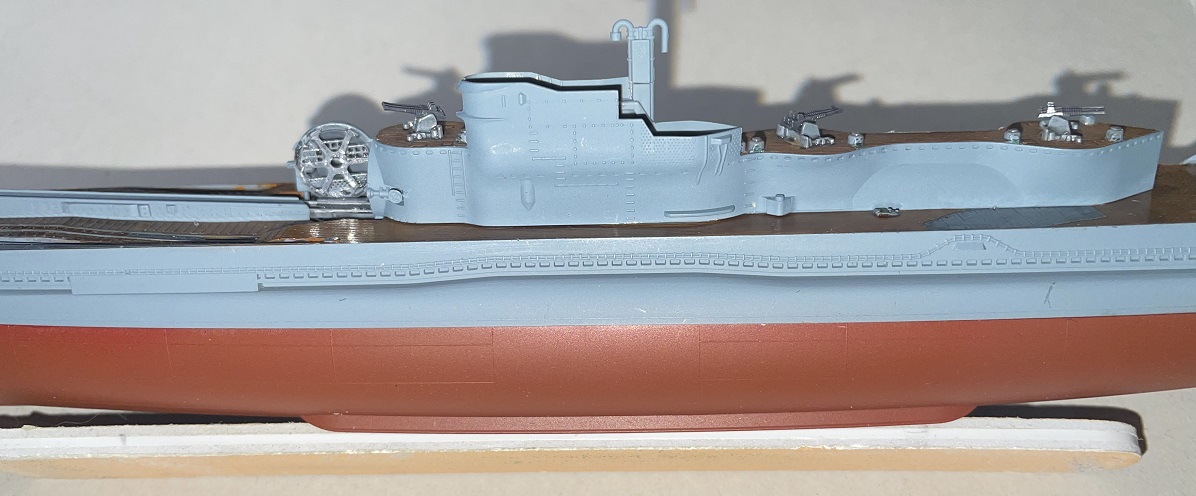
Gloss tint coat on whole sub. Makes the limber holes in the side black but not a huge contrast like paint would. Gives the rest a nice blotchy look.
Next is a flat coat to subdue it all.


Aircraft complete (well so is the sub but no pictures yet)


Testers Dull Coat over tinted gloss tones down the dark but lets the tiny panel lies still show nicely


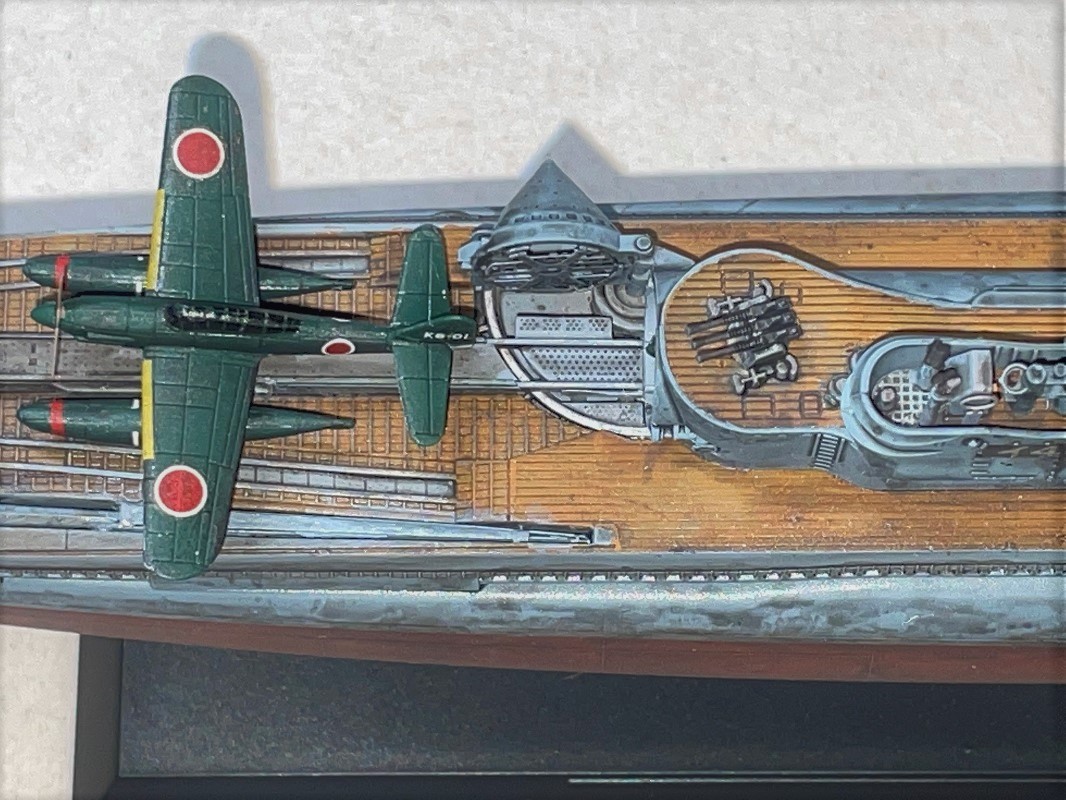
The grey on the folded wing version looks horrible in the pictures but when you consider that it will fit on a nickel then you see how it would just look feathered in real life. Same applies for what looks like exccsive weathering on the grey parts of the wings. The almost microscopic chipping came out great.


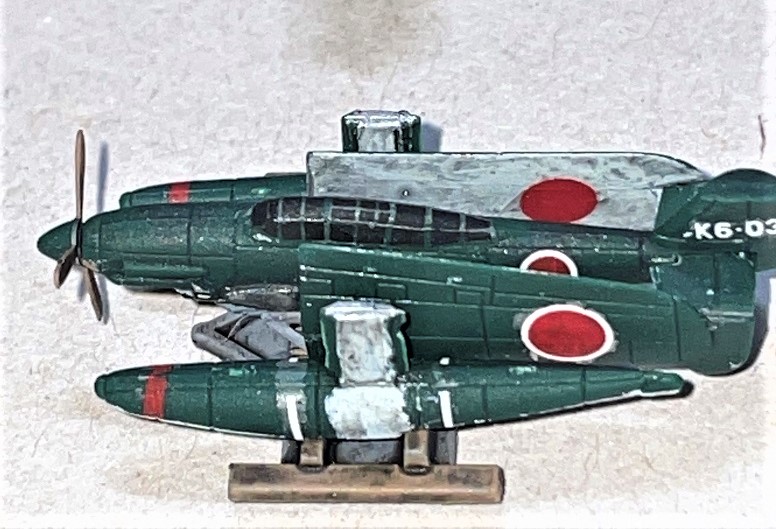
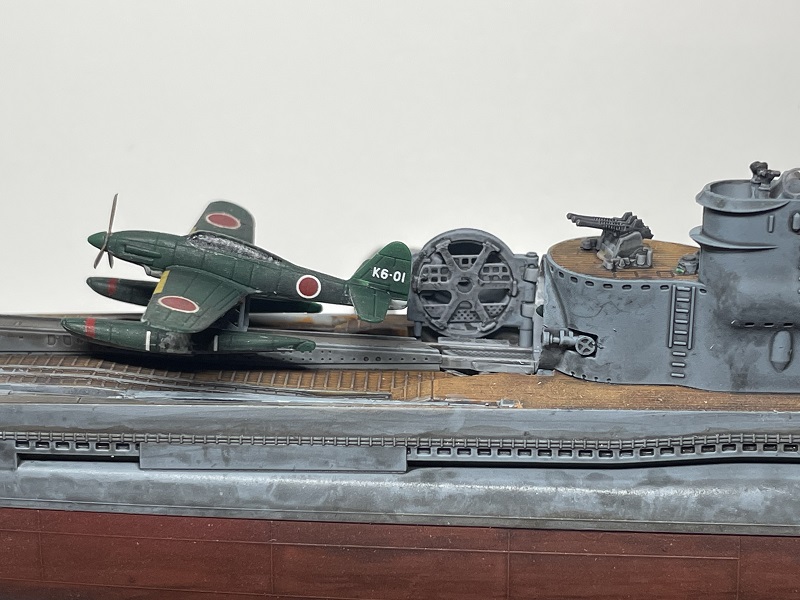
The ready to go version shows the effects a bit better. Actually very happy how the canopy decals came out now that the gloss isn't hiding the framing.
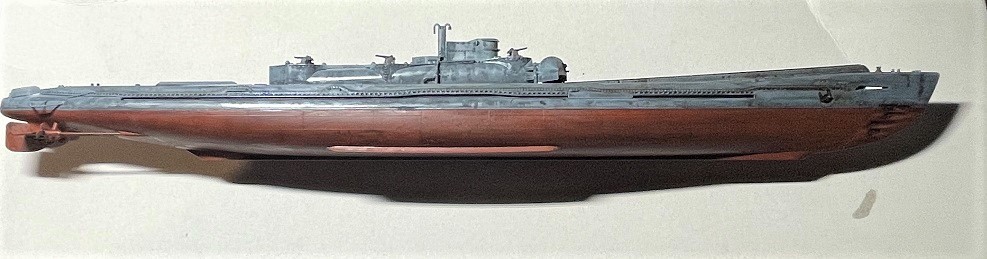
 

Annnnnd Done!

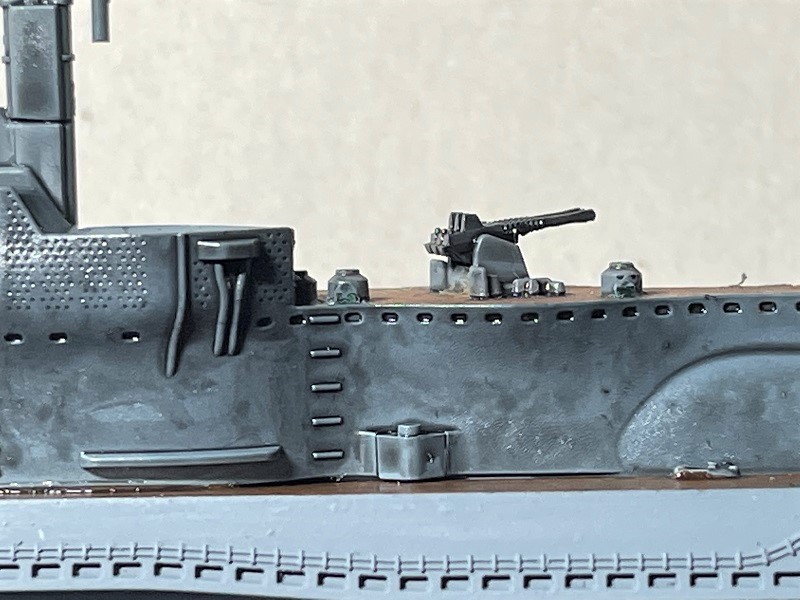
Just shy of 20 hours on the bench not counting paint drying time.  As I said at the start of this thread this kit was built more as a side project and reference for building a 1/48 folded Serian being removed from the hanger so it is strictly out of box with a focus on the finish. This means no railings, ech ladders, gun sights etc. Just a shake and bake build. I may break down and add railings to at least the antiaircraft gun decks later if I can find a nice cheap set of generic rails.


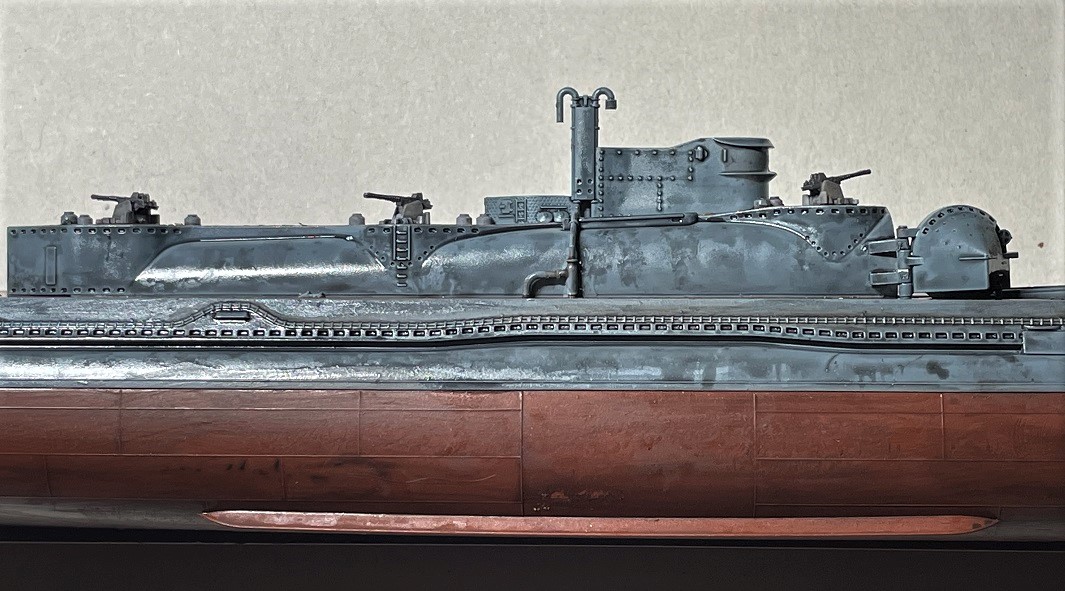
Dull coat tones down all those black blotches nicely.


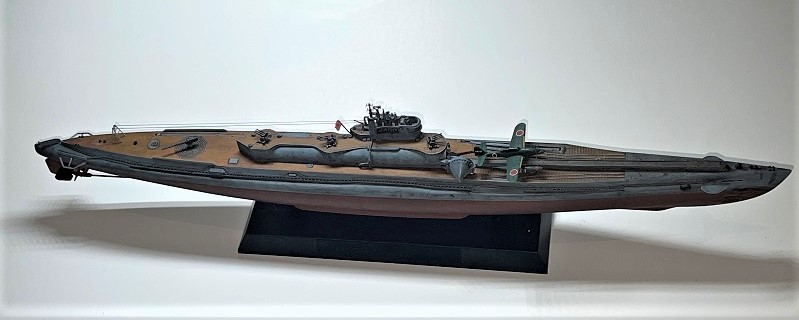
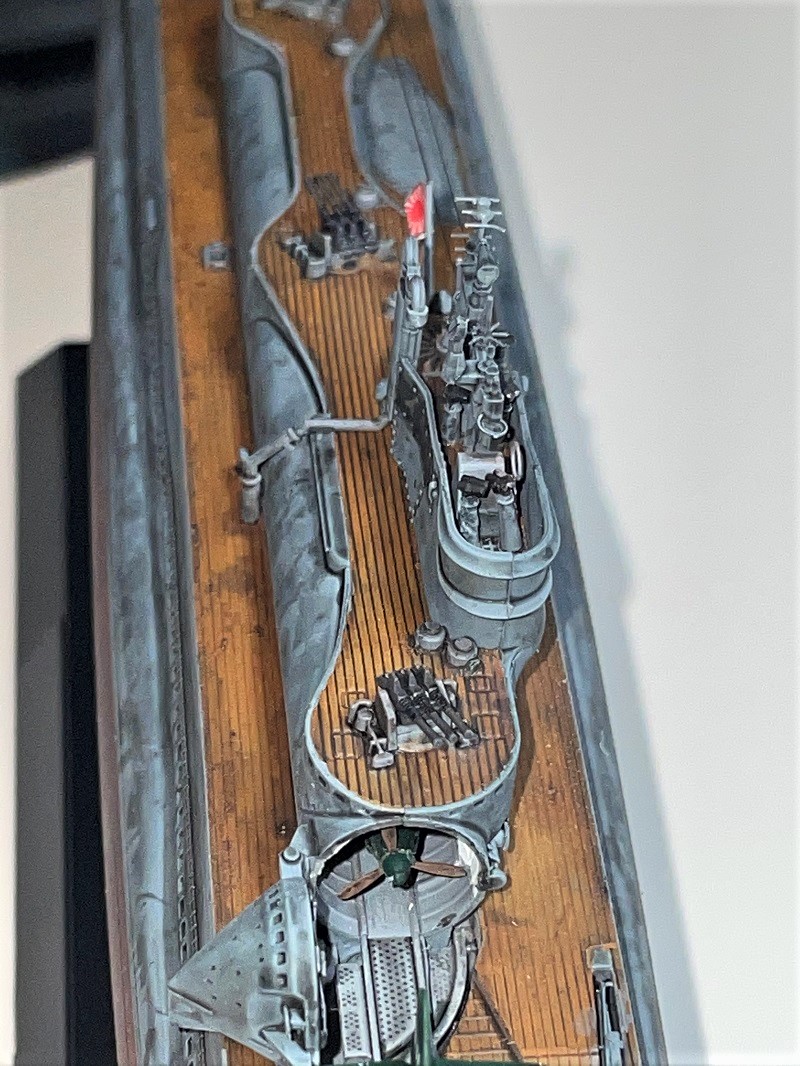
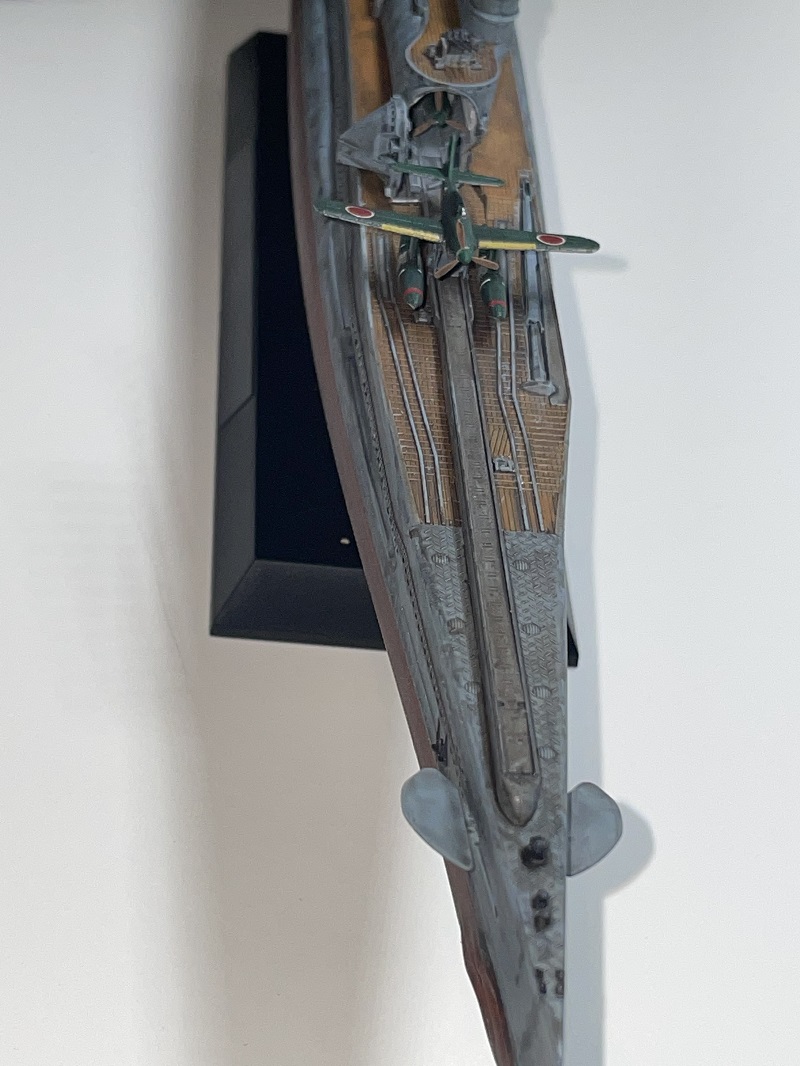
Built it with crane up but it blocked the area I wanted to see the most so stowed it.


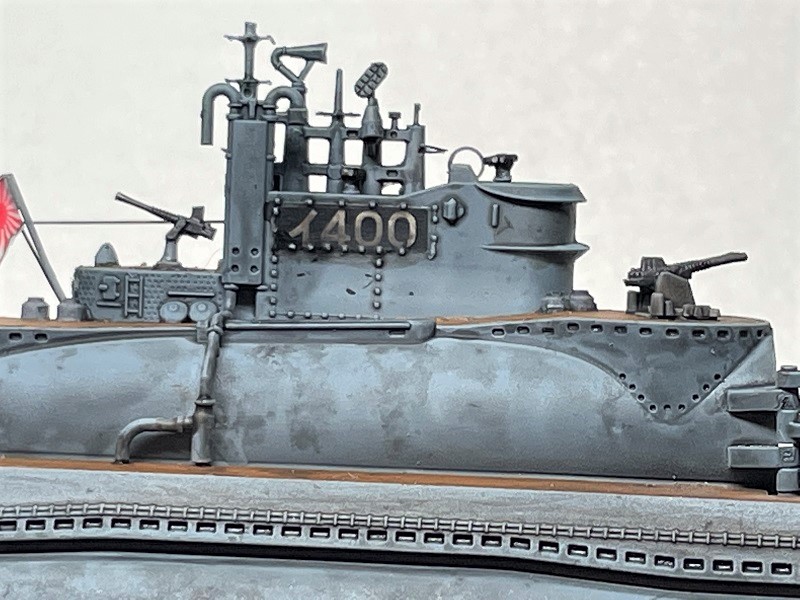
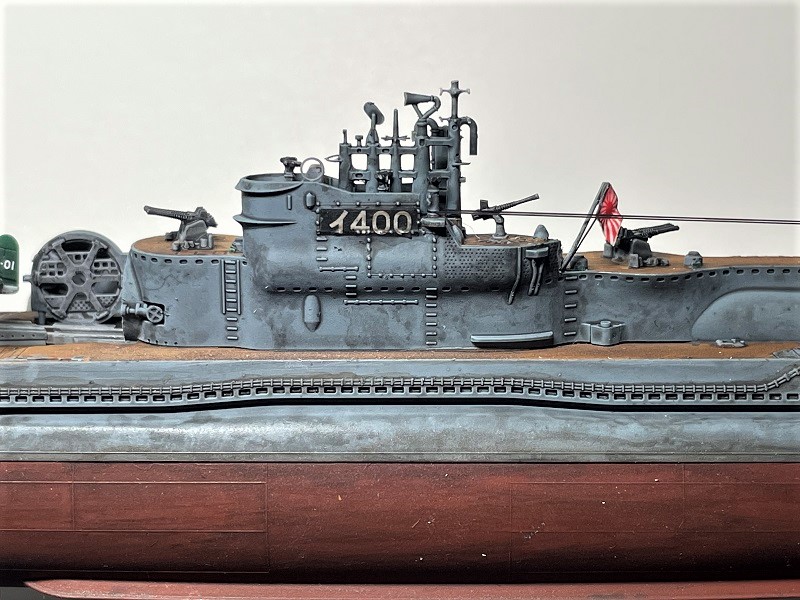
Note that I did not use the big Japanese flag decal  you see on most models and drawings of this sub. Of all the pictures I looked at I only saw one distant shot that may or may not have had it there. In fact in the surrender videos' the numbers are even painted out on the starboard side. Besides I would think that if I was a Japanese sub captain in 1945 the last thing I would want is a 20 foot white rectangle with a bullseye in the center painted on the tower!


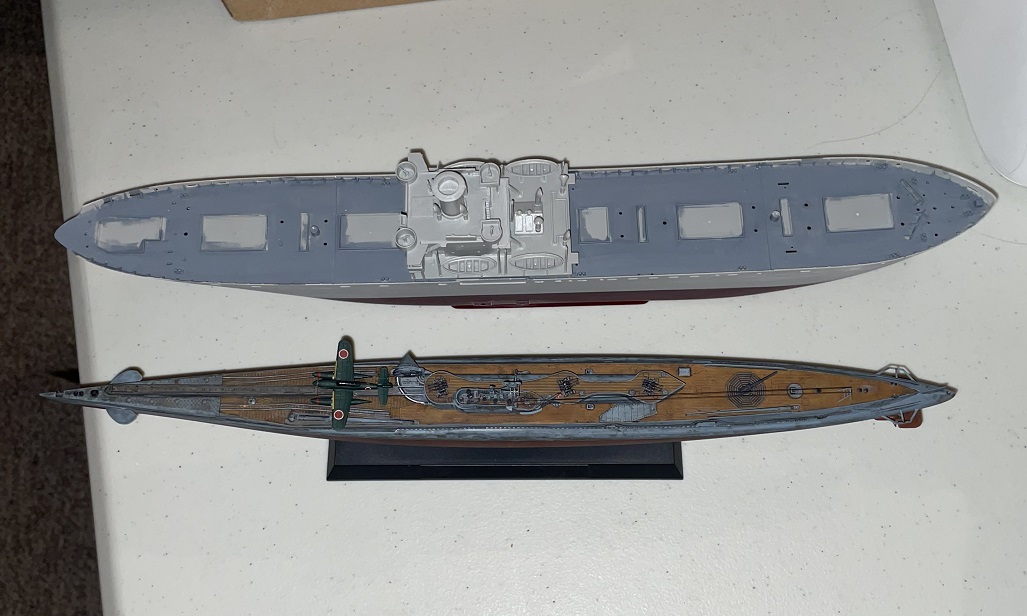
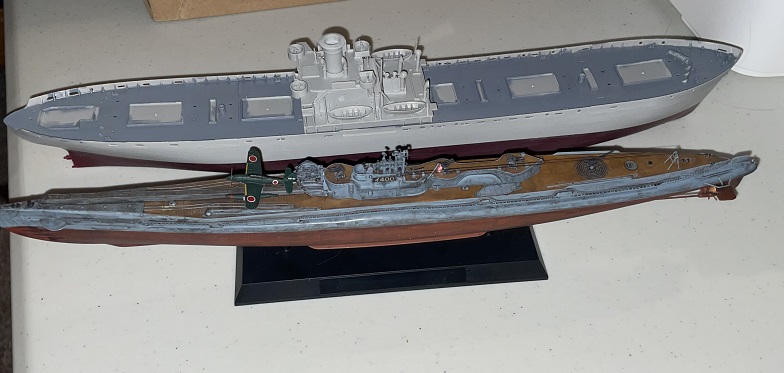
For a good idea of just how big these subs were here it is with a 1/350 liberty ship


Ahhhh what do we have here? Coming soon to a forum near you.

  • Member since
    April 2003
  • From: USA
Posted by keavdog on Friday, December 16, 2022 7:35 AM

I had read a bit about these subs and the Seiran is a great looking float plane.  I didn't realize that that packed 3 of them in there though!

Thanks,

John

  • Member since
    December 2022
  • From: Canada
Posted by Tcoat on Friday, December 16, 2022 8:11 AM

keavdog

I had read a bit about these subs and the Seiran is a great looking float plane.  I didn't realize that that packed 3 of them in there though!


Especially when you see how big an aircraft it actually was. Folded up well but was still dive bomber sized. 

  • Member since
    July 2015
Posted by MR TOM SCHRY on Friday, December 16, 2022 8:33 AM

Tcoat, this looks fantastic.  I love the dirty grimey weathered look.  Do you regret not drilling out the limber holes on it?  I know there are some after market PE sets for it, do you feel that out of the box it's lacking and needs this PE?  I have this kit on the shelf & it's on my "To Do" list for 2023.  I've also got a still in the shrink wrap old Aurora 1/285 scale I-19 in the stash.  A few years ago I also built the Lindberg 1/72 I-53 with Kaitens.(terrible kit but still looks impresssive next to Revell's Gato and U-Boat)  I read somewhere that the intended mission of these Japanese subs was to get close enough so their aircraft could bomb and put the Panama Canal out of comission.  I don't know if that is accurate.  Great job!

tjs

TJS

  • Member since
    December 2022
  • From: Canada
Posted by Tcoat on Friday, December 16, 2022 9:03 AM

MR TOM SCHRY

Tcoat, this looks fantastic.  I love the dirty grimey weathered look.  Do you regret not drilling out the limber holes on it?  I know there are some after market PE sets for it, do you feel that out of the box it's lacking and needs this PE?  I have this kit on the shelf & it's on my "To Do" list for 2023.  I've also got a still in the shrink wrap old Aurora 1/285 scale I-19 in the stash.  A few years ago I also built the Lindberg 1/72 I-53 with Kaitens.(terrible kit but still looks impresssive next to Revell's Gato and U-Boat)  I read somewhere that the intended mission of these Japanese subs was to get close enough so their aircraft could bomb and put the Panama Canal out of comission.  I don't know if that is accurate.  Great job!

tjs


I have had some say that it is too dirty for a sub but since it was captured intact and functioning there are loads of documentation showing I probably didn't make it dirty enough. There is one account someplace that when captured the conditions inside were absolutely appalling.

https://www.youtube.com/watch?v=S5bKPUaojLw

Keeping in mind that it is only 8" long drilling out the limber holes would have little visual effect. In fact the thickness of the plastic would make them look way out of scale. Using a tinted Future wash filled them all in nicely. The pictures don't show it well but from 2' away they look like they are open space. 
As I said in my narrative this was a side project for a bigger plan so I didn't bother with photoetch. The kit comes with the main things that would benefit from it anyway. I have considered doing railings as that is the only thing really obvious but haven't stumbled across an inexpensive set yet. All in all out of the box but with added railings would be plenty for most people. 
You are correct. Their original goal was to make 20 of these. The canal was one proposed target but they also considered things such as the naval bases on the east coast and even New York and Washington DC. Imagine sitting peacefully in your office in the Pentagon and all of a sudden  60 dive bombers appear out of nowhere, attack and then just disappear!
Of course they only finished 3 and even then it was too late for them to be effective. The design aspects went on to influence large sub building for years after the war though. The double "figure eight" pressure hull and even the hanger design were huge influences on the U.S. post war subs. This is why they took them all out and sank them before the Soviets got to inspect them. 


The hanger idea that stuck around until better missiles that could be launched while submerged were developed.

Pressure hull design that allowed subs to increase in size

  • Member since
    March 2009
  • From: brisbane australia
Posted by surfsup on Saturday, December 31, 2022 9:56 PM

The weathering sets her off very nicely indeed. Lovely work.....Cheers mark.....Cheers mark

If i was your wife, i'd poison your tea! If Iwas your husband, I would drink it! WINSTON CHURCHILL

  • Member since
    July 2003
  • From: On my kitchen counter top somewhere in North Carolina.
Posted by disastermaster on Tuesday, January 3, 2023 3:04 PM

This is "really" nice.

I think it looks great.

I built a larger (don't remember the scale) motorised version of this back in the early 70's. There's still some of the pieces around here someplace.

Sherman-Jumbo-1945

"I was so much older then, I'm younger than that now"


  • Member since
    December 2022
  • From: Canada
Posted by Tcoat on Tuesday, January 3, 2023 3:55 PM

disastermaster

This is "really" nice.

I think it looks great.

I built a larger (don't remember the scale) motorised version of this back in the early 70's. There's still some of the pieces around here someplace.


Yep. There was an old Yamada kit back in the 60s and 70s. Pretty sure I built it in the 60s but don't know for sure. I remember a Japanese sub that went on a voyage in a pond and never returned. Of course at 6 or 7 years of age I didn't clue in about the signficance of an aircraft on a sub. I still have most of their Yamato motorized model I built back then.

The sub kits still show up on vintage model sales sites every now and then.

  • Member since
    October 2004
  • From: Orlando, Florida
Posted by ikar01 on Friday, January 6, 2023 6:57 PM

Good jb on that sup.  I builtone and gave it to a retired Pastor who is also a builder and history nut.  He was really surprised by the kit and has it on display with the other ships I built for him.

One of their missions was to have been to attack the canal and damage the locks.  The attack never happened and the subs surrendered to the U.S. fleet.  They were later sunk at Bikine or one of the other island tests, I think.

  • Member since
    December 2022
  • From: Canada
Posted by Tcoat on Friday, January 6, 2023 8:13 PM

ikar01

Good jb on that sup.  I builtone and gave it to a retired Pastor who is also a builder and history nut.  He was really surprised by the kit and has it on display with the other ships I built for him.

One of their missions was to have been to attack the canal and damage the locks.  The attack never happened and the subs surrendered to the U.S. fleet.  They were later sunk at Bikine or one of the other island tests, I think.


They took the two surviving subs to Pearl Harbor for examination. In early 1946 the US became concerned that the Soviets wanted to examine them and may get some ideas so they sank them both off the coast of Hawaii during "torpedo tests".  The wrecks were found on the bottom just a few years ago.

  • Member since
    October 2005
  • From: Maryland
Posted by usmc1371 on Saturday, January 7, 2023 10:57 PM

Looks nice. I did the same kit some years ago.  There's a fascinating book on the sub called: I-400: Japan's Secret Aircraft-Carrying Strike Submarine.  The book has a lot of interesting pictures that I haven't seen on the internet.

If I recall correctly, the hull actually had a rubberized type of coating applied to reduce sound.

I went to the Udvar-Hazy museum last year and saw the Seiran plane there.  It was much bigger than I thought.  Too bad the Navy had to sink the sub but it's understandable why.  At the time, the US didn't want the Russians to get access to the sub.

- Jesse

JOIN OUR COMMUNITY!

Our community is FREE to join. To participate you must either login or register for an account.

SEARCH FORUMS
FREE NEWSLETTER
By signing up you may also receive reader surveys and occasional special offers. We do not sell, rent or trade our email lists. View our Privacy Policy.