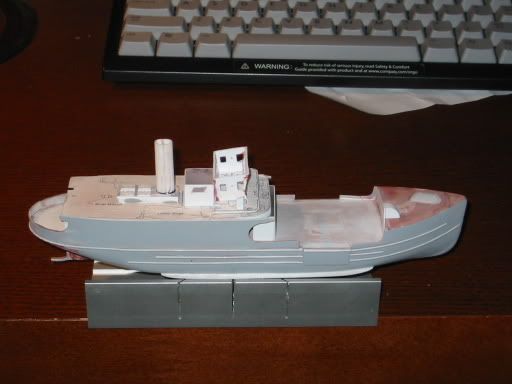
This is a 133 foot US Coast Guard buoy tender I'm scratchbuilding

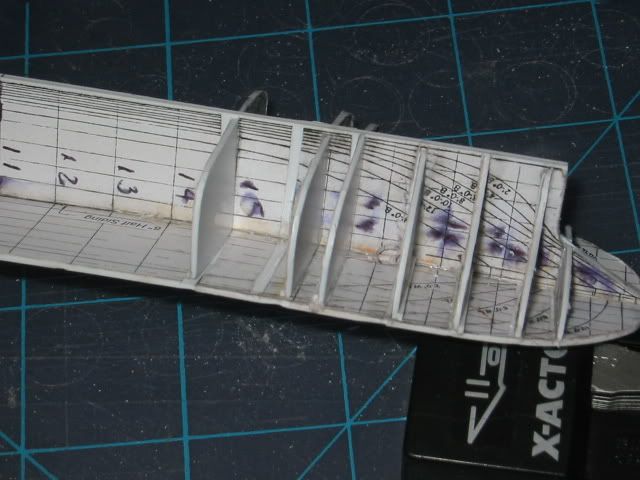
I started with the hull lines (elevation and cross-section).

I shot them to the desired size on a Xerox machine. The parts were cutout and glued to some sheet plastic.

The cross sections are glued in place on their corresponding station lines. When cutting the cross-section be sure to account for the thickness of the plastic which is the center "keel".
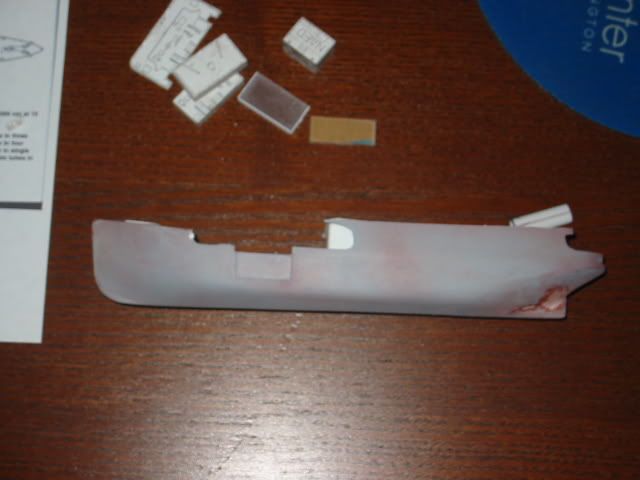
I was taught this method by Jon Warneke of Iron Shipwright. Jon's method is to wrap the completed rib and keel assembly with masking tape and fill the spaces with resin. Then when the resin is hard remove the tape and sand smooth - back to the ribs. Fill imperfections with putty. Apply a deck and applique details.
I departed from Jon's method by attaching the deck to the ribs & keels so that I could get the desired deck camber. I also put intermediate braces beteen the ribs and skinned the frame with sheet plastic. I then filled imperfections with CA and Bondo putty. That was a repetitive process to get a smooth hull. Then apply applique details such as the rubrails and scuff plates.

Other strucures are plastic sheet and/or plastic wrapped around plexiglas blocks. Later photoetched details such as hatches will be added to the superstructure.
I can see a similar process for your submarine. Form your hull from the plan's cross-section and elevation. Pour a hull. Use scribed plastic for any planked deck. Add details such as flood and drain ports. Laminate sheet plastic to the desired thickness & sand to shape for the sail. Make control surfaces out of sheet plastic, cut to shape.
Hope these thoughts give you some suggestions on how to proceed.