SEARCH FINESCALE.COM

Enter keywords or a search phrase below:

Gaps and Seams Help - difference?

5364 views
12 replies
1 rating 2 rating 3 rating 4 rating 5 rating
  • Member since
    November 2017
Gaps and Seams Help - difference?
Posted by NewGuy83 on Friday, December 8, 2017 12:41 PM

Hello, 

I went through searching the forums on this as there is a lot of material out there about filling gaps. But I think I may be confusing myself on some lingo. Gaps and seams - are these words used interchangably? I think of gap as just that - a large space between two objects that you have to fill in. A seam I see as just the "line" you see when two pieces are joined. 

I will join two halves of the fueslage together and you can see where they are joined at - there is a "line". Now, I wouldnt call it a gap - it's more of just the seam. I will sand the seam without any filler until it feels smooth. But when I paint, you can still see the seam. 

So, the question, are you all putting down product on every seam to sand smooth? 

  • Member since
    September 2006
  • From: Bethlehem PA
Posted by the Baron on Friday, December 8, 2017 1:25 PM

Here's how I think of it:

A seam is a place where two parts meet-along the top or underside of an airplane's fuselage, for example; where the wing attaches to the fuselage; where the deck fits the sides of the hull of a ship; maybe a truck's cab is made in left and right halves; or where the limbs meet the torso on a figure; and so on.  The parts may fit well, but we can see the seam.

A gap is when those parts don't meet properly.  Maybe they're not molded well; maybe we removed material; or something else causes it.  In any case, there is open space.

Cleaning up or hiding the seam might just require painting; or applying a little putty, or a surfacing compound, before painting.

Cleaning up a gap usually implies filling the space with something more than just putty, especially if the gap is particularly wide.  Putties usually need something to support them, till they cure.  With styrene, maybe we have to stick pieces of styrene sheet or sprue into the gap, and melt them with liquid glue.  Or we have to put a backing behind the gap, to support a putty as a filler.

In the case you mention, an aircraft fuselage, I like to use liquid cement, then press the halves together enough to extrude a bead of melted plastic along the seam.  Once the glue sets, I can scrap away the bead, leaving no gap along that seam.  To hide the seam, I may apply some Mr Surfacer, or Squadron putty thinned with acetone, then sand and prime.  It might be necessary to repeat these steps a couple of times, till the seam disappears.  Fill/cover, sand, prime, check.

Hope that helps!

The bigger the government, the smaller the citizen.


  • Member since
    May 2009
  • From: Poland
Posted by Pawel on Friday, December 8, 2017 3:03 PM

Hello!

It's life - and usually there are no razor sharp lines separating something from something similar. So a gap can be seen as a seam that went hard core :-)) Put a piece of styrene in it and you have two seams :-))

There are lots of methods of filling surface imperfections and you have to decide which one to use depending on whay you can do, what you have at hand, the place on the model and many other factors. The right decision comes with experience.

Good luck with your builds and have a nice day

Paweł

All comments and critique welcomed. Thanks for your honest opinions!

www.vietnam.net.pl

  • Member since
    December 2002
  • From: Fort Knox
Posted by Rob Gronovius on Friday, December 8, 2017 3:08 PM

No, some seams are supposed to be visible and others invisible. Gaps are often inadvertent due to molding limitations, worn out molds or poor engineering. They usually need to be filled entirely.

Some seams need to be smoothed over like the ones down the center of a gun tube. Others, like the corners of where two armor plates meet, are visible.

  • Member since
    October 2010
Posted by hypertex on Saturday, December 9, 2017 6:09 AM

NewGuy83

So, the question, are you all putting down product on every seam to sand smooth? 


I think your nomenclature is fine. Whether it is a seam or a gap, if it is unwanted then it must go. So to answer your actual question, yes I put down product on every seam that I want to disappear. No matter how well parts fit, not matter how well I get them aligned, there will always be some microscopic flaw that doesn't show up until paint is applied. At least for me, sanding alone is almost never good enough.

My product of choice in this case is thin CA glue. I use the thin becaue it levels out better and dries faster than the thicker CA glues. Plus, it doesn't cure hard as a rock.

I made a glue applicator out of a sewing needle. Just cut off about half of the eye and mount it in pin vise or glue it into a dowel. I use the y-shaped remenant of the eye to apply very small amount of glue along the seam. It will dry in a few seconds without accelerator. I then sand it smooth. Sometimes it takes a couple of layers.

Then, I use a flashlight to inspect the seam (I figure that IPMS judges use flaslights to find seams, so I may as well do the same). If the seam looks smooth, I brush paint a bit of primer over the seam and let it dry. Primer (or silver paint) is great at revealing the tiniest of flaws. If the seam checks out, I remove the primer and move on.

It's tedious, but it beats discovering flaws when I shoot the first coat of primer on the model.

  • Member since
    March 2015
Posted by Peaches on Saturday, December 9, 2017 9:09 PM

It also depends are we talking about Armor vs Aircraft.  On Aircraft, we aren't supposed to have very many seams/gaps

WIP:
Academy F-18 (1/72)

On Deck 

MH-60G 1:48 (Minicraft)

C-17 1/144

KC-135R 1/144

Academy F-18(1/72)

Ting Ting Ting, WTF is that....

  • Member since
    January 2009
  • From: hamburg michigan
Posted by fermis on Saturday, December 9, 2017 11:15 PM

NewGuy83

 ....But when I paint, you can still see the seam. 

There's a couple tricks to rid yourself of this issue...

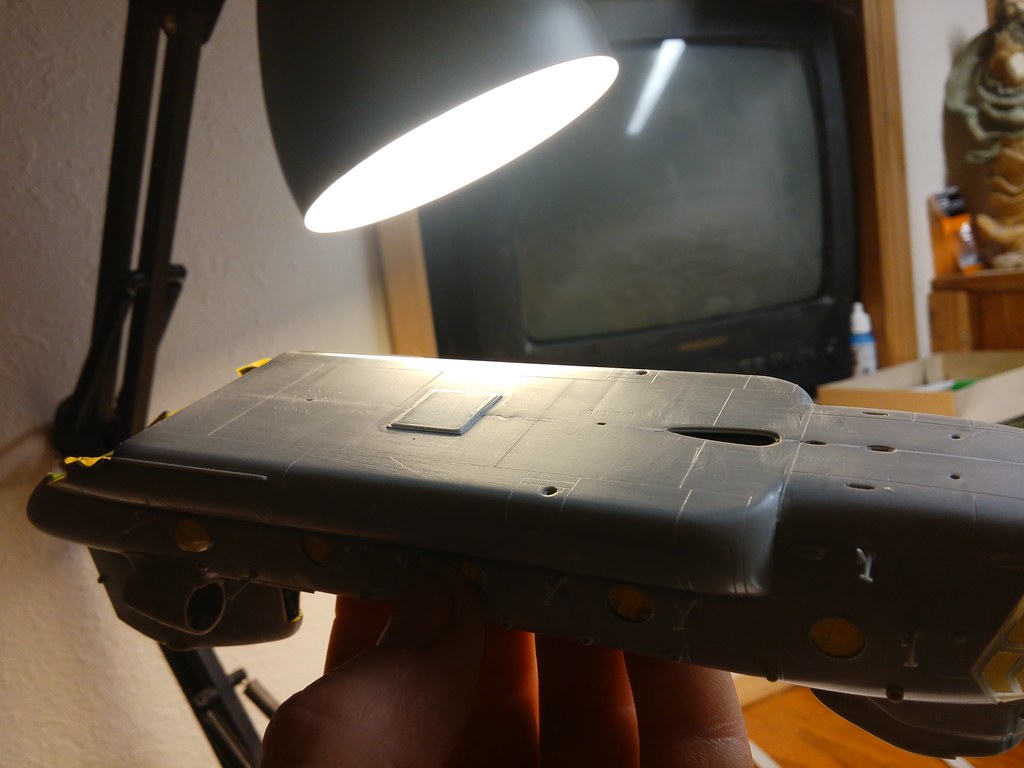
1. After sanding, hold the model up to a light (between your eye and the light, and just slightly below the light) and spin/twist the model around to view at all angles...this will show every imperfection.

In this pic, you can see the imperfection, just forward of the "hell hole" cover(square piece), as well as the sink marks fore and aft.(note...the model is about 6 inches away from the light, toward my eye, not directly under it)

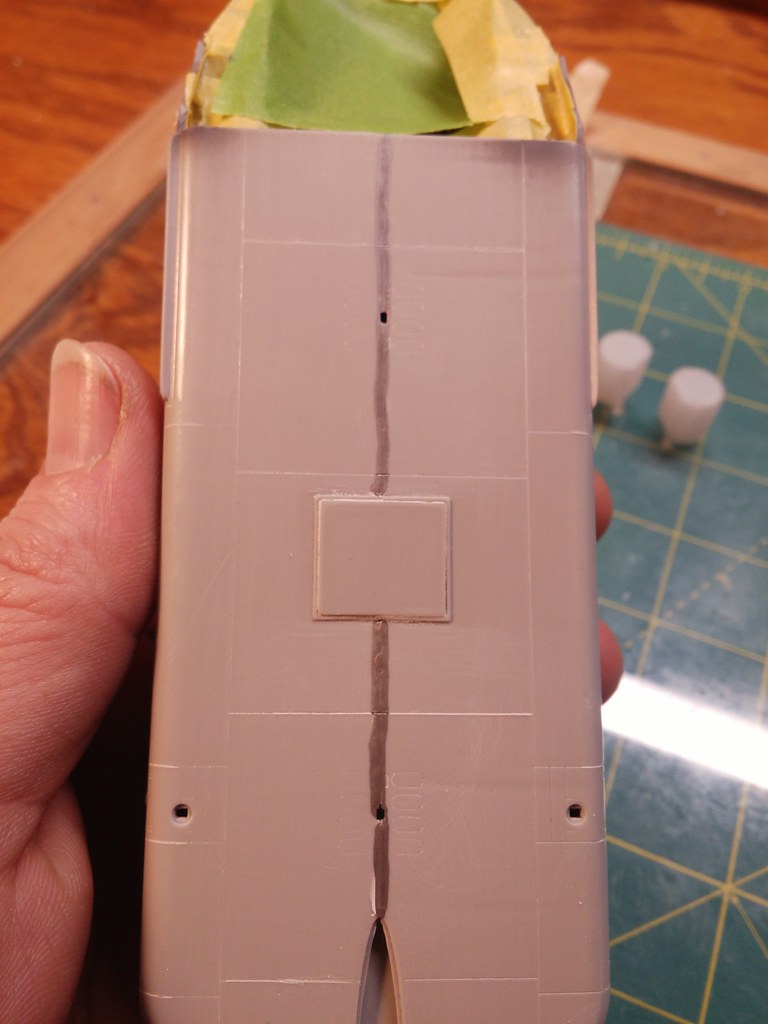
Another way to spot issues, is to brush on a line of silver paint, just along the seam...

Even with just this, the blemish is clearly visible, just in front of the square plate...

After a little sanding...

The remaining paint shows where you need a little filler.

Now...to fill in the seam.

I usually use CA(superglue), and have done so on this seam...or you can use putty (I like Tamiya putty), which I used to fill in the sink marks...

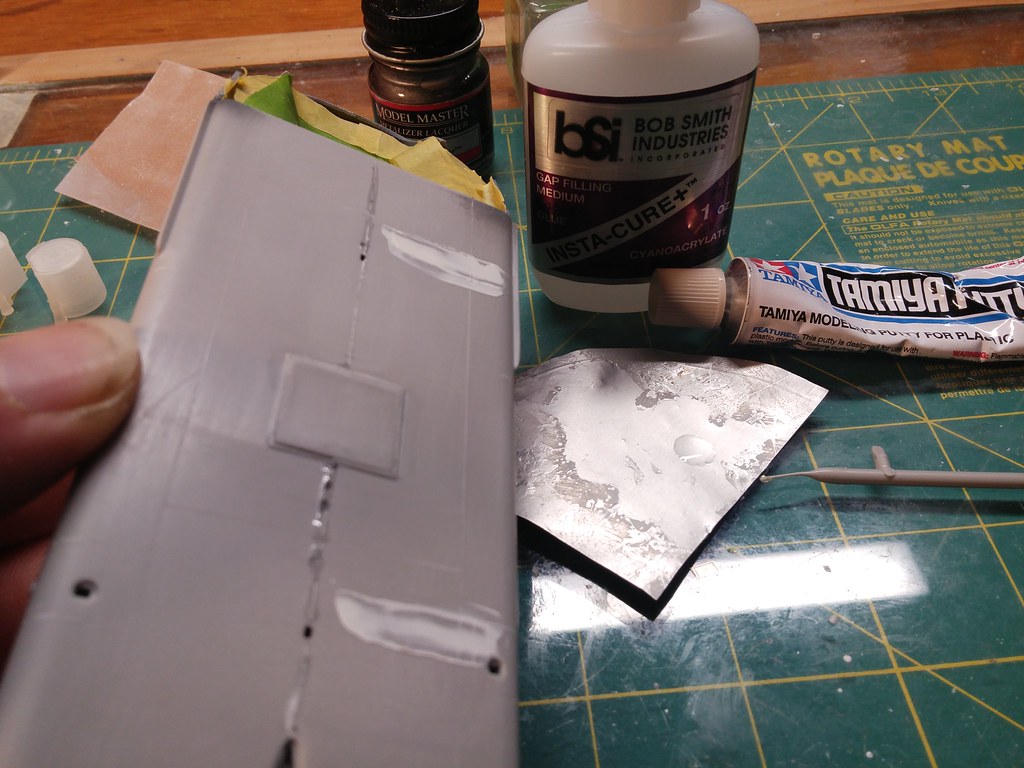
I put a drop of CA on a "palette" and use a bit of stretch sprue as an "applicator"(as seen in pic).

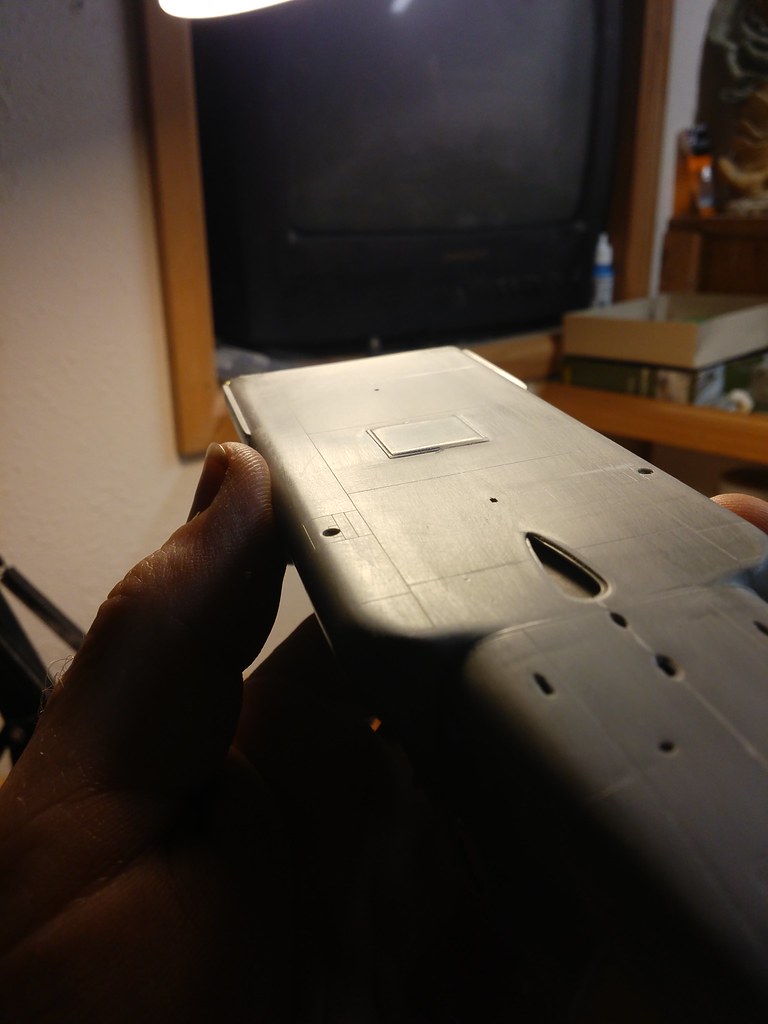
After sanding, I could still see a tiny bit of seam, when held to the light. I ran another bead of CA and sanded again...

I can't show painting results, as I have been doing this as I make this post. When I do paint, I'll spray along the seams first...give it a couple minutes drying time and check it against a light again. If seams show, I'll run a bead of CA...sand...check, etc.

  • Member since
    July 2013
Posted by steve5 on Saturday, December 9, 2017 11:23 PM

cheer's for the tutorial fermis , that will come in handy .


  • Member since
    July 2014
  • From: Franklin Wi
Posted by Bakster on Sunday, December 10, 2017 9:29 AM

steve5

cheer's for the tutorial fermis , that will come in handy .


I agree. 

  • Member since
    November 2009
  • From: Twin Cities of Minnesota
Posted by Don Stauffer on Sunday, December 10, 2017 10:49 AM

I agree with the Baron.  Some seams do show on prototype, some do not.  A seam can be around an access panel, for instance, and that shows.  On natural metal finishes, the seams between panels are slightly visible, the same seam on a painted plane is even less visible.  We need to look at actual planes, tanks, cars, etc.  to see exactly what shows and what does not.


Don Stauffer in Minnesota

  • Member since
    September 2006
  • From: Bethlehem PA
Posted by the Baron on Monday, December 11, 2017 1:29 PM

I apologize if I caused any confusion.  I understood the original post to mean, "seams and gaps that we don't want to show", and so, that's what I was talking about.  I didn't think about seams that are present on the actual subject and should therefore be visible on a model of that subject, like the seam between the hood of a car and the rest of the body.

The bigger the government, the smaller the citizen.


  • Member since
    June 2014
  • From: New Braunfels , Texas
Posted by Tanker - Builder on Wednesday, December 13, 2017 1:25 PM

Hi ;

 Like Fermis I do this to find the ones that won't hide .Then I use a product I call Spru - Glu . Glues and Chopped Sprue , mixed up into a liquidy " Putty " . Why ? well can you think of a better patch than the same material the model is made out of ?

 This too may require more than coat depending on the thickness of the Spru-Glu . This is okay though . This product also lets you feather a whole lot better at the point of work .

 T.B. 

  • Member since
    March 2015
  • From: Close to Chicago
Posted by JohnnyK on Tuesday, February 13, 2018 3:23 PM

I am currently working on a Monogram 1/48 B-27J. It seems that all of Revell/Monogram bombers have a real nasty seam at the engine nacelle. This time I tried a combination of Bondo Glazing &Spot Putty and Mr. Hobby's Mr. Dissolved Putty. After the wing halves were clamped and gued I applied the Bondo product to fill the large gap. After the Bondo was sanded I applied a couple coats of Mr. Dissolved Putty with a tooth pick as a finishing filler. After sanding, the joint was filled perfectly. Mr. Dissolved Putty also works great on the joint between the wing halves.


Your comments and questions are always welcome.

JOIN OUR COMMUNITY!

Our community is FREE to join. To participate you must either login or register for an account.

SEARCH FORUMS
FREE NEWSLETTER
By signing up you may also receive reader surveys and occasional special offers. We do not sell, rent or trade our email lists. View our Privacy Policy.