SEARCH FINESCALE.COM

Enter keywords or a search phrase below:

Masking with Silly Putty

2141 views
14 replies
1 rating 2 rating 3 rating 4 rating 5 rating
  • Member since
    March 2014
Masking with Silly Putty
Posted by BarrettDuke on Tuesday, March 4, 2014 2:25 PM

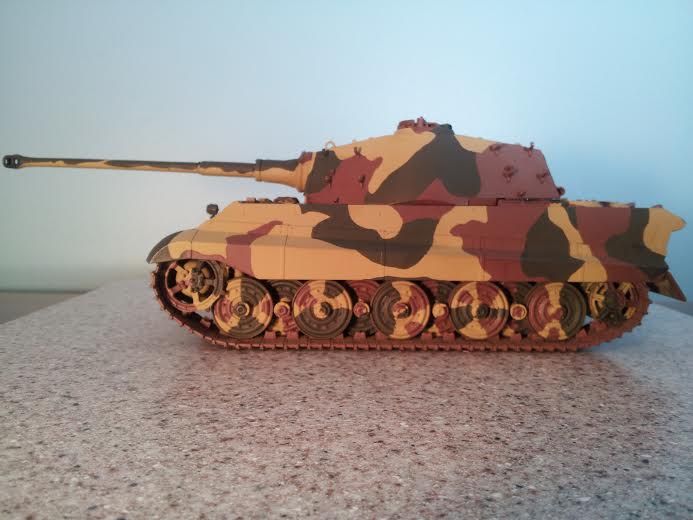
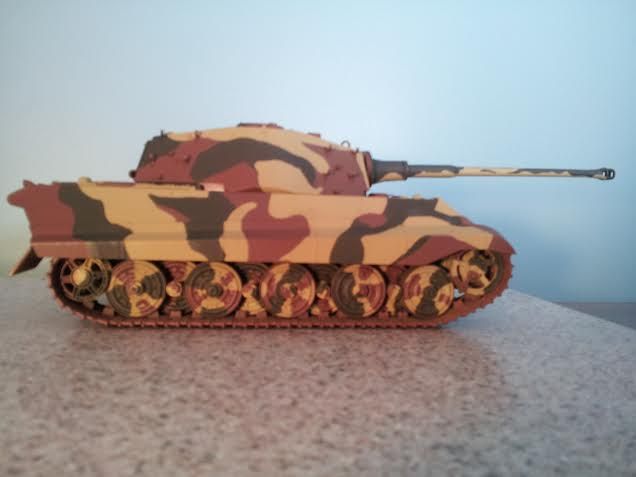
I'm just getting starting with models and figured I'd try the Silly Putty masking technique. I think it worked pretty well. I'm so happy with the result, I'm struggling with doing anything to it! The Silly Putty works really well, especially for complex designs. Just be careful what you use for paint. These are Tamiya arcylics applied wiith air brush, mostly! I painted the whole thing dark yellow, then masked off what I wanted to stay dark yellow and sprayed everthing that was exposed dark green. I then left the dark yellow covered and masked off what I want to stay green. Then I resprayed what was left exposed with dark yellow so I didn't have the dark green base under the red-brown when I sprayed it on. That's when I made my mistake. To save time, I sprayed  the new dark yellow base from a can of Tamiya. Once that dried, I sprayed those areas with the red-brown. Once the paint dried, I started removing the Silly Putty, which was when I got my surprise--some chemical in the Tamiya spray can had started to liquify the Silly Putty. It was a real chore getting it all off. Fortunately, Silly Putty likes sticking together, and eventually I got it all off. I did the wheels with a brush, no masking there.

A couple things to keep in mind. Press the silly putty down really well. Whatever is exposed will get paint on it. I also had to do some touch up with a brush afterward, where lines weren't quite right or the Silly Putty wasn't pushed down well enough. Now, I'm getting ready to sand it smooth with really fine grit paper so there aren't any brush marks or paint edges for washes to settle into, which is the next part I'm still trying to make myself do. Here's the result:
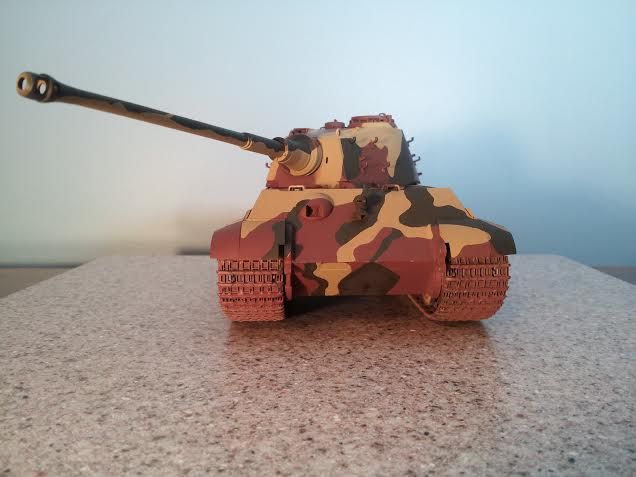
 photo KingTiger3_zps3b79b1d0.jpg

 photo KingTiger1_zps61cc0527.jpg


 photo KingTiger2_zpsa77117df.jpg

  • Member since
    May 2013
Posted by Snibs on Tuesday, March 4, 2014 2:32 PM

That's just brilliant, 1/72nd?

Some stuff that might be interesting.

https://sites.google.com/view/airbrush-and-modeling/home

On The Bench.

Tiger 1 and Tooheys.


  • Member since
    March 2014
Posted by BarrettDuke on Tuesday, March 4, 2014 2:36 PM

Thanks! It's a 1:35 Tamiya.

  • Member since
    May 2013
Posted by Snibs on Tuesday, March 4, 2014 2:43 PM

I should of noticed no cables and tools etc. Very nice job indeed.

Some stuff that might be interesting.

https://sites.google.com/view/airbrush-and-modeling/home

On The Bench.

Tiger 1 and Tooheys.


  • Member since
    March 2014
Posted by BarrettDuke on Tuesday, March 4, 2014 3:07 PM

There are cables and tools! I just haven't put them on yet. I did replace the tracks, though, with a Tamiya track links kit.

  • Member since
    December 2006
  • From: Phoenix, AZ
Posted by Fly-n-hi on Tuesday, March 4, 2014 3:12 PM

I love using Silly Putty as a mask.  Here's a build that I masked with Silly Putty:

  • Member since
    May 2013
Posted by Snibs on Tuesday, March 4, 2014 3:31 PM

Another fantastic paint job.

My 1/72 KT has all the tools molded, still needs it's Machine gun, headlight, track gluing, more touch ups the camera just kindly pointed out to me and final matt finish.

Some stuff that might be interesting.

https://sites.google.com/view/airbrush-and-modeling/home

On The Bench.

Tiger 1 and Tooheys.


  • Member since
    March 2014
Posted by BarrettDuke on Tuesday, March 4, 2014 3:52 PM

Yup. Good looking plane!

  • Member since
    March 2014
Posted by BarrettDuke on Tuesday, March 4, 2014 3:53 PM

Ah, yes, got it. Well, they'd be mighty small tools to handle if they weren't!

  • Member since
    August 2007
  • From: back country of SO-CAL, at the birth place of Naval Aviation
Posted by DUSTER on Tuesday, March 4, 2014 4:02 PM

Very good looking job. sounds like you have a good grasp of 'how to".

and the point about the spray can is  spot on. -darn pesky chemical additives 

Steve

Building the perfect model---just not quite yet  Confused

G-J
  • Member since
    July 2012
Posted by G-J on Thursday, March 6, 2014 5:36 PM

What a great idea....I just completed my last build doing the camo freehand.  Never again.  My next build I believe will have camo, so I'll give this a whirl.

On the bench:  Tamyia Mosquito Mk. VI for the '44 group build.  Yes, still.

On deck: 

  • Member since
    March 2014
Posted by BarrettDuke on Thursday, March 6, 2014 6:47 PM

Snibs, That looks really good!  1:72 must be tough to work with in that detail. The Porsche turret really changes the looks of the tank, too.

  • Member since
    March 2014
Posted by BarrettDuke on Thursday, March 6, 2014 6:49 PM

Cool, G-J. I hope you'll post a picture when you get the camo done.

  • Member since
    May 2013
Posted by Snibs on Thursday, March 6, 2014 11:08 PM

Thanks BarrettDuke, meant 1/76....always mix those two scales up.

Some stuff that might be interesting.

https://sites.google.com/view/airbrush-and-modeling/home

On The Bench.

Tiger 1 and Tooheys.


  • Member since
    January 2014
Posted by Silver on Wednesday, April 2, 2014 2:09 PM
Perfect for camo.Even on aircraft patterns.
JOIN OUR COMMUNITY!

Our community is FREE to join. To participate you must either login or register for an account.

SEARCH FORUMS
FREE NEWSLETTER
By signing up you may also receive reader surveys and occasional special offers. We do not sell, rent or trade our email lists. View our Privacy Policy.