- Member since
July 2009
- From: North Carolina
|
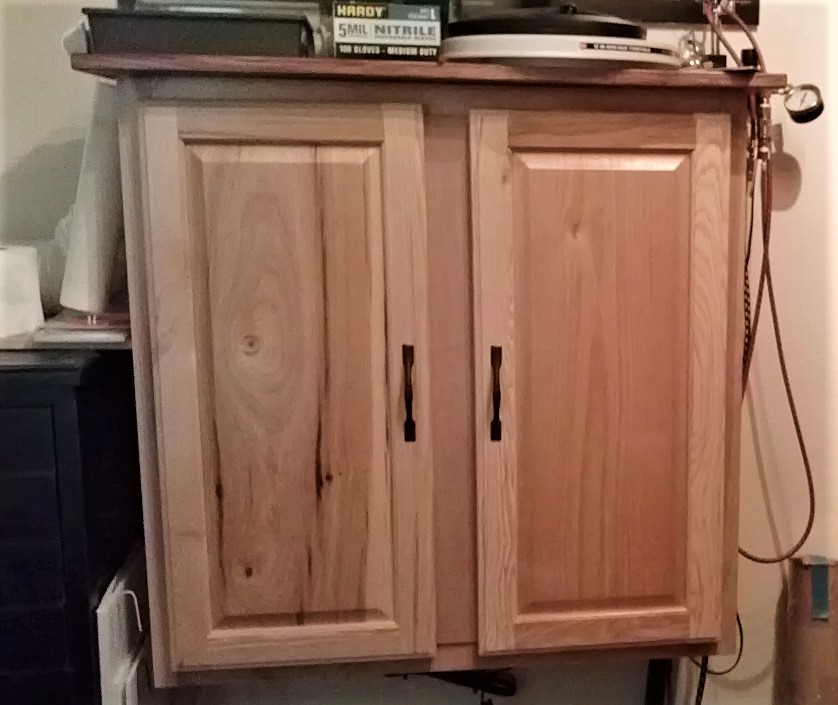
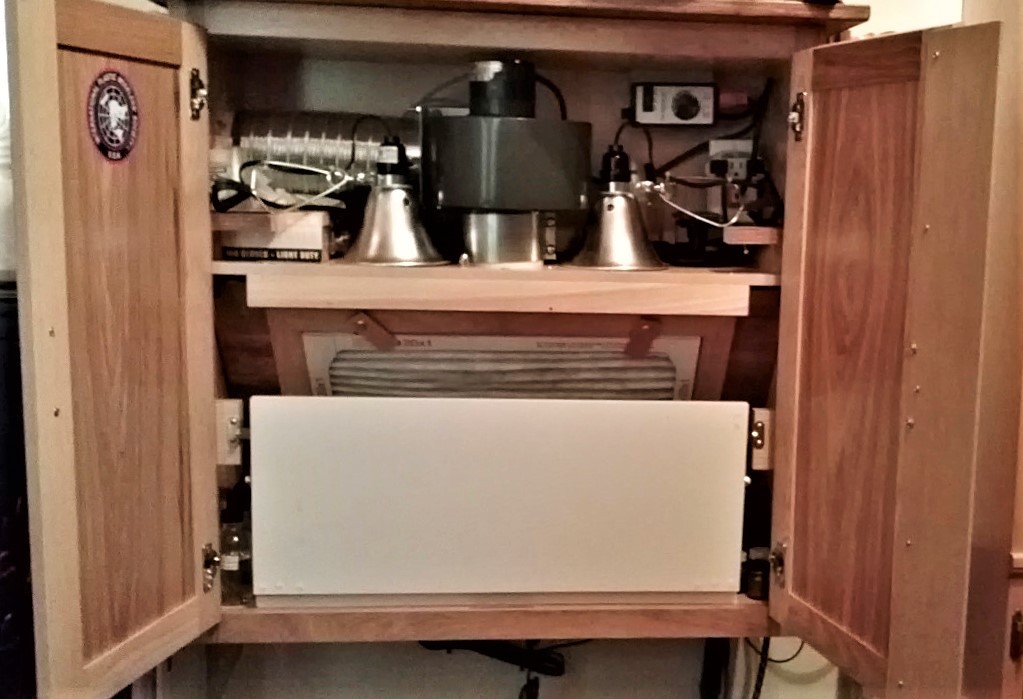
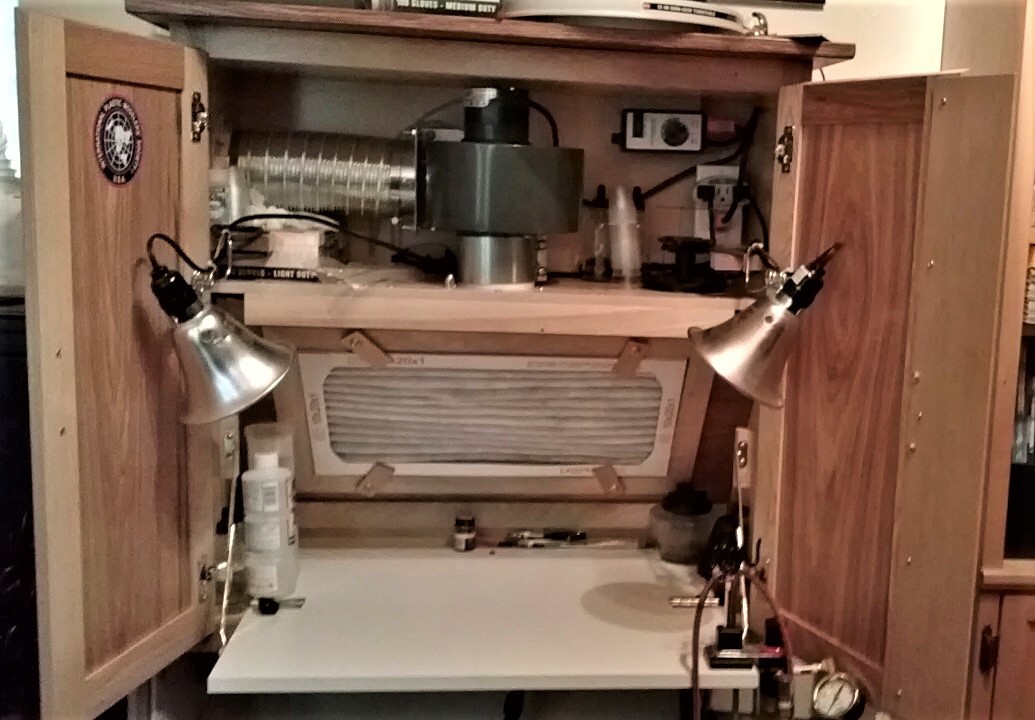
A compact spray booth using a standard wall mount kitchen cabinet
After years of mostly lurking I have finally subscribed to a photo hosting site so that I can post images (I hope lol). Here is one way to create a spray booth using a wall cabinet if your work space is limited (sorry for the crummy old cell phone pics). The cabinet is a standard wall mount kitchen cabinet. I removed the vertical center piece from the face frame and fastened a piece of 1/8” birch plywood on the rear of one door edge to close the center gap when the doors are closed. I then constructed a simple plenum with an angled panel that included an opening to accept a standard furnace filter. The exhaust blower (a Dayton shaded pole unit) was mounted on the top panel of the plenum and ducted out the side of the cabinet using standard 4” dryer duct. This was then passed out a nearby window using another short run of flex duct. The fold down work surface is just a piece of melamine that is hinged and supported using standard lid support hardware from the local home center. For lighting I used inexpensive clamp on reflector lights with daylight temperature CFL bulbs and they just clamped to wood blocks attached to the sides of the cabinet. I also installed a speed controller for the blower but ended up running it at full speed all the time. A plus using the controller was the fact that it included a standard fuse holder and it is wise to fuse the system at a level that is appropriate for whatever blower current rating you have. All in all it worked pretty well for my situation and it was a fun project.
|