SEARCH FINESCALE.COM

Enter keywords or a search phrase below:

Liquid dispensers

5499 views
105 replies
1 rating 2 rating 3 rating 4 rating 5 rating
  • Member since
    July 2014
  • From: Franklin Wi
Liquid dispensers
Posted by Bakster on Saturday, February 12, 2022 9:38 PM

Perhaps I am bored. Perhaps I need a diversion from the model I am working on. In either case, here is another post from yours truly. Maybe it will be of interest to someone. 

I did some major revamps regarding my spaybooth and the tools that I use with it. I first started by calking some of the air leaks. The blower I am using is one of those portable paint booth jobbers that fold up. I retrofitted it to the back of my booth and what I recently discovered is that the fan housing had some major air leaks. Why is that a problem? Because it is blowing paint particulates and fumes through those leaks and into my working environment. You could litterally feel air blowing out when you put your hand over them. There were three major areas that had leaks. 

1. Around the powerswitch housing.

2. Around the flange for the exhaust hose.

3. Around the powercord compartment. 

4. Lastly, I shored up the opening into my booth.

Since doing this it has drastically reduced fuming, and I dare say, it improved the air draw out of the booth and through the exhaust hose.

But that is all side commentary of what I wanted to mention. And that is, I have new liquid dispenser bottles, aka, safety wash bottles.
And I have to say, they are proving to be very handy.

 I use them primarily for dispensing lacquer thinner during my AB cleaning process. One bottle is for used lacquer, the other is for clean lacquer. So when it's time to clean the AB, I first squirt thinner from the used thinner bottle and into the color cup. For the most part, particulates settle and what comes out is fairly clean lacquer. (Why waste clean lacquer for this messy stage.) I take a foam swab, dip it into the cup, and wipe the paint from the wall and bottom of the cup. Then I spray the thinner through the brush. I refill the cup but this time leaving the nozzle in the cup, I depress the container, and this causes the thinner to back flush into the bottle. I repeat this process in a quick motion and this forces thinner back and forth helping to loosen remaining paint in the cup. I then spray the thinner into a paper towel and remove the color cup. Using the nozzle I port it up into the neck of the cup, and do the same process of flushing /back flushing. It clears the paint in the neck and bottom of the color cup. And at any stage I can draw the dirty solution back into the bottle. No need to dump it. I reattach the color cup, and now using the fresh thinner bottle I fill the cup and spray out any remaing color. It sounds complicated but it's easy and fast. Then I follow my regular process of cleaning of the needle and nozzle. Btw. Reusing the dirty lacquer keeps it from having to be dumped. I can use that refuse for probably years.

And if none of that grabs ya, I will just say this. These make for great dispensors. The liquid comes out in a fine and controlled stream. The angle of the nozzles works well with streaming fluid into your cup. I love that the nozzels have caps and that helps with fuming, and with evaporation into your living/working environment.

Also new, are the mini pippets that I ordered. I ordered a box of 200 off Amazon for $9. The waste footprint of these is smaller than the typical pippets, so not as much plastic going into a landfill. And the size is I think perfect for extracting paint from paint jars. I succumbed to using pippets because I was tired of trying to clean the threads off paint jars after pouring. There is less waste of paint too because of this. You can get exact amounts of paint that you need straight from the jar and into your color cup. If you draw too much, squirt it back into the paint jar. No muss, no fuss.


So from all that malarkey, maybe you can garner something. If not, well, I had a good time posting it.

PS: Here are some links.

https://www.amazon.com/dp/B097GYJ4B8?psc=1&ref=ppx_yo2_dt_b_product_details

https://www.amazon.com/dp/B0853DDH7C?psc=1&ref=ppx_yo2_dt_b_product_details

  • Member since
    August 2021
Posted by goldhammer88 on Saturday, February 12, 2022 9:59 PM

If you have the marking on them rubbing off, relabel and cover with a wrap of clear package tape.

  • Member since
    July 2014
  • From: Franklin Wi
Posted by Bakster on Saturday, February 12, 2022 10:08 PM

goldhammer88

If you have the marking on them rubbing off, relabel and cover with a wrap of clear package tape.


Good tip, GH. I will probably have to because I think it's rubbing off already.

  • Member since
    April 2020
Posted by Eaglecash867 on Sunday, February 13, 2022 5:08 AM

You can also use cheap masking tape to make your labels.  The cheap tape isn't much good for masking things because the adhesive is too strong, which makes it great to use as labels.

Just in case you don't already know this, since you're rightly concerned about the waste footprint of your pippettes, I found that they're usually surprisingly solvent-proof.  So, you can clean and reuse them.  I just stick the tips in my relish jar of dirty MEK and squeeze the bulb a few times to flush them clean after each use.

My airbrush cleaning is a bit different since I have an external mix Paasche H.  Between each color, I just drop the color cup, needle, and air cap into another relish jar of MEK, close the jar, and run it in my little ultrasonic cleaner for about 30 minutes.  In the mean time, I have 2 more full sets of color cups, needles, and air caps, so I can keep going with subsequent colors if I want to.  Those parts are cheap for the Paasche H, and easy to get.

No paint booth here.  My airbrushing technique doesn't require one because nearly every drop of paint goes on the model and not into the air.  I use an extremely bright headlamp during my model building, and its great for detecting when my paint volume is too high and dispersing into the air.  Dust and paint particles light up like a Christmas tree if they're present.  The super fine coats also minimize fuming because the paint is mostly dry within a few seconds of being applied.  My old testors enamels are the worst in the stink department...not much I can do about their slow cure time, but MRP lacquers are great.  Very little fuming from those with my airbrushing technique.

Nice system you've got there Bakster.  Always cool to see the ingenuity of fellow modelers.

"You can have my illegal fireworks when you pry them from my cold, dead fingers...which are...over there somewhere."

  • Member since
    February 2021
Posted by MJY65 on Sunday, February 13, 2022 5:30 AM

I also use similar wash bottles.  Brother P-touch labels hold up pretty well and only need to be changed occasionally.  

  • Member since
    July 2014
  • From: Franklin Wi
Posted by Bakster on Sunday, February 13, 2022 8:46 AM

MJY65

I also use similar wash bottles.  Brother P-touch labels hold up pretty well and only need to be changed occasionally.  


Good to know! Thank!

  • Member since
    July 2014
  • From: Franklin Wi
Posted by Bakster on Sunday, February 13, 2022 9:18 AM

Eaglecash867
Just in case you don't already know this, since you're rightly concerned about the waste footprint of your pippettes, I found that they're usually surprisingly solvent-proof.  So, you can clean and reuse them.  I just stick the tips in my relish jar of dirty MEK and squeeze the bulb a few times to flush them clean after each use.

Yup, I didn't mention that but I do that from time to time. Sometimes, I let the paint set too long and cleaning them gets too difficult. Maybe I should have a small jar of thinner that it soaks in. Or maybe just toss them! Lol.

Eaglecash867
My airbrush cleaning is a bit different since I have an external mix Paasche H.  Between each color, I just drop the color cup, needle, and air cap into another relish jar of MEK, close the jar, and run it in my little ultrasonic cleaner for about 30 minutes.  In the mean time, I have 2 more full sets of color cups, needles, and air caps, so I can keep going with subsequent colors if I want to.  Those parts are cheap for the Paasche H, and easy to get.

That is a nice system as well. I am really interested in hearing more about this brush since it's an external mix. I have never tried an external mix brush. Do you care to share how it performs for you? Obviously you really like it or you wouldn't be using it. Tell me what you like about it and what you might not like about it. And what I am most interested is in how the paint behaves when it hits the model. Can it go on heavy? Does it go on smooth? Orange peel? Tip dry issues? I am really tired of the dance I have to do to avoid orange peel and or occasional clumps. It is making me want to try rattle cans, particularly with larger sections of models.

There was a video I watched years back where a guy demonstrated using a cheapo external mix brush. It might have been a testers brush. I was amazed at the volume of paint he could lay down, and in so doing, he got a nice smooth finish. It was like watching him using a mini rattle can. The guy basically admonished people to stop using internal mix brushes that take too long a time to lay paint.

Eaglecash867
Nice system you've got there Bakster.  Always cool to see the ingenuity of fellow modelers.

If I show you the lengths I go through you will think I am nuts. I built a booth that has holes in the front that I put my arms through. It is almost a closed system but not entirely because I have to allow for air movement. I built it for back in the day when I lived in an apartment building. I had to minimize fuming for myself and for my girlfriend that had health issues. It works really well for that. With my latest mods, I don't smell anything until I open the front door of the booth. I will post pictures later.


  • Member since
    April 2020
Posted by Eaglecash867 on Sunday, February 13, 2022 9:57 AM

Bakster
That is a nice system as well. I am really interested in hearing more about this brush since it's an external mix. I have never tried an external mix brush. Do you care to share how it performs for you? Obviously you really like it or you wouldn't be using it. Tell me what you like about it and what you might not like about it. And what I am most interested is in how the paint behaves when it hits the model. Can it go on heavy? Does it go on smooth? Orange peel? Tip dry issues? I am really tired of the dance I have to do to avoid orange peel and or occasional clumps. It is making me want to try rattle cans, particularly with larger sections of models.

It performs flawlessly, and I haven't found anything I can't do with it.  Its all just a matter of getting the paint/thinner ratio and the pressure right for what I'm trying to accomplish.  The only time that orange peel is a problem is when I'm spraying into tubes or semi-enclosed areas that have sharp angles.  But, that's only a problem when I forget to dial my air pressure down.  I airbrush the insides of intake tunnels and exhaust tubes at about 10 PSI, and I get a nice, smooth finish.  There's absolutely nothing I don't like about it.  Its like the AK-47 of airbrushes, just keeps on shooting no matter what.

You can go as heavy as you want to with it, but I never do because its just not how I airbrush.  Even a nice, glossy finish on a car body or chassis goes on with thin, light passes...I just gradually increase the volume of paint and get progressively closer to get the wet look at the end.  I find that I like the results better than a heavy coat.  It preserves fine details, and gradually builds thin layers of paint that become increasingly more able to hold onto their own kind so the final pass goes on wet, without worrying about runs of sags.  Just have to keep moving and not hover over anything.  You can get needle and aircap combinations from the #1 which is the finest, to the #5 which is the largest, highest-volume.  I almost never use anything bigger than the #1, except for doing a gloss finish on a car, where I may step up to a #3.

I live in an apartment myself and the thin, light, low-volume technique pretty much eliminates paint odors or stray paint particles floating in the air.  Something that has helped tremendously with getting the volume, pattern width, and air pressure right is that I always start by spraying onto a Post-It Note pad.  That also helps me make sure any lingering moisture in the lines is purged before it goes to the model.  

Did all of the primering, 2K black base coating, Alclad plating, painting, and Alclad heat effects and metal color variations and shading on this F-4B stabilator with this one, simple airbrush.

Also did all of the same stuff, with heating effects and soot deposits on the exhausts of the same aircraft with it.  Its a very versatile airbrush that has been trouble-free and low maintenance.


"You can have my illegal fireworks when you pry them from my cold, dead fingers...which are...over there somewhere."

  • Member since
    May 2013
  • From: Indiana, USA
Posted by Greg on Sunday, February 13, 2022 10:10 AM

I use the standard squrt bottles as shown on the left in your pic for everything, except lacquer which I keep in a sealed glass pickle jar-type thing, and I STILL sometimes find it evaporates.

I put lacquer into something plastic once I shouldn't have, and I've been afraid to store it in anything but glass since. It looks like those containers you are using work just fine, so thanks for that. (would save me the extra step of using a pipette for cleanup. So thanks for that. No evaporation, right?

Also, I read the above a few times to try to find and answer to this; I obtained one of those 90 degree angle dispenser tip bottles with an airbrush cleaning kit years ago and have yet to use it. Can you explain more why the bend is helpful? (You probably hit on it in your post above, but it is evading me)

BTW, I like the idea of saving used lacquer for initial cup cleaning!

  • Member since
    July 2008
  • From: Summerville, SC
Posted by jeffpez on Sunday, February 13, 2022 10:17 AM

I've been using empty dishwashing liquid bottles for years with no issues. That includes lacquer thinner which doesn't evaporate (assuming I remember to close the cap) and doesn't destroy the plastic bottle either. I last replaced one because the flip open top broke off and I'm too lazy to want to take it off and put in down on the bench. I have 4 bottles each with different things in them. 

  • Member since
    July 2014
  • From: Franklin Wi
Posted by Bakster on Sunday, February 13, 2022 10:45 AM

Eaglecash867


Bakster
That is a nice system as well. I am really interested in hearing more about this brush since it's an external mix. I have never tried an external mix brush. Do you care to share how it performs for you? Obviously you really like it or you wouldn't be using it. Tell me what you like about it and what you might not like about it. And what I am most interested is in how the paint behaves when it hits the model. Can it go on heavy? Does it go on smooth? Orange peel? Tip dry issues? I am really tired of the dance I have to do to avoid orange peel and or occasional clumps. It is making me want to try rattle cans, particularly with larger sections of models.


It performs flawlessly, and I haven't found anything I can't do with it.  Its all just a matter of getting the paint/thinner ratio and the pressure right for what I'm trying to accomplish.  The only time that orange peel is a problem is when I'm spraying into tubes or semi-enclosed areas that have sharp angles.  But, that's only a problem when I forget to dial my air pressure down.  I airbrush the insides of intake tunnels and exhaust tubes at about 10 PSI, and I get a nice, smooth finish.  There's absolutely nothing I don't like about it.  Its like the AK-47 of airbrushes, just keeps on shooting no matter what.

You can go as heavy as you want to with it, but I never do because its just not how I airbrush.  Even a nice, glossy finish on a car body or chassis goes on with thin, light passes...I just gradually increase the volume of paint and get progressively closer to get the wet look at the end.  I find that I like the results better than a heavy coat.  It preserves fine details, and gradually builds thin layers of paint that become increasingly more able to hold onto their own kind so the final pass goes on wet, without worrying about runs of sags.  Just have to keep moving and not hover over anything.  You can get needle and aircap combinations from the #1 which is the finest, to the #5 which is the largest, highest-volume.  I almost never use anything bigger than the #1, except for doing a gloss finish on a car, where I may step up to a #3.

I live in an apartment myself and the thin, light, low-volume technique pretty much eliminates paint odors or stray paint particles floating in the air.  Something that has helped tremendously with getting the volume, pattern width, and air pressure right is that I always start by spraying onto a Post-It Note pad.  That also helps me make sure any lingering moisture in the lines is purged before it goes to the model.  

Did all of the primering, 2K black base coating, Alclad plating, painting, and Alclad heat effects and metal color variations and shading on this F-4B stabilator with this one, simple airbrush.

Also did all of the same stuff, with heating effects and soot deposits on the exhausts of the same aircraft with it.  Its a very versatile airbrush that has been trouble-free and low maintenance.


I just watched a video (Paul Budzik) and he says the H does not atomize as well as an internal mix. Though, he says it's a good brush. I found the video a bit confusing. I am still very intrigued by your testimony. You make the point that you have to adust accordingly, and that could explain the difference with his view, and what your experience is. Thanks for the in-depth analysis. I truly appreciate it and I am considering this brush. 

I am very critical with my paint finishes and generally, I can get an almost glass smooth finish but, I have to flood the piece with paint to draw it out. I hate graininess in what is supposed to be a gloss. Even with a flat, I want it completely smooth. In the case of gloss, by flooding it on you are opening things up to splatter, catching dust, and runs. And I question whether the internal mix brushes I use are suited for this. Hence, my interest in the external mix.

Just musin...

  • Member since
    July 2014
  • From: Franklin Wi
Posted by Bakster on Sunday, February 13, 2022 11:16 AM

Greg
I keep in a sealed glass pickle jar-type thing, and I STILL sometimes find it evaporates.

I think yes, it always will. It will find a way to gas out no matter what.

Greg
No evaporation, right?

Greg, I think it will be the same as above. The caps slow it down but it always finds a way. Having said that though, if it is, I think it is very minimal. And yes, this plastic is not melting on me so it should be good to go.

Greg
Can you explain more why the bend is helpful?

That is a good question and I had to think it through. I think it's helpful because it gives you extreme control. The bottle remains in an almost vertical position and yet you can steam fluid at a right angle with almost no drippage. Like when before I was using a pipette to draw thinner from a bottle, I immediately had to flip the pipette upwards or the thinner would drain out onto your work surface. Then I had to be careful as I position it over the color cup because, again, it drains, and makes a mess.  In fact, this is what made me search out these bottles because I was sick to death of the drippage from pipettes, or even from an eye dropper. They leak too. These bottles are extremely precise. No muss no fuss. I love them.

Greg
BTW, I like the idea of saving used lacquer for initial cup cleaning!

Yeah Buddy, recycling. Less waste, less cost.


  • Member since
    July 2014
  • From: Franklin Wi
Posted by Bakster on Sunday, February 13, 2022 11:20 AM

jeffpez

I've been using empty dishwashing liquid bottles for years with no issues. That includes lacquer thinner which doesn't evaporate (assuming I remember to close the cap) and doesn't destroy the plastic bottle either. I last replaced one because the flip open top broke off and I'm too lazy to want to take it off and put in down on the bench. I have 4 bottles each with different things in them. 


Whatever works right Jeff? Yes

  • Member since
    May 2013
  • From: Indiana, USA
Posted by Greg on Sunday, February 13, 2022 12:59 PM

Thanks for opining further on the bent nozzle stems, Steve. That all makes sense. I'll have to try mine.


  • Member since
    July 2014
  • From: Franklin Wi
Posted by Bakster on Sunday, February 13, 2022 1:17 PM

Greg

Thanks for opining further on the bent nozzle stems, Steve. That all makes sense. I'll have to try mine.


No problem, Greg. You know that l like to Opine! Lol

  • Member since
    July 2014
  • From: Franklin Wi
Posted by Bakster on Sunday, February 13, 2022 1:48 PM

As promised, here is my spraybooth. I made this over 30 years ago, though she has seen some revision changes, mostly with the extraction system. I made it out of items readily available at a hardware store, including the aluminum angle stock that I cut, mitred, and drilled. I have one fan directly behind the booth, and an inline fan further up the food chain. The exhaust is sent to my attached garage. And let me tell you, when I enter the garage after the spray session, it smells to high heaven. And that speaks to the fuming if I didn't vent it. My basement would wreak for hours and the heating system would suck and blow it throughout the house. But not the case with my system. Part of my regiment is to collect the soaked papertowels, gloves, foam swabs, whatever, and take it straight to the dumpster. Opening the main garage door for those few minutes is enough to clear the stink.

So, I do my setup, close the front door, and spray with my arms working through the front openings. The system works so well, I don't have to wear a resporator. On the left front side I made an opening that is filtered allowing some outside air to draw in. Additional air would come through the sleeves I made.

Close up view.

Fan assembly behind the booth.

The only negative in this design is that the plexiglass has a charge to it and that attracts dust. I need to figure that out. Maybe wipe it down with a fabric sheet or something. So when I spray, the overspray changes the charge in the booth and anything clinging to the ceiling will drop. 

And as long as I am in talkative mood, here is another thing I repurposed. This caddy was designed for giftwrapping. I turned it into a AB cart. It has wheels and I role it over when needed, usually when I am ready to clean the brush. I store swabs, and much more. The rod at the side of the rack was to hold ribbon spools, I use it as a paper towel dispense. The thing works very well for my purposes. I think I got this about 4 years ago.  (Assembly required)

 And that completes my tour for the day.

 https://www.amazon.com/gp/product/B01HI6SLD6/ref=ppx_yo_dt_b_asin_title_o07_s00?ie=UTF8&psc=1

 Possible alternate..


https://www.afrugalchick.com/michaels-mobile-craft-storage-center-45-reg-90/


  • Member since
    July 2014
  • From: Franklin Wi
Posted by Bakster on Sunday, February 13, 2022 3:09 PM

Hey Eaglecash, I ordered an H. I have to try it. FYI.

  • Member since
    April 2020
Posted by Eaglecash867 on Sunday, February 13, 2022 5:09 PM

Cool beans, Bakster!  I think with airbrush review type videos, the reviewer is always going to be a little biased just from the fact that they have a model of airbrush they like and have a lot of experience with.  Its totally understandable that trying something different may or may not be like what they're used to.  Its all about setting things up right with the right amount of thinning and air pressure and it atomizes beautifully.  Its not complicated at all though, I'm definitely not one to be into using a virtual chemistry set to make paint flow through it properly.  One of the first things I painted with it was a 1984 Corvette model I had built in high school to give to my step-father as a birthday present.  Still remember being scared to touch it a week after I painted it, because the paint was so smooth and glossy, it looked perpetually wet.  I also have a Paasche VL and an Iwata Eclipse HP-CS, but I have been using the same Paasche H since I was 15 and just keep coming back to it because its what I'm used to.  I'm sure you'll love its simplicity and reliability.

"You can have my illegal fireworks when you pry them from my cold, dead fingers...which are...over there somewhere."

  • Member since
    July 2014
  • From: Franklin Wi
Posted by Bakster on Sunday, February 13, 2022 6:15 PM

Eaglecash867
I think with airbrush review type videos, the reviewer is always going to be a little biased just from the fact that they have a model of airbrush they like and have a lot of experience with.  Its totally understandable that trying something different may or may not be like what they're used to

I agree wholeheartedly.


Eaglecash867
I'm sure you'll love its simplicity and reliability. Add Quote to your Post

That is what I am hoping for, simple but effective. I can't wait to try it. Maybe get some modeling joy back. Seems like everything I try of late has been a struggle. 

I will let you know how it works out. It will be a few weeks at least because it sound's like a few weeks for arrival.

  • Member since
    April 2020
Posted by Eaglecash867 on Sunday, February 13, 2022 7:03 PM

Bakster
That is what I am hoping for, simple but effective. I can't wait to try it. Maybe get some modeling joy back. Seems like everything I try of late has been a struggle.  I will let you know how it works out. It will be a few weeks at least because it sound's like a few weeks for arrival.

Looking forward to that.  Heh...you know...airbrushing is actually my favorite part of model building these days.  Finding those MRP paints made it even more enjoyable than it already was.   I can paint a whole group of parts, or just paint one part, the setup and cleanup are that easy...don't even have to plan airbrushing sessions to minimize messing around...there is none.  I just decide to paint something, and 5 minutes later, I'm done and everything is cleaned up.  Can't get much enjoyment out of something that is a PITA, and this is as slick and painless as it gets.  Cool

"You can have my illegal fireworks when you pry them from my cold, dead fingers...which are...over there somewhere."

  • Member since
    July 2014
  • From: Franklin Wi
Posted by Bakster on Sunday, February 13, 2022 7:59 PM

Eaglecash867
Can't get much enjoyment out of something that is a PITA, and this is as slick and painless as it gets.  

Amen. Man, you are singing airbrsushing heaven. If this works as good as you say... I'll be shouting it from the rooftop.  Who's that nut on the rooftop? Oh, thats just Bakster.

I just canceled my order through Amazon because I found someone locally that is stocking it. So with luck, I will be trying it out this week! Sha-ba...

  • Member since
    November 2020
  • From: Blaine ,MN
Posted by BootBoyx2 on Sunday, February 13, 2022 8:20 PM

Bakster, if you're talking about a small static elec. charge buildup in your booth maybe try a small gauge grounding wire attached to the metal frame. Just a thought.

Be careful of what you ask for, you just might get it.

  • Member since
    July 2014
  • From: Franklin Wi
Posted by Bakster on Sunday, February 13, 2022 8:24 PM

BootBoyx2

Bakster, if you're talking about a small static elec. charge buildup in your booth maybe try a small gauge grounding wire attached to the metal frame. Just a thought.


Yup that is exactly what I am talking about. You think that would do it? Interesting idea.

  • Member since
    November 2020
  • From: Blaine ,MN
Posted by BootBoyx2 on Sunday, February 13, 2022 9:11 PM

It's worth a try. I'm not an electrician but I think a 18,20 or 22 gauge wire would be enough. Attach one end to a screw in the frame and the other to IDK ,the table leg or maybe a screw in your inline fan. Maybe another member has an idea. If it does'nt work your not out much.

Be careful of what you ask for, you just might get it.

  • Member since
    July 2014
  • From: Franklin Wi
Posted by Bakster on Sunday, February 13, 2022 9:58 PM

BootBoyx2

It's worth a try. I'm not an electrician but I think a 18,20 or 22 gauge wire would be enough. Attach one end to a screw in the frame and the other to IDK ,the table leg or maybe a screw in your inline fan. Maybe another member has an idea. If it does'nt work your not out much.


ig 


It is worth a try. Thanks for the idea. I will try it....

  • Member since
    July 2014
  • From: Franklin Wi
Posted by Bakster on Sunday, February 13, 2022 10:02 PM

Hey Eaglecash... check this video out using the Paasche H #3. This is what is am talking about.  Clearly, this brush is capable of moving some paint.


Link below should the first one not work well.


https://youtu.be/lCKZ_fo4eW0

  • Member since
    October 2019
  • From: New Braunfels, Texas
Posted by Tanker-Builder on Monday, February 14, 2022 8:25 AM

Hi;

        Just thought I would chime in. My newest A.B. is twenty years old. I still use mainly an old DeVilbiss sign and mural brush from my Automotive repair days. That coupled with Three Badgers and one Paasche they are all internal mix.

       I never have liked external cup brushes. I had instances where detritus fell in the cup from wherever. Some of the places I was contracted to work in, had lousy airflow and filtering. When You're painting a sign on the side of a commercial vehicle you don't want to waste time always cleaning out the brush and cups.

       The DeVilbiss replaced a Binks I bought used and got many years of service out of. When parts got hard to find I went to the D.V. Besides the D.V. and the Binks were then used to frost a clearcoat over the area and blended with clear to the panel edges. Signs last longer that way! Now they wrap them.

  • Member since
    April 2020
Posted by Eaglecash867 on Monday, February 14, 2022 11:07 AM

Bakster

Hey Eaglecash... check this video out using the Paasche H #3. This is what is am talking about.  Clearly, this brush is capable of moving some paint.


Link below should the first one not work well.


https://youtu.be/lCKZ_fo4eW0


YIKES!  Those are the airbrushing videos that make me cringe.  LOL.  Definitely not my style of airbrushing.

On the subject of the static charge on your plexiglass, maybe that isn't necessarily a bad thing.  Better to have the dust particles being attracted to the plexiglass and not the pieces you're painting.  If you don't want the static charge on the plexiglass, you'll have to switch to a different material.  Putting a ground wire on the door won't do anything because the plexiglass itself is an insulator and will hold the charge all day long, no matter what the door frame is grounded with.  I have seen the glass on old copiers with automatic document feeders that had a conductive coating on them.  That conductive coating dissipated the static charge so the paper passing through wouldn't get stuck to it.  You might also look into getting ESD-safe plexiglass (or whatever the material actually is).  That would be conductive, so putting a ground wire on that will dissipate the charge.  Other than that, you can just get a pack of microfiber towels from Amazon and just dust it regularly.  Those towels make it really easy...and green, because you can just wash and re-use them instead of throwing them away like paper towels.

"You can have my illegal fireworks when you pry them from my cold, dead fingers...which are...over there somewhere."

  • Member since
    July 2014
  • From: Franklin Wi
Posted by Bakster on Monday, February 14, 2022 3:16 PM

Eaglecash867
YIKES!  Those are the airbrushing videos that make me cringe.  LOL.  Definitely not my style of airbrushing.

Yeah Buddy-- that is how I roll. Give me coverage-- or give me death. Stick out tongue Especially with car models. Not so much other things.


Eaglecash867
You might also look into getting ESD-safe plexiglass (or whatever the material actually is). 


That is another interesting thought. Fitting new panels would be a lot of work but, I will keep that in mind.

Eaglecash867
Other than that, you can just get a pack of microfiber towels from Amazon and just dust it regularly.  Those towels make it really easy...and green, because you can just wash and re-use them instead of throwing them away like paper towels.

Here is the issue. Anytime you wipe plastic you build up a static charge. Two issues.

1. As I wipe the inside walls, I have the front panel open. Static electricity builds and like a magnet, dust is drawn in. I have seen it happen. I watched a piece of lint sized dust float straight in like it was on a mission. I am standing there thinking, where the H do you think you are going? And no, the fan was not on, should anyone have the thought.

2. Once I start to airbrush, the panels lose their static charge and dust falls right onto what I am working on. It took me awhile to figure this out. I could not understand how after I meticulously cleaned the inside of the booth--dust would later fall onto my work. Then I had seen it happen. I had literally seen a piece of lint sized dust release from roof, right onto my work. I am convinced that by airbrushing during those times, it eventually changes the charge on those panels and dust lets loose. 

I watched a video recently where a builder talked about dust issues. He said the best area to store a model for curing is in a metal cabinet, and never plastic. Never plastic for the very reason I am talking about, that plastic attracts dust. Based on my experiences, I must agree with him. 

So what I try to do is spray the walls with cleaner, wipe them down, then take one of them sticky tape rolls and roll it over the entire inner surface. Any captured dust should get stuck to the roll. I think I might add to the equation wiping the wall with a dryer sheet. I read somewhere that that is one way to help reduce the static charge.

Anyway--it's always something. 

Got the AB today, picked it up at noon. Also got a jar of MR Primer Surfacer 1500, this was the gray. I should take a picture from within the store.  A person can not believe it. There are boxes stacked everywhere. It gets worse every time I go in there. I just shake my head because the workers don't know where to go!

Hey and TB -- don't rain on my parade. I am gonna like this brush. Think positive my good man. LOL. Yes But seriously, thanks for the input.

  • Member since
    July 2014
  • From: Franklin Wi
Posted by Bakster on Monday, February 14, 2022 10:35 PM

Hey Eaglecash... I took the H for a spin. To be honest with you, I didn't intend to try it tonight, but because the hookup went so well I thought, what the heck.

I used the #3 tip that the gun comes assembled with. I tried various settings on the brush and various compressor settings. Before long, I settled in at about 20 lbs air pressure and about 1 1/2 turns on the needle adjustment. For a heavier gloss coverage, maybe up to three turns. At higher air pressure like 30 I would get occasional globs in the finish. I was probably blowing paint off the tip. At the 20 lbs range, I got consistent and clean coverage.

The gloss came out as good as anything I got from my internal mix Badgers. And with the Badgers, I had to push the flow hard to bring out the gloss because the guns want to spray it dry. I had to work at it, and the result was not always that clean. With this gun, at the right setting, the gloss is immediate, and coverage can be built up. Or, go for the gold, turn it to 3 and spray it heavy.

Long story short, the first pass was very impressive, and I can see already that this may become my go to gun. The simplicity and effectiveness is unlike what I have experienced in the last 30 years of my airbrushing. Granted, this was just my first go, but the fact that I was able to get a good result in such short order, THAT says a lot! 

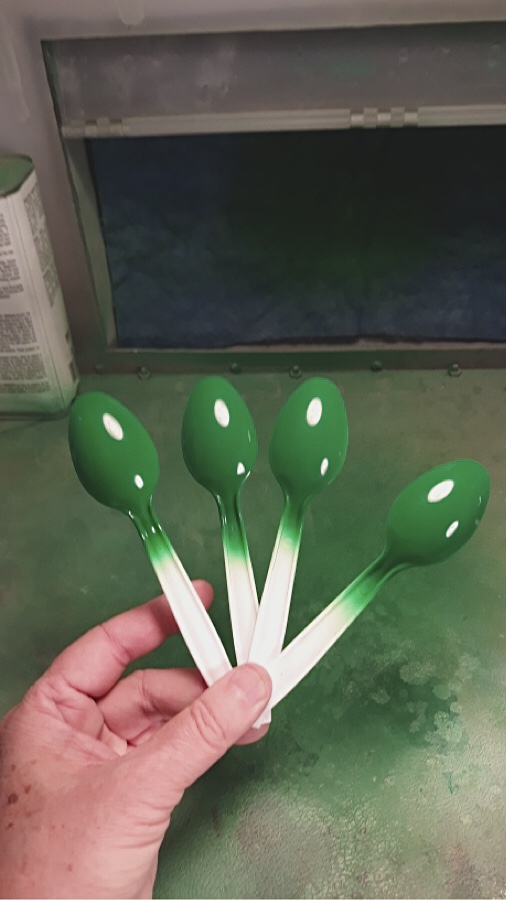
Below: Not one my clearest images but I didn't feel like digging out my dedicated camera. This image is from my shaky camera phone. But, you get the gist from it. The gloss is as good as I could expect.


Some things I need to learn:

1. I took the sidecup to my bench, added some thinner, added paint, and paint started spilling out the neck. I come to realize that because they have the spout so low and at an angle, I can only fill it half way. The alternative is to add the paint while the cup is attached to the brush. Then, it's a non-issue. So, I need create a new way of doing things. I don't typically mix the thinner/paint concoction with the cup on the brush. 

2. I need to come up with a new holder because the gun does not sit in the one I have. The kit comes with a wall mount thing but that is not the way I want to go.

3. When I first tried to spray, air was coming out, but not the paint. Eventually, I disconnected the hose and reconnected it. Suddenly, it worked. Not sure what happed but  it works now.

4. I need to learn a cleaning regiment. It seems clear to me that spraying thinner alone, won't do the job. I did that and there was still plenty of paint on the exterior of the needle. Not a big deal, easy enough to take it out. Just need to come up with a process.

Going to this gun is a different way of doing things. As our wise friend Yoda once said, you must unlearn, what you have learned. And that is so true.

Feel free to offer any additional advice.


JOIN OUR COMMUNITY!

Our community is FREE to join. To participate you must either login or register for an account.

SEARCH FORUMS
FREE NEWSLETTER
By signing up you may also receive reader surveys and occasional special offers. We do not sell, rent or trade our email lists. View our Privacy Policy.