SEARCH FINESCALE.COM

Enter keywords or a search phrase below:

How to do paint wear effect like this?

843 views
8 replies
1 rating 2 rating 3 rating 4 rating 5 rating
  • Member since
    September 2007
How to do paint wear effect like this?
Posted by rios on Monday, October 1, 2007 12:10 PM

My first post here. Actually I've been reading these forums for quite a while, just didn't have the courage to ask.

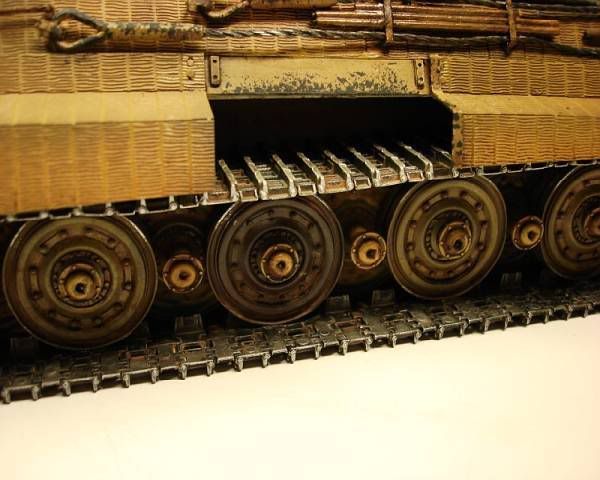
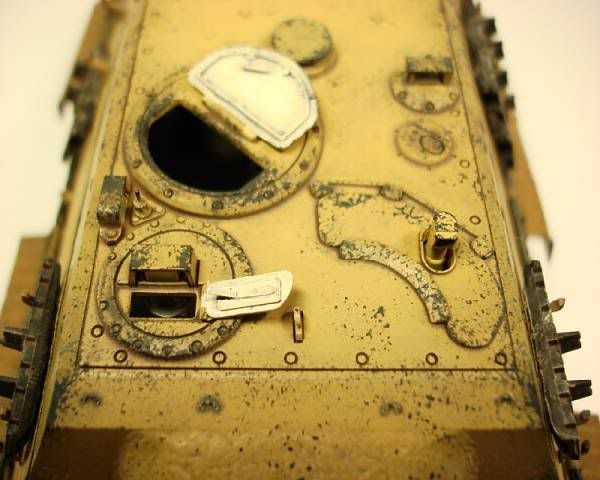
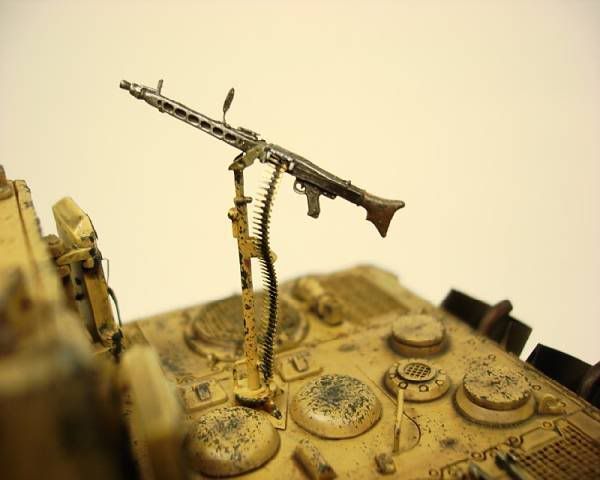
Don't know what's the proper term for it, the subject in question is the effect shown in the photos below (I stole them from a ebay store named 2deli).

I assumed they were painted together when doing paint chips, but how does one paint dots that small, and so closely grouped together?  It doesn't looked like achieved through whitewashing/scraping or sprinkling pigments (I've tried normal pastel, grinded graphite and MIG pigments).

This thing had bugged me for quite a while. I've also tried making masks (poking dots on thin plastic films) and airbrush, that didn't work out either. The closest result I've gotten to was by paintstakingly rearranging mig pigment powder under magnifier using hairline paint brush, but the powder is very fragile when set on like this, and there's no way I could overcoat that and seal it.

Please teach me how. Every time I see these perfectly done paint wears, a mixture of envy, jealousy, pain and hatrate started to burn in my chest...


  • Member since
    October 2006
Posted by uh-oh on Monday, October 1, 2007 12:44 PM

I once did it by using a toothbrush with paint. I put paint in a small dish and dip the toothbrush, then, bring the brush near to the model, with one finger, carefully press the brush and release, (more like scraching the bursh with your finger), paint will ejected from the brush and deposit on the surface. Practice this with different force and you will be able to control the dots.

 Good luckl


  • Member since
    September 2007
Posted by rios on Monday, October 1, 2007 1:27 PM
 uh-oh wrote:

I once did it by using a toothbrush with paint. I put paint in a small dish and dip the toothbrush, then, bring the brush near to the model, with one finger, carefully press the brush and release, (more like scraching the bursh with your finger), paint will ejected from the brush and deposit on the surface. Practice this with different force and you will be able to control the dots.

 Good luckl


Hi. I've tried that. I used unthinned enamel (so there's no dripping) and used toothbrush to flick it on. Some drops looked ok, but there were also large drops that seemed out of scale. I also tried using a screen (bug mesh for windows) to flick the toothbrush since pressure would of been more even this way, it still didn't completely prevent the large drops from happening. 

  • Member since
    December 2003
  • From: Indiana
Posted by hkshooter on Monday, October 1, 2007 5:27 PM
Take an old, small paint brush and cut off almost all of the bristles. Only leave a stub. now bang it against the table in a straight down direction. Really beat it up, bend the bristle stubs up really well. Load the brush with paint and then wipe it off on a paper towel or rag until most of the paint is gone, just like you would for dry brushing. Now lightly pat the brush against the surface to be painted. Ninety degrees to the surface will be best. Practice, more paint, less paint, hit harder or lighter. Let me know how it works.
  • Member since
    July 2003
  • From: Alabama
Posted by Circuitrider on Monday, October 1, 2007 5:53 PM

Welcome rios!  Follow this link for a weathering tutorial including how to create the type of wear your asking about.

/forums/824087/ShowPost.aspx

  • Member since
    September 2007
Posted by rios on Monday, October 1, 2007 7:28 PM

that one I did not notice.

Seemed like a good method though, and it would be somewhat controllable. 

I'll have to give it a try. Thanks for pointing it out for me.

  • Member since
    July 2003
  • From: Alabama
Posted by Circuitrider on Monday, October 1, 2007 9:56 PM
 rios wrote:

 Thanks for pointing it out for me.

No sweat, friend.  I hope to try it out soon myself!

  • Member since
    September 2007
Posted by rios on Tuesday, October 2, 2007 10:27 PM

Hi guys.

I tried out both hkshooter and doog's methods earlier tonight.

Sorry hkshooter, but the foam method seemed easier to control. With a brush (I have those brushes that's premade into the form you described btw), the dot sizes looked a bit too uniformed, and you could sort of see the pattern repeating. The depth of color was also quite difficult to control since the brush was very dry.

dogg's method was very easy. The foam soaked up excessive paint so there was almost no smearing from the process, although a steady hand would still help. I used 1/4 square chunks of cut off foam. After it was picked up by a tweezer, the foam surface was curved and became even smaller. I also tried using a heated needle to burn off some areas of the foam, which made the dots more spreaded. I used a reversed tweezer/clamp, it worked like a special paint brush with exchangable tips :D 

  • Member since
    December 2003
  • From: Indiana
Posted by hkshooter on Tuesday, October 2, 2007 10:39 PM
Wonderful! Thanks for reporting back. I don't do much armor but I will have to find something to thry the foam method on. Looks cool.
JOIN OUR COMMUNITY!

Our community is FREE to join. To participate you must either login or register for an account.

SEARCH FORUMS
FREE NEWSLETTER
By signing up you may also receive reader surveys and occasional special offers. We do not sell, rent or trade our email lists. View our Privacy Policy.