SEARCH FINESCALE.COM

Enter keywords or a search phrase below:

Punch Set Usage!

782 views
3 replies
1 rating 2 rating 3 rating 4 rating 5 rating
  • Member since
    December 2002
Punch Set Usage!
Posted by SNOOPY on Wednesday, July 20, 2005 8:13 PM
Just wondering if anyone has used the handheld hole punches that you strike with a mallet to cut circles needed? Also, what would be the best course of action when you need to cut a circle odd sized not found in a regular punch size? All opinions needed!
  • Member since
    February 2003
  • From: Grass Valley, CA
Posted by seaphoto on Saturday, July 23, 2005 11:48 AM
A lot depends on what your are looking for - the hold or the disk. For a handheld punch, you can produce an OK hole, but I think the disk would be ragged. In any event, the punch is brought into contact with the work, and a sharp tap will cut the hole - practice is needed to modulate the pressure. Be sure to back the material with a piece of pine or other soft wood, or you will damage the punch.

For odd sizes, if you need a hole, the best way is to drill it. If you need the disk, you can construct a punch and die fairly easily if you have access to a drill press. There is a recent thread on the subject in this section on making this tool.

Kurt

Kurt Greiner

Interested in large scale, radio control warships? http://www.warshipmodelsunderway.com

  • Member since
    December 2002
Posted by SNOOPY on Tuesday, July 26, 2005 6:41 PM
Seaphoto: Thanks, I saw the thread and that is why I was asking about using the handheld punch to see if it is even worth my time and effort or just go straight to the Waldron Type punch set. The disks I need to make are different sizes than in the Waldron Type punch set and was wondering what was another way of making disks plus the handheld punch sets are only 10.00 dollars through Harbor Freight tool store.
  • Member since
    January 2003
  • From: Washington State
Posted by leemitcheltree on Wednesday, July 27, 2005 7:29 AM
Snoopy,
I made my own punch and die set - and it works like a charm. Best of all, I made it for almost no cost at all.
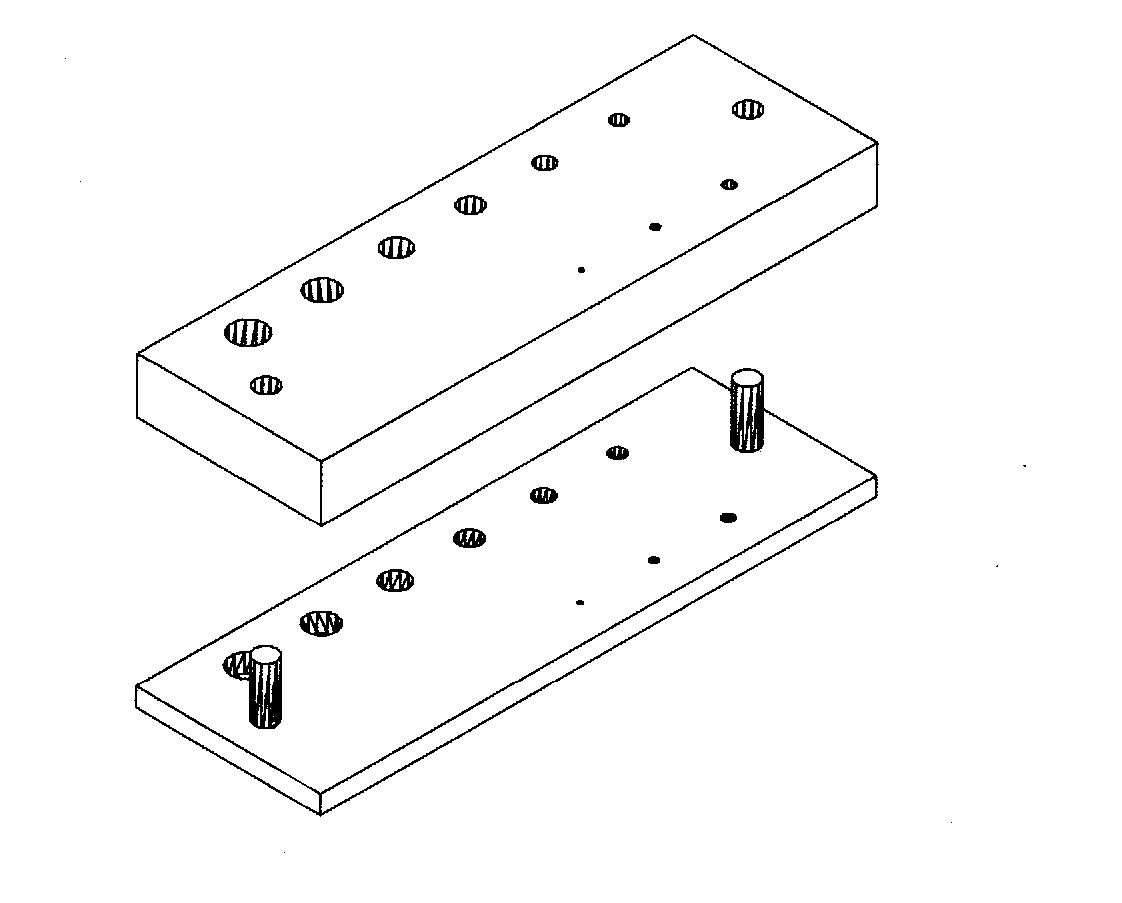
Below is a schematic - I took 3mm perspex, laminated 3 pieces together for the top, and I now have an aluminum base (it used to be plastic) for the bottom.
I clamped the top and the base together, drilled holes in each end (use a drill press!! This is important!!!) for steel locating dowels which were glued into the base.
Once they were located together, I used a stepped set of drills to carefully and slowly drill through the perspex and the aluminum. I used a metric set of drills - they come in 1/2 mm steps. Drill slowly and use a lubricating oil for a coolant to keep the perspex from heating and melting.
Use a drill press to keep all the holes perpendicular to the base. This is important for the longevity of the shear cutting edges of the base.

For the punches, I hit the back of the shanks of the same drills with the fine wheel on my bench grinder to get nice clean, sharp edges......and to use the drills, I have a small copper mallet - it weighs enough to do the job, and is soft enough to do no damage to the drill tip.
Believe me, the set works like a charm, cost next to nothing and has lasted for more than 5 years so far. It's easy to make, too.
If you have any problems, just email me.

Cheers, LeeTree
Remember, Safety Fast!!!

JOIN OUR COMMUNITY!

Our community is FREE to join. To participate you must either login or register for an account.

SEARCH FORUMS
FREE NEWSLETTER
By signing up you may also receive reader surveys and occasional special offers. We do not sell, rent or trade our email lists. View our Privacy Policy.