SEARCH FINESCALE.COM

Enter keywords or a search phrase below:

Micro Weld Review

7239 views
10 replies
1 rating 2 rating 3 rating 4 rating 5 rating
  • Member since
    July 2004
  • From: Sonora Desert
Micro Weld Review
Posted by stikpusher on Saturday, May 9, 2020 5:26 PM

On a whim for extra padding in an online hobby purchase, I decided to pick up some Micro Weld model cement. I had seen it for years at local shops on the Micro Scale products display racks, but never bought or used the stuff. With the current COVID stuff going on, and associated difficulties of getting some supplies due to shortages, I decided that it was time to try it out. 


It comes in the typical Micro XXX plastic product bottle, that we know from their decal solutions and other products. But with a green lettered label in this case.
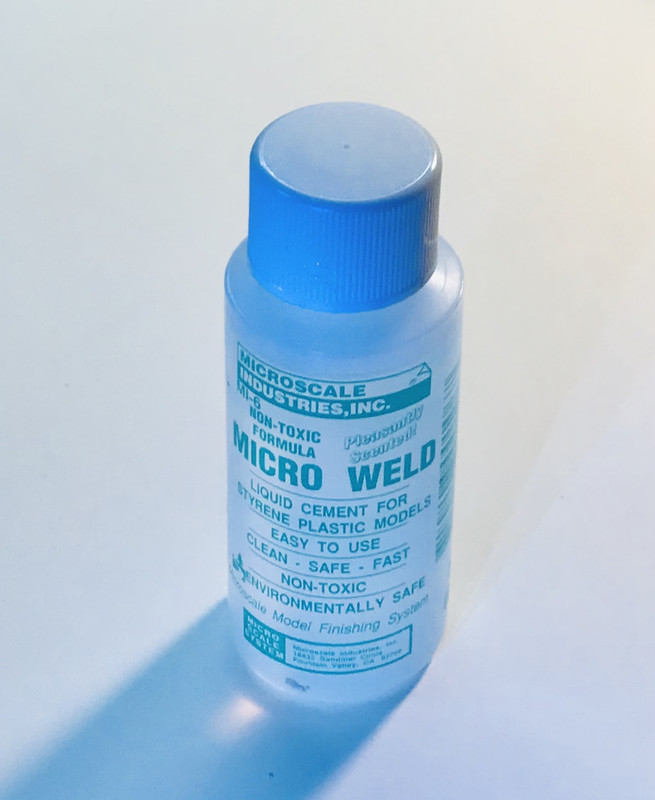


The label says non toxic, so that aroused my curiosity and suspicion. Was this like the terrible lemon scented Testors tube glue from the 70’s that didn’t work worth spit? Well now I had to find out. I have an aircraft project on deck, so I decided to kick it off by building the simple cockpit, a grand total of six parts. Tub, throttle and control stick, and three part ejection seat. Easy as pie.


The bottle instruction say to place the parts together and apply the paint with a brush, not provided, and allow capillary action draw the cement into the contact areas. Or, alternately, brush cement onto the contact area of both parts, then place them together. I opted for capillary action method one using an old #0 synthetic paint brush. 


I started with the ejection seat. I opened the cap of the bottle and caught a whiff of a citrusy scent. Not a good omen, my grade school memories flashbacks reminded me. But, following the directions, holding the two parts together with one hand, I dipped my brush in the cement and applied the glue where needed. It flowed just like Tamiya Extra Thin into the proper areas. One ejection seat side glued on. Repeat for other side. Bang seat done. I then glued the two control sticks into their proper location holes on the cockpit tub. Easy peasy. Now allow it all time to dry.


After about 10 to 15 minutes of drying time I decided to try a few challenges. I push the parts to see if they’ll move easily. Nope... solid as a rock. I then try a shock test. Pick it up and drop it about 8 inches or so to my worktable top surface. Nothing pops free from impact. Now, the final test, drop it about four feet onto the epoxied concrete floor of my work area. No damage. Nothing pops off, shifts position, zero I’ll effects. I’m sold on this stuff so far. It’s putting to rest the ghosts of Testors past so far.


The only gig that I have against the stuff is the packaging. The bottle can be easily knocked over, and it is easily confused with all the other Micro Scale products in my supply area. Gotta pay attention to the labels. And figure out a way to stabilize the bottle.


This is the work done so far
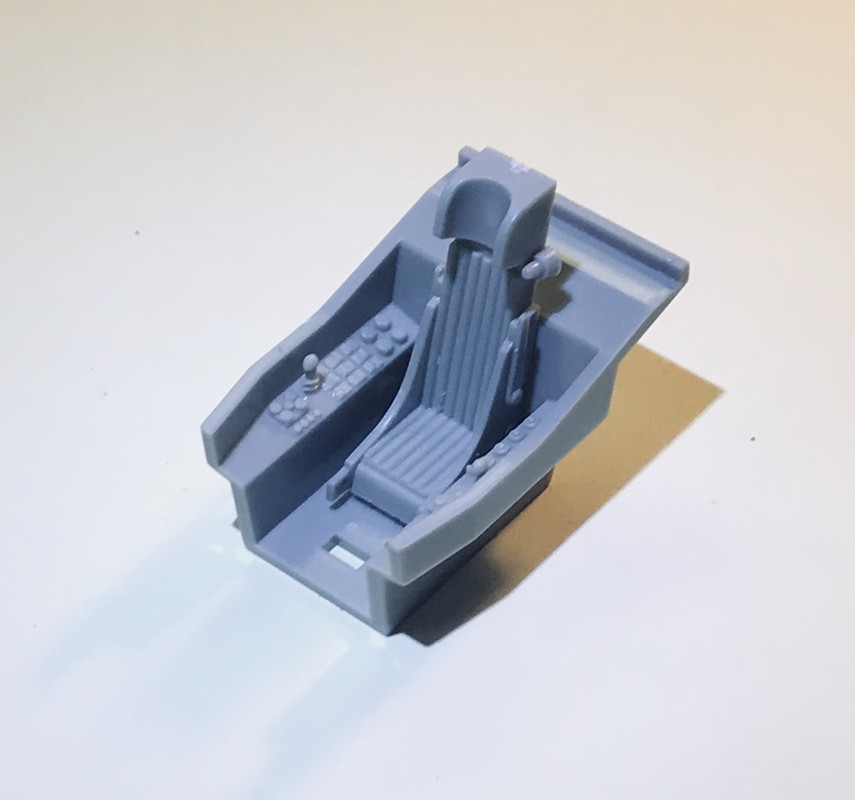


I’ll do another bit with fuselage seams and other stress bearing joining surfaces in the future as I reach those points of assembly. As well as some styrene figure assembly some time. But so far, so good. Another option for you to consider when your primary styrene cement is out of stock.


F is for FIRE, That burns down the whole town!

U is for URANIUM... BOMBS!

N is for NO SURVIVORS...

       - Plankton

LSM


  • Member since
    August 2014
  • From: Willamette Valley, Oregon
Posted by goldhammer on Saturday, May 9, 2020 11:09 PM

Take a couple inch square piece of 1x wood, drill a hole the bottle fits in.  Will also make ID easier if you leave it in the block.  

  • Member since
    May 2013
  • From: Indiana, USA
Posted by Greg on Sunday, May 10, 2020 7:59 AM

It's nice to see you with some time on your hands, finally, so you can do stuff like this review.

Yes

  • Member since
    July 2004
  • From: Sonora Desert
Posted by stikpusher on Sunday, May 10, 2020 11:25 AM

Gold, I don’t have any plywood onhand here. Nor the power tools to create such goodies if I did. But I do have plenty of foam packing padding that comes in shipping boxes. I’ll probably use some of that to create a similar set up for the bottle.


Greg, thank you. It’s really enjoyable when they pay you not to show up to work anymore and do whatever you like with your waking hours. Of course there are the requirements of home life....  


F is for FIRE, That burns down the whole town!

U is for URANIUM... BOMBS!

N is for NO SURVIVORS...

       - Plankton

LSM


  • Member since
    December 2015
  • From: providence ,r.i.
Posted by templar1099 on Monday, May 11, 2020 5:36 AM

Thanks for the heads up Stik.

"le plaisir delicieux et toujours nouveau d'une occupation inutile"

  • Member since
    July 2018
  • From: The Deep Woods
Posted by Tickmagnet on Wednesday, May 13, 2020 5:33 AM

In reference to stabilizing the bottle. I put a piece of foam plumbing insulation around the bottles of my microset and microsol and haven't spilled one since. I think it was for 3/4" pipe and I cut it to about half the height of the bottle.


  • Member since
    May 2013
  • From: Indiana, USA
Posted by Greg on Wednesday, May 13, 2020 8:56 AM

Isn't it funny how some folk paint first then assemble, and some vice-versa?

Though your thread subject is the weld/cement, every time I look here I get fixated on how in the world are you going to paint that cockpit? (I'm in the paint then assemble group above).

Smile

I'd never considered the added value of the short, bottom-heavy glass cement bottles from Tamiya before. Interesting your observation about the stabilty of the Micro-x bottle.

  • Member since
    July 2004
  • From: Sonora Desert
Posted by stikpusher on Wednesday, May 13, 2020 11:43 AM

Templar, you’re welcome.

Tick, Plumbing insulation is a really good idea.  Ill have to look for some.

Greg, this is all sub assemblies right now. The seat and IP are still separate from the tub. I am going to dress up the cockpit a bit before I add any paint. There is more gluing to be done.


F is for FIRE, That burns down the whole town!

U is for URANIUM... BOMBS!

N is for NO SURVIVORS...

       - Plankton

LSM


fox
  • Member since
    January 2007
  • From: Narvon, Pa.
Posted by fox on Wednesday, May 13, 2020 1:01 PM

Thanks for the review Stick! Good to know about the alternatives in case.

Jim  Captain

Stay Safe.

 Main WIP: 

   On the Bench: Artesania Latina  (aka) Artists in the Latrine 1/75 Bluenose II

I keep hitting "escape", but I'm still here.

  • Member since
    October 2019
  • From: New Braunfels, Texas
Posted by Tanker-Builder on Wednesday, May 13, 2020 4:42 PM

Hey Stick.

      That is a good adhesive. I have used it for years on special projects . Why Special projects? back when I first started using it, the cost was way higher than regular Testors Liquid. Now I do use Tamiya for regular projects, But I can now get the adhesive you reviewed. I have six unopened botttles of it in the shop.

      Now that my projects take precedence I am enjoying it and making sure it is secured in a Half of a cue ball I cut apart and drilled for something else and it fit perfect for the " Bottle Stabilization Method Mark 1"

dlh
  • Member since
    March 2017
  • From: Chambersburg, PA
Posted by dlh on Sunday, May 17, 2020 11:22 AM

On my Micro (sol-set) bottles I put a dab of blu-tac on the bottom and stick them to the mat. (Starting doing that after losing half a bottle of Microsol)Angry

JOIN OUR COMMUNITY!

Our community is FREE to join. To participate you must either login or register for an account.

SEARCH FORUMS
FREE NEWSLETTER
By signing up you may also receive reader surveys and occasional special offers. We do not sell, rent or trade our email lists. View our Privacy Policy.